Not a lot of Serious Attempts at any completed images, since weather has been pretty bad and as we get closer to planet season, I’ve just been messing around, basically. I took off an entire week I knew would be a new/no moon and of course it was cloudy every. single. day. You win some, you lose some. Of course it cleared up instantly the day I went back to work. Jupiter was at opposition on 6/10, so I decided to screw around with planetary stuff again. I don’t really have a telescope suited for planets at all – my astro-tech AT72EDII is only f/6 and I’ve never even been able to get a barlow to work with it (can’t pull focus), but even if I did it’d cut the light down to nil. Additionally it’s only 430mm, so not really long enough for planets. But nonetheless I realized I could use my ASI120mc camera (which I got mostly to be a guidecam) directly with the AT72EDII and take a stab at jupiter for fun. I didn’t really get anything worth stacking (had some debayering issues), but I at least managed to watch Europa slowly set behind Jupiter (had to completely blow out the photo to see the moons). It was pretty neat to watch (this is an animated gif, it’s just slow):
I then targetted the moon cus why not – was curious how diff it looked in a much tighter field of view (but on an admittedly much crappier camera). I didn’t bother stacking the results but I did upload a video. I was pretty impressed by how well my mount tracked – no guiding or anything!
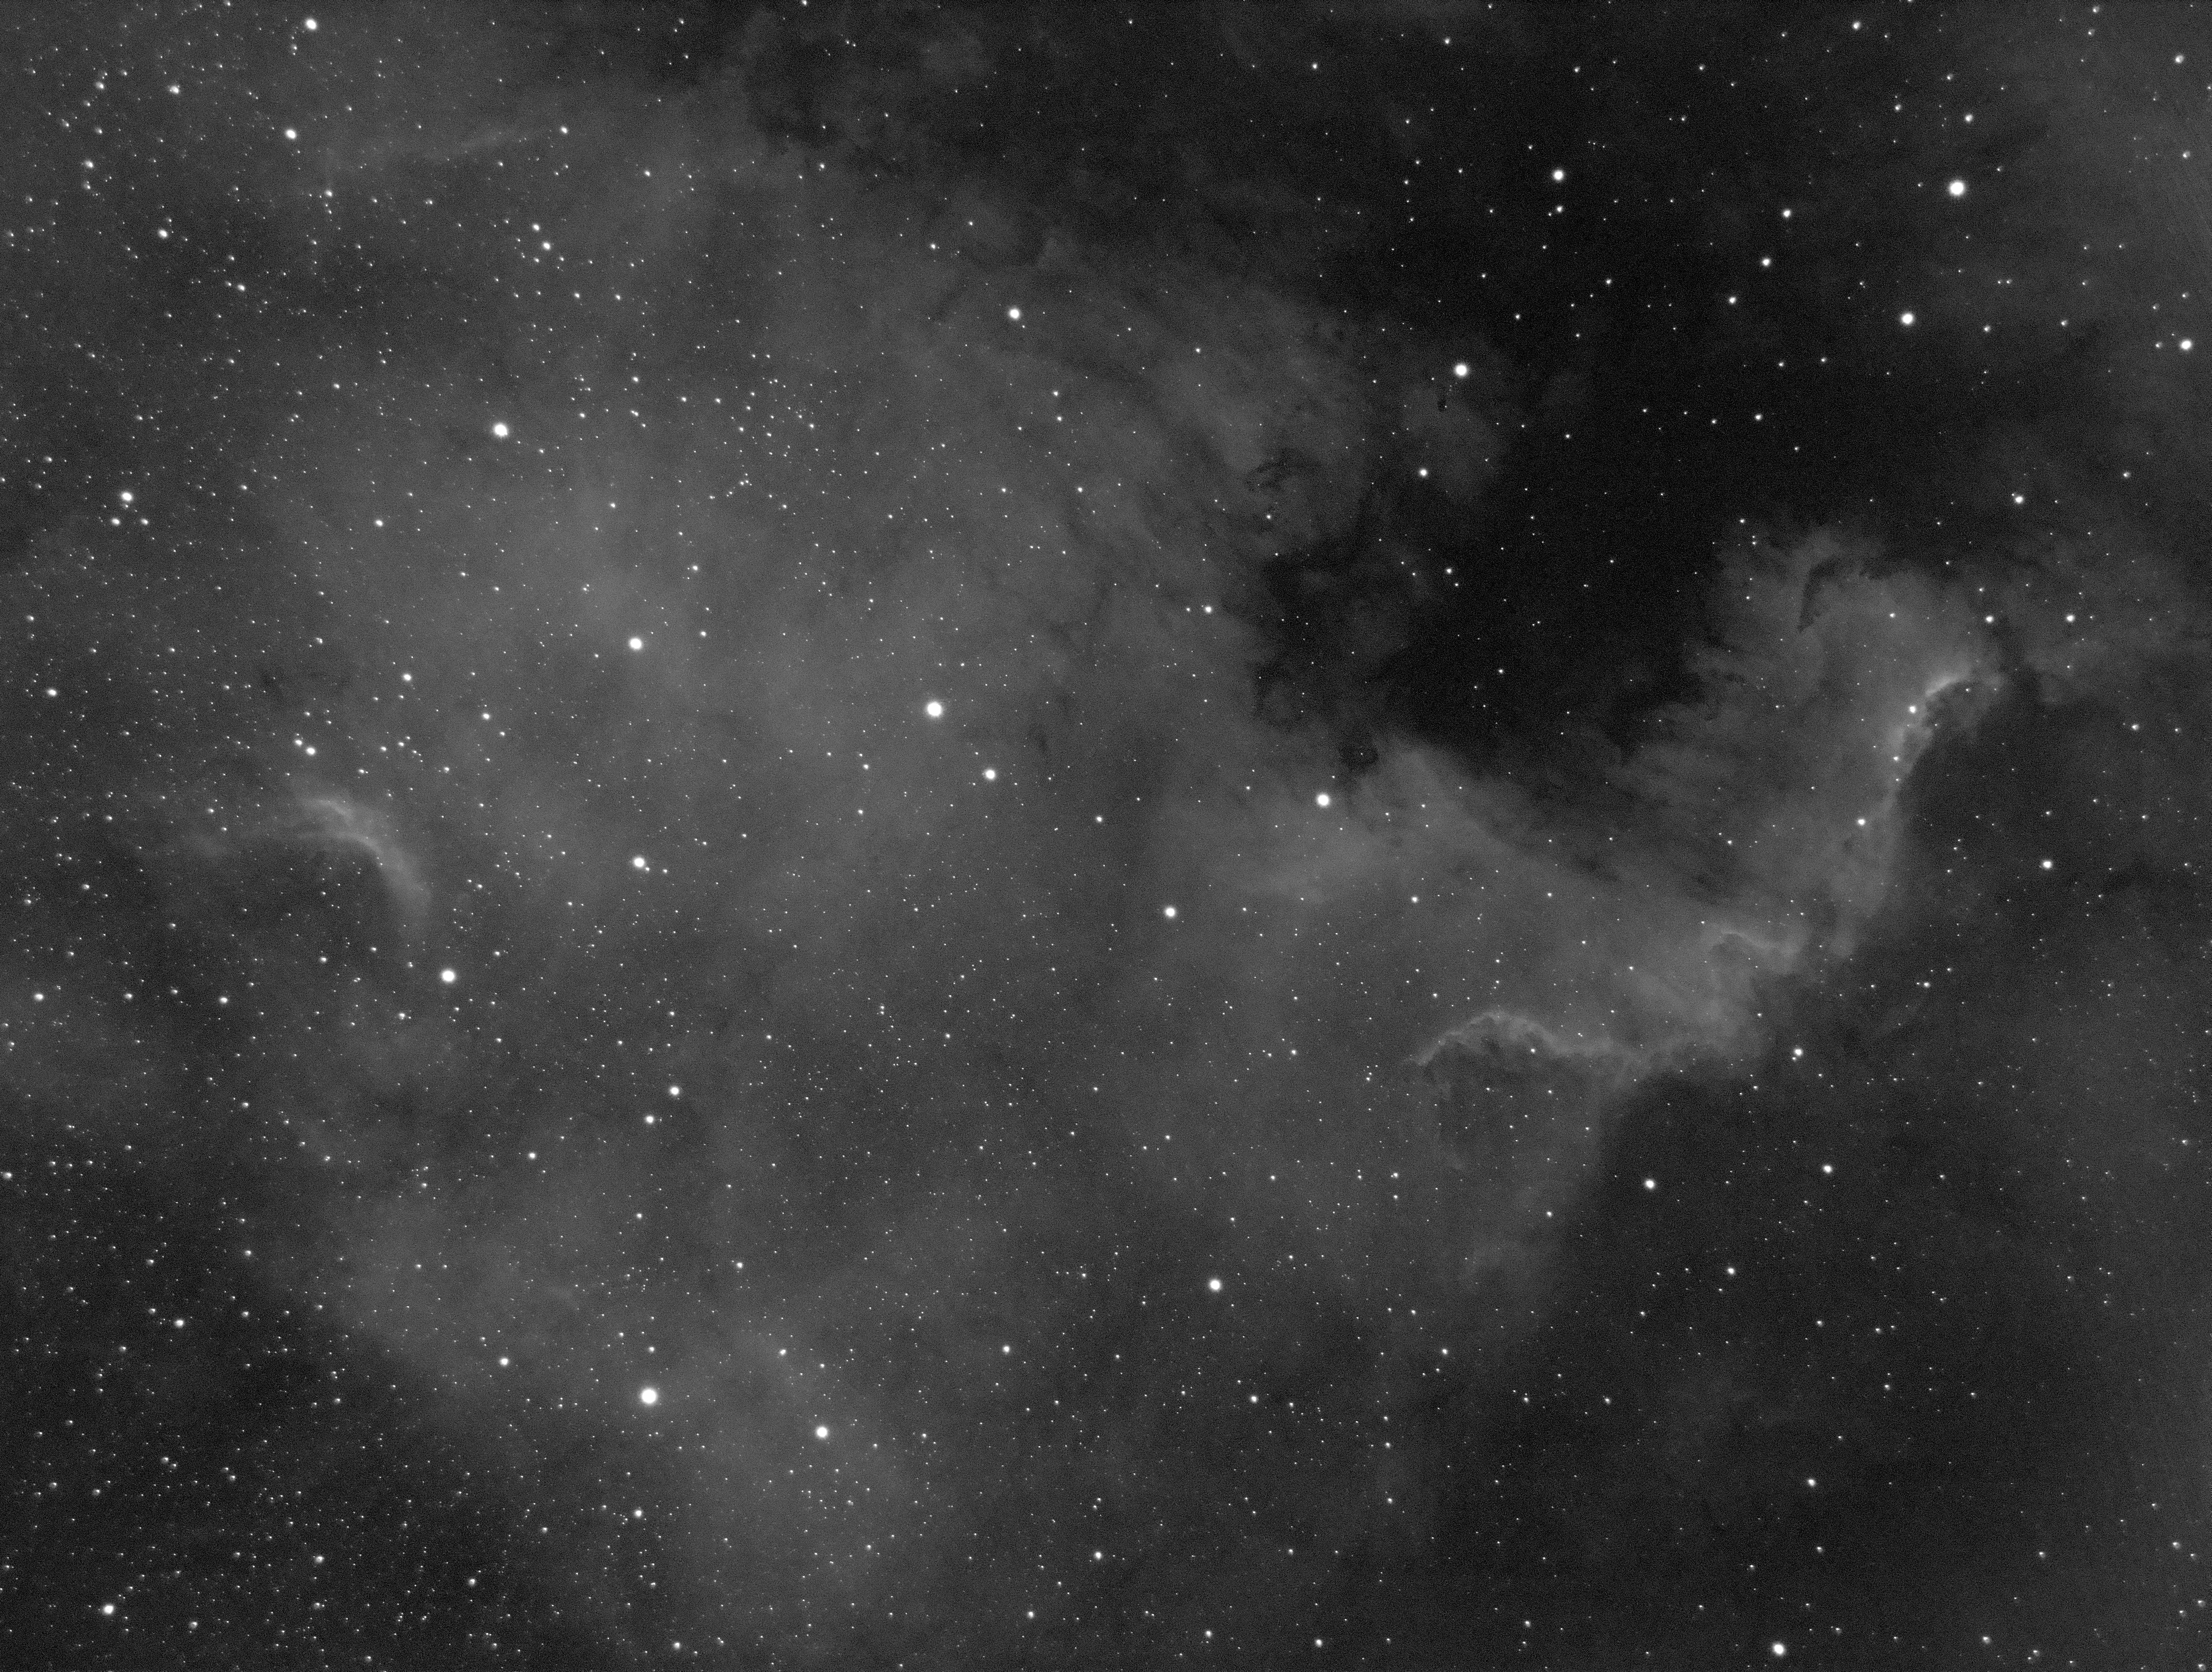
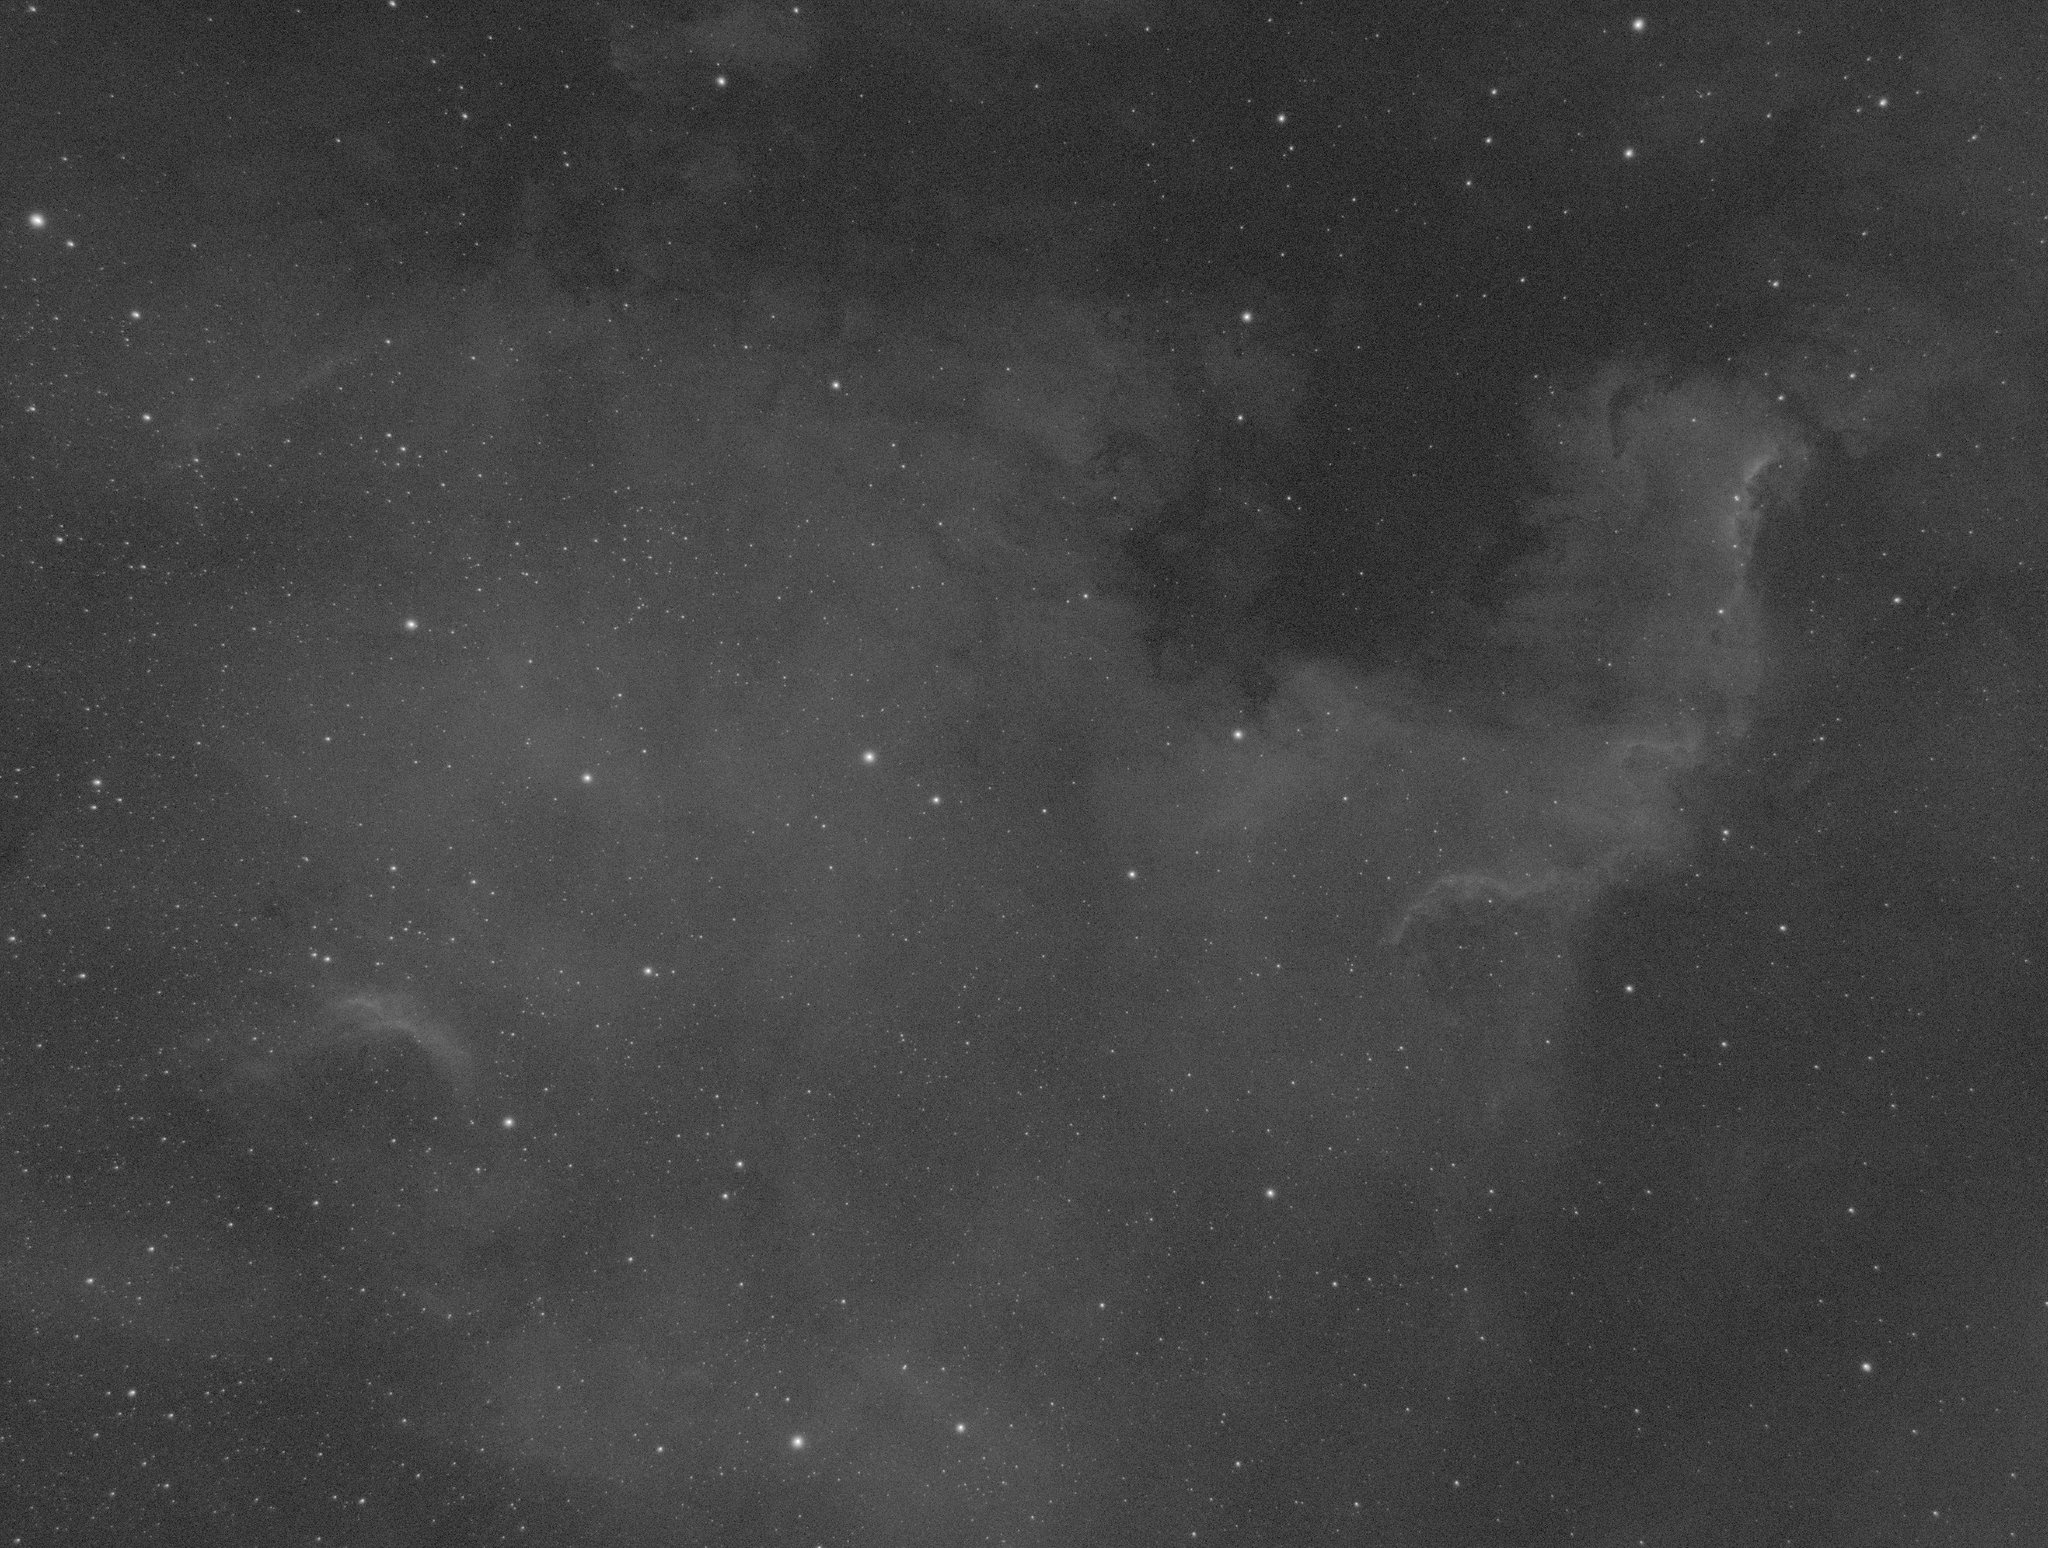
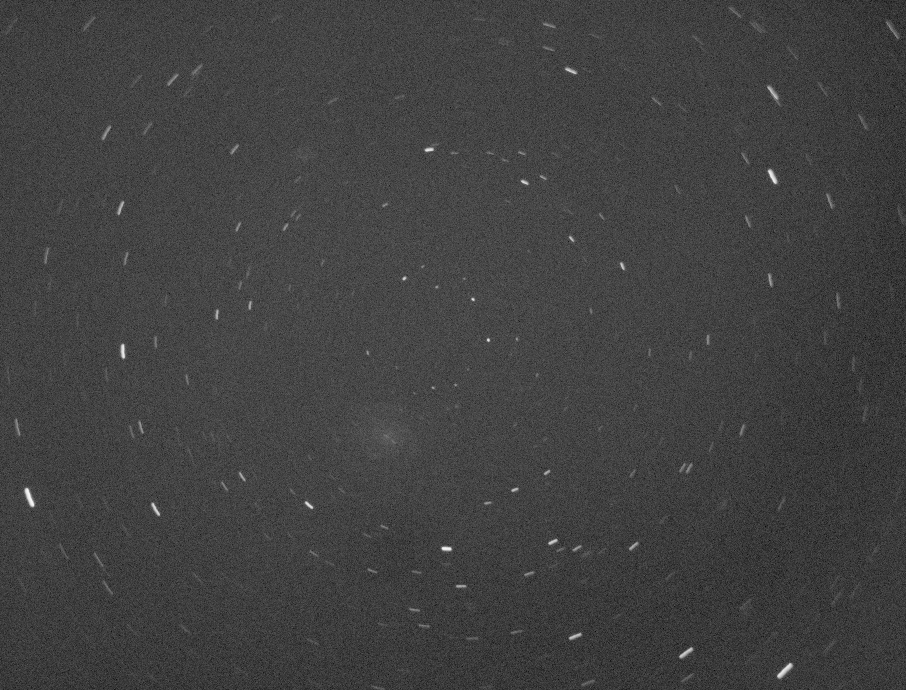
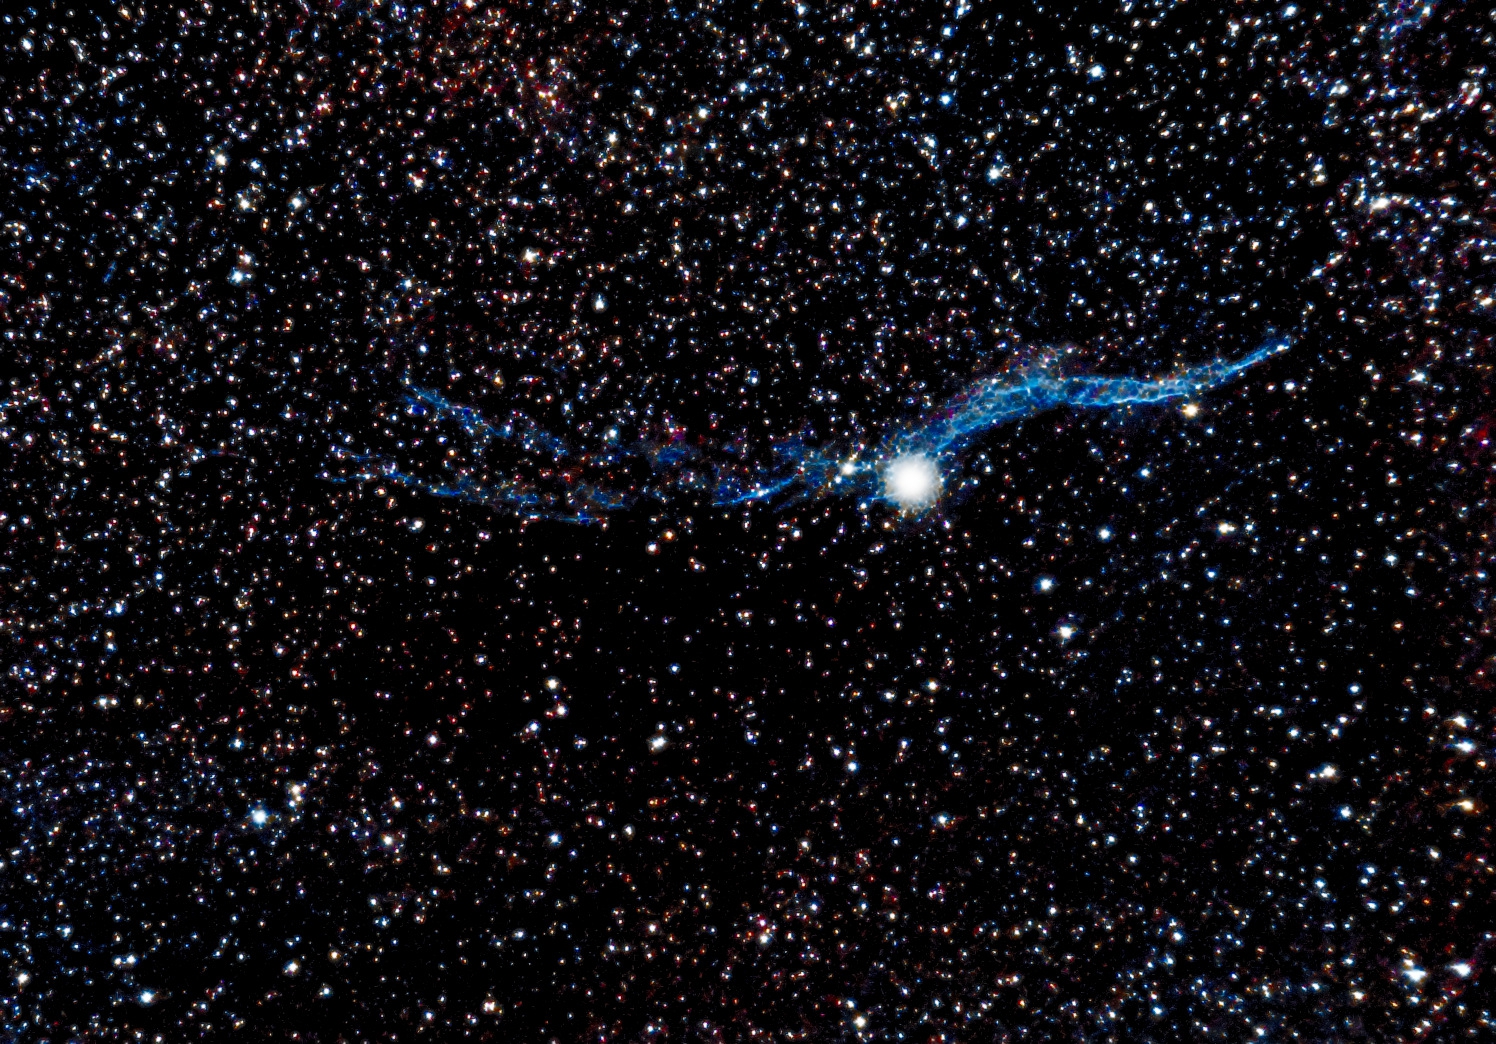
Had a subsequent clear (and absolutely GORGEOUS and very unseasonable cool for June) night, so I setup the gear without much of a clear plan: just screwing around, basically. Astrophotography can be a lot of work so sometimes I have to remind myself it’s okay to just setup the gear and slew around without much of a plan. This particular night though I had, basically, endless problems. I was able to platesolve just fine, but NINA absolutely refused to slew the mount to anything I was trying to target. TL;DR I think the problem was that my battery pack wasn’t plugged in and was actually quite low on power, leading to my mount doing some … odd things. I finally got it to work around midnight, which didn’t leave me a lot of time. I took an hour of luminance of M101, which I might do again on other nights and try to get the rest of the channels. Lastly I pointed at the american nebula, since it’s high, bright and always a satisfying Ha target. I did 10 2 minute subs and stacked:
I’ll probably try to get more Ha data and OIII and SII channels as well and see how it looks.
So, not a lot to report, except that I am, yes, dear reader, thinking about buying a new telescope. Planetary season is upon us and I’d really like something capable of doing planets properly and also venturing into some smaller DSO targets. This means, I think, it’s time to venture into newtonian reflector territory. I was pretty well sold on the astro-tech AT8in – an 8” reflector. Alas, this particular telescope and even the 10” at10in are both back-ordered until October! Soooo, if I want to actually do anything this year, I think I’ll wind up getting the Orion 8” version, which is mostly the same OTA/mirror/etc but with different rings/focusers and other things. We’ll see. It’s surprisingly cheap, all things considered. Stay tuned!
Just a small update here – the weather has not really been cooperating, and the few clear nights I’ve had were accompanied by a high and bright moon. But I did get the gear out and practice a bit.
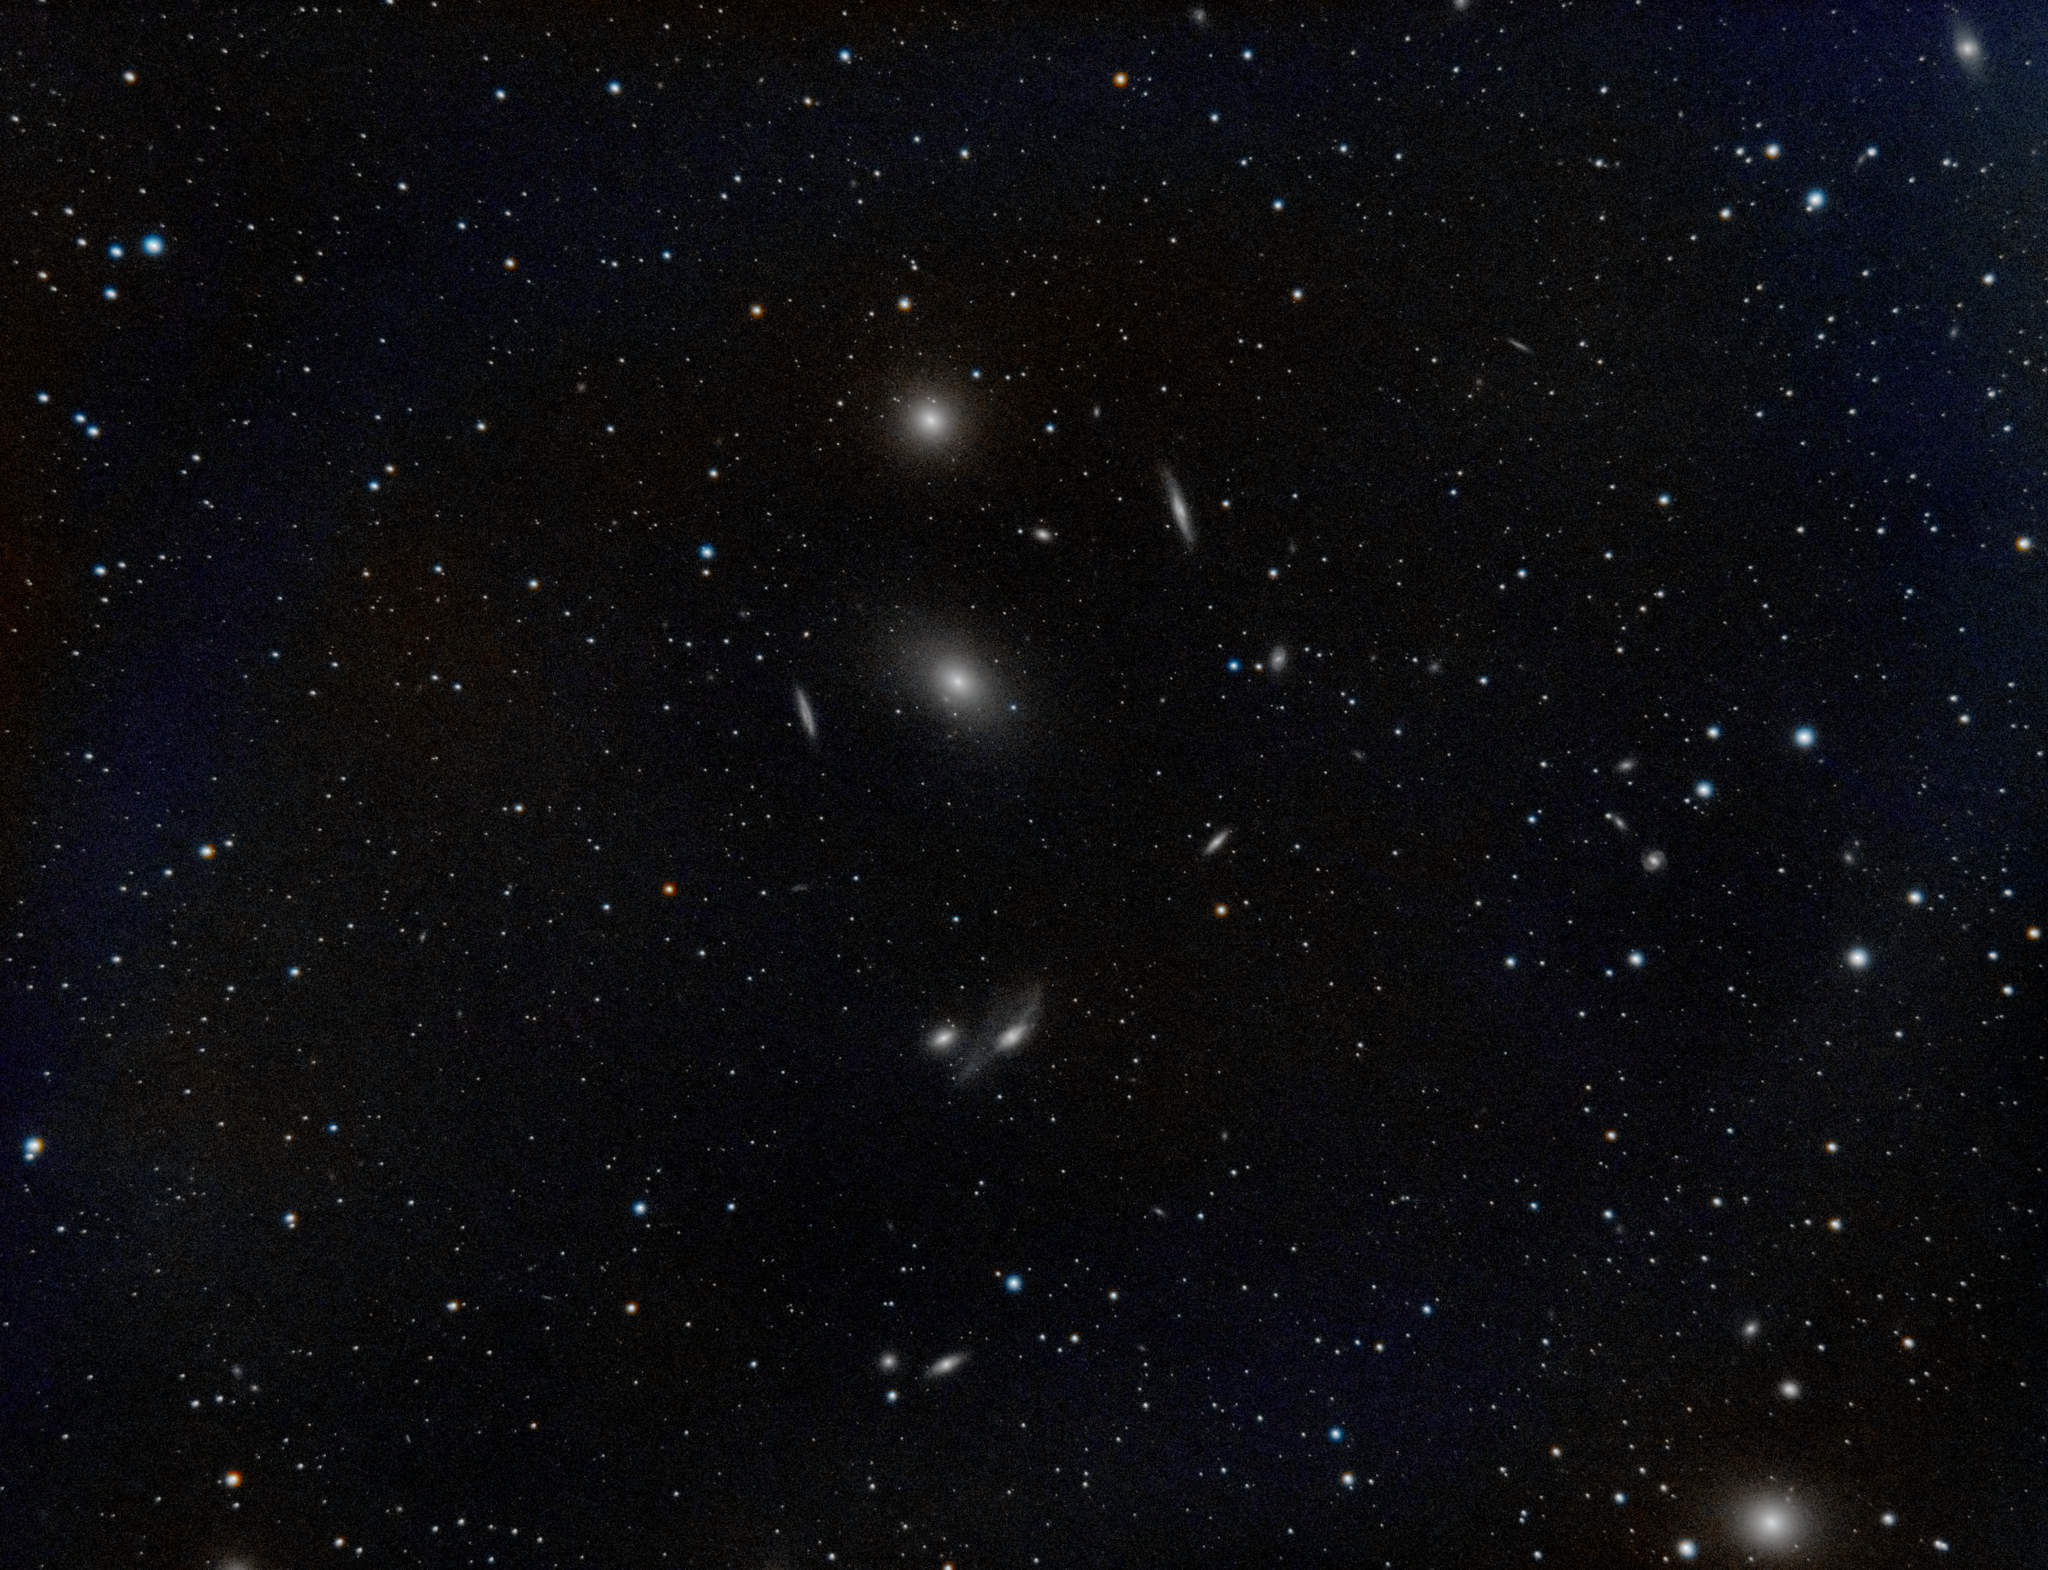
I was kindof hoping to gather some more data for the Leo Triplet and finish a color rendering, but the moon was literally right in front of it, so I took a pass at Markarian’s Chain instead:
Sooooo, this was probably the worst experience I’ve had as far as the ratio of “work required to get an image” and “quality of the result”: basically ~8 hours overnight to gather LRGB data, and then an entire Saturday processing it, only to get some frankly shit results. I managed to get plenty of detail, but had a lot of noise and basically no color, which I attribute to the moon washing things out. It was pretty disheartening at first, but I have to remind myself I’m still a beginner and I’m still taking photos in an inner city Bortle 8 zone, so – perfect galaxy results are gonna be tough.
I took away a few lessons (well, things I need to learn) from this night’s imaging:
Camera Gain
My new camera (ASI 1600mm) has gain and offset controls – kinda like ISO – and the choice you pick, of course, has an impact on exposure times and noise. There are settings that are ideal for relatively light-polluted skies (which I have), and I need to put more work into figuring out the ideal settings instead of just screwing around with it.
Flats
Flats, flats flats. The bane of my existence. Flats, if you’ll recall, are images you take of a “flat” white source, with the aim of reproducing flaws (dust motes, vignetting, etc) and subtracting them from your actual images. I’ve had a lot of trouble with flats to begin with and now with a monochrome camera, I have to take flats for every channel I photograph. I am not really sure what I am doing wrong, but my flats were very weird in the above session. My current process for taking them is just using an LED tracing pad, a white tshirt doubled over and just putting that on top of the telescope dewshield and turning it on. Possible problems: too close to the telescope resulting in reflections in the barrel? I dunno, but I think eventually I’m gonna give taking flats at twilight a while (basically just pointing at the sky) instead of using the LED tracing pad.
LRGB Combination
This is just my inexperience, but the learning curve to understanding the various ways you can combine luminance with RGB channels is very steep – and probably tl;dr for the purposes of this blog. But, the gist of it is that I did get it to work, but was dismayed by there being basically no color in the galaxies whatsoever (probably can blame the moon and light pollution for this), and lots of horrible fringes on the stars. I suspect the latter is probably the combination of bad tracking and uneven intensity of the RGB channels resulting in (e.g. red) being more pronounced and resulting in a fringe/halo around the stars. I think there are post-processing things I can do to reduce this, but we’ll see.
More recently, I had a clear night and a waxing gibbous moon, so I decided to take a photo of the moon – the first time trying it with the ASI 1600mm (which is not really designed for it, but hey):
I shot it with the hydrogen alpha filter for shits and giggles – it came out pretty nice! This was around 100 exposures, which I took a first pass using PIPP and autostakkert in windows, but the results weren’t great. I took a second pass in Pixinsight registering (aligning the photos) and stacking. Normally in pixinsight you register photos with StarRegistration – basically, aligning the photos by the stars. Of course, with a photo of the moon, there are no stars. Fortunately there’s a handy script in pixinsight called FFTRegistration (fourier fast transform), which has the added benefit of being able to correct rotation. Obviously the moon itself isn’t rotating, but its position in the frame rotates ever so slightly as you’re tracking it across the sky. The results from this registration and integration were much sharper.
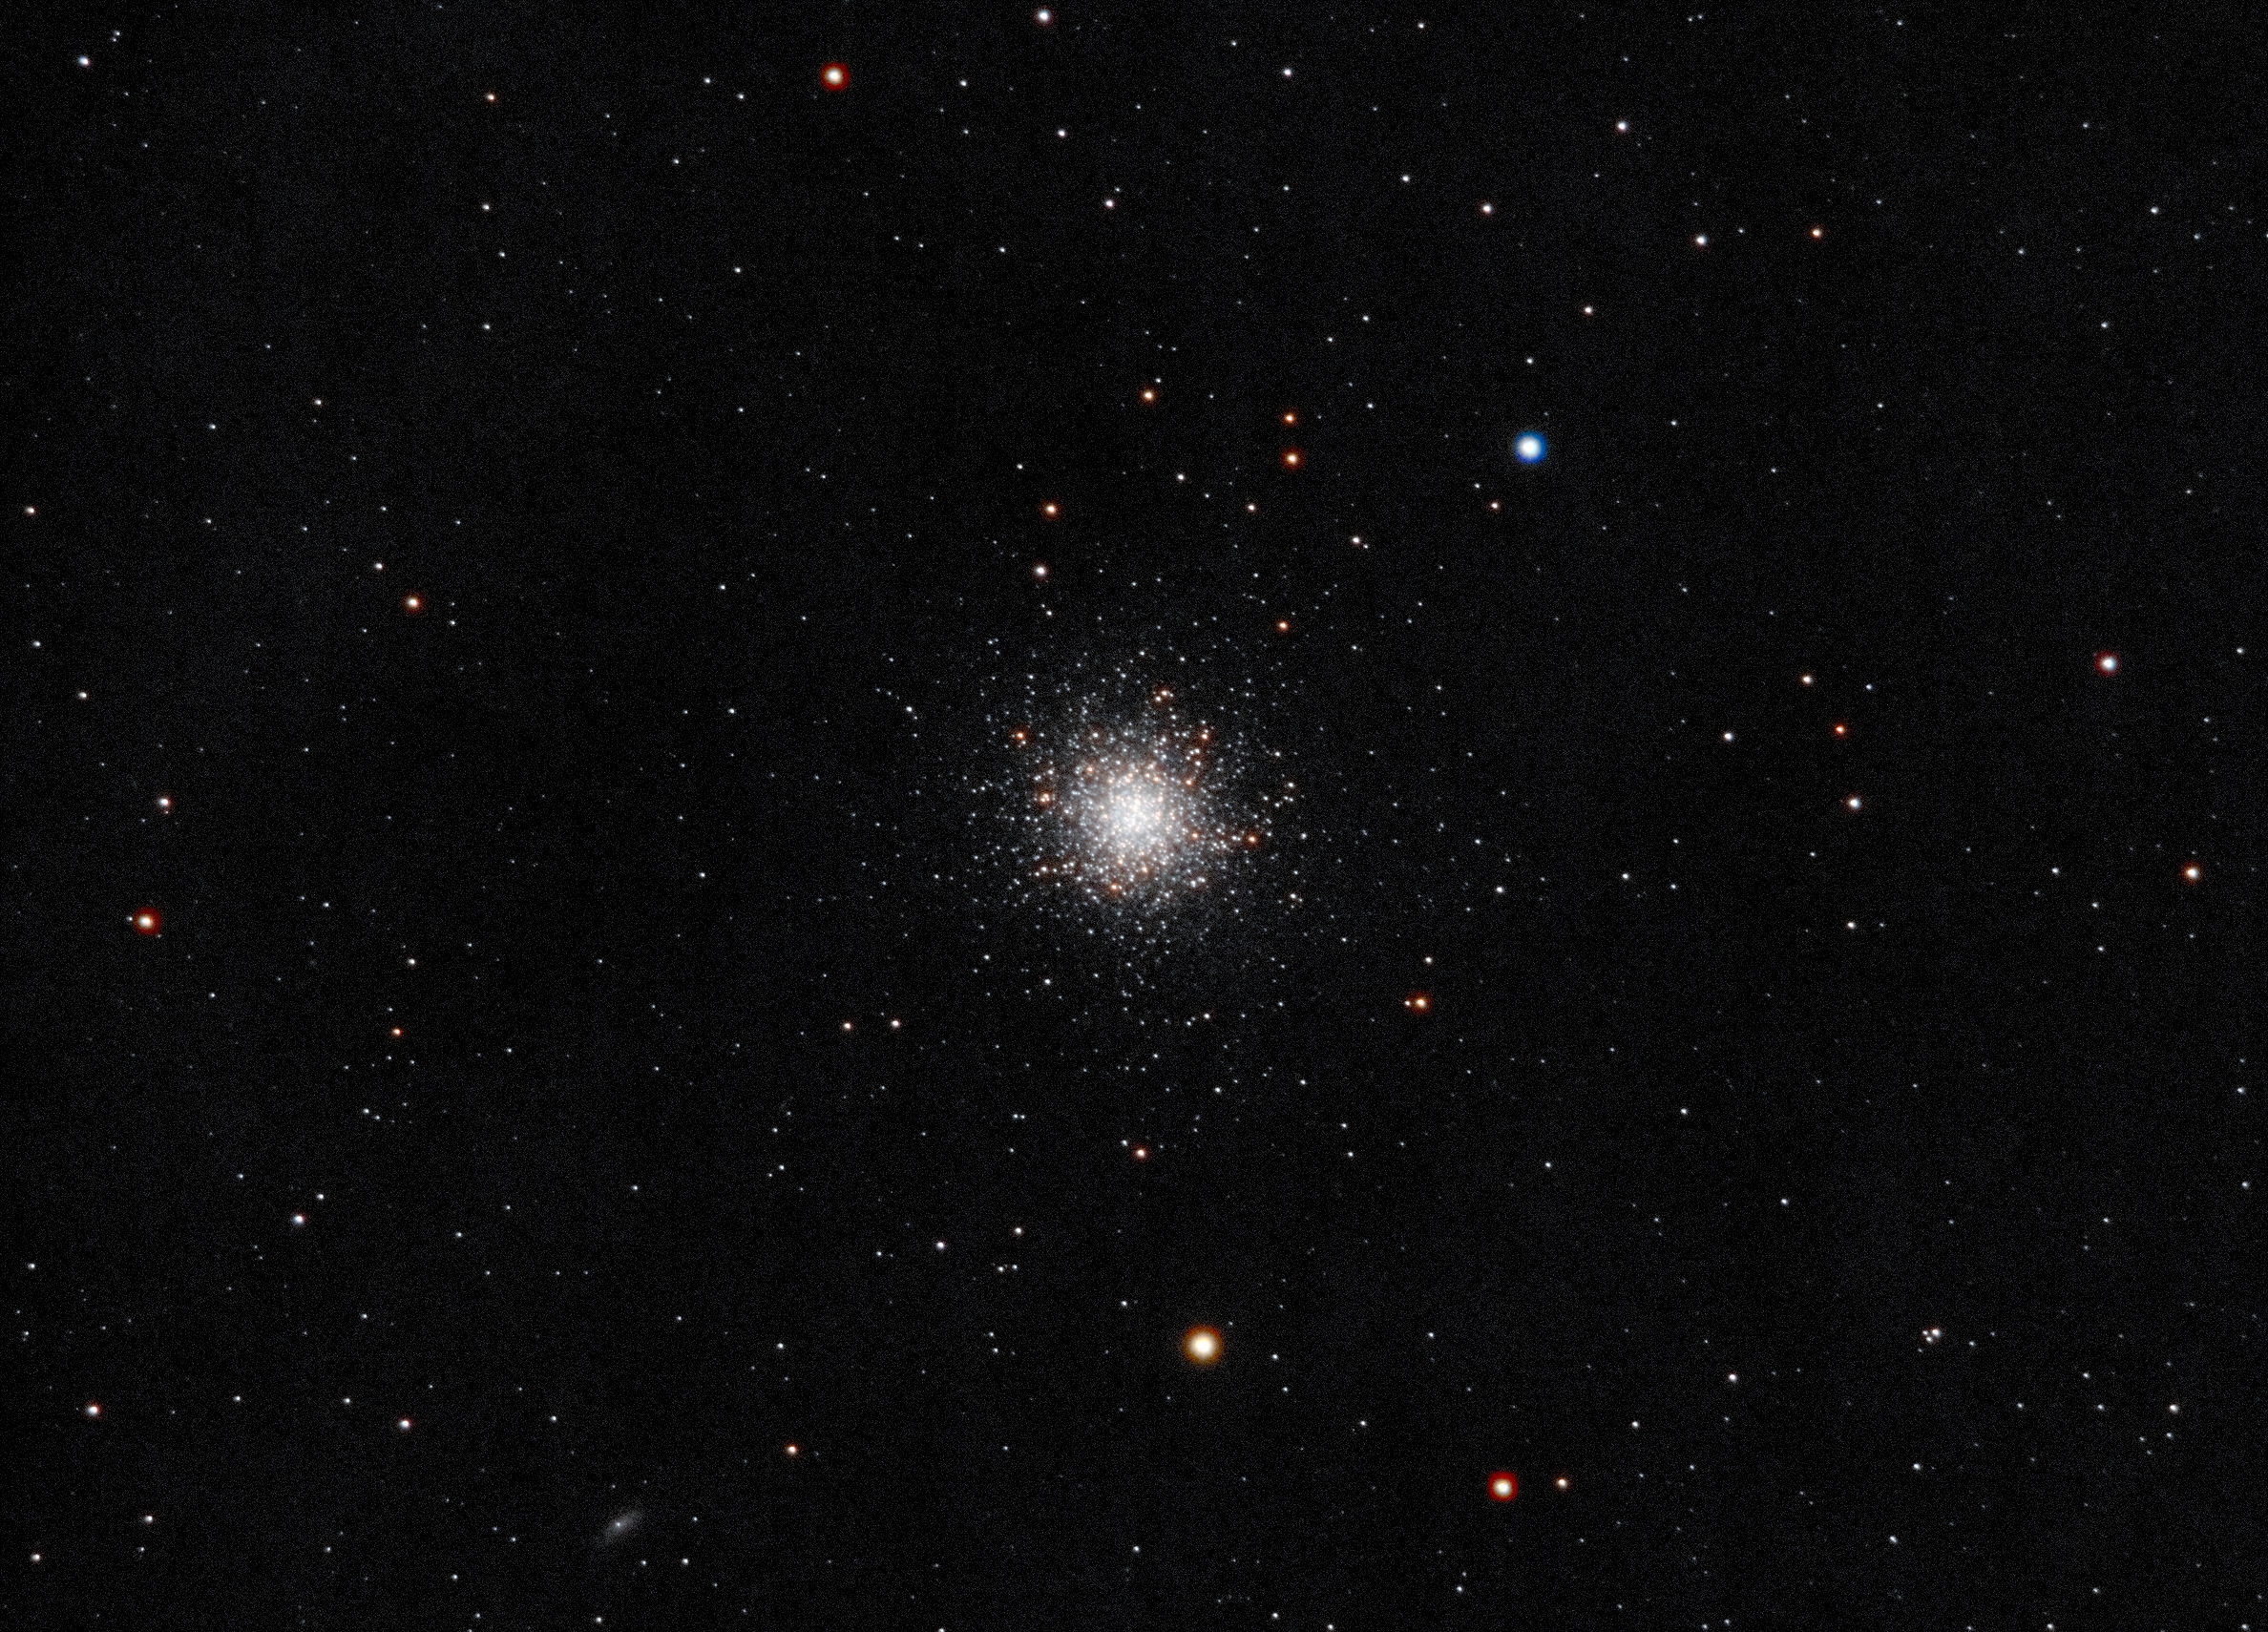
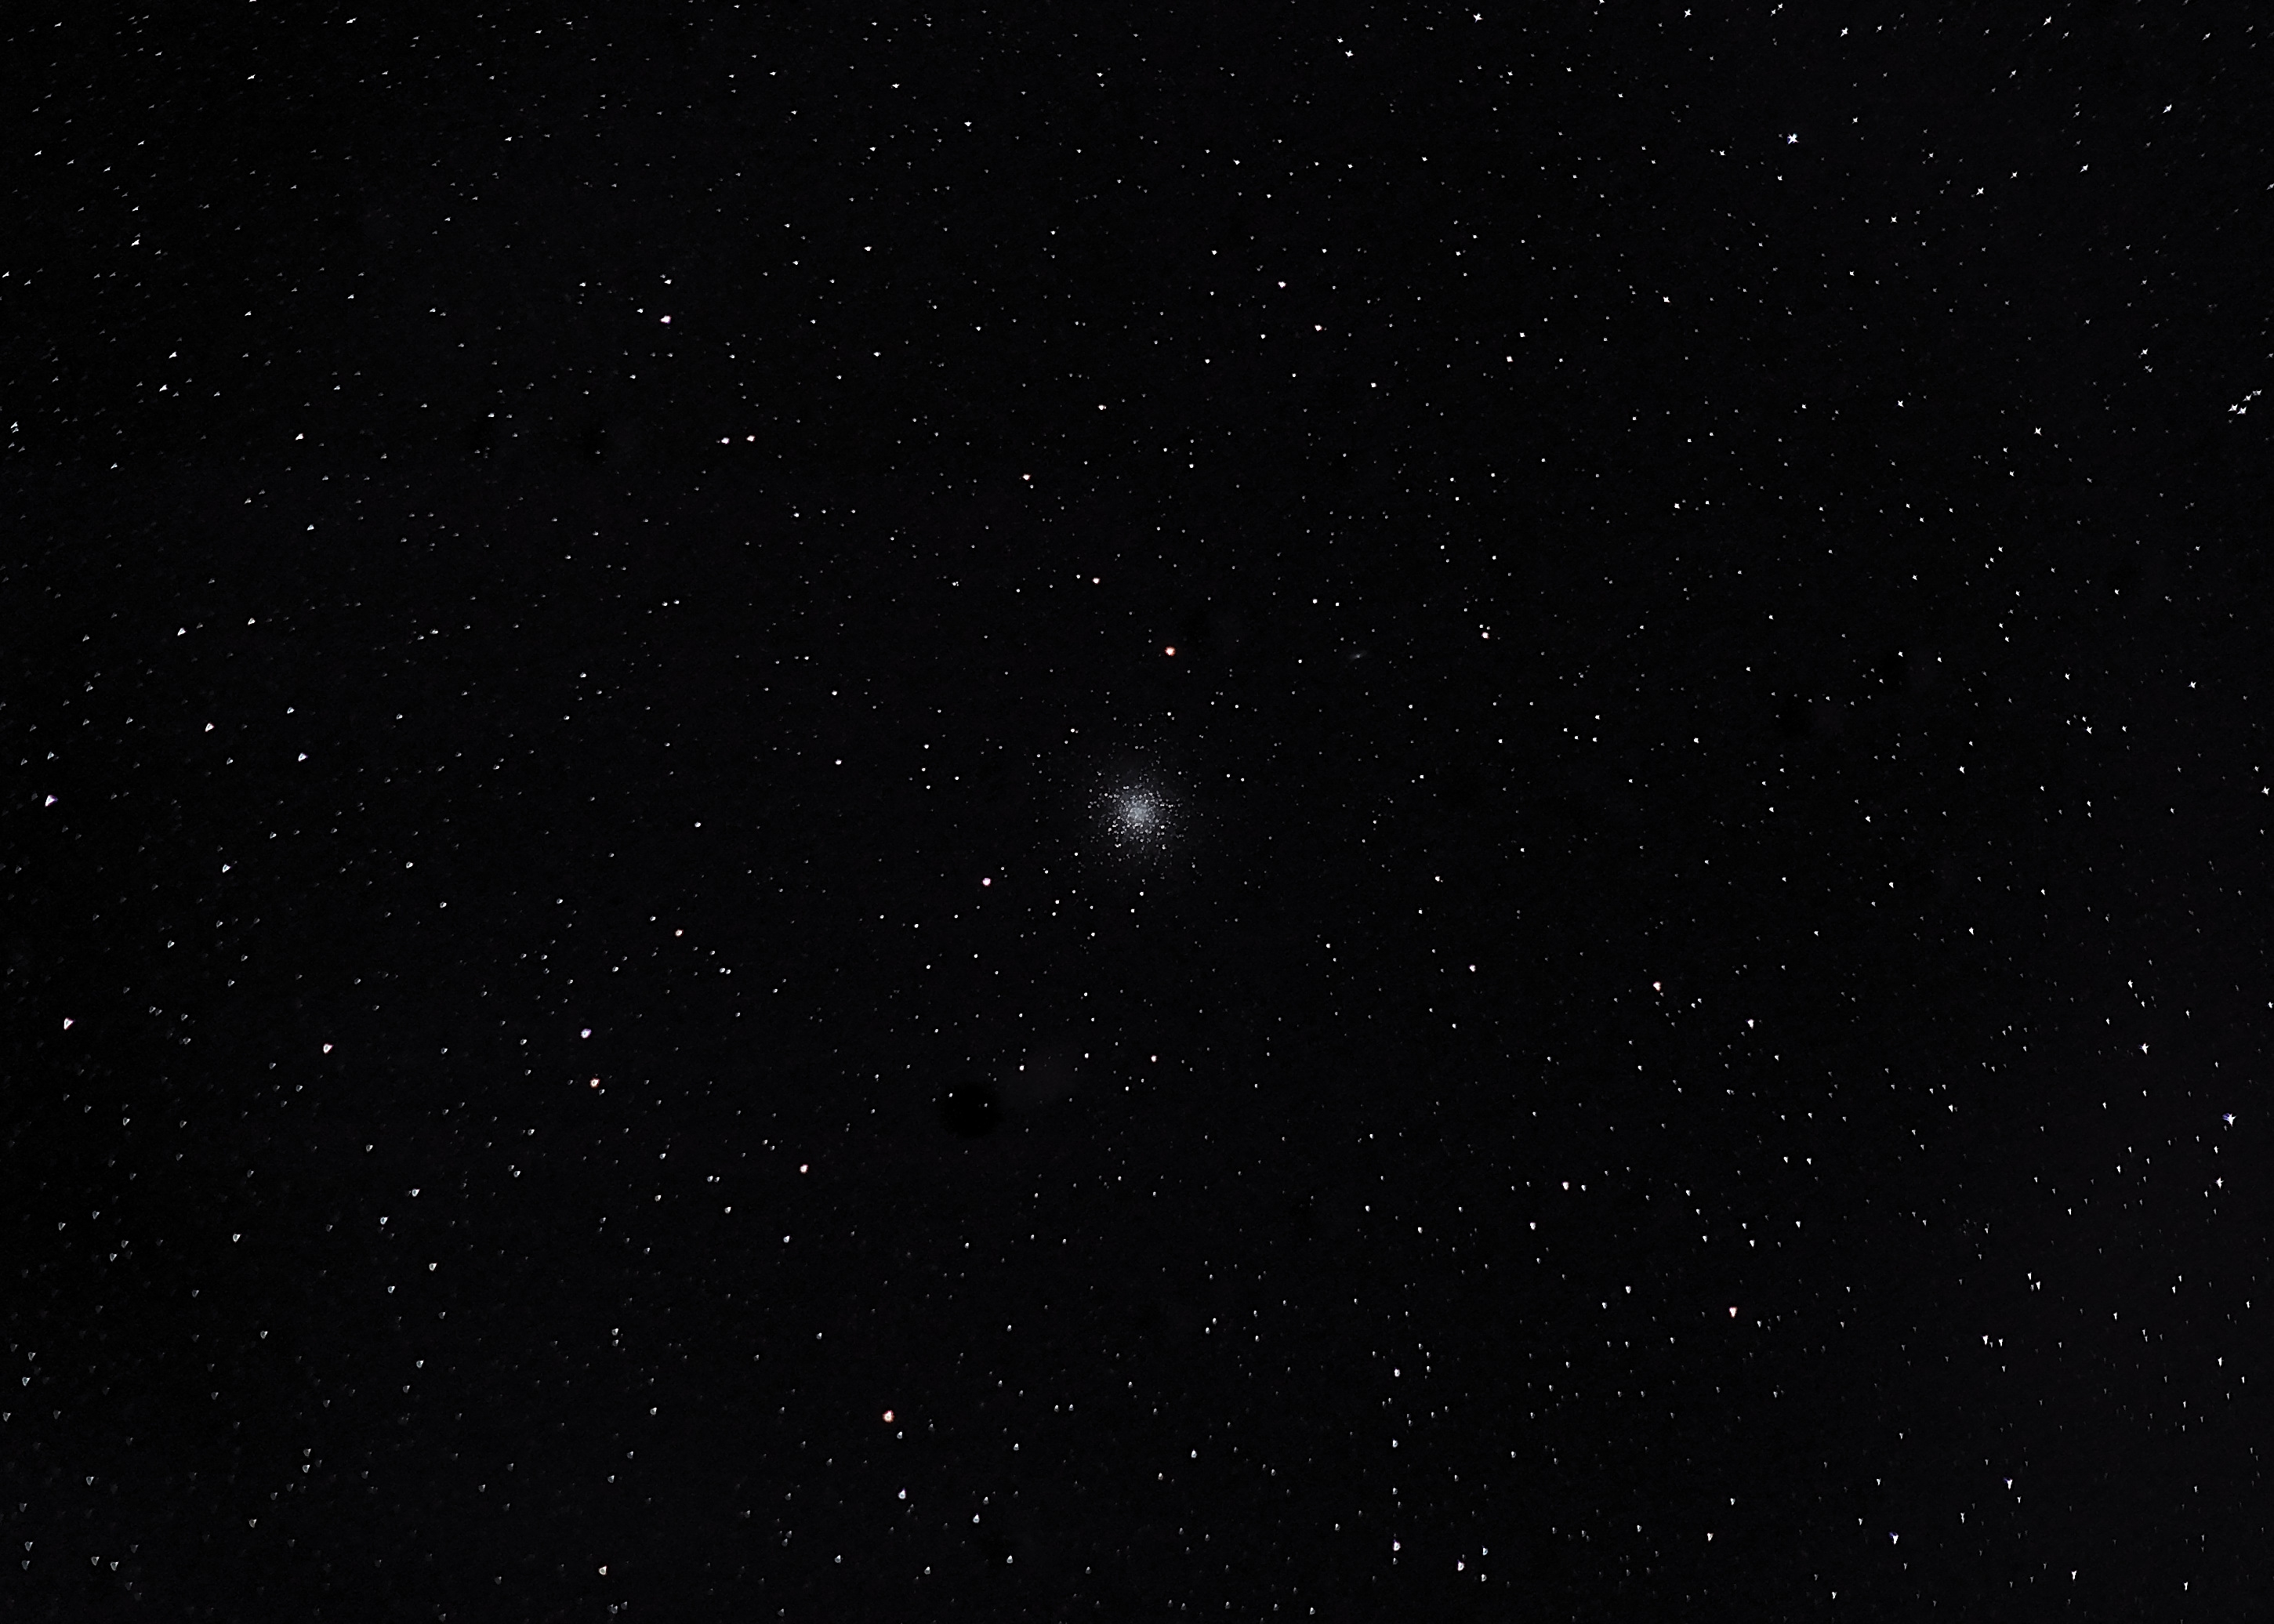
Since I already had the gear out, I couldn’t help but take a stab at some other DSO, so I pointed the scope at M13 – a large globular cluster:
I didn’t even bother with flats or darks for this set, for two reasons: 1) I didn’t think it would matter as much for a globular cluster since it’s just stars, and 2) i was drunk and tired. Okay, so it was mostly 2). What I was happy with: I managed to actually get some color (distinct young/old red/blue stars) and plenty of detail in the cluster. What I wasn’t happy with: still tons of noise and still that really bad fringing on the stars. Nonetheless, I’m gaining confidence in the post-processing, which is good! Excited to try again.
Not a lot of amazing results to report, but plenty of trial and error learning. One thing I knew going into the whole monochrome camera thing is that it inherently would involve more time. And boy, does it ever: between the added time of having to take different sets of data for at least LRGB and do flats for each one, it can be a real challenge to finish even one photo in a night. Weather hasn’t been cooperating, with roughly one clear night in the last ~2 weeks or so, so I have a lot of incomplete data owing to delays from both software and hardware problems.
Part 1: Acquisition
My first issue came last week, when we had a clear night and I decided to set everything up, expecting that I’d have a full night of clean imaging without any problems! (You can probably see where this is going.) I quickly ran into a snag when I realized that my awesome plate-solving alignment process (covered here) was .. delayed. Turns out astrometry.net is like any website and occasionally gets slammed – I don’t know if it was the fact that it was the first clear night in a while and the entire eastern seaboard was slamming them at once, but I suspect that might have been part of it. So, anyway – using their API to platesolve was right out (the few jobs I submitted didn’t actually platesolve until 5AM that morning). So I was forced to take a stab at getting local platesolving working – I won’t go into the unsavory details, but it involved installing at least 3 different platesolving software packages and by midnight I found myself installing cygwin, build tools, and editing makefiles. I knew I’d have to do this eventually anyway, since relying on internet access to do astrophotography is silly.
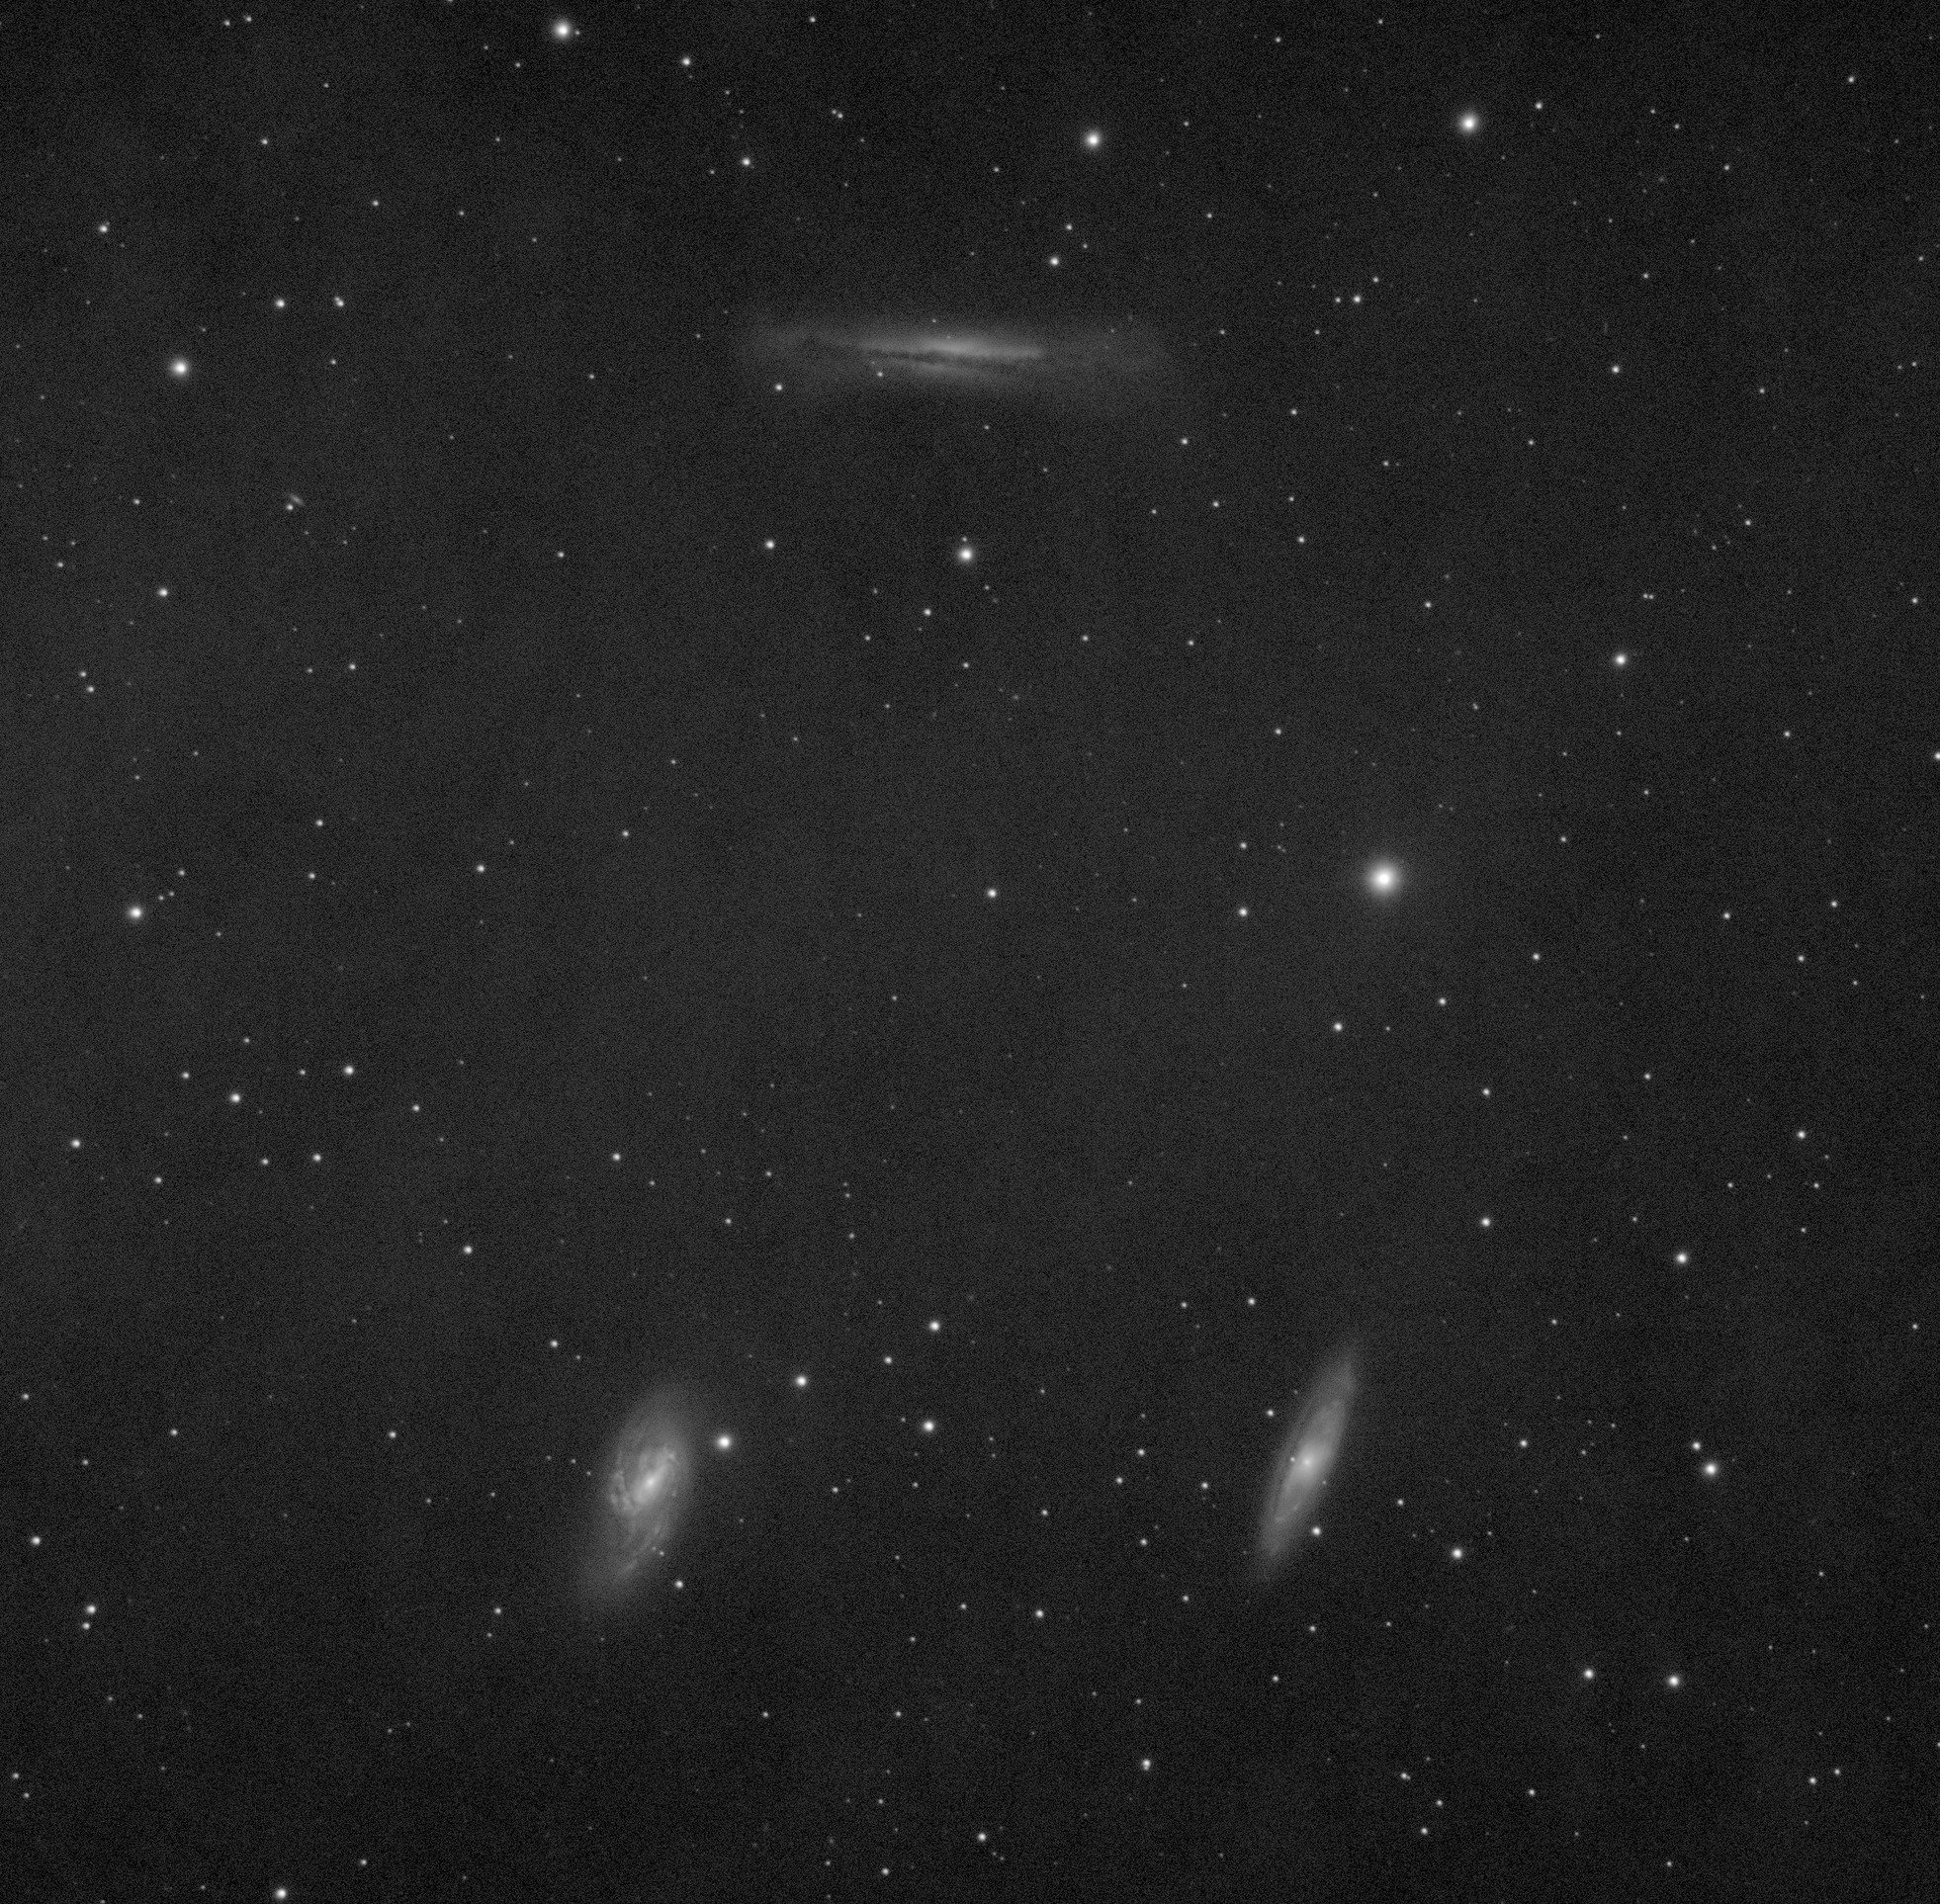
Sooo yeah. I did finally get one/some of them working enough to get aligned and started imaging the Leo Triplet. Unfortunately, this session came to an abrupt halt when I realized my telescope got stuck again (Leo Triplet is high in the meridian) when my guidescope banged into the mount. It was pretty late at this point, so it put a quick end to my hopes for the night, since I had only just started imaging red data and still had green and blue to go. The results were somewhat promising from the luminance data at least:
This was the last straw for mount clearance problems putting a stop to imaging, so I bit the bullet and bought a pier extension – this is basically an 8” tube that adds space between your mount head and the tripod so you have more clearance from the legs. Hopefully this will help, although I am dismayed that I now have Yet Another Piece of Gear to shlep around.
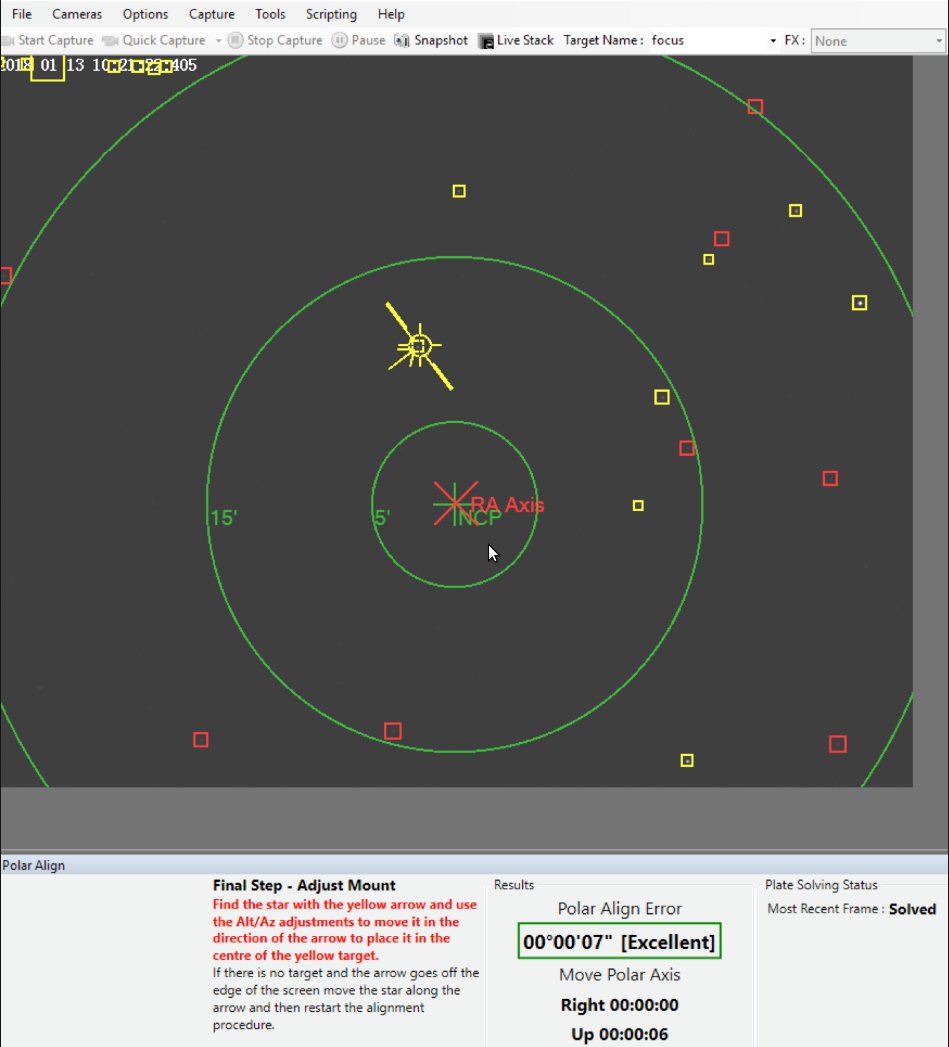
The only other subsequent clear night we had was a non-starter for finishing Leo Triplet, because the moon was up and high, basically tracking right alongside the triplet. So I decided to take a stab at Bode’s and Cigar again, since they were a little further away from the moon. This night of imaging went much smoother – I got platesolved and aligned quickly. I even got my guiding down to sub-3 arcsecond corrections (which is not amazing, but still pretty good for me so far). I’ve been using another neat bit of software to improve my polar alignment. Basically, aligning an equatorial mount to polaris though its polar scope works well, but is unavoidably imperfect – squatting down and looking through a small scope and trying to align a star in a reticle is not exactly a super precise process. Sharpcap is a piece of software which has an awesome polar alignment utility (only with purchasing the Pro version – but well worth it!). This software lets you refine your polar alignment by platesolving (again, another magical use of this technology!), rotating the mount on the RA axis, platesolving again and using the combined positions to calculate how far off you are from celestial north alignment:
It seems to have helped a lot! So, anyway, I was able to image a full set of data, with the exception that a thin patch of wispy high altitude clouds rolled across towards the end of the green and blue sets, so I had far less of this data. Everything else generally went well, except that I had some trouble taking flats (always the bane of my existence). NINA is software with an amazing set of tools – one of which is a “flats wizard”, which will take some exposures and help you optimize exposure. This is something I clearly need, since I’ve taken more bad flats than good images in my career so far. One of the things it was telling me is that my flats were too bright (even with my LED tracing pad on its lowest setting). This left me with an engineering problem – one I solved by (for now), cutting up a perfectly good white undershirt and duct-taping it to the LED pad (cue the macgyver theme) to cut the light, which seemed to help, but I’m still wary that the uneven pattern of the shirt fabric could result in imperfections in the flat. I’m still also struggling with the actual process (for now precariously balancing the LED tracing pad and its battery pack on top of the telescope’s lens hood and hoping it doesn’t fall off or rotate while I take the flats). There has to be a better way, but I still haven’t figured it out.
Part two: Processing
It’s clear that the days of “take photos, process and post results on the internet for everyone to gawk at” are long gone, now – just imaging a full set of data in one night at all was a miracle. (I expect this will get better with time as I learn, but nonetheless..). So I spent the next week or so toying with the data and embarking on my first attempt at actually combining sets of luminance, red, green and blue data into a natural/real RGB image. It’s a lot of work. Fortunately, lightvortex.com has an amazing set of tutorials, one of which covers precisely how to do this – both preparing the data and actually combining it. I think the snags I ran into are probably not worth detailing here, but briefly: possibly bad flats resulting in weird background patterns (different on each channel), intense halos around all the stars, pronounced oversaturation of the red in the stars vs next to no actual color in the galaxies. I suspect the three main issues are: (still as ever) bad flats, bad/weak color data (washed out by moonlight), and my lack of experience in processing the data (perhaps not weighting or fitting the data linearly properly).
Sooooo yeah. I am not really happy about anything with how this photo turned out – stars look weird, I still had to clip a lot of really good detail in the galaxies due to chrominance noise, little to no color in the galaxies. Still, the mission was a success, at least, insofar as I actually imaged a full set of data and put it together, even though it kinda looks like crap. I think the results would have been better if I had: darker skies, no moon, and longer cloud-free sets of data. So all in all I shouldn’t be too hard on myself – even though it can be somewhat discouraging to put so many hours into one photo only to be like “yep that looks like shite”.
Bonus photo: one night after imaging my actual target I realized the american nebula was up, so I took one hydrogen alpha shot of it:
I’m continually impressed by how bright and crisp the images I get with this new camera are in narrowband – I am thinking american nebula might actually be my next target, since light pollution and moonlight would (in theory) be far less of a problem. In addition, it’s a target so big it’s too big even for my relatively wide telescope, so I could possibly try to do a mosaic or something.
So, to conclude:
Wins:
Got sharpcap vastly improving my polar alignment and guiding
actually assembled a set of LRGB data into a photo
Ha narrowband imaging appears to be awesome
Losses:
LRGB photo kinda looks like garbage
clearance issue with my mount (should be fixed with pier extension)
Wew, it’s been a while! Time for a very long update: some learning/progress, some hilarious fails.
I have a shocking update: I bought more stuff. If you’ve followed my progress so far, you know I’ve been struggling with issues trying to use my Sony camera. I knew I wanted to upgrade to something better suited for astrophotography, but I had been waffling for a long time: should I get a dedicated astrophotography camera (and with it, the requirement that my setup will now be somewhat more complicated and involve a computer), or should I just buy a modern modded DSLR? The latter seemed more ridiculous the more I thought about it – I have no need for a new terrestrial camera (my Sony is awesome), and if I’m gonna drop a bunch of money on a camera, I may as well get one dedicated to astrophotography. This unfortunately means I’d have to give up the convenience of a DSLR (portability, liveview, etc) in favor of using a laptop to control my camera. I use computers for a living, and I have a decades-long traumatic abusive relationship with Windows, so this prospect was unpleasant, but I decided it was necessary nonetheless.
The next dilemma: monochrome or color? In every normal terrestrial camera, the sensor has a bayer array filtering the light before it hits the sensor and thus you get RGB images (for more on how this works, see this explanation). This is convenient, but has some drawbacks: because every shot is filtered, the total light actually getting to your sensor is greatly decreased, so in general it’s not as sensitive or efficient. In addition, an RGB sensor means that you are limited to the RGB spectrum (unless you mod the camera by removing the infrared filter, which many people do), which means that imaging non-visible parts of the spectrum (which many nebulas and galaxies emit light in) is at least more complicated. A monochrome camera doesn’t have these limitations, but comes with drawbacks of its own: to create RGB images, you need filters in front of the sensor for whatever part of the spectrum you’re hoping to photograph in, and combine them all later in software.
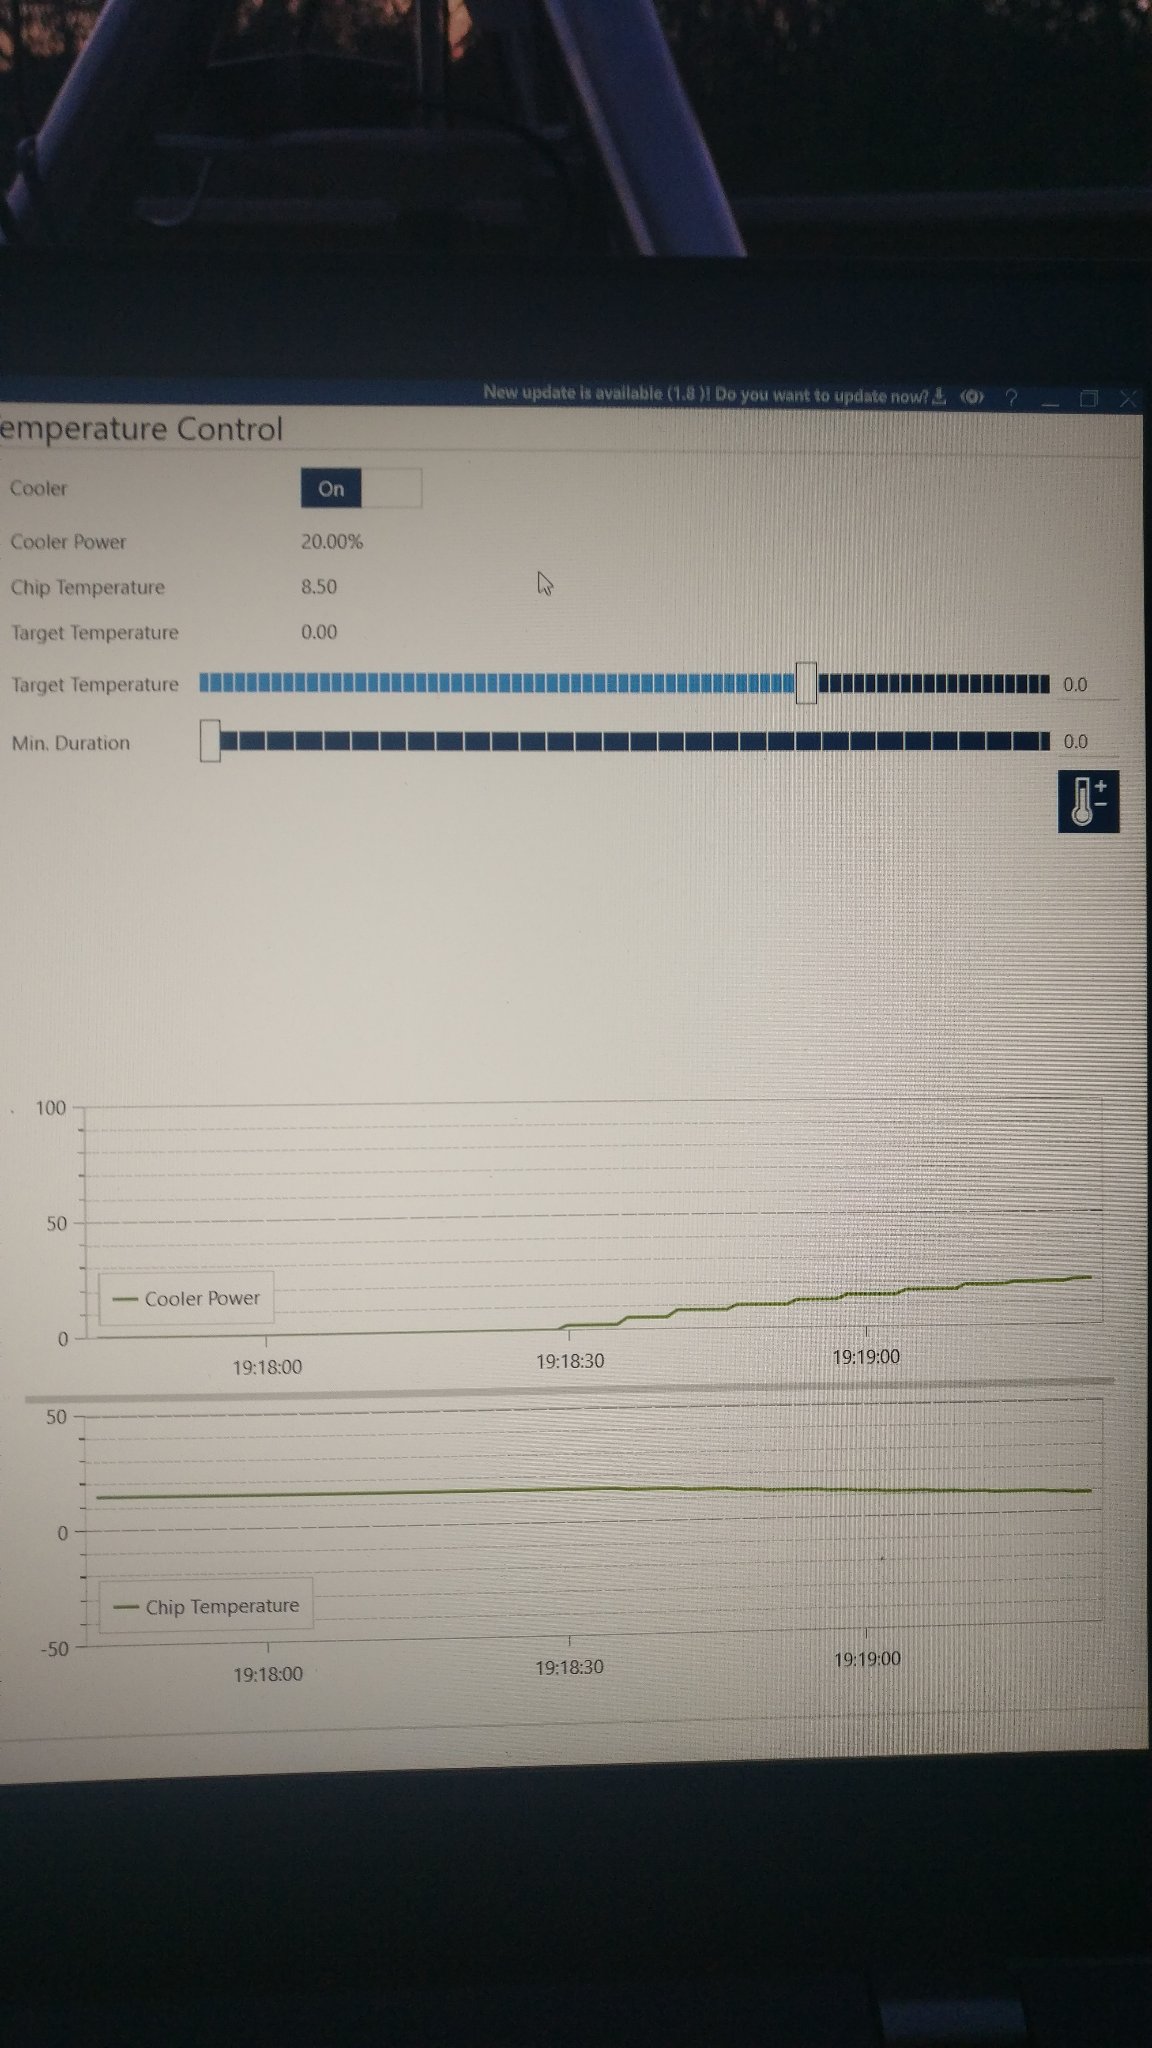
tl;dr: Ultimately I decided on mono, and decided to go with the fairly well-regarded ZWO ASI1600mm pro, which has the added benefit of having an actively cooled sensor. Sensor noise increases with heat, so the cooler your sensor, the less noise you’ll get. This camera can cool down to delta 30C below ambient temperature, as low as -40C. Pretty cool! You can buy convenient kits that also come with the ZWO EFW (Electronic Filter Wheel), which is what it sounds like – a wheel of filters that can be controlled via USB from your computer, so that you can just pick what part of the spectrum you want to photograph. It also came with a set of filters: Luminosity, Red, Green, Blue, Sulfur II (SII), Oxygen II (OII), and Hydrogen Alpha (Ha).
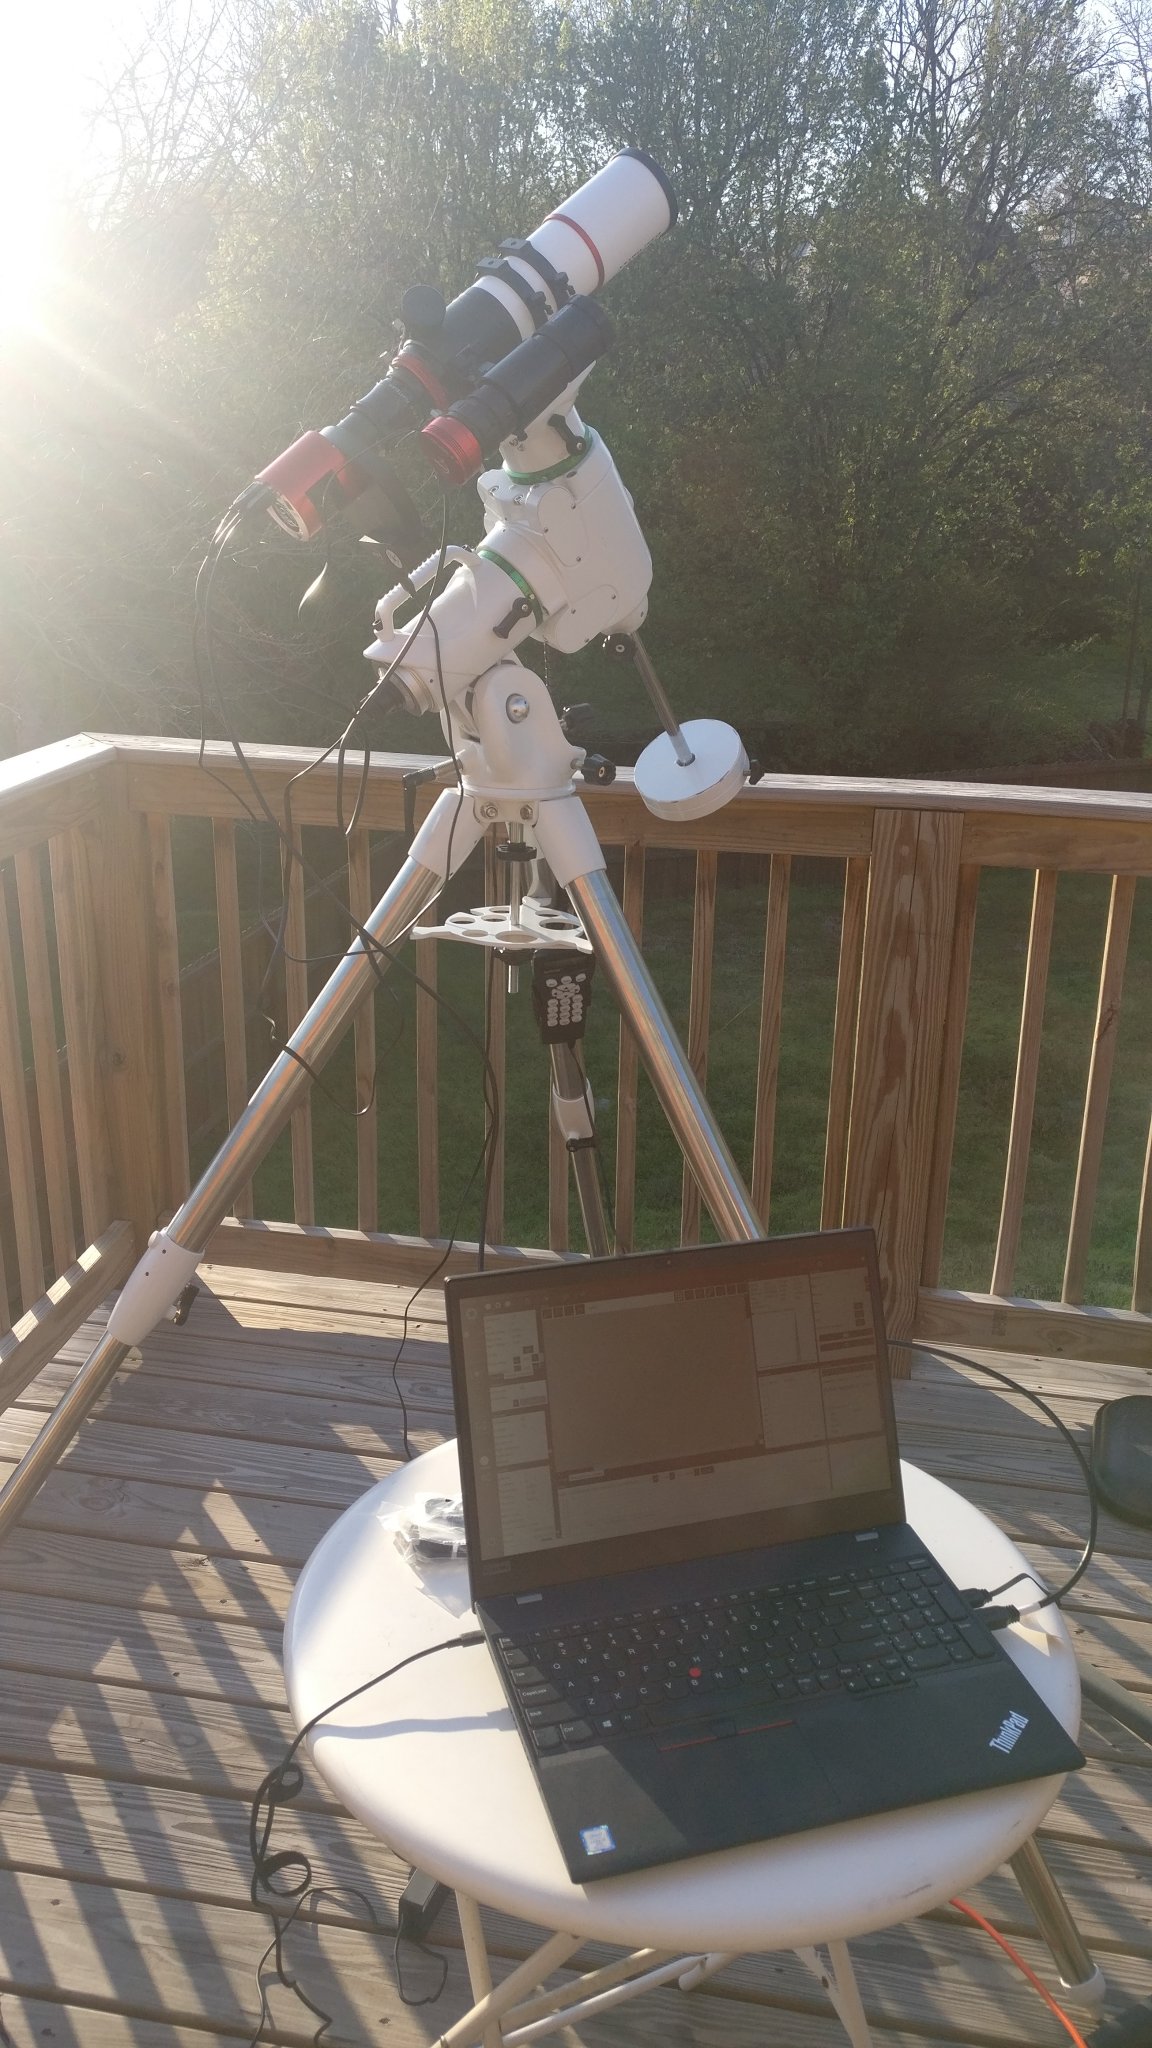
It all arrived last weekend and it was quite a chore getting it all assembled, but looked pretty sexy when it was all done:
The next step, of course, was figuring out how it all works. As mentioned, despite the fact that I loathe using windows, due to the relative usability of software available, I nonetheless decided to go with this for now (more on this to come), using the ASCOM drivers for the ZWO equipment and my mount, along with PHD2 for guiding and NINA for controlling the whole rig. I won’t bore you with the specifics of how it’s all connected, but it involves a lot of cables.
Last night we had our first clear night in a while, so I put it all together and prepped for a test run:
I didn’t have much of a plan for photographing anything in particular (and increasingly I’m realizing this time of year is in fact not great for narrowband nebulas, being mostly galaxy season), but I figured it didn’t matter much, since even getting it working at all would be a win.
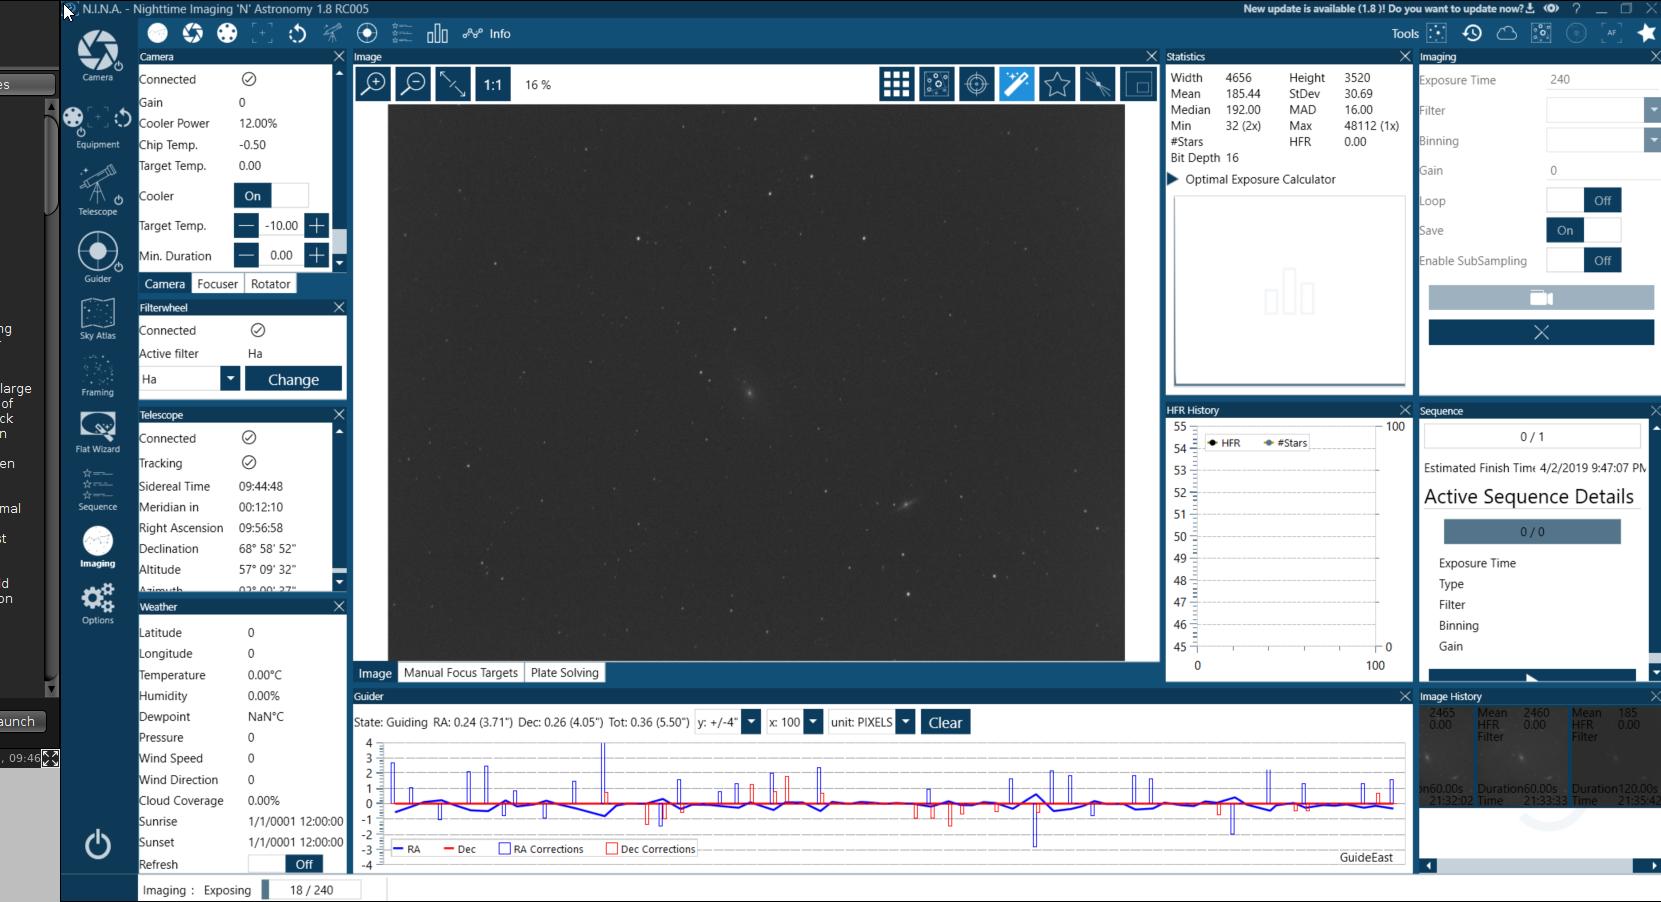
First step was getting the camera connected – because I already had the ASI drivers installed for my ASI120MC (which I had already used to test guiding as well as some limited success with NINA), it worked instantly! I even got it cooling right off the bat:
Next, I verified everything else worked – EFW was working fine and NINA was able to change the filters successfully. Then, I just had to wait for dark. First, a quick detour: another (unexpected) benefit of using a laptop to control your camera that I hadn’t anticipated is the use of platesolving to sync your telescope/mount. You may recall the immense frustration I had aligning my mount the first time around. I got a lot better at it, but it’s still somewhat a pain in the ass. To recap: with this method, you use the handset for the mount to slew the camera (close to, or sometimes far from) a particularly bright star, align it to be centered on the star, and repeat. This tells the mount where the mount is actually pointing, so you can then tell it to go look at other objects in the sky. Modern software (like NINA) instead can use a process called platesolving. This processes utilizes the massive accumulated data of star charts and databases to “solve” an image and figure out what part of the sky it’s looking at. So, with this process, you simply setup your telescope, polar align the mount, take a photo through the telescope and then platesolve it. The software then knows (roughly) where the scope is pointing, and you can then tell it to view a particular object/part of the sky, and it will platesolve, sync and repeat until the reported position in the sky matches what it’s supposed to be (within tolerances you can define). In other words, this means aligning my scope is now as simple as taking a picture and waiting for the software to do its thing. Pretty neat!
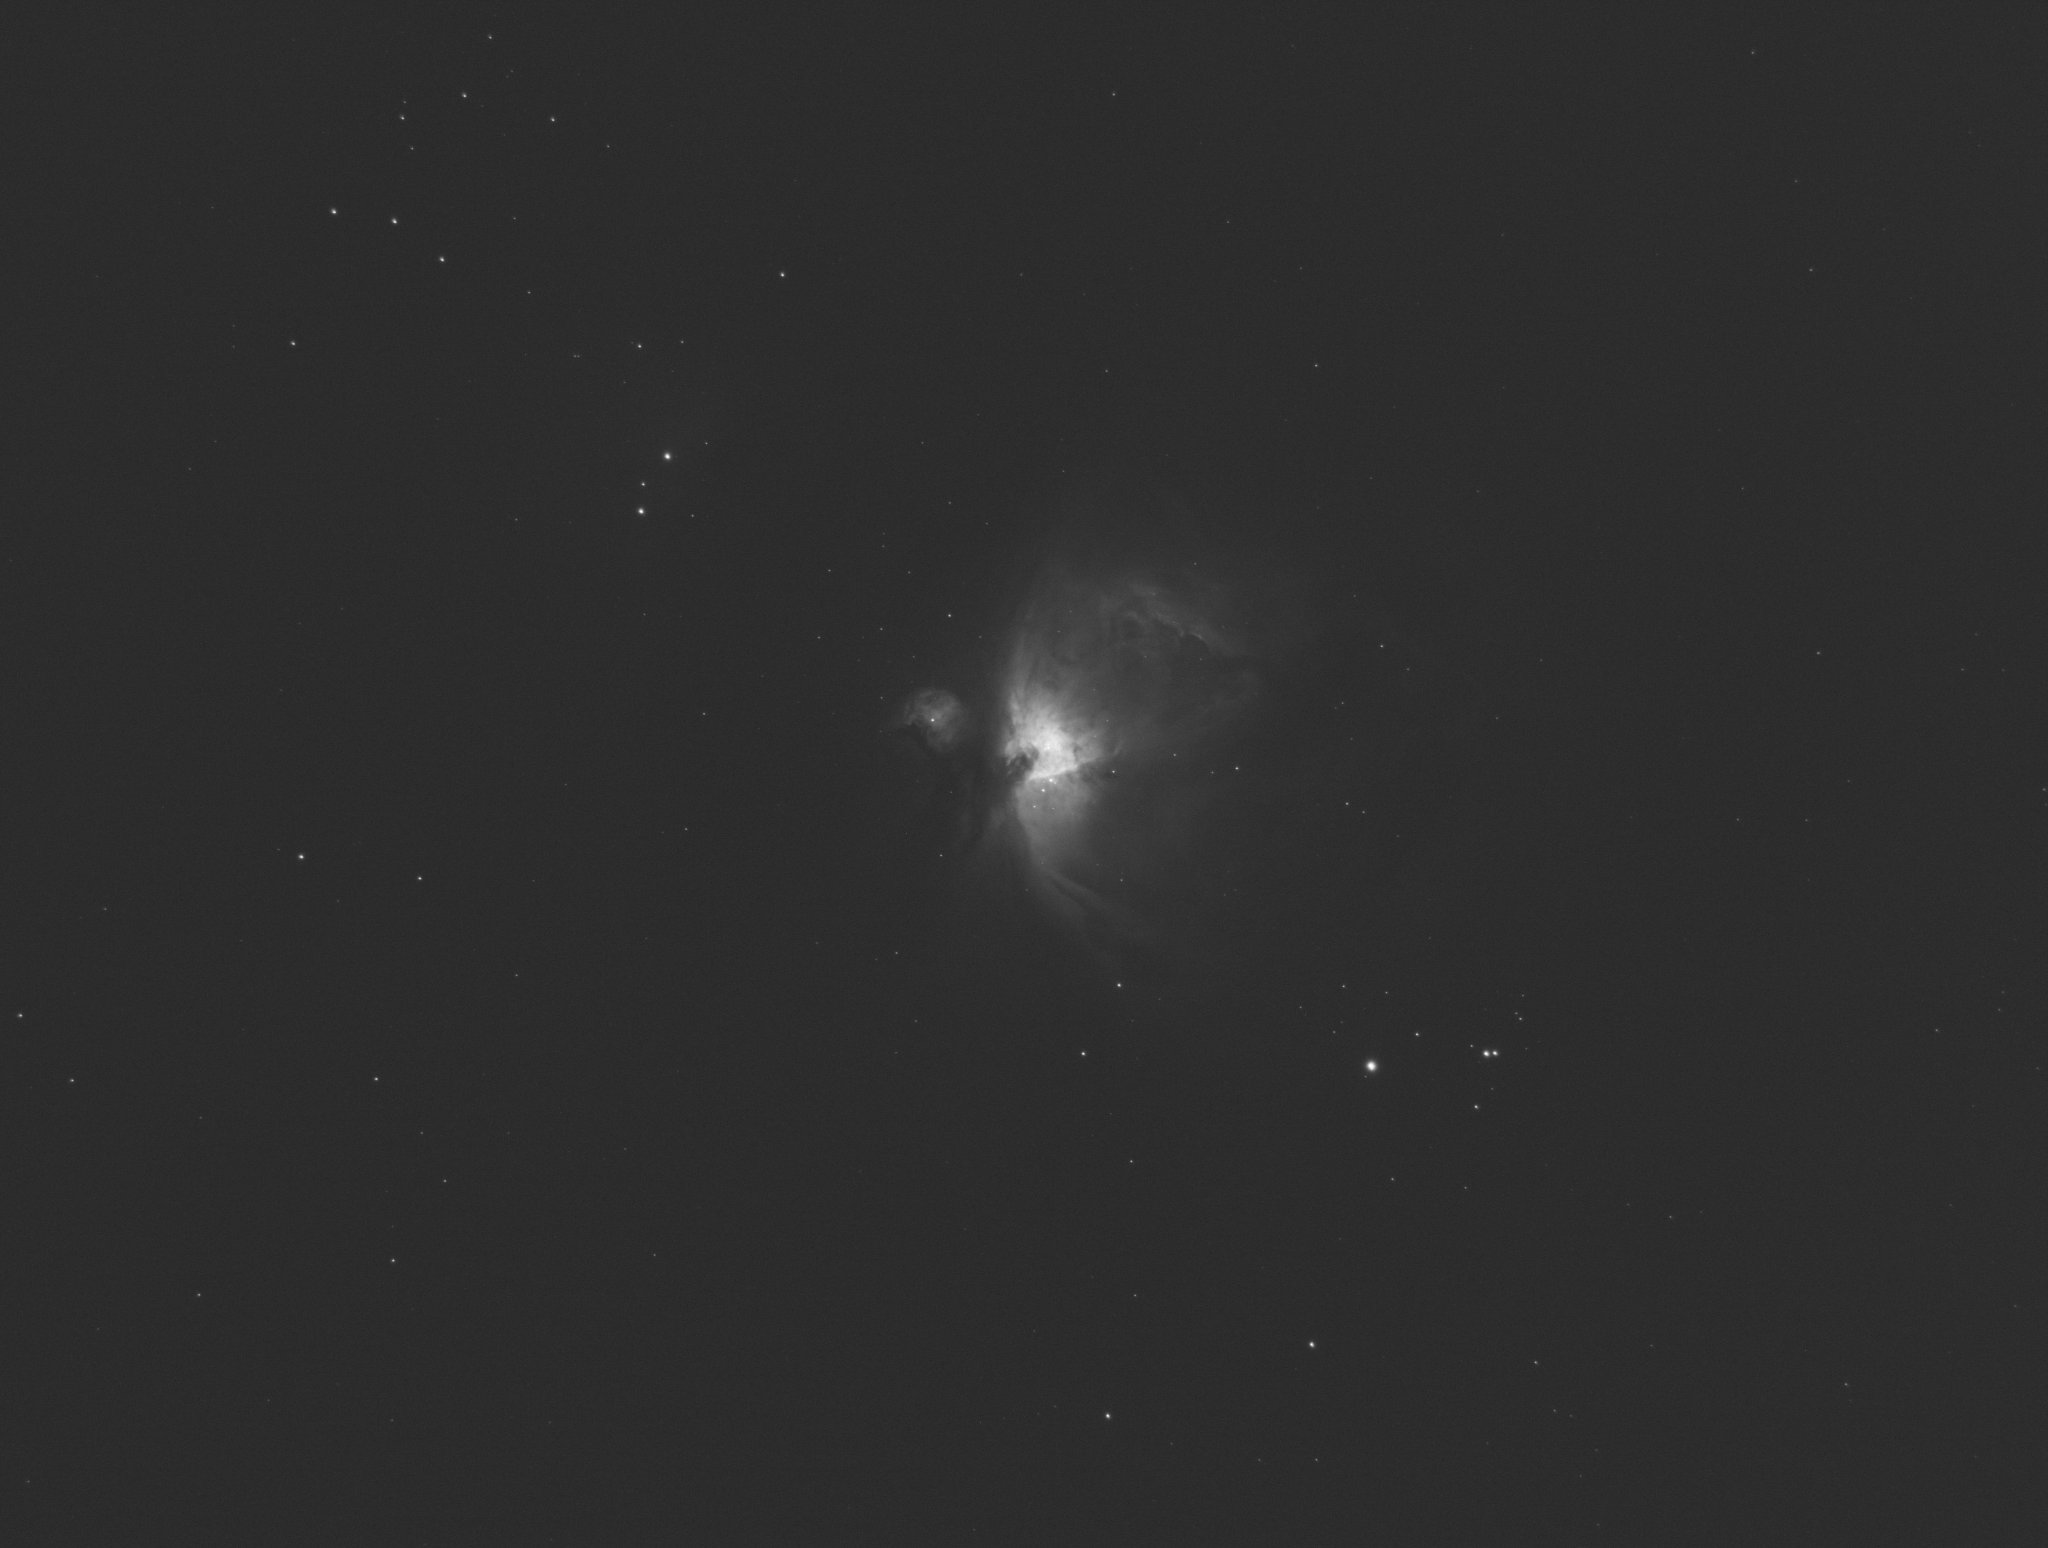
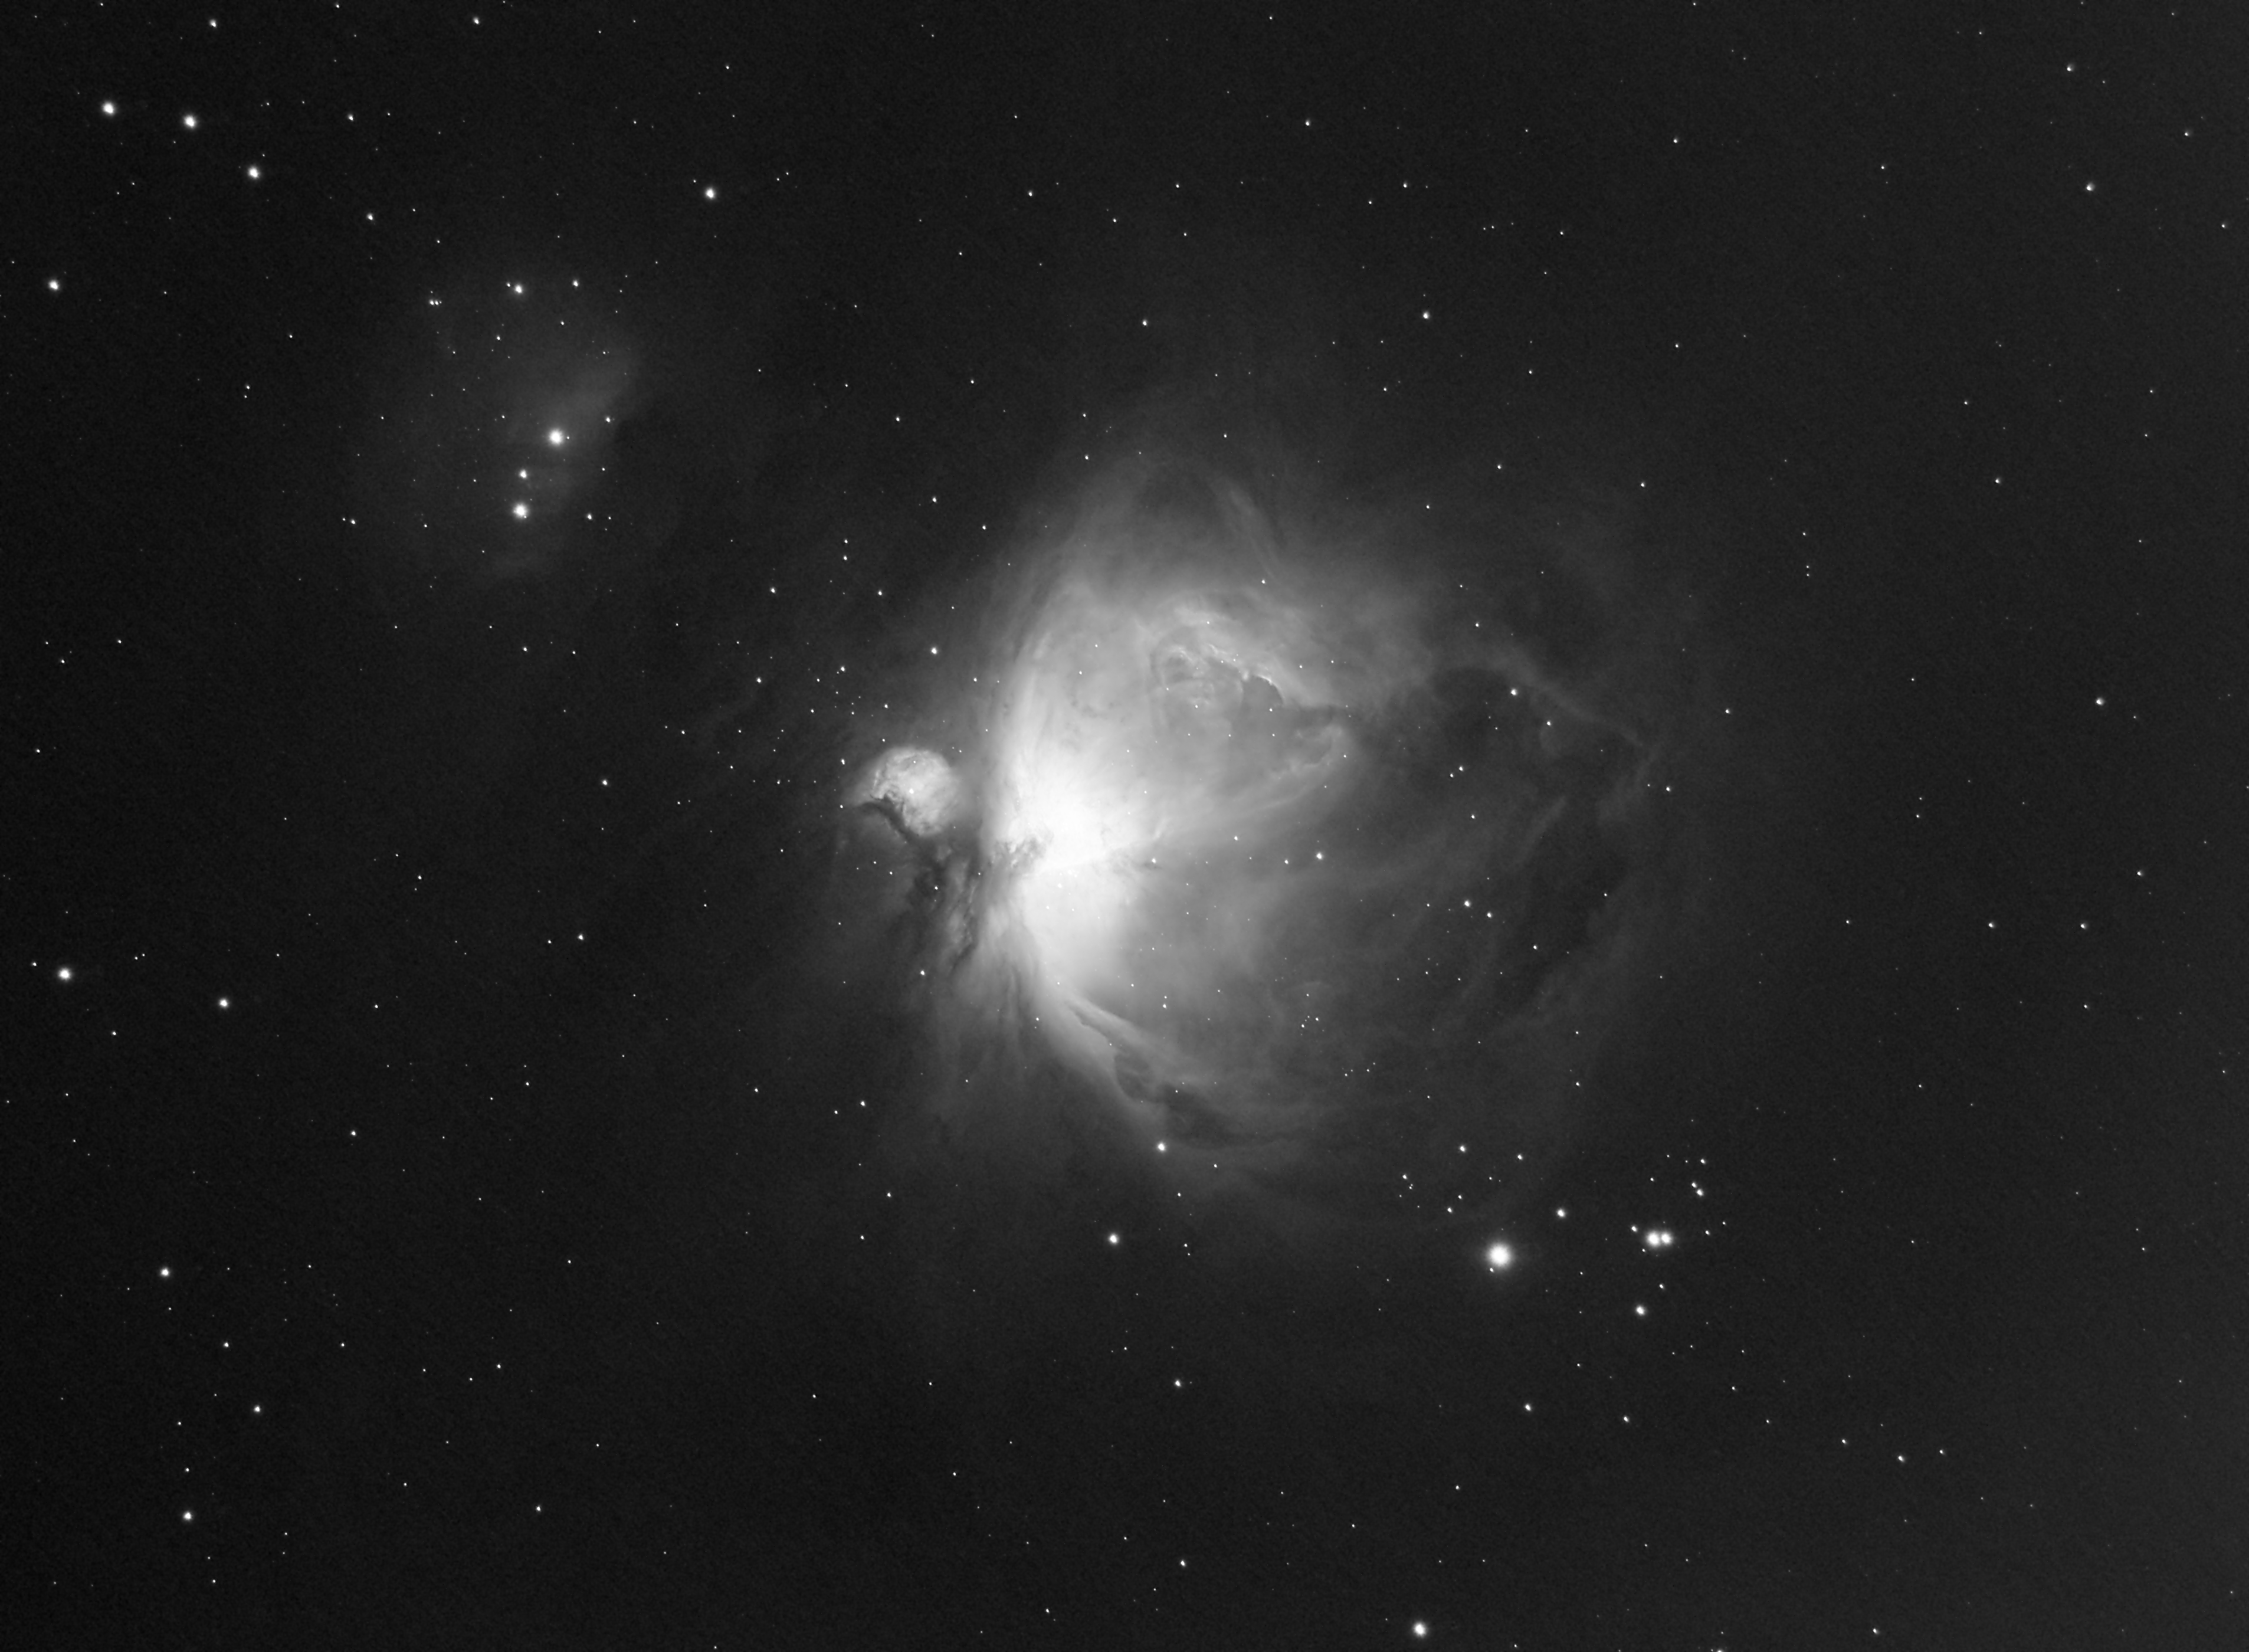
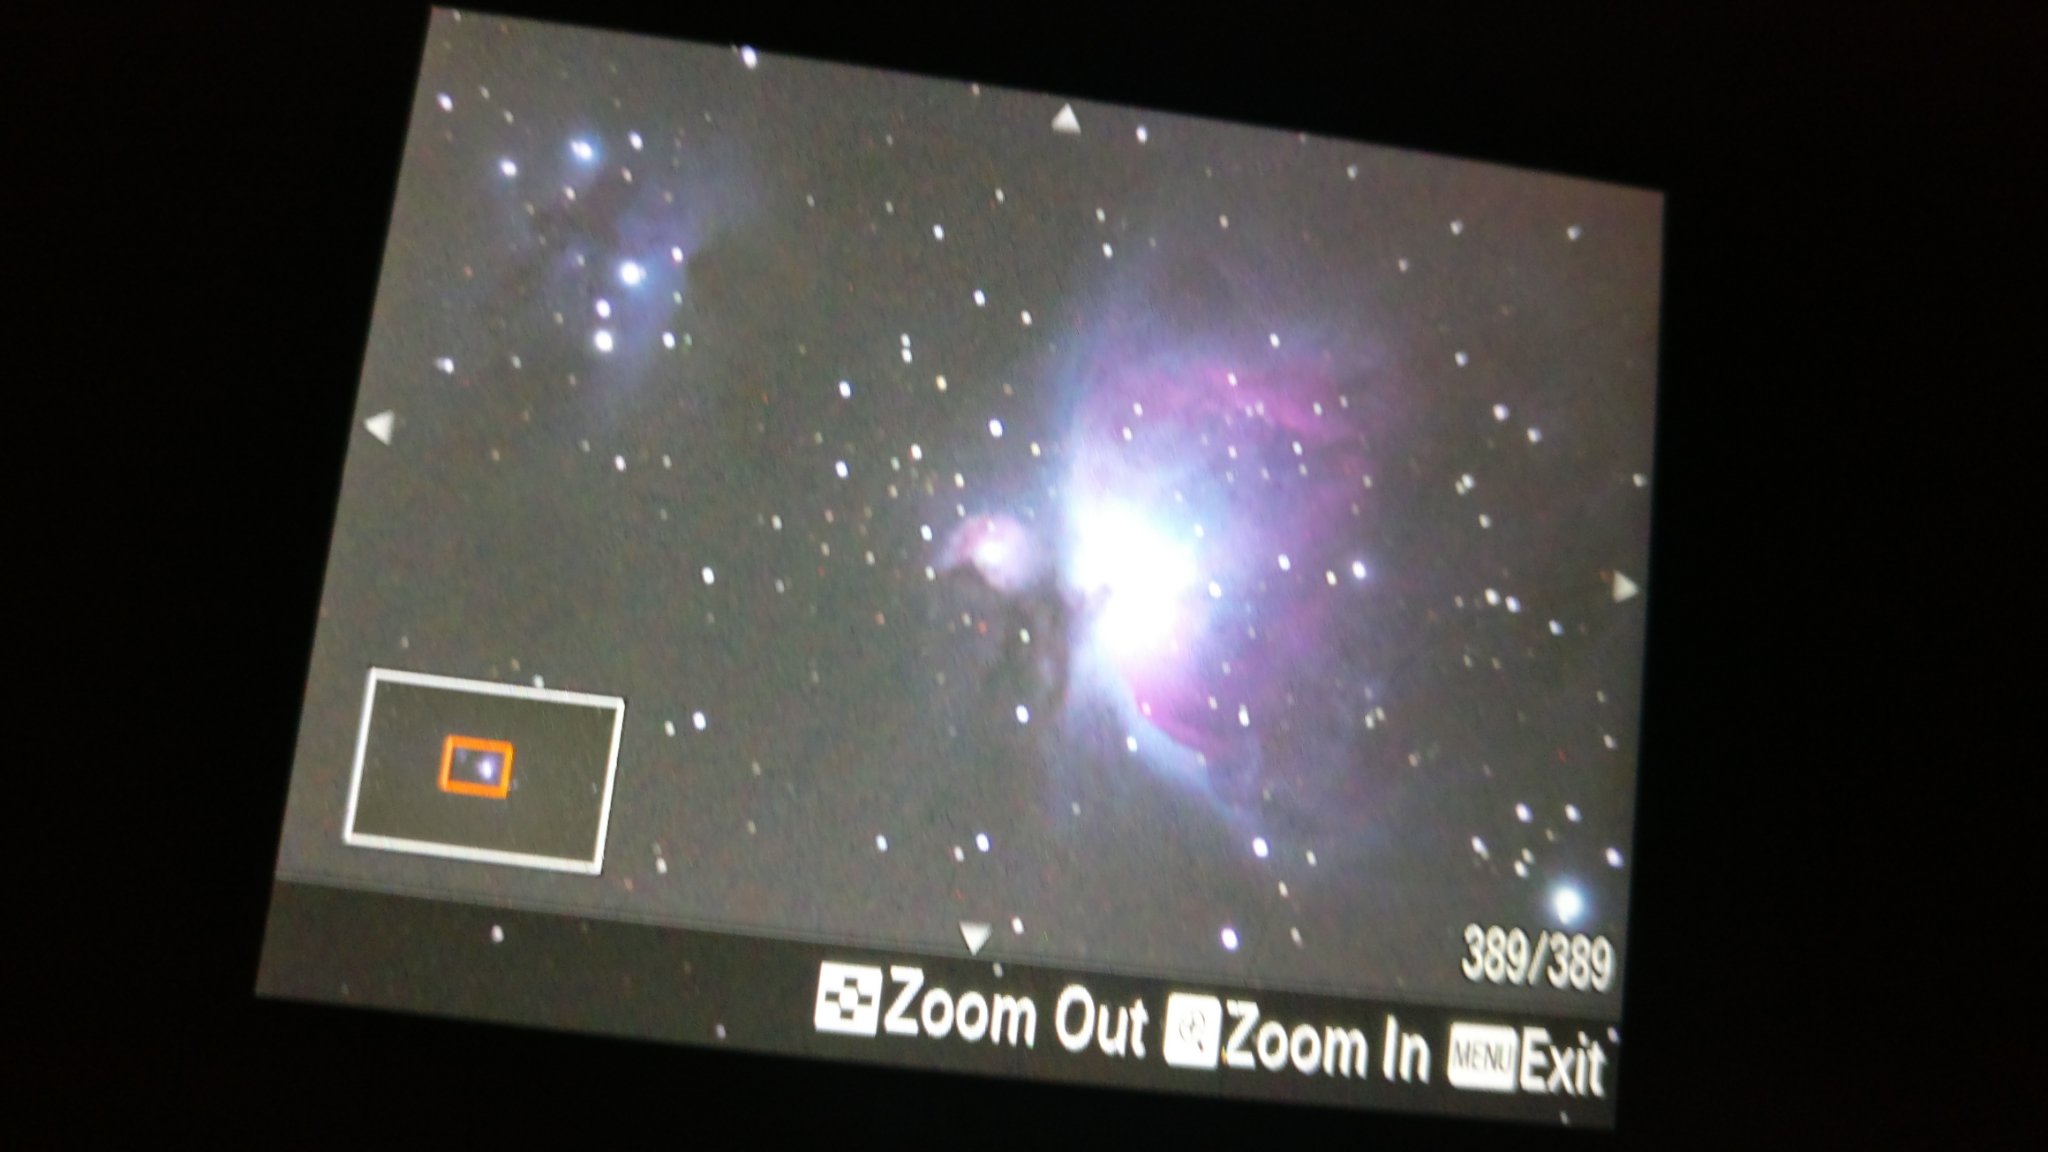
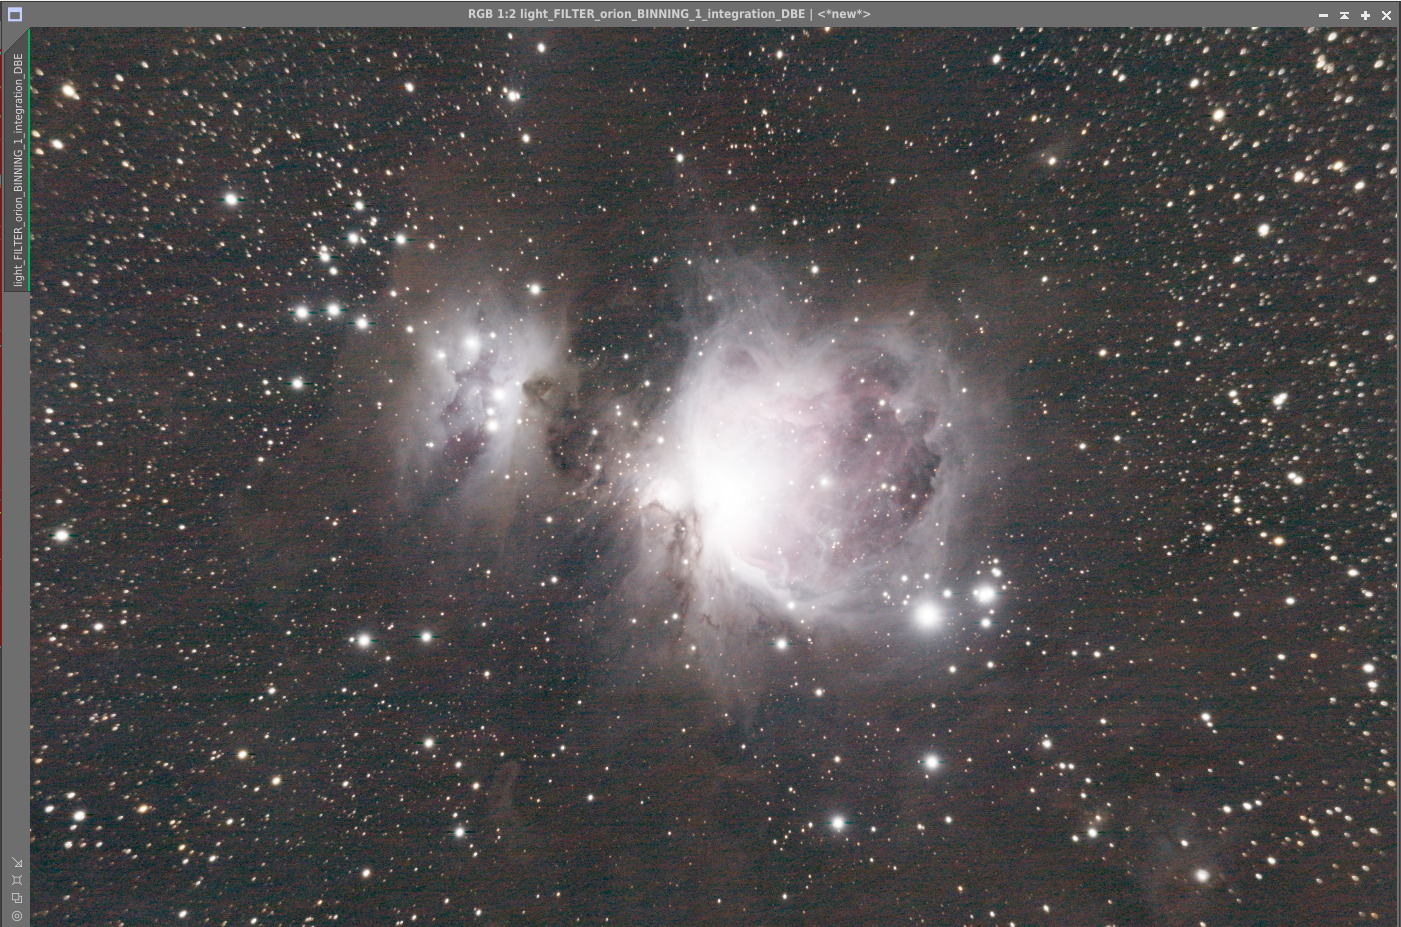
So, once it got dark, I platesolved, synced, and slewed to the biggest target I could think of this time of the year: M42 (The Orion Nebula). Alignment worked great, and with some trepidation, I set my filter wheel to the Ha filter to see what M42 looks like in hydrogen alpha:
Amazing! I was pretty impressed with this result – only 40 seconds of hydrogen alpha light came out looking fairly crisp and incredibly noise-free (compared to my Sony, at least). Since I figured I’d want some data to play with, I went ahead and let it roll, taking 30 40” subs of M42 in hydrogen alpha. This evening I stacked them just to see how it looks:
Pretty nice, despite not bothering to take any flats or darks. Remember of course this is monochrome because to get a full color picture, I’d have to gake the other LRGB sets of photos – I didn’t bother doing this tonight, because I still wanted to test other things out. It was around this time that it occurred to me that I could install VNC on my laptop and be doing (most of) this from the comfort of my warm house. Despite taking somewhat away from the whole ‘be outdoors experiencing the majesty of nature and the skies’ aspect, I have to say this was pretty cool. This was the setup I looked at (remotely) from my PC imaging Bode’s and the Cigar galaxy:
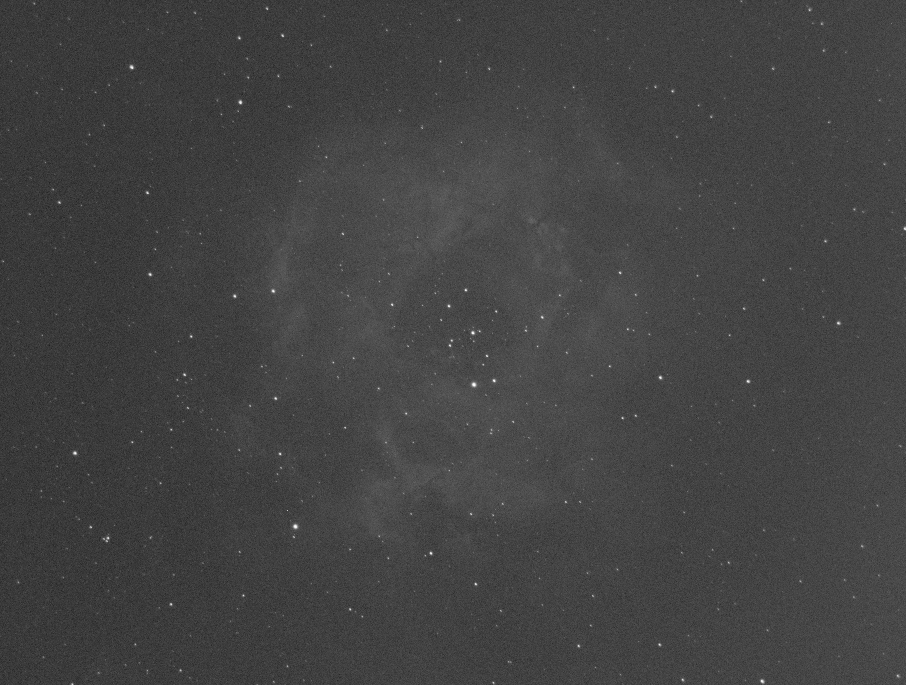
Next, I pointed the camera at the Rosette Nebula, because this is a particularly good narrowband target – I should have done this earlier though, as it sets fairly early this time of year. Still, even the one exposure I got looks pretty cool!
It’s amazing how large this nebula is – for reference, the moon in this same field of view would be roughly the size of the dark part in the middle of the nebula. Big!
This is where things take a slight detour into the comical, so some blooper reel territory shit resulting from the many things I still need to learn. First, the camera suddenly stopped cooling. Perplexed, I thought something was broken until I realized the rather obvious problem: I was out of juice. The battery I use (although plugged in), was draining faster than it could charge. I swapped the camera and laptop to AC power and proceeded.
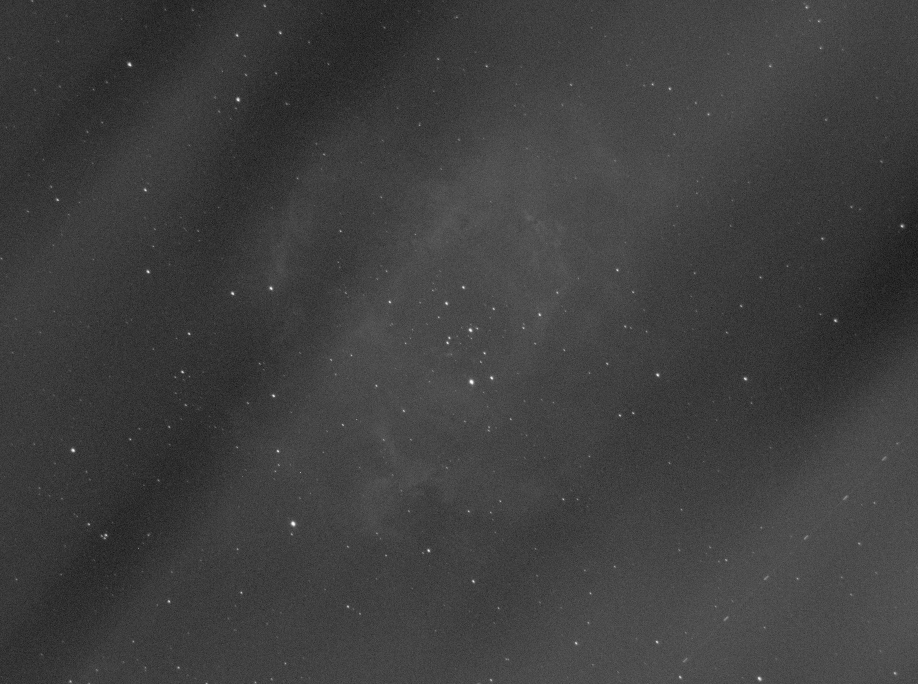
Next, I figured I’d let things run on the rosette nebula for a while, but the very next photo I got was .. not right:
What the hell happened? I triple-checked the forecast and it was supposed to be crisp and clear. I went outside and couldn’t see a cloud in the sky. Did my neighbors fire up a bonfire? Did the northern lights make an astonishingly southern appearance? No, as with most of these things: I was just an idiot. If you were paying attention earlier, I mentioned that the Rosette nebula sets early this time of year. Yeah. These were trees on the horizon already creeping in to the field of view, appearing as streaks over the course of 6’ exposures. So much for that target!
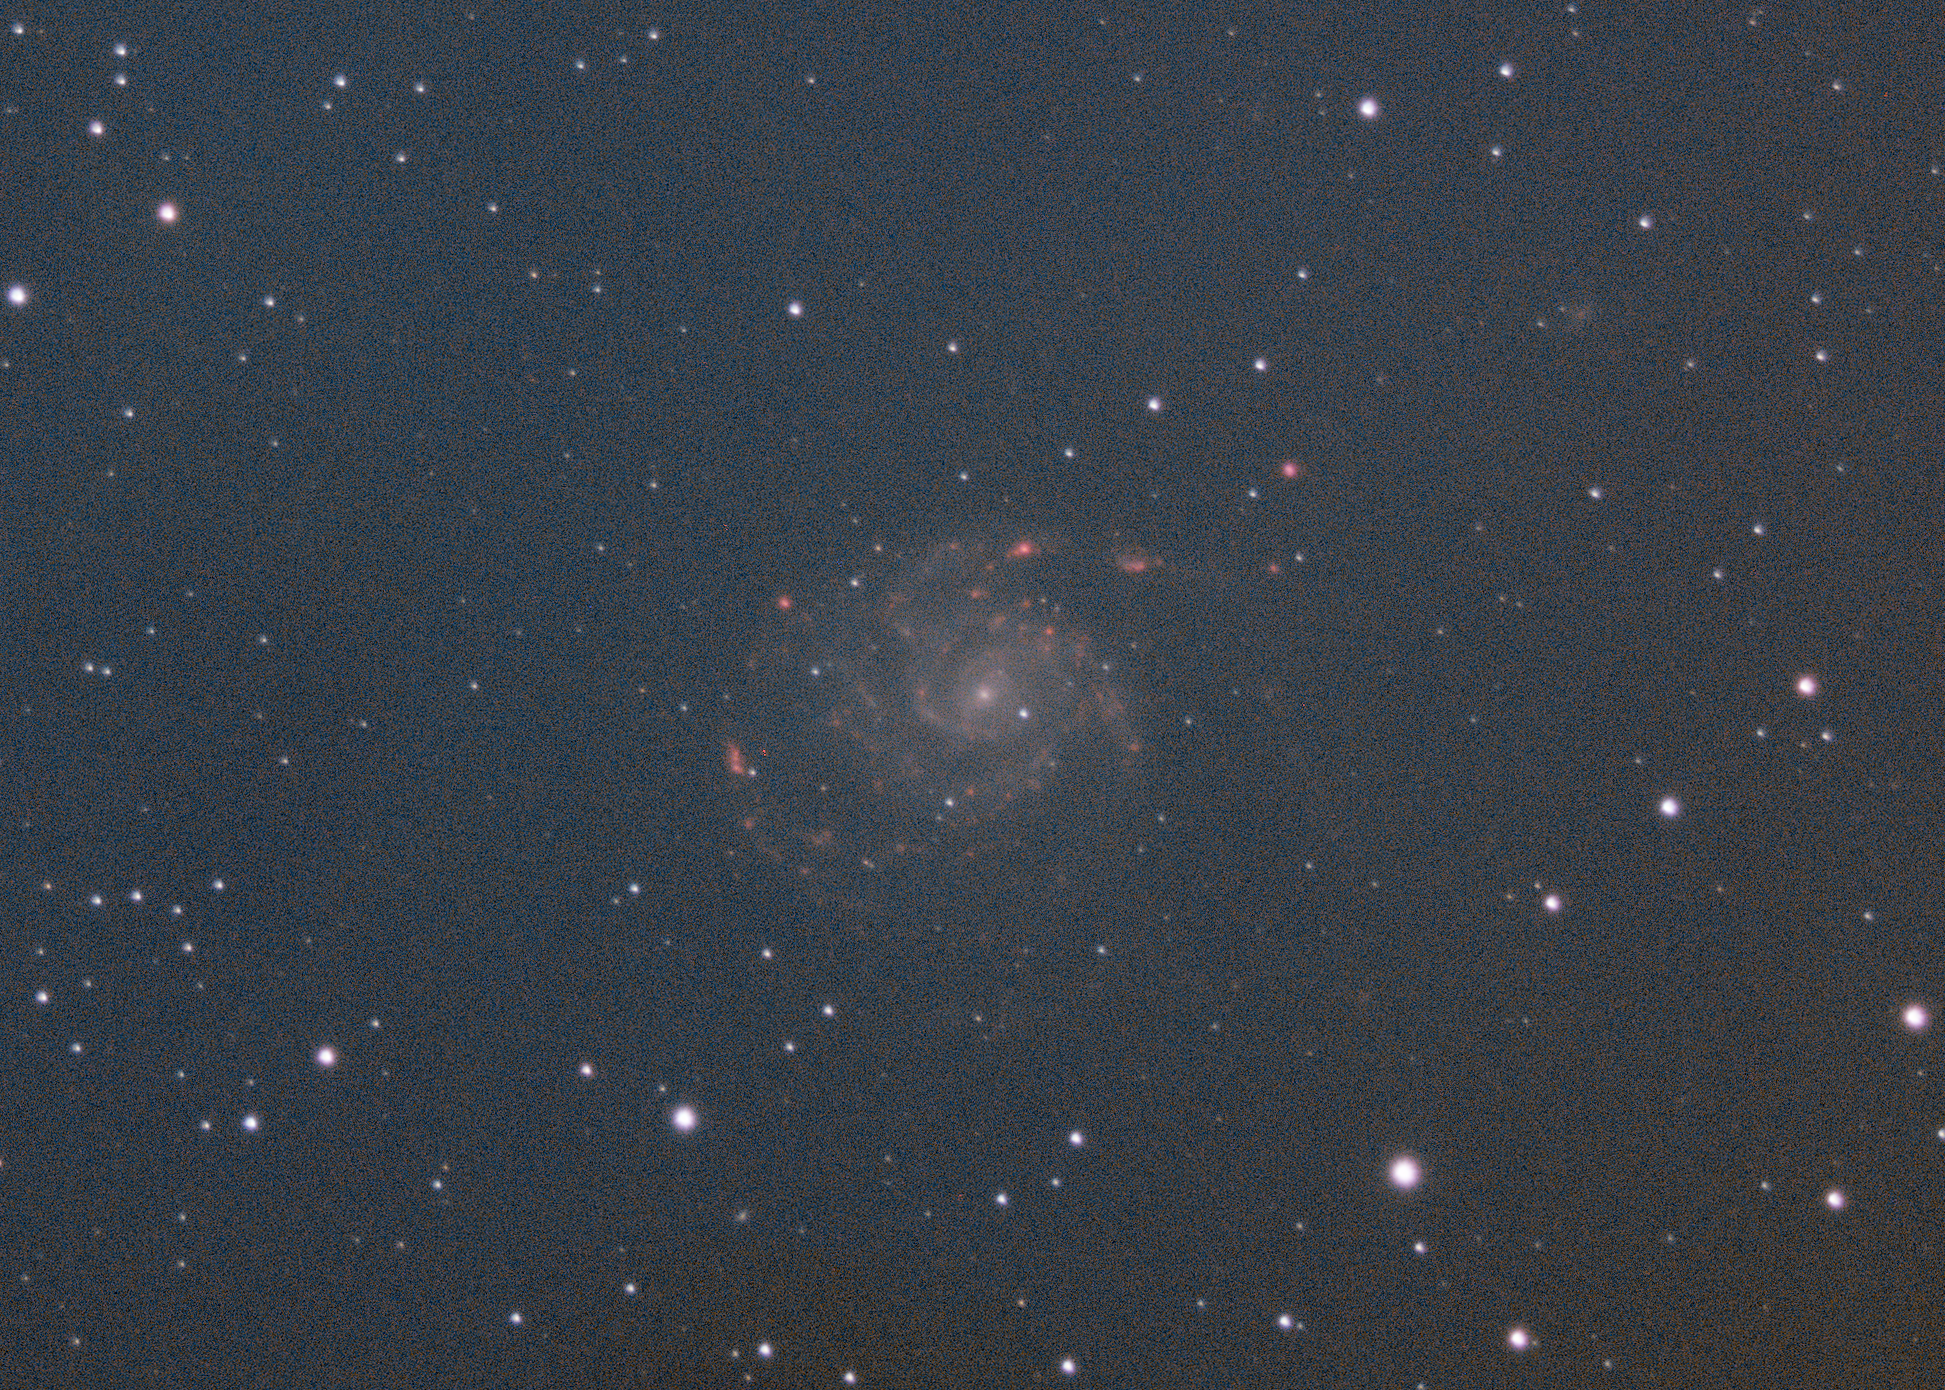
Determined to get some more data to play around with, I tried to salvage the night by pointing at M101, which was just rising. This was going well, and I got a set of Ha subs, a set of luminosity subs, and had just started with the red subs when I noticed this:
Fearing the worst, I went out there expecting to troubleshoot catastrophic mount failure or something. Fortunately, the problem was a little simpler: the filter wheel had started hitting the mount itself and was slowly turning the camera in the field of view as it tracked. So, apparently leaving your gear to run automated while you sit around inside watching star wars is not without its risks.
It was pretty late at this point, so I decided to call it a night. I gave stacking and integrating the photos of M101, but the result looks like crap, mostly because M101 is fairly small in my telescope, I took no darks/flats/biases, and couldn’t even finish taking red green and blue. I combined the Ha, luminosity and small amount of red channels into something with completely fake colors just for shits and giggles:
These colors are all wrong, but then again what colors in astrophotography are ‘real’? It’s interesting that you can see the portions of the Ha data in red – these are typically (as I understand it) areas of active star formation that are high in narrowband emissions.
All in all, despite the numerous disasters, all the gear worked flawlessly, and I’m pretty excited to give this a whirl and get a full set of data. I was worried about the pain of using a laptop (and getting all this gear out into the field is still a whole other thing I have to figure out), but I have to admit: sitting at a computer and slewing the telescope flawlessly to look at things from the comfort of my office is pretty damn cool.
But what did I learn? I now (as always) have a TODO list a mile long:
improve my polar alignment – guiding was working, but having a really hard time. Sharpcap is yet another software tool that I think will help with this.
figure out how to position my EFW and set the tolerances in software so it doesn’t bang into the mount while tracking.
obtain a full set of data and figure out how to combine LRGB/Ha/SII/OIII data properly
fix the spacing in my optical train – I’m still getting coma in the corners, which means that my sensor is too close to the field flattener
try not to take photos of things that are behind trees
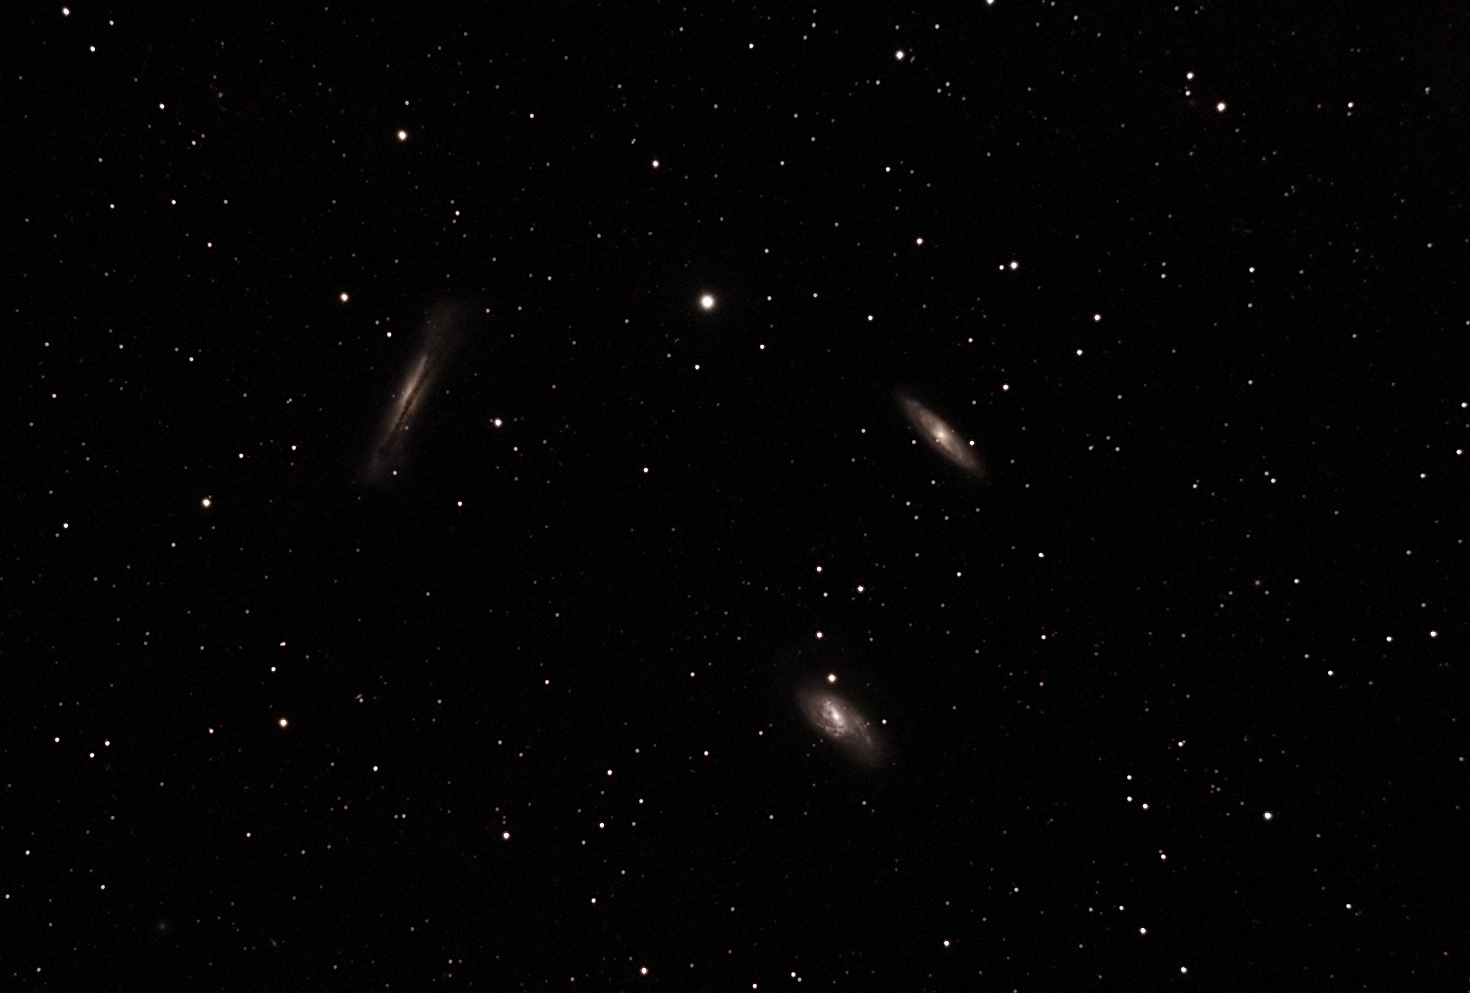
Nashville has been inundated with clouds and rain (and flooding), so not much occasion for astrophotography these days .. until this weekend! I am still pretty new, and thus unfamiliar with the winter sky, so I was glad for a few clear nights so I could finally see what’s out there. I decided to target a long-time favorite of mine: the Leo Triplet of galaxies (M65, M66, and NGC 3628). These galaxies are distant (for my telescope, anyway), at around 35 million light years away. However, they are also quite bright, so I decided to give it a whirl. I took a few test shots and was pleased to see all 3 galaxies clear, so I let it roll for a few hours. Unfortunately, clouds started moving in, but I had a sneaking suspicion they would burn up overnight and I was right! Decent results, and probably about as good as I can ask for with this particular telescope/camera combo:
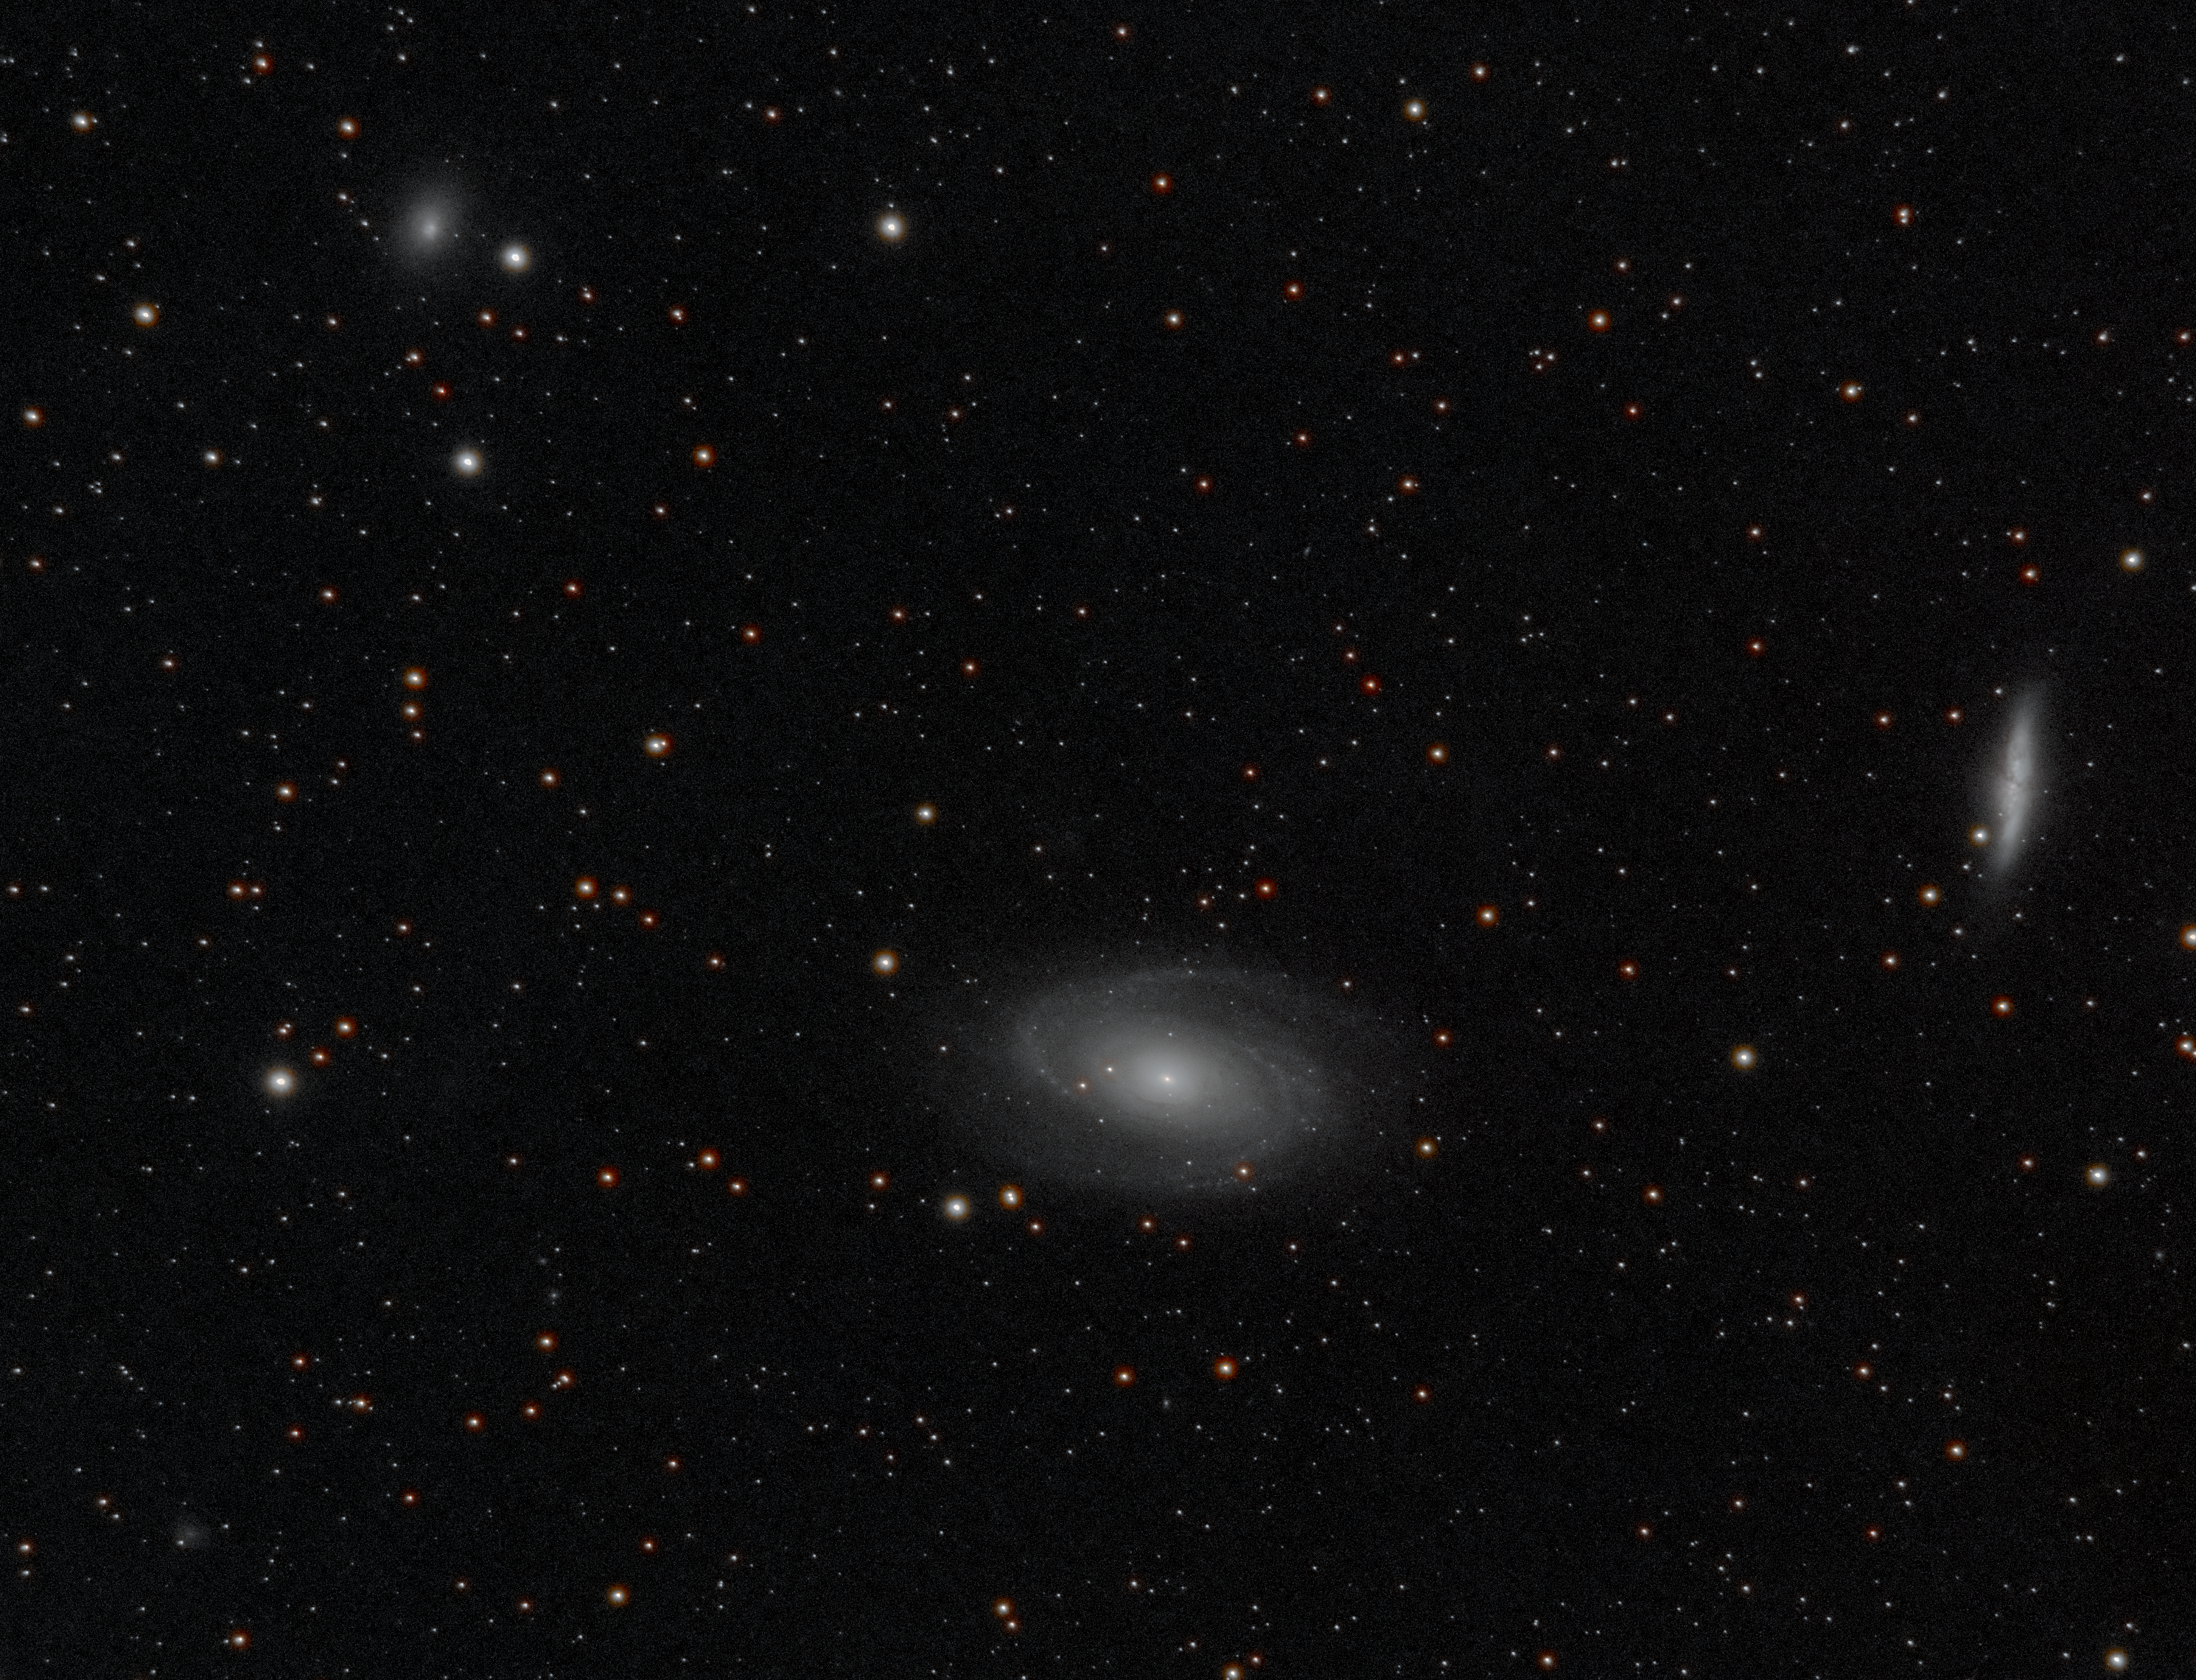
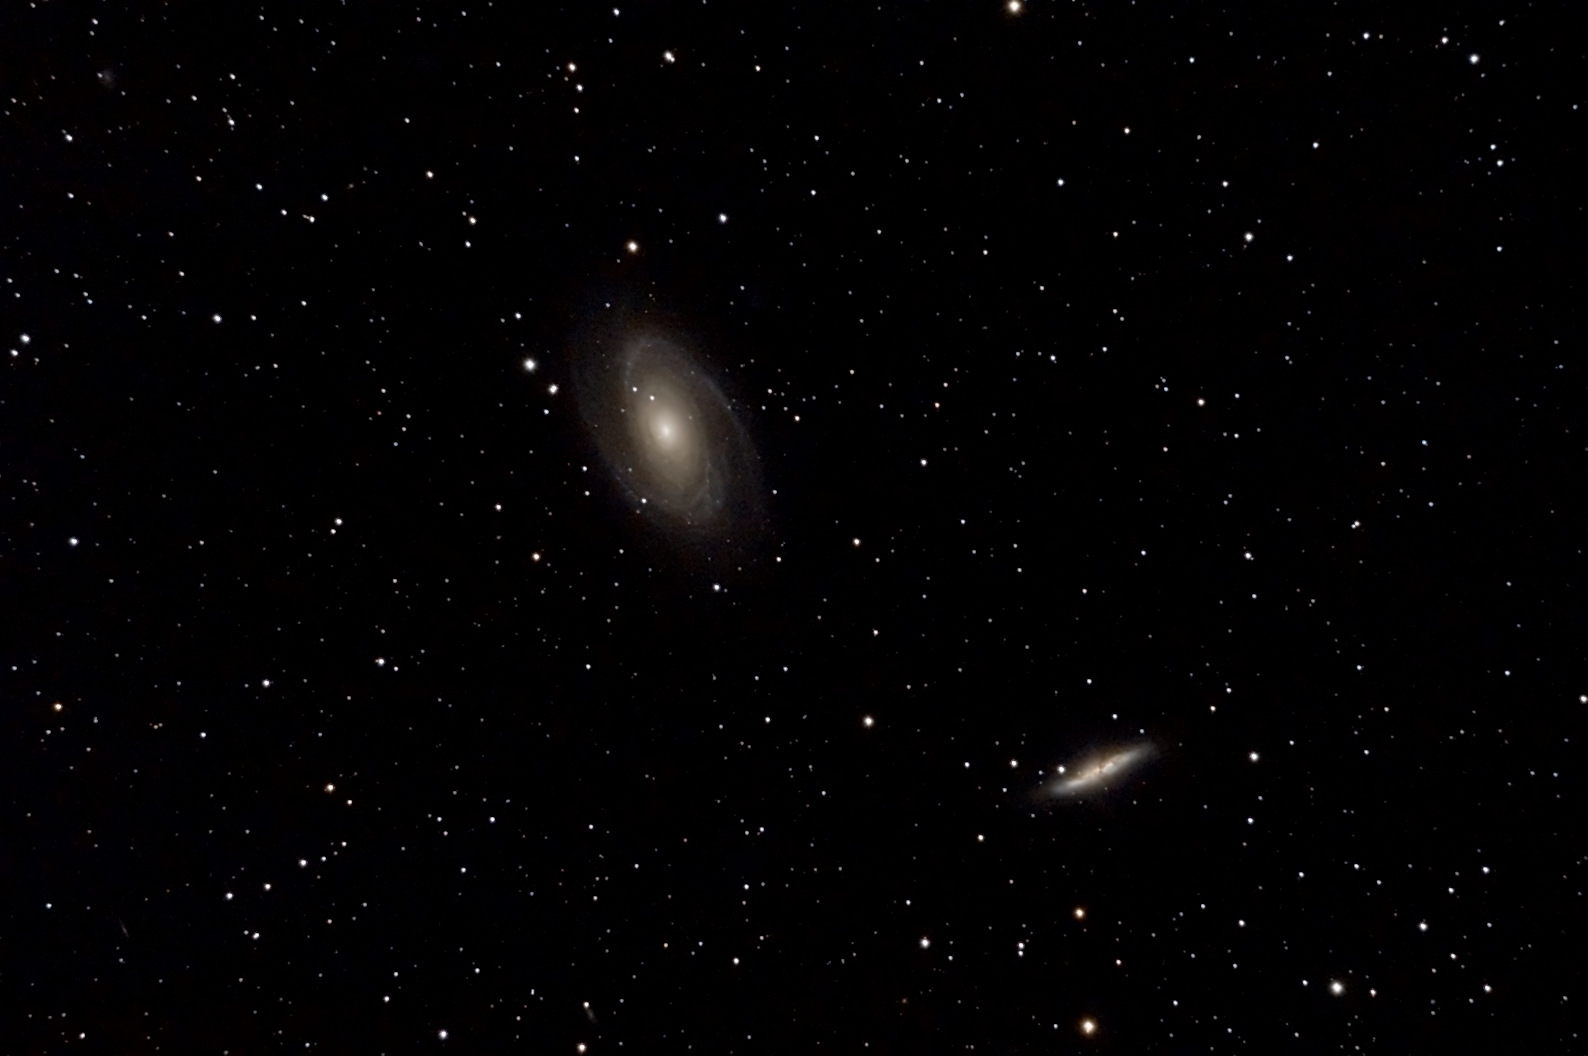
I decided to cut my losses early with the Leo Triplet because I was still afraid of the clouds creeping further north, so I pointed at Bode’s & Cigar Galaxy – another favorite of mine. Bode’s is not as bright as the Leo Triplet, but it’s much bigger. By the time I was already taking photos of these, the sky had completely cleared, so I probably could have just stuck with gathering data of the Leo Triplet, but ah well. At least I got two photos!
Subject: Bode’s and the Cigar Galaxy (M81 and M82)
Not bad, but would have been better with some more time to bring out detail. Pretty pleased for a first pass, though! I didn’t spend a lot of time on postprocessing these – I even used AutomaticBackgroundExtraction, just because there wasn’t a particularly bad gradient. I tried to get some more color but after color calibration and boosting saturation it just wound up exascerbating the noise and looking shittier, so in the end I just ended up going with the slightly-warmer-than-natural white balance I got out of the camera since I like the way it looked better.
Happy new year! Winter is upon us, and with it, clouds and cold. I didn’t do much for a few months, but we finally had a few warmer clear nights, so I did a little bit of experimenting.
One thing I’ve been wanting to play with is autoguiding. Modern equatorial tracking mounts are amazing devices, but being mechanical devices, they aren’t perfect – even the best mount will “drift” a bit from what it’s tracking with the motion of the earth. The result of this is that over the course of a longer exposure, your photo can be ever so slightly blurry, losing a lot of potential detail. One way to correct this is by using a second telescope, another camera, and a computer. You piggyback a smaller (usually wider-field) telescope on your main “imaging” telescope and then use software on the laptop to pick a star and track it for movement – if it drifts from where it was, the software sends corrective instructions to move the mount back in place. The result looks something like this:
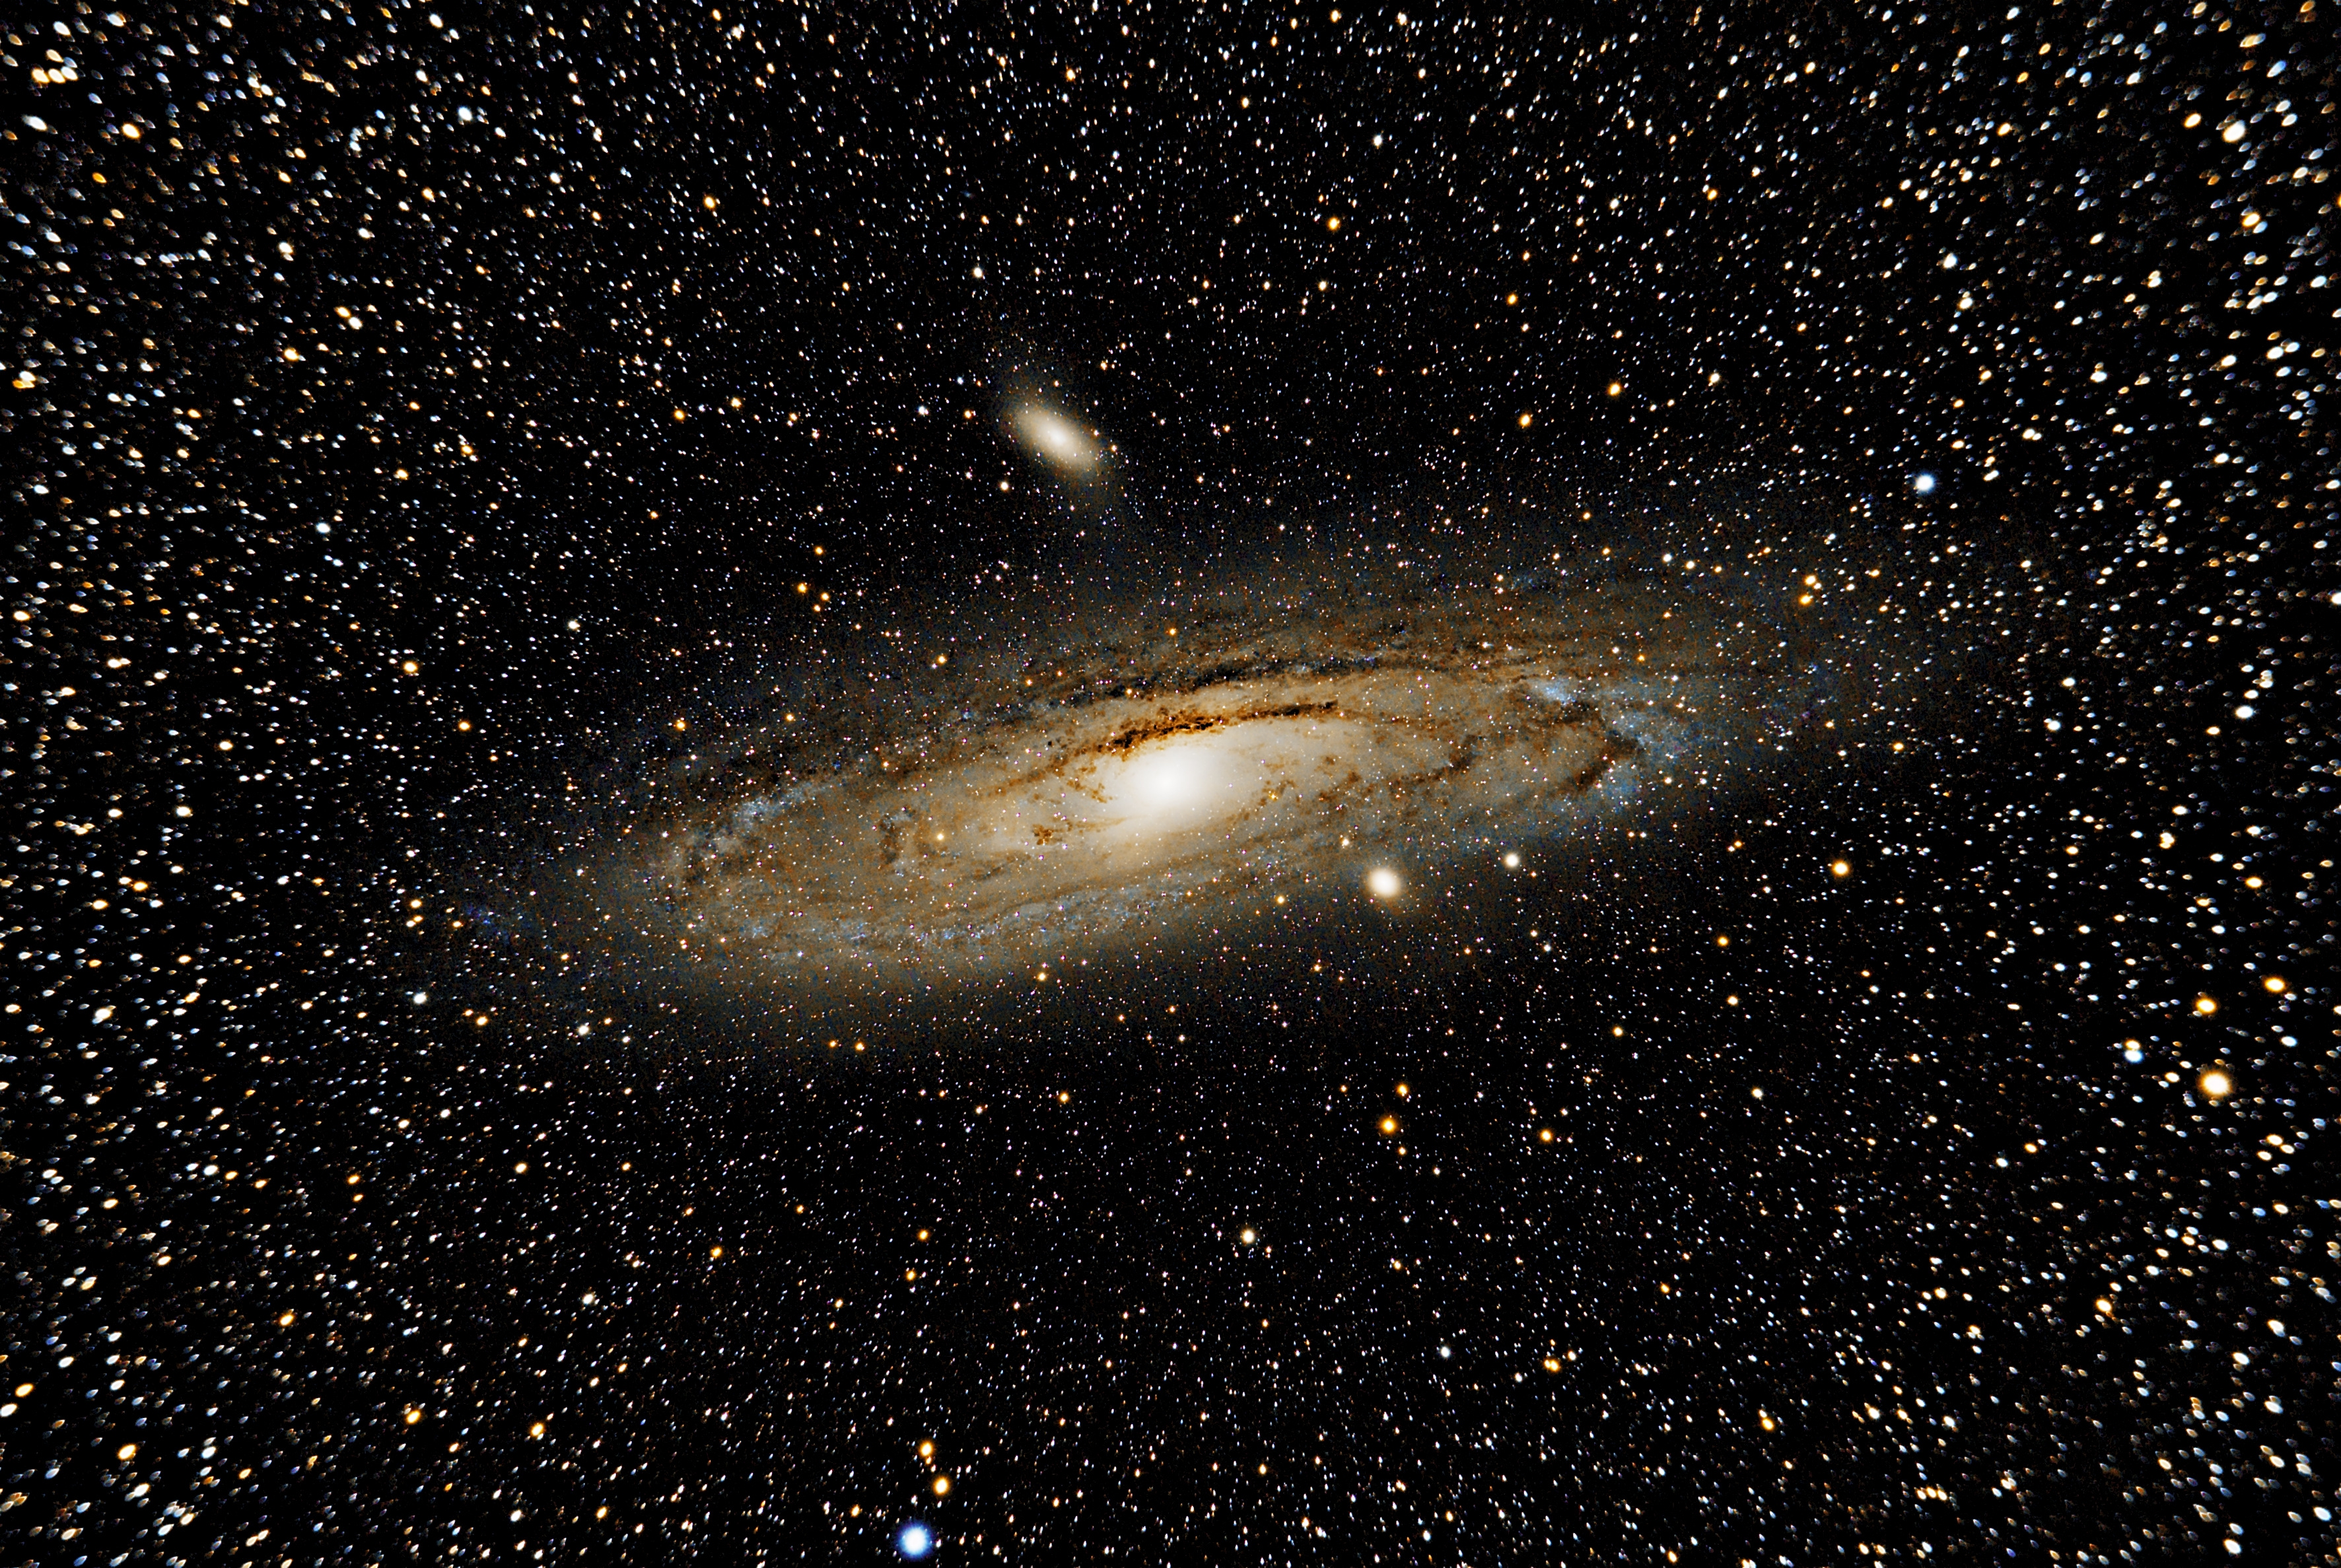
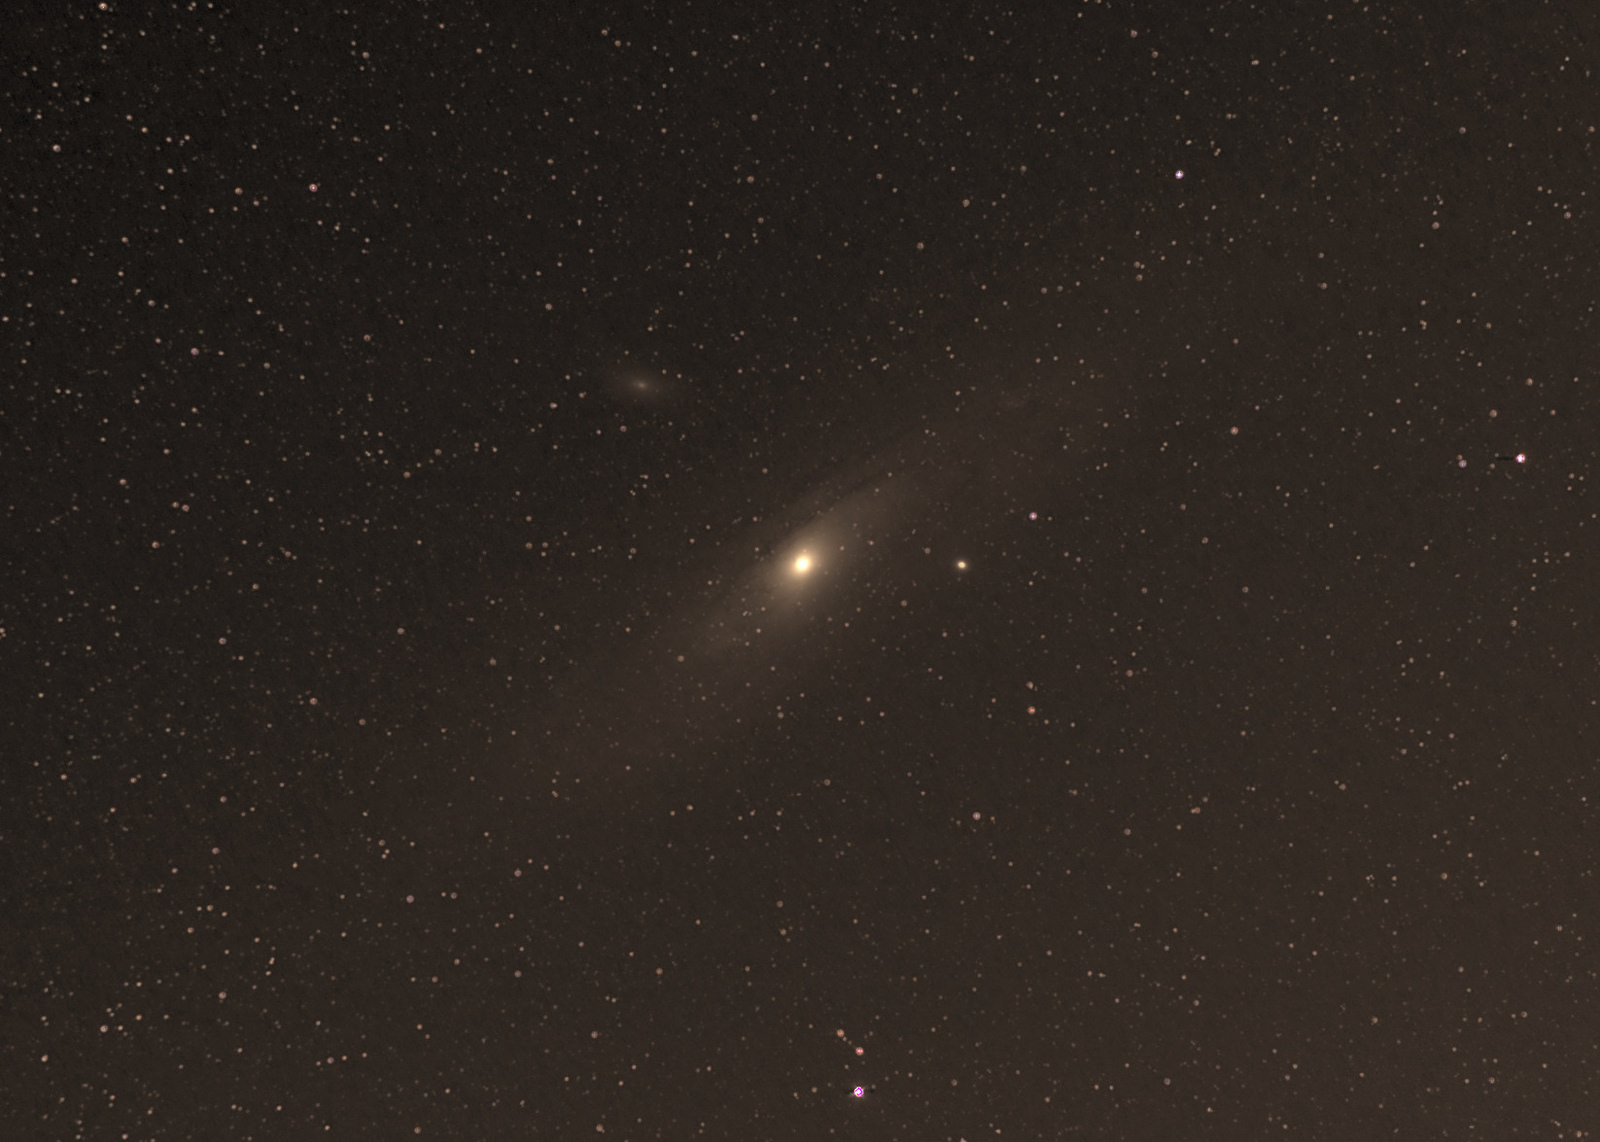
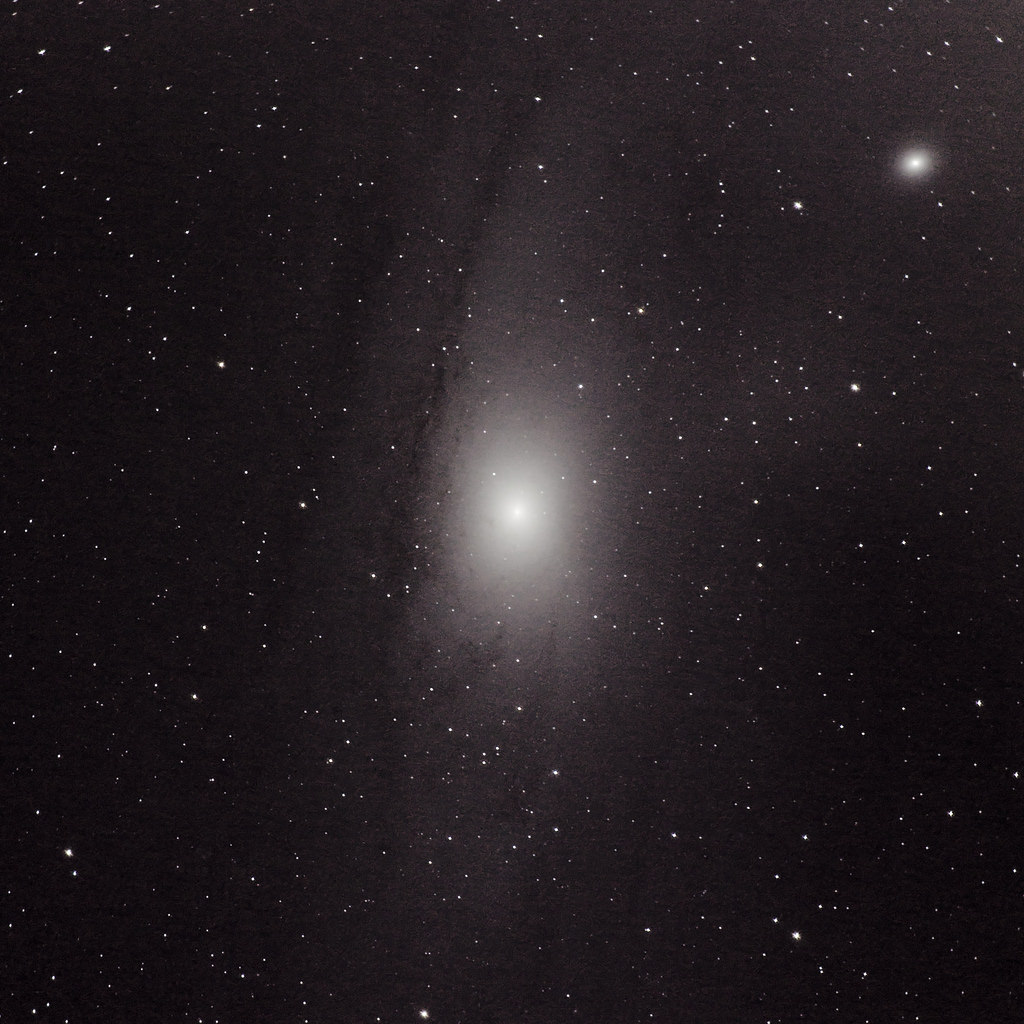
This is by far the least of my problems, but I wanted to give it a whirl anyway. I did a test-run of Andromeda (an easy target) with the guiding telescope and software active:
Frankly, it .. didn’t go well. Clouds moved in, so I didn’t get a ton of exposures to begin with. The guiding seemed particularly sensitive to any jostling, such that when I went out there in between exposures, it’d lose the guide star. As far as objective comparisons go it’s pretty terrible as well, since it was different ISO, longer exposure, and in the city w/ lots of light pollution and some clouds. But, at least I got some experience playing with the gear and software. In general, it’s kindof a pain in the ass. I’m still waffling on whether this will be part of my regular setup going forward. They do make auto-guiding all-in-one devices you can buy, but the reviews on them are mixed. We’ll see.
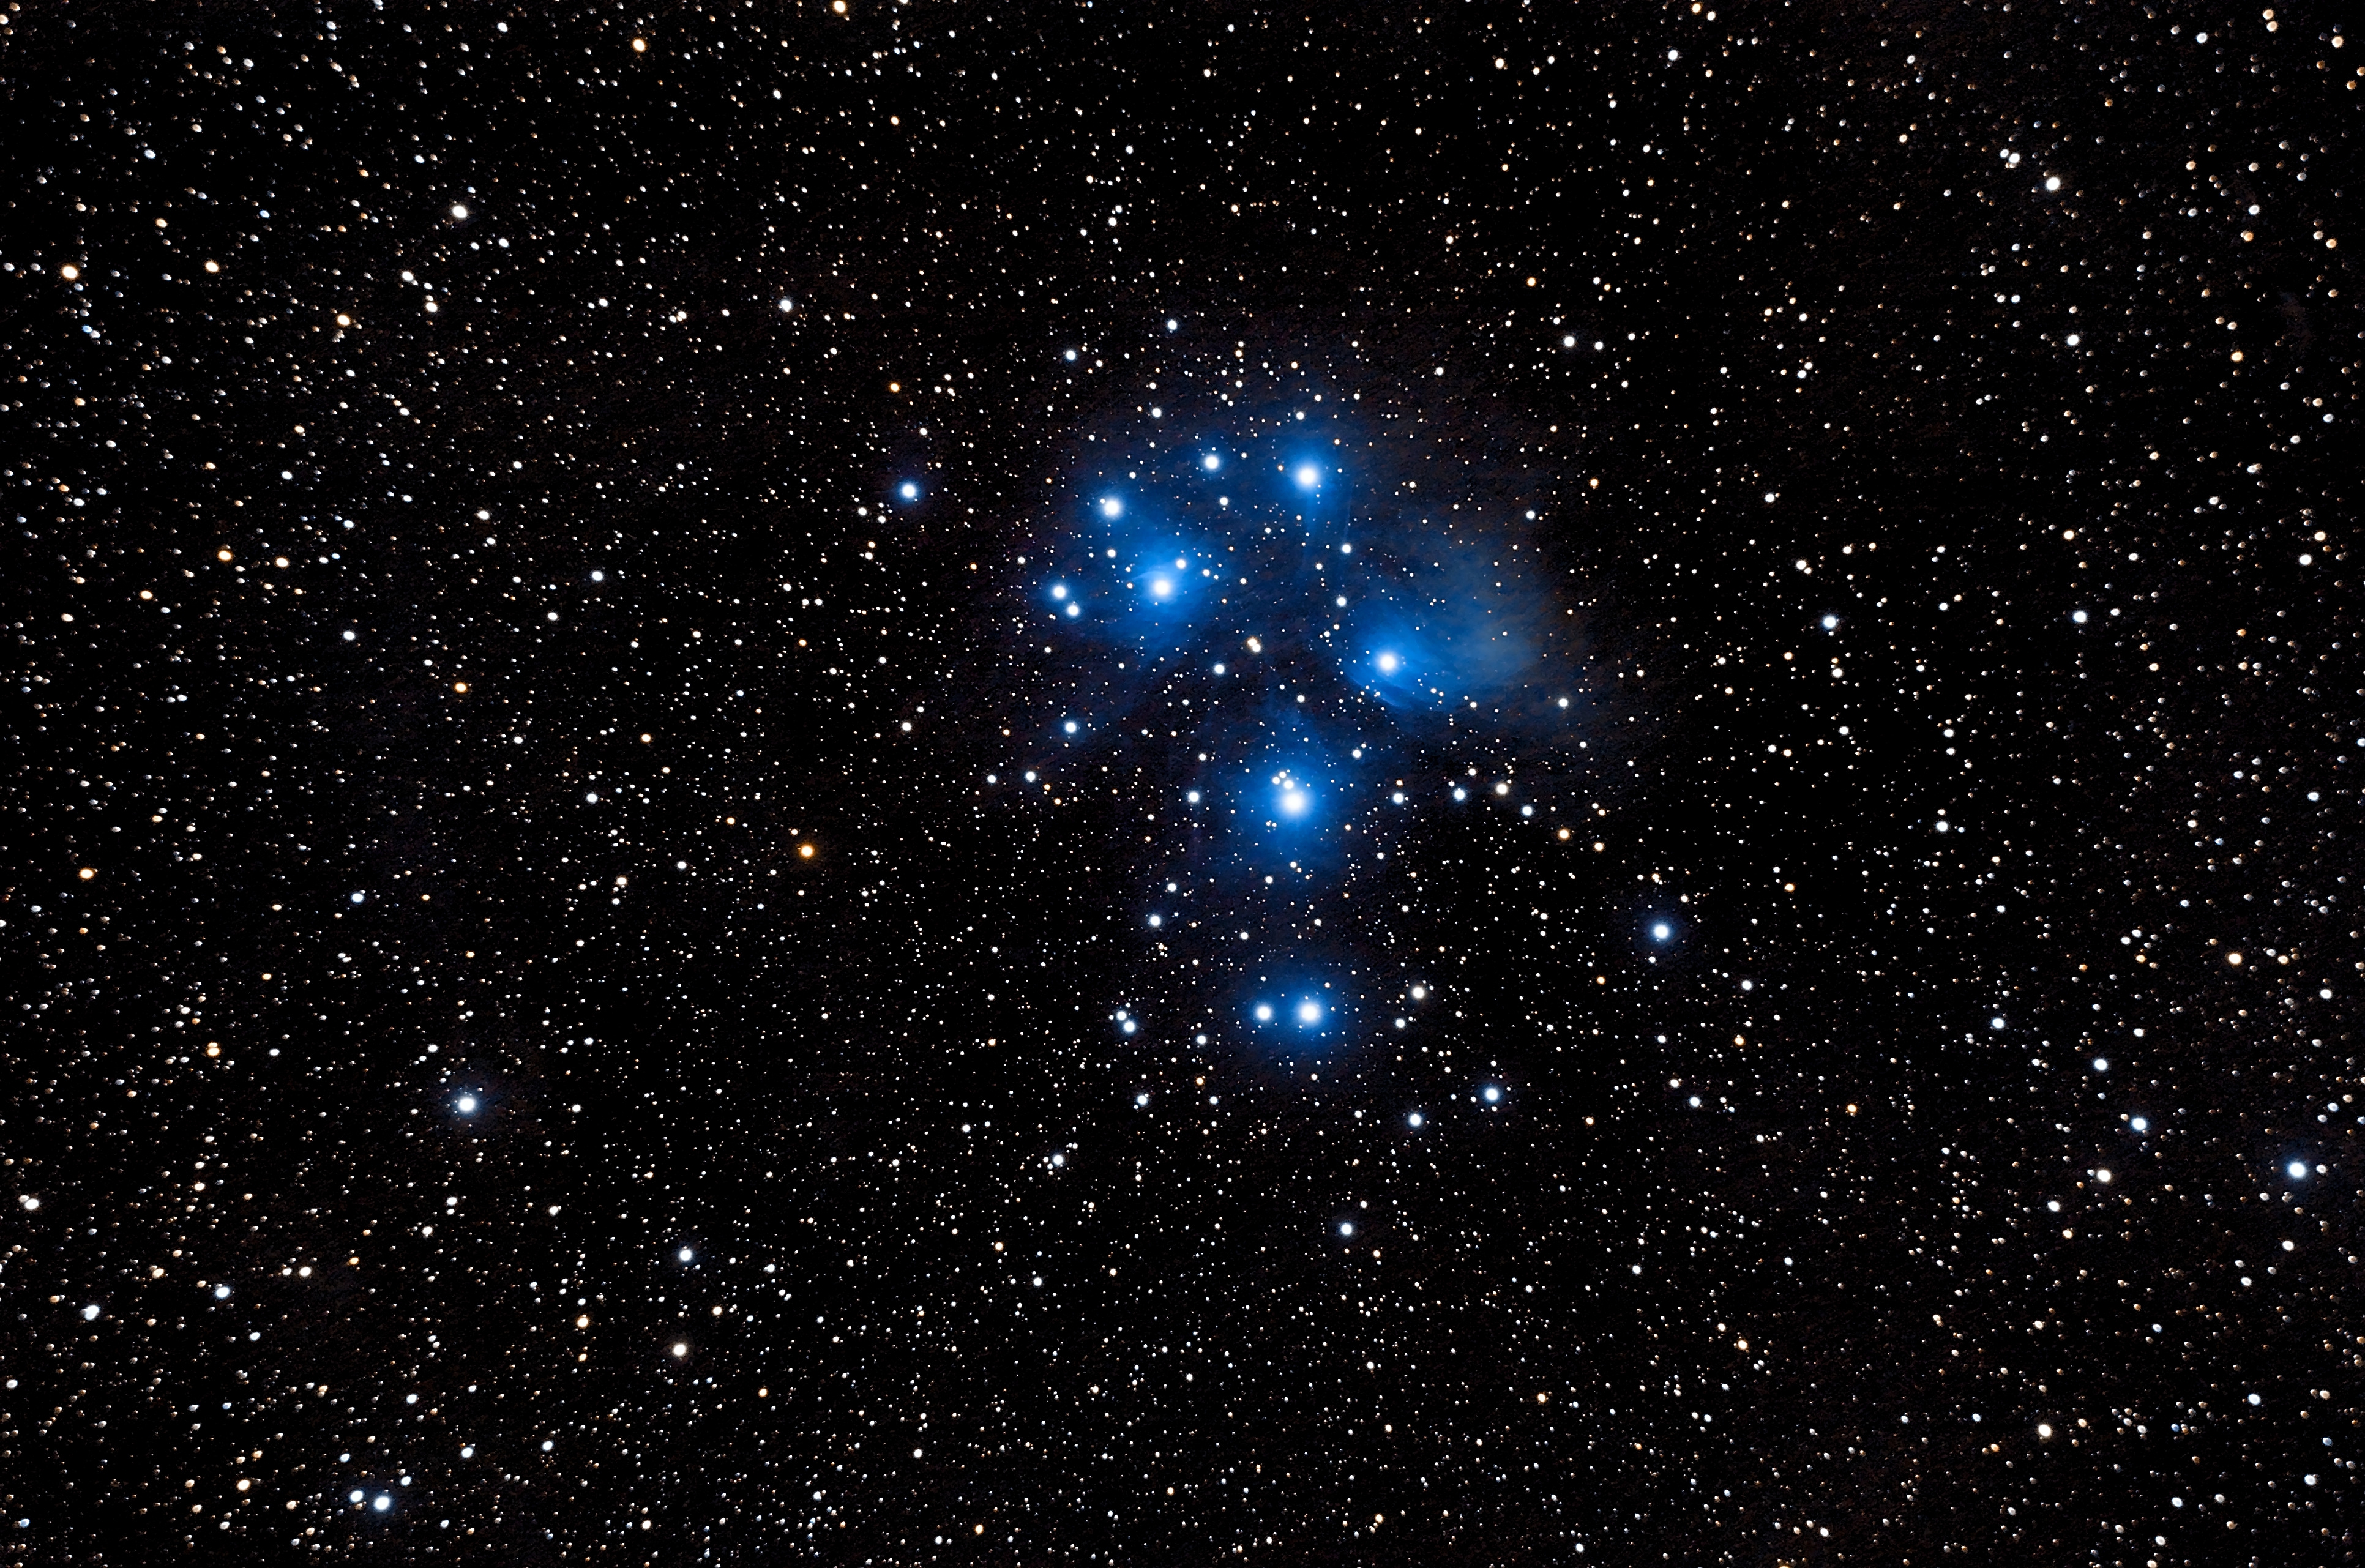
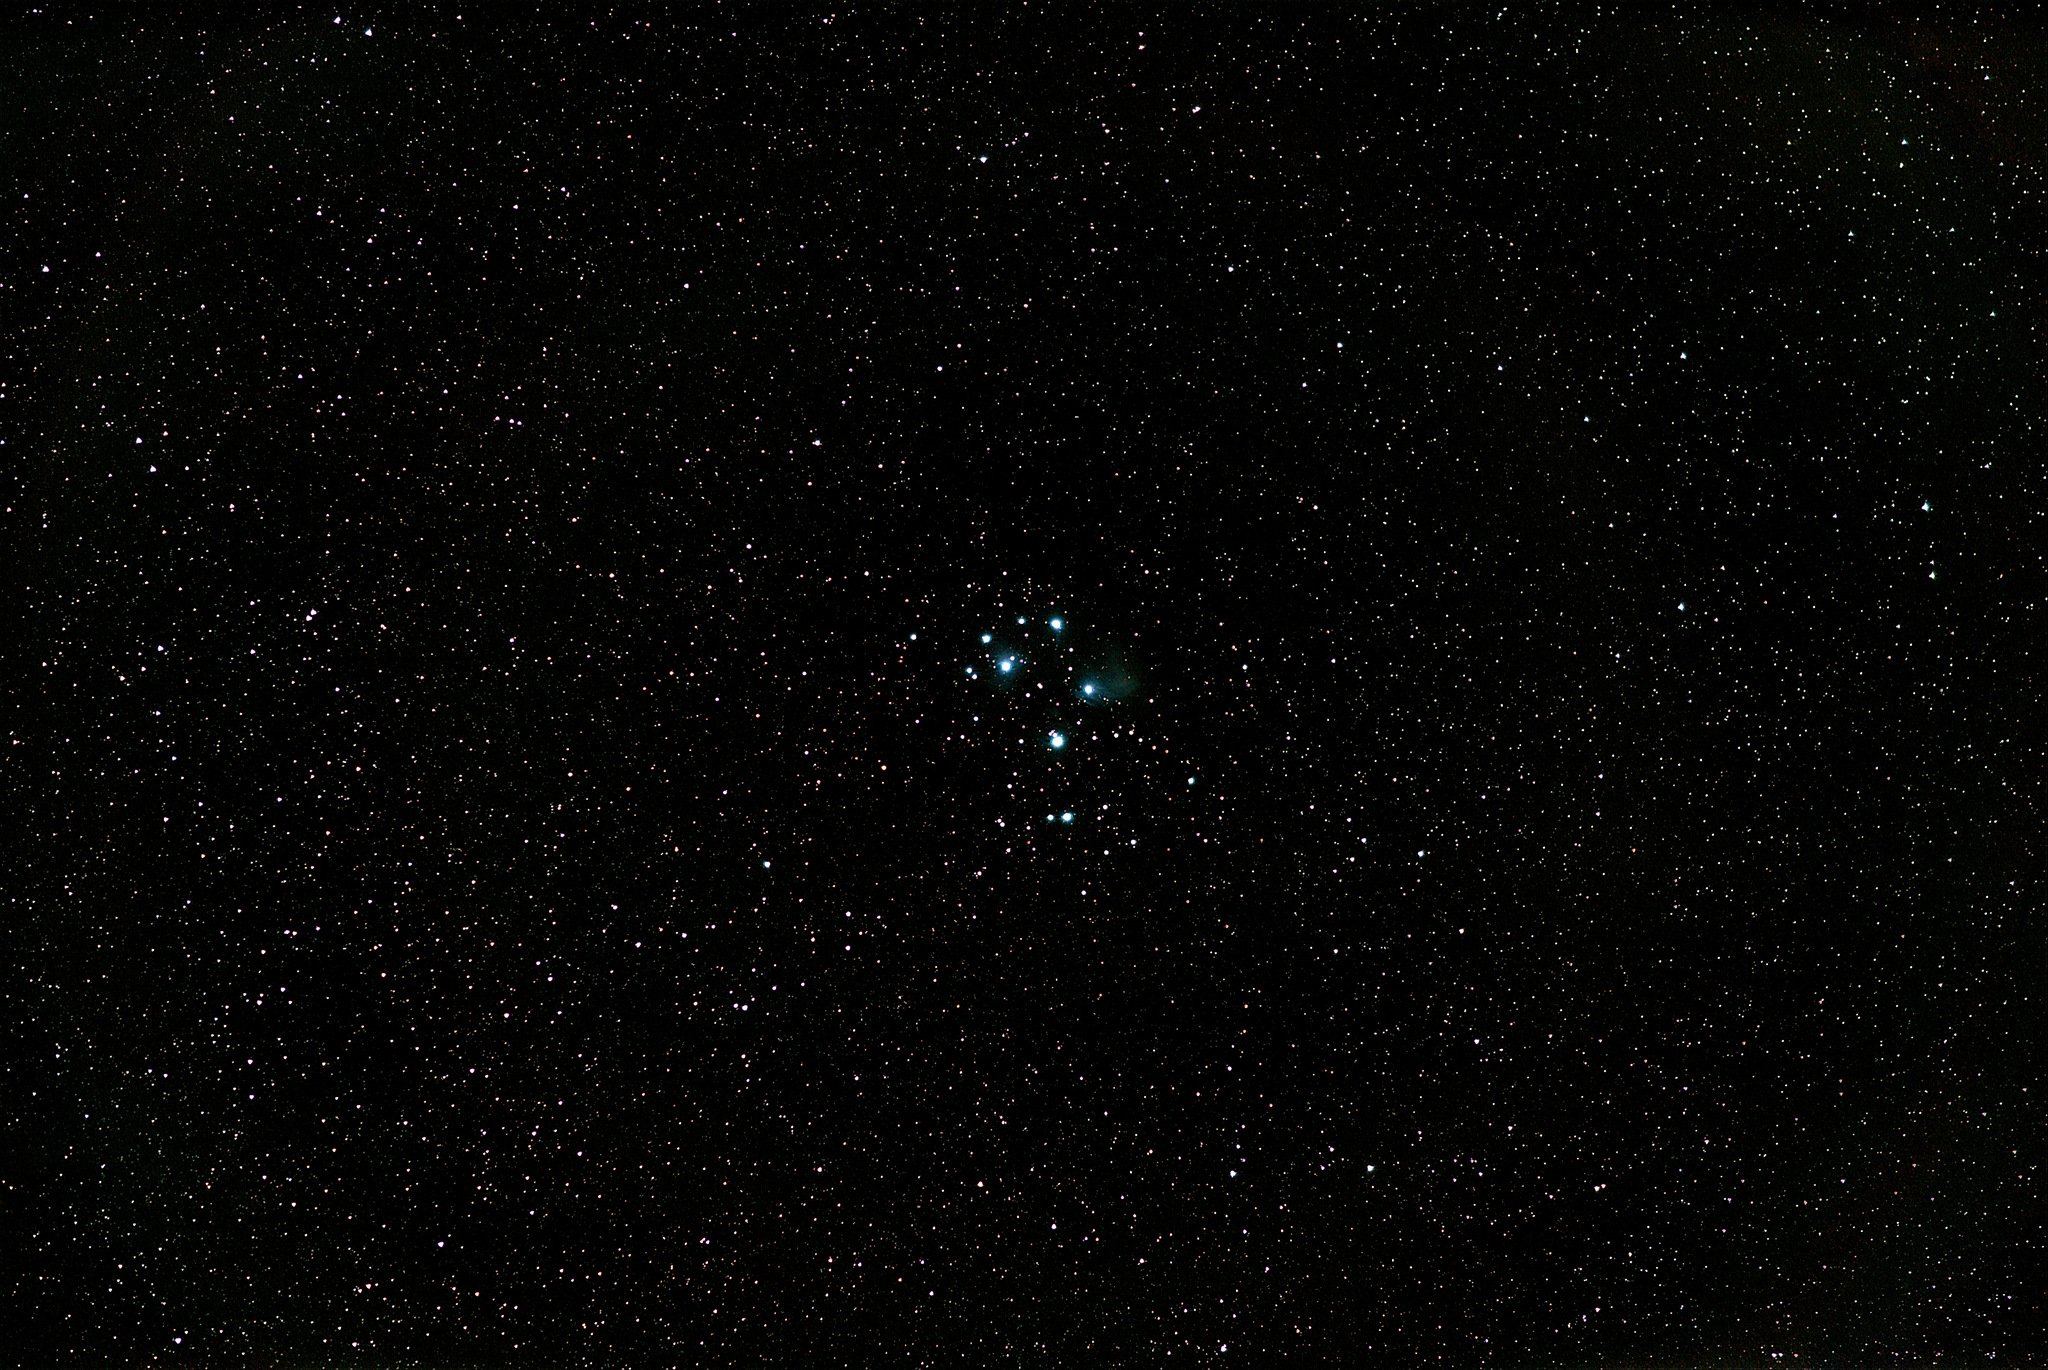
Following this, I didn’t do much for a few months – lots of rain, lots of clouds. I finally had a weekend with nice weather and decided to get out the telescope. Boy, in some ways this stuff is not at all like riding a bike – I was out of practice! It took me longer than normal to get the mount setup and aligned. I didn’t bother with the autoguiding setup, since it had been a while and I was rusty anyway. This was also my first time doing astrophotography with a winter sky – was nice, if disorienting, to be able to choose some different targets. First up was Pleiades – which I’ve attempted before, but with pretty terrible results. In the summer, Pleiades is only rising very early in the morning, so usually by the time I tried it, I was already exhausted and ready to go to bed, so they were never particularly long exposures. In the winter, though, it’s rising early and so I had a chance to take my time and do it right. It turned out much nicer:
Managed to get a decent amount of the nebulosity for a change! Still not great due to all the light pollution I’m fighting at home, but all things considered I was pretty pleased. I’d like to try Pleiades sometime from darker skies.
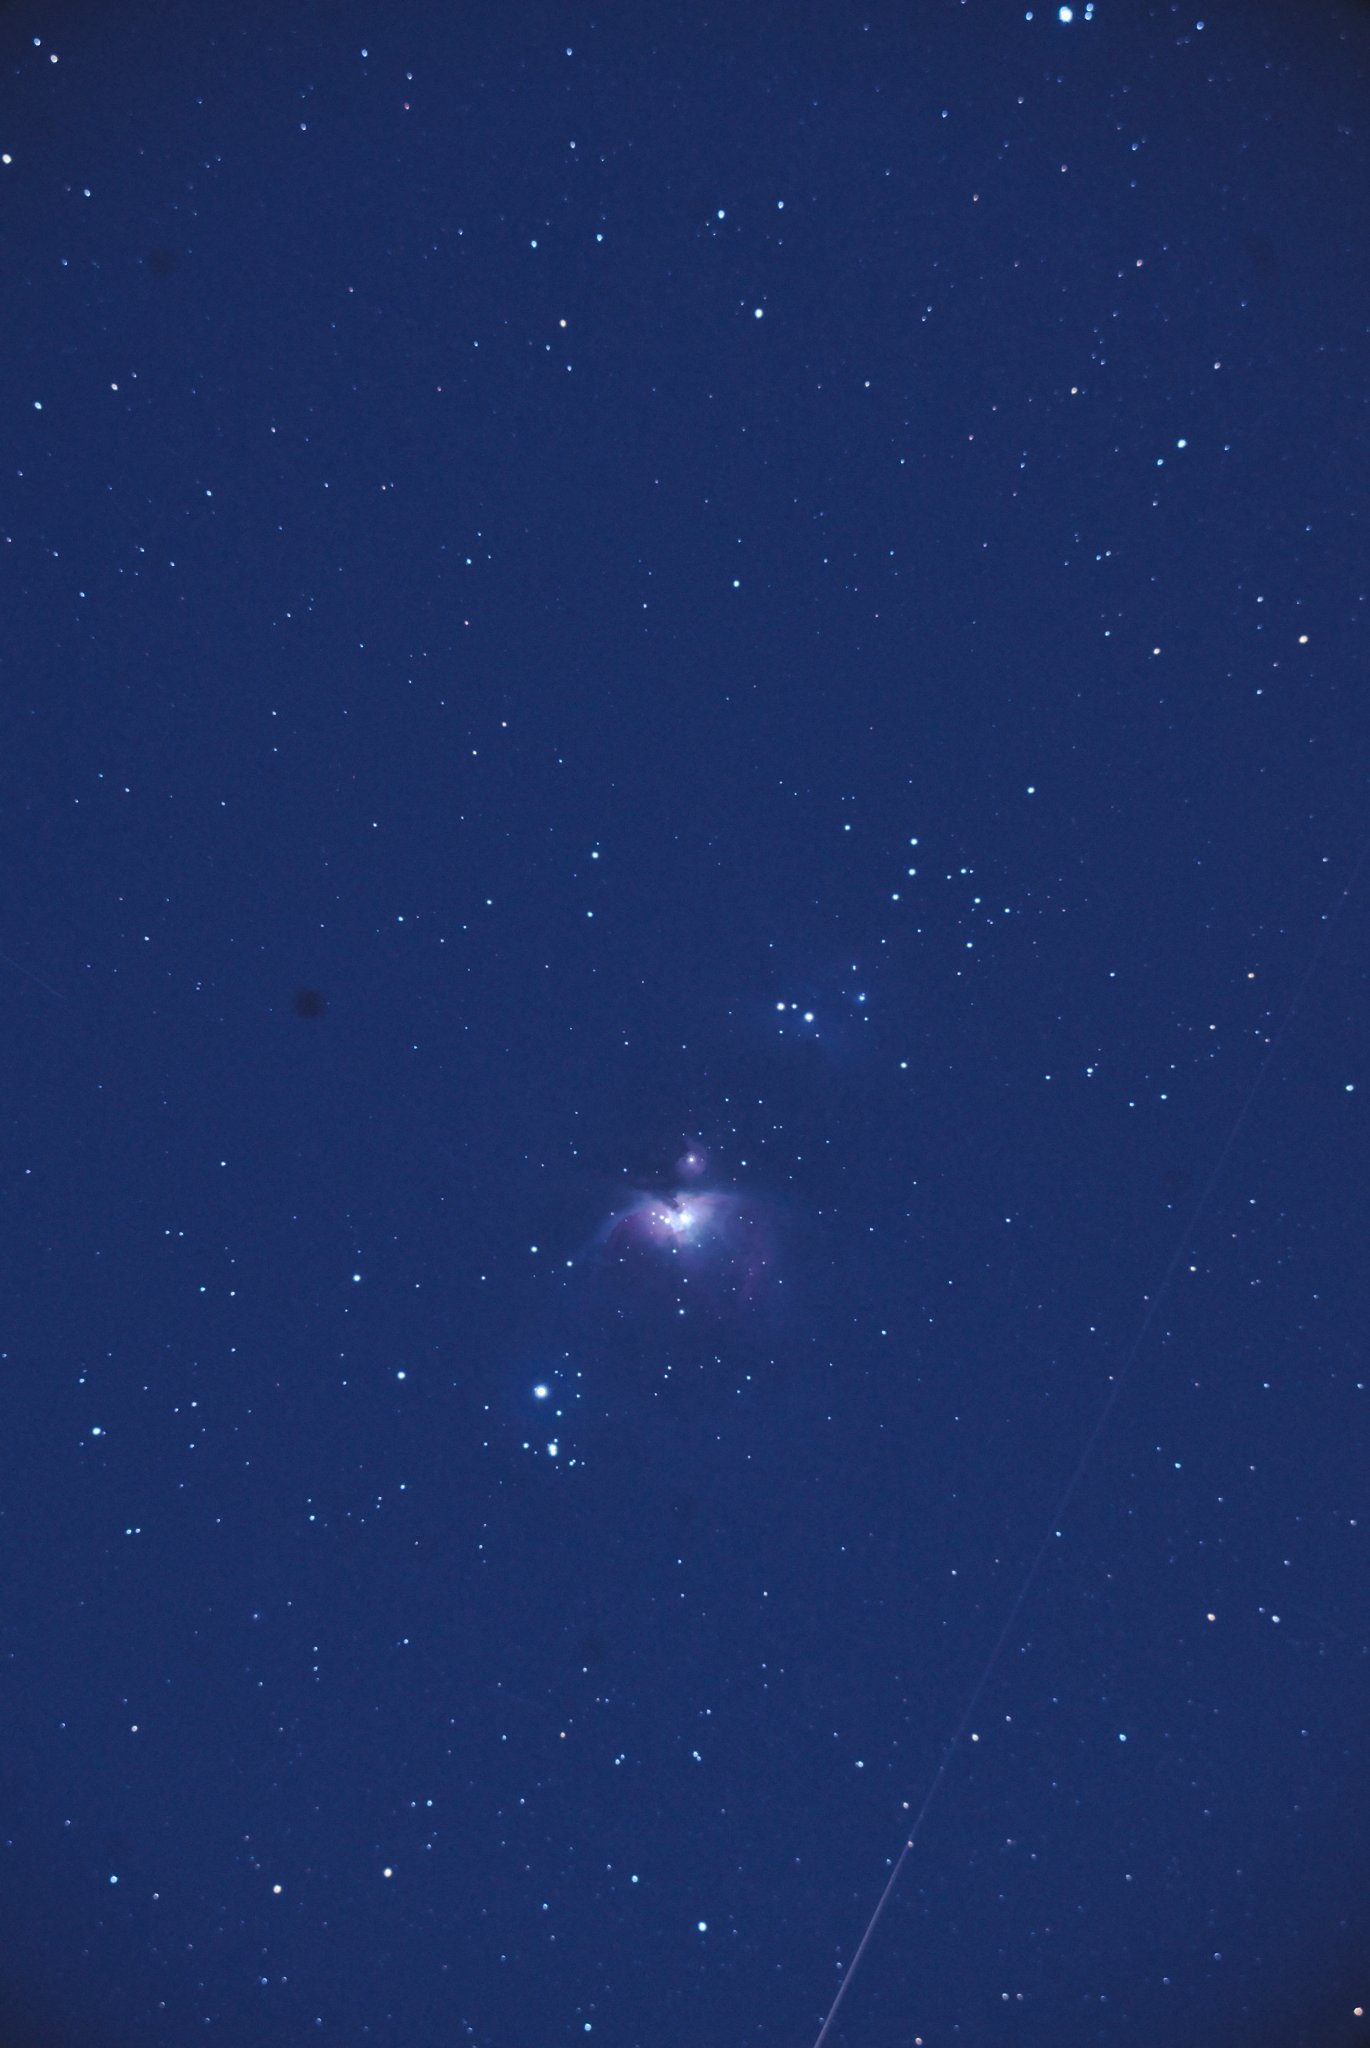
Next, I thought I’d try a shot of the Orion nebula but not cropped and framed such that I might get some of the flame/horsehead nebula area in the frame. I failed, but got a wider-field perspective on the area, in any event:
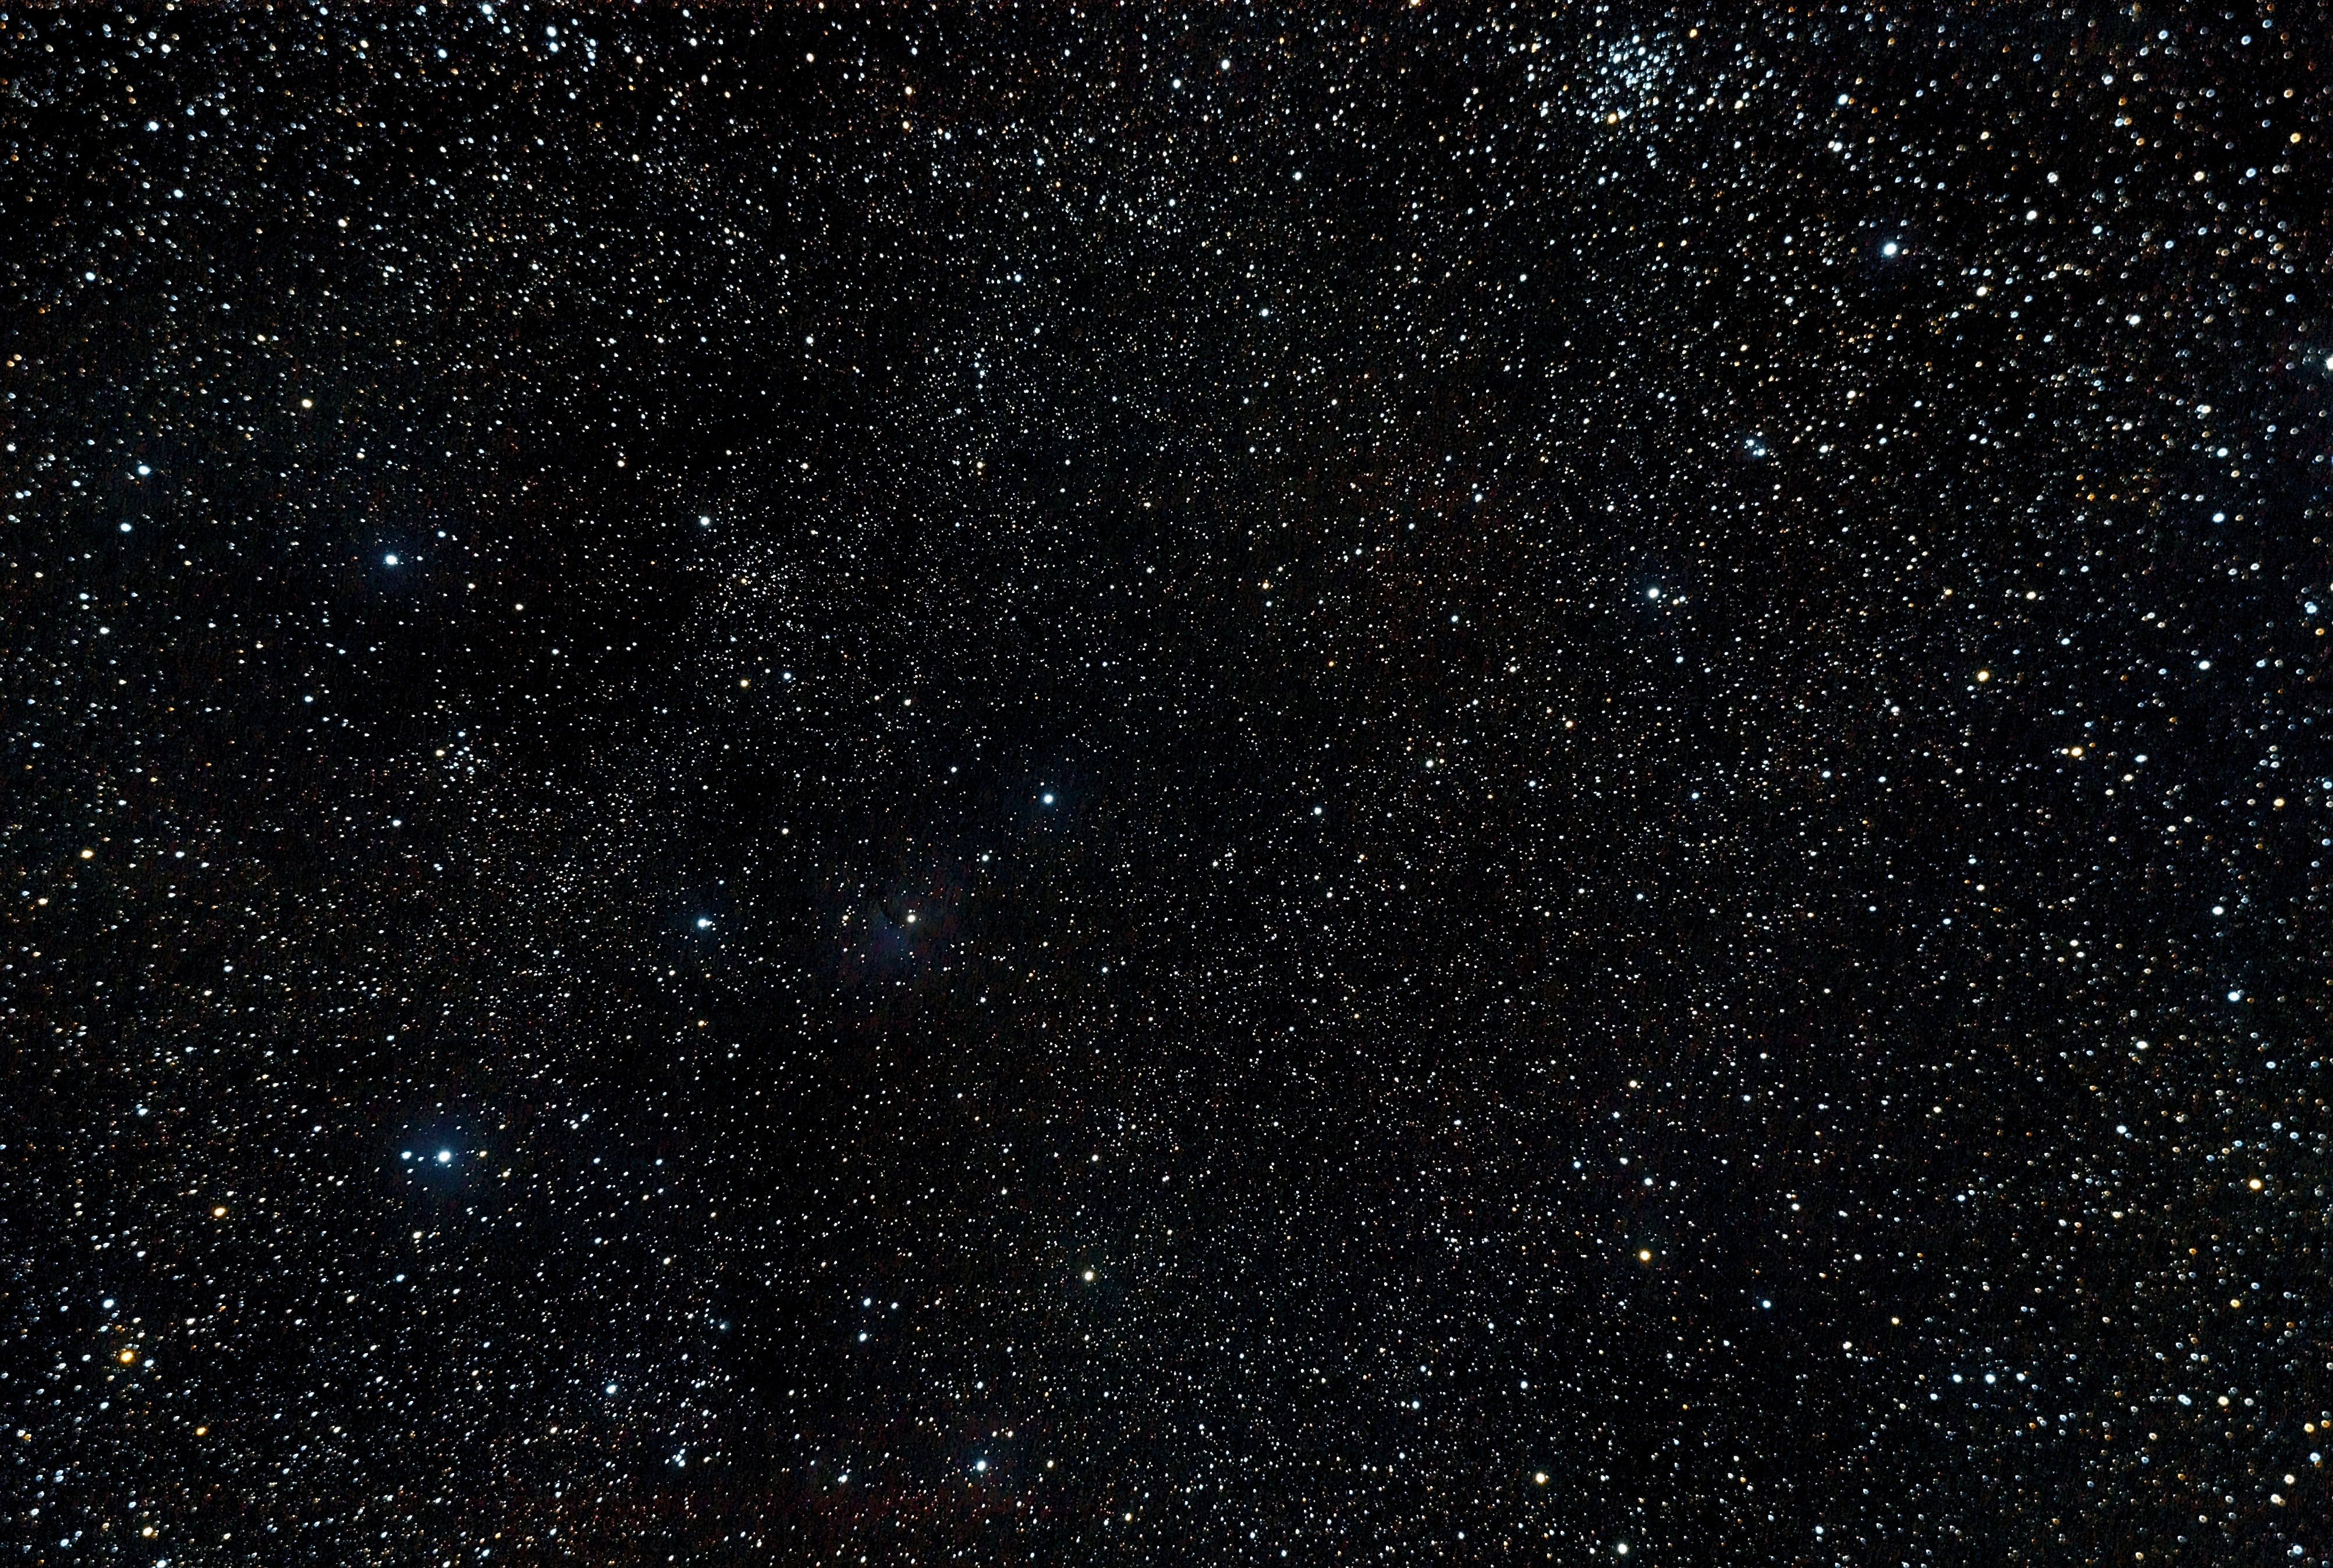
I finished up the night as usual with an exhaustion-fueled Bad Decision and pointed my telescope at IC 2177. IC 2177, however, is mostly hydrogen-alpha nebulosity and pretty much pointless to take a photo of in LRGB from the city:
You can actually see the tiniest bit of nebulosity, and some clusters – M50 at the top, and NGC 2343 and NGC 2335 center left. Still, all in all a pretty pointless photo.
A few nights later we had a balmy evening with clear skies, so I decided to try something the flame and horsehead nebula area. I knew I’d need to gather a lot of light, so I dedicated the night to it and did around 360 light exposures:
I am pleased with how this turned out – I didn’t expect to get much from the city, since these nebulas are much fainter than Orion, and it’s complicated by a few very bright stars, but for a bortle 8 city zone, I think it’s pretty cool!
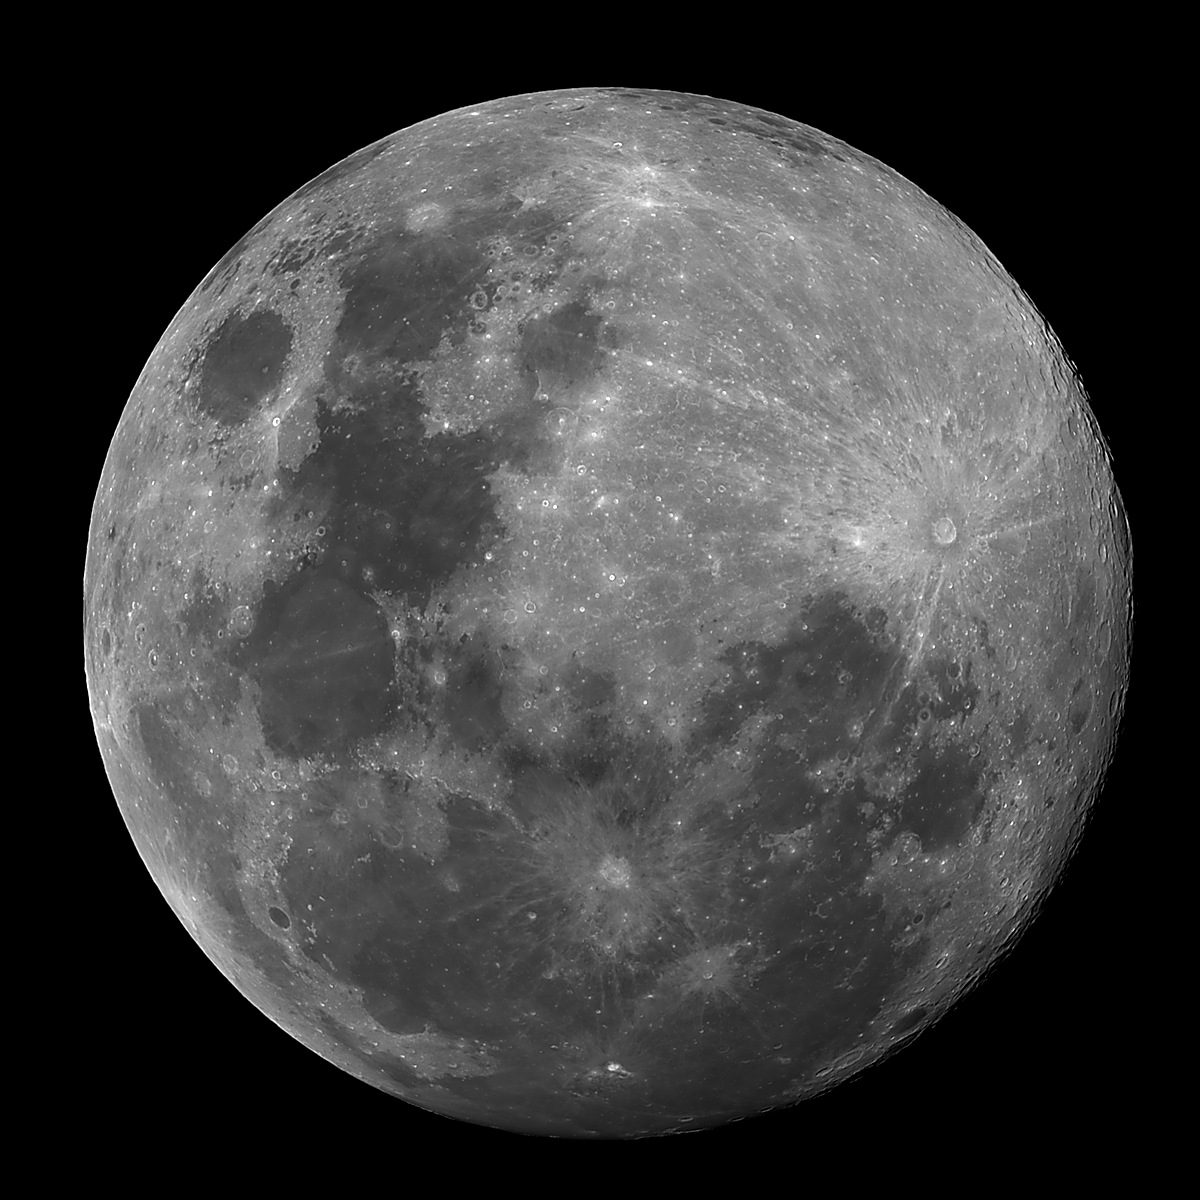
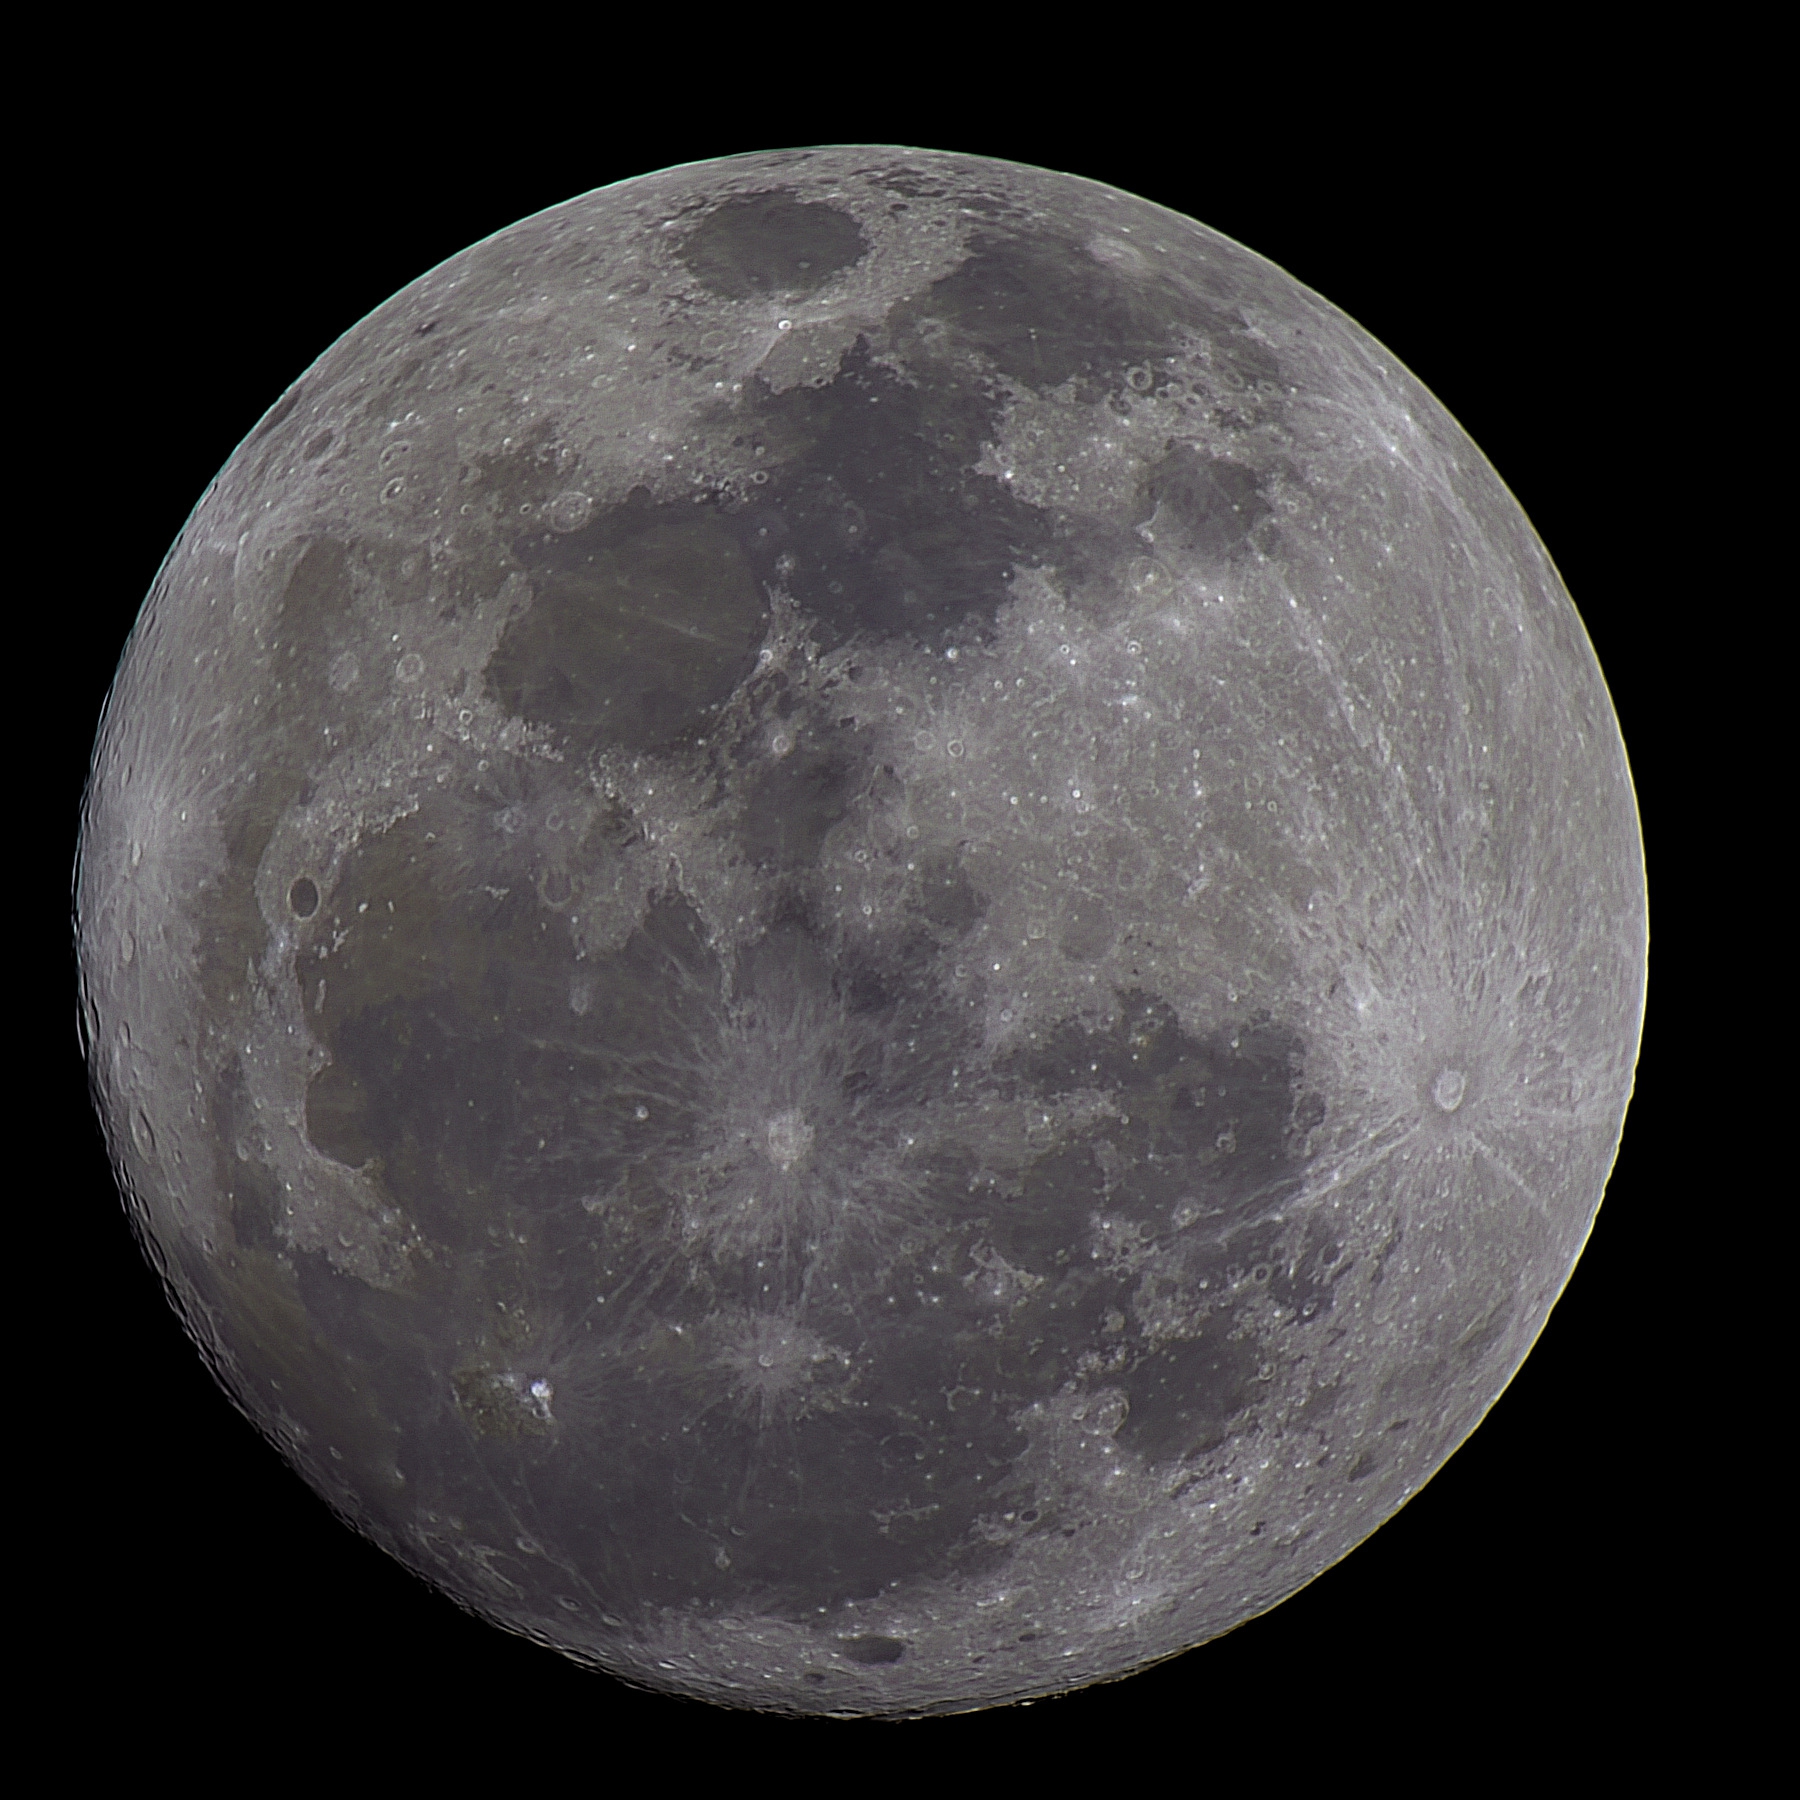
The moon continues to be high and bright, making any attempts at DSOs (especially with the light pollution at home) mostly fruitless, so here’s the moon, waxing gibbous:
Subject: The Moon
Camera: Sony A7S II
Telescope: Astronomers Without Borders Onesky 130
ISO: 640
Shutter Speed: 1/640
~2400 frames (MP4 movie), best 600 stacked
Quality-estimated/weighted/cropped in PIPP
Stacked in Autostakkert 3
Pixinsight - Color Calibration, MultiscaleLinearTransform wavelets
Darktable - Levels, sharpening
I have to admit I forgot what a tremendous pain it is to take photos through the AWB Onesky’s focuser – such a nightmare compared to my new refractor. Still, much more suitable (for the time being) for moon photography, since I can use a 2X barlow.
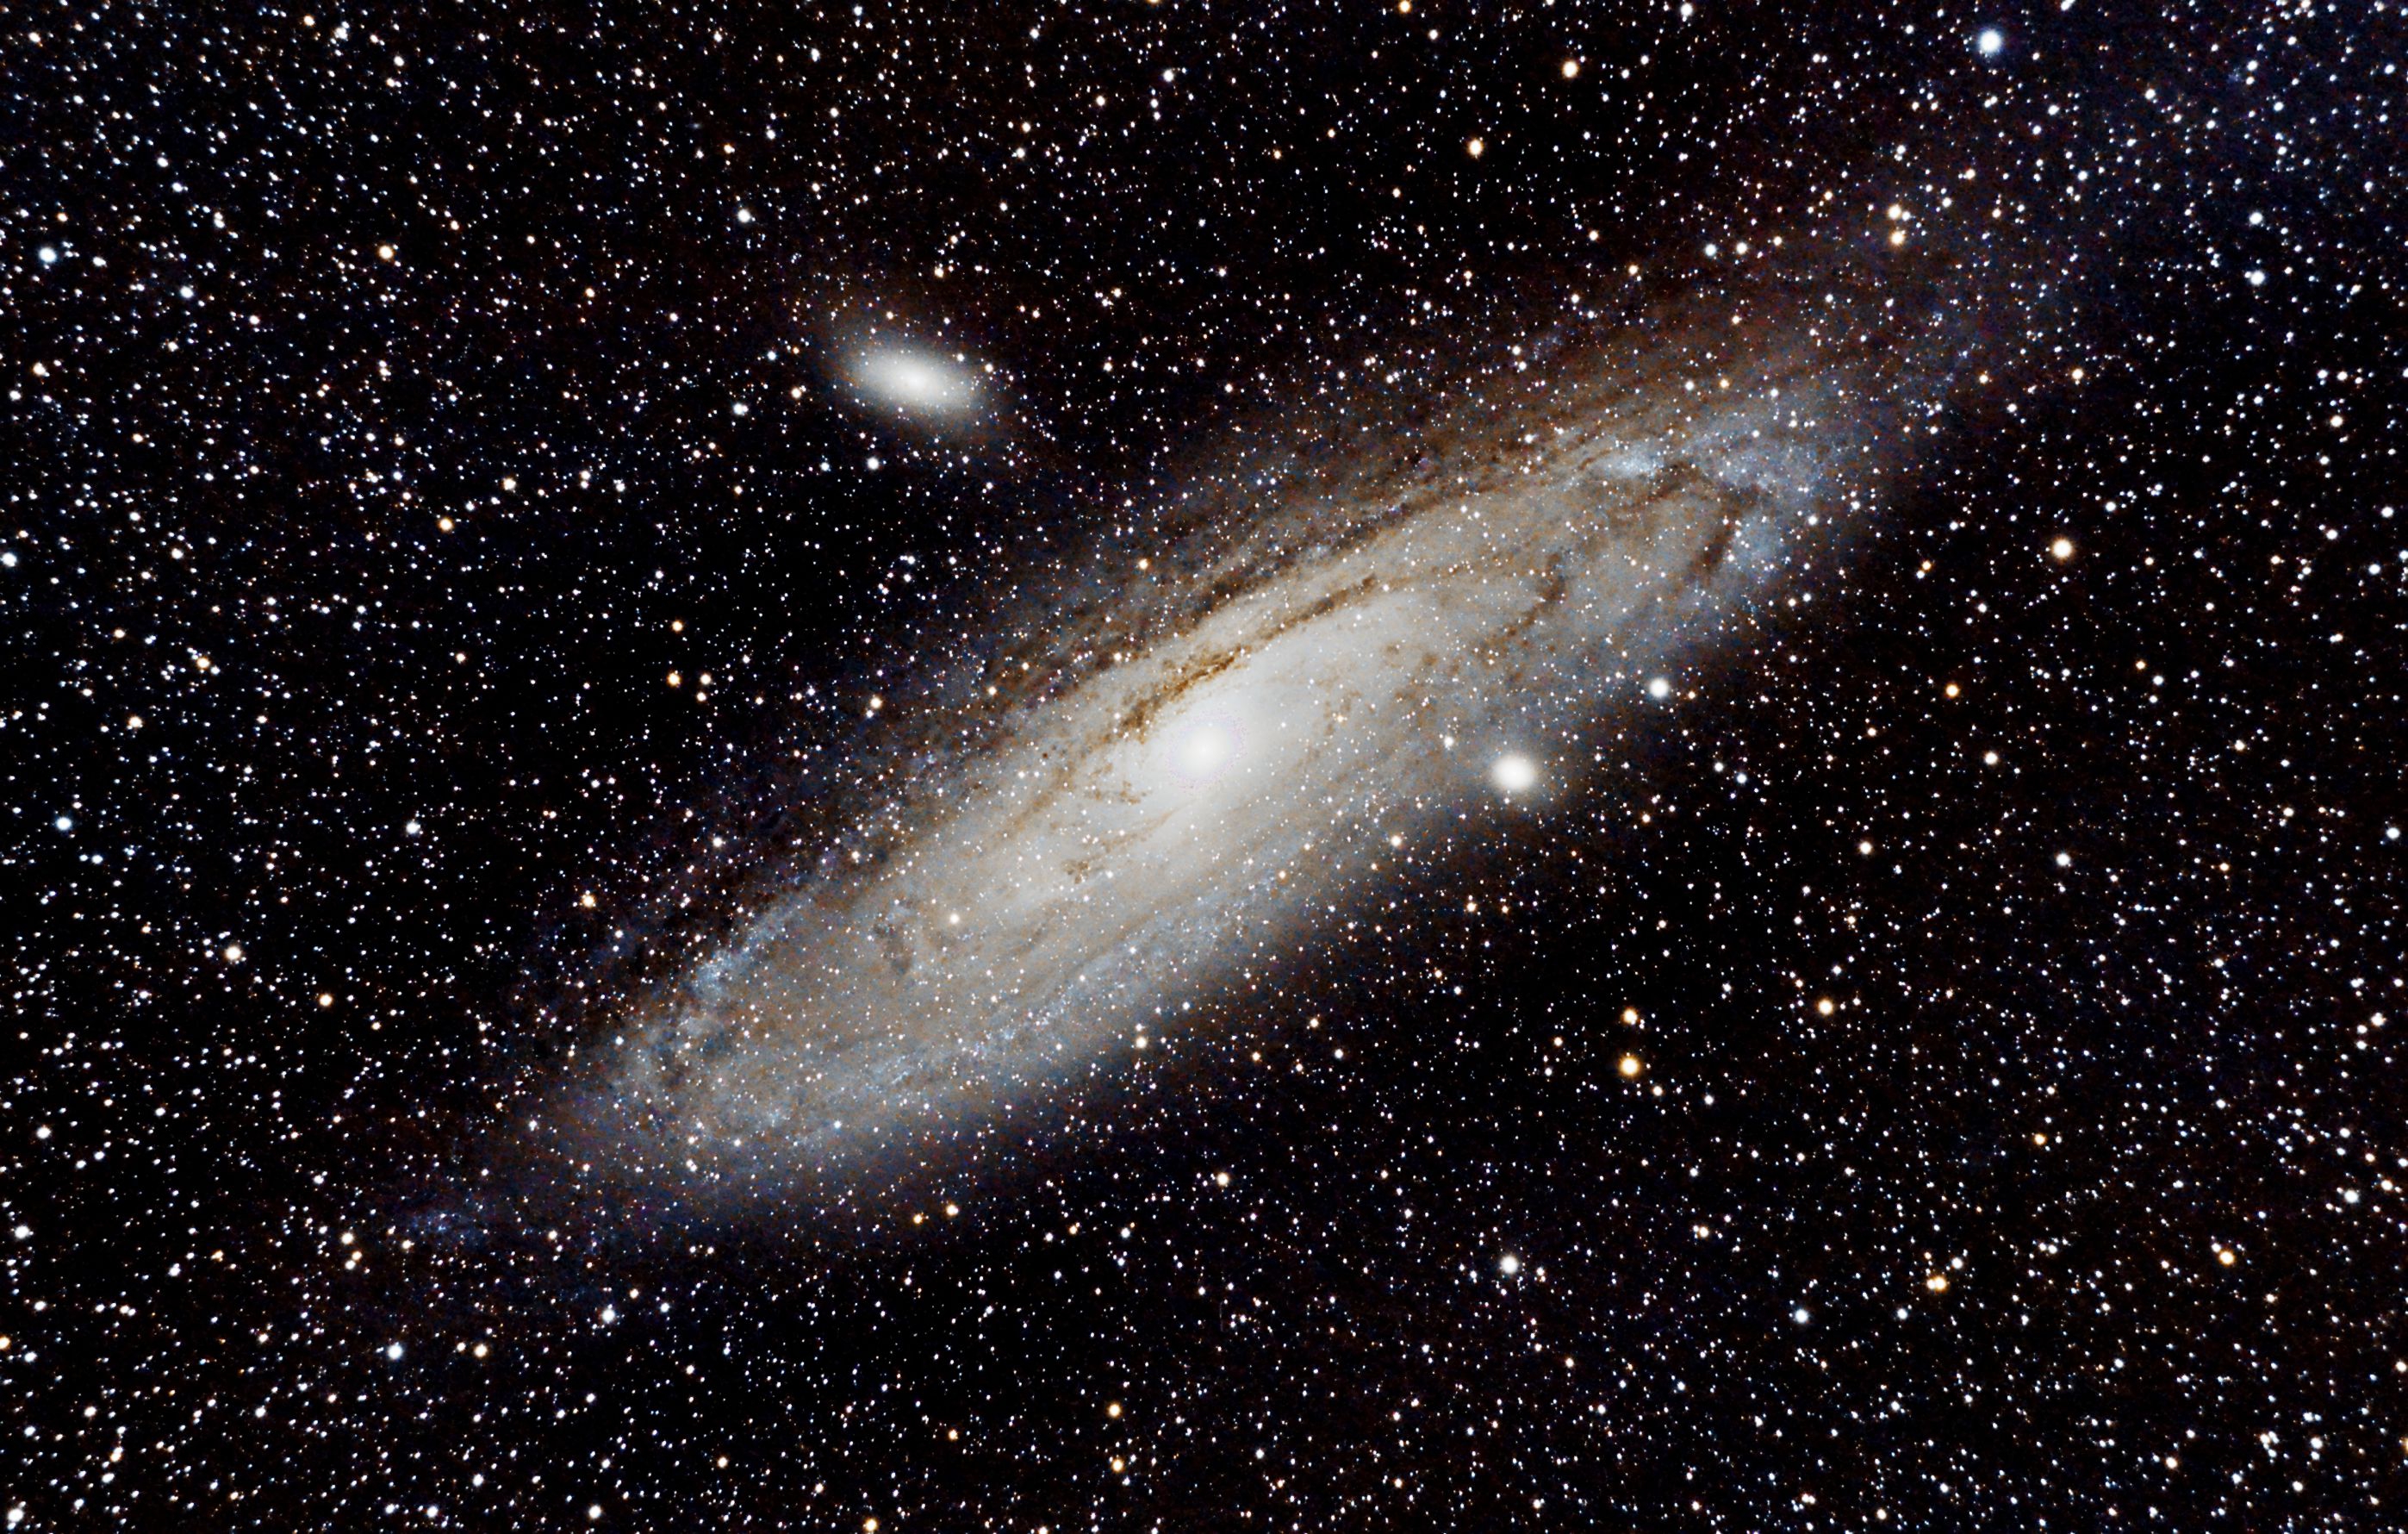
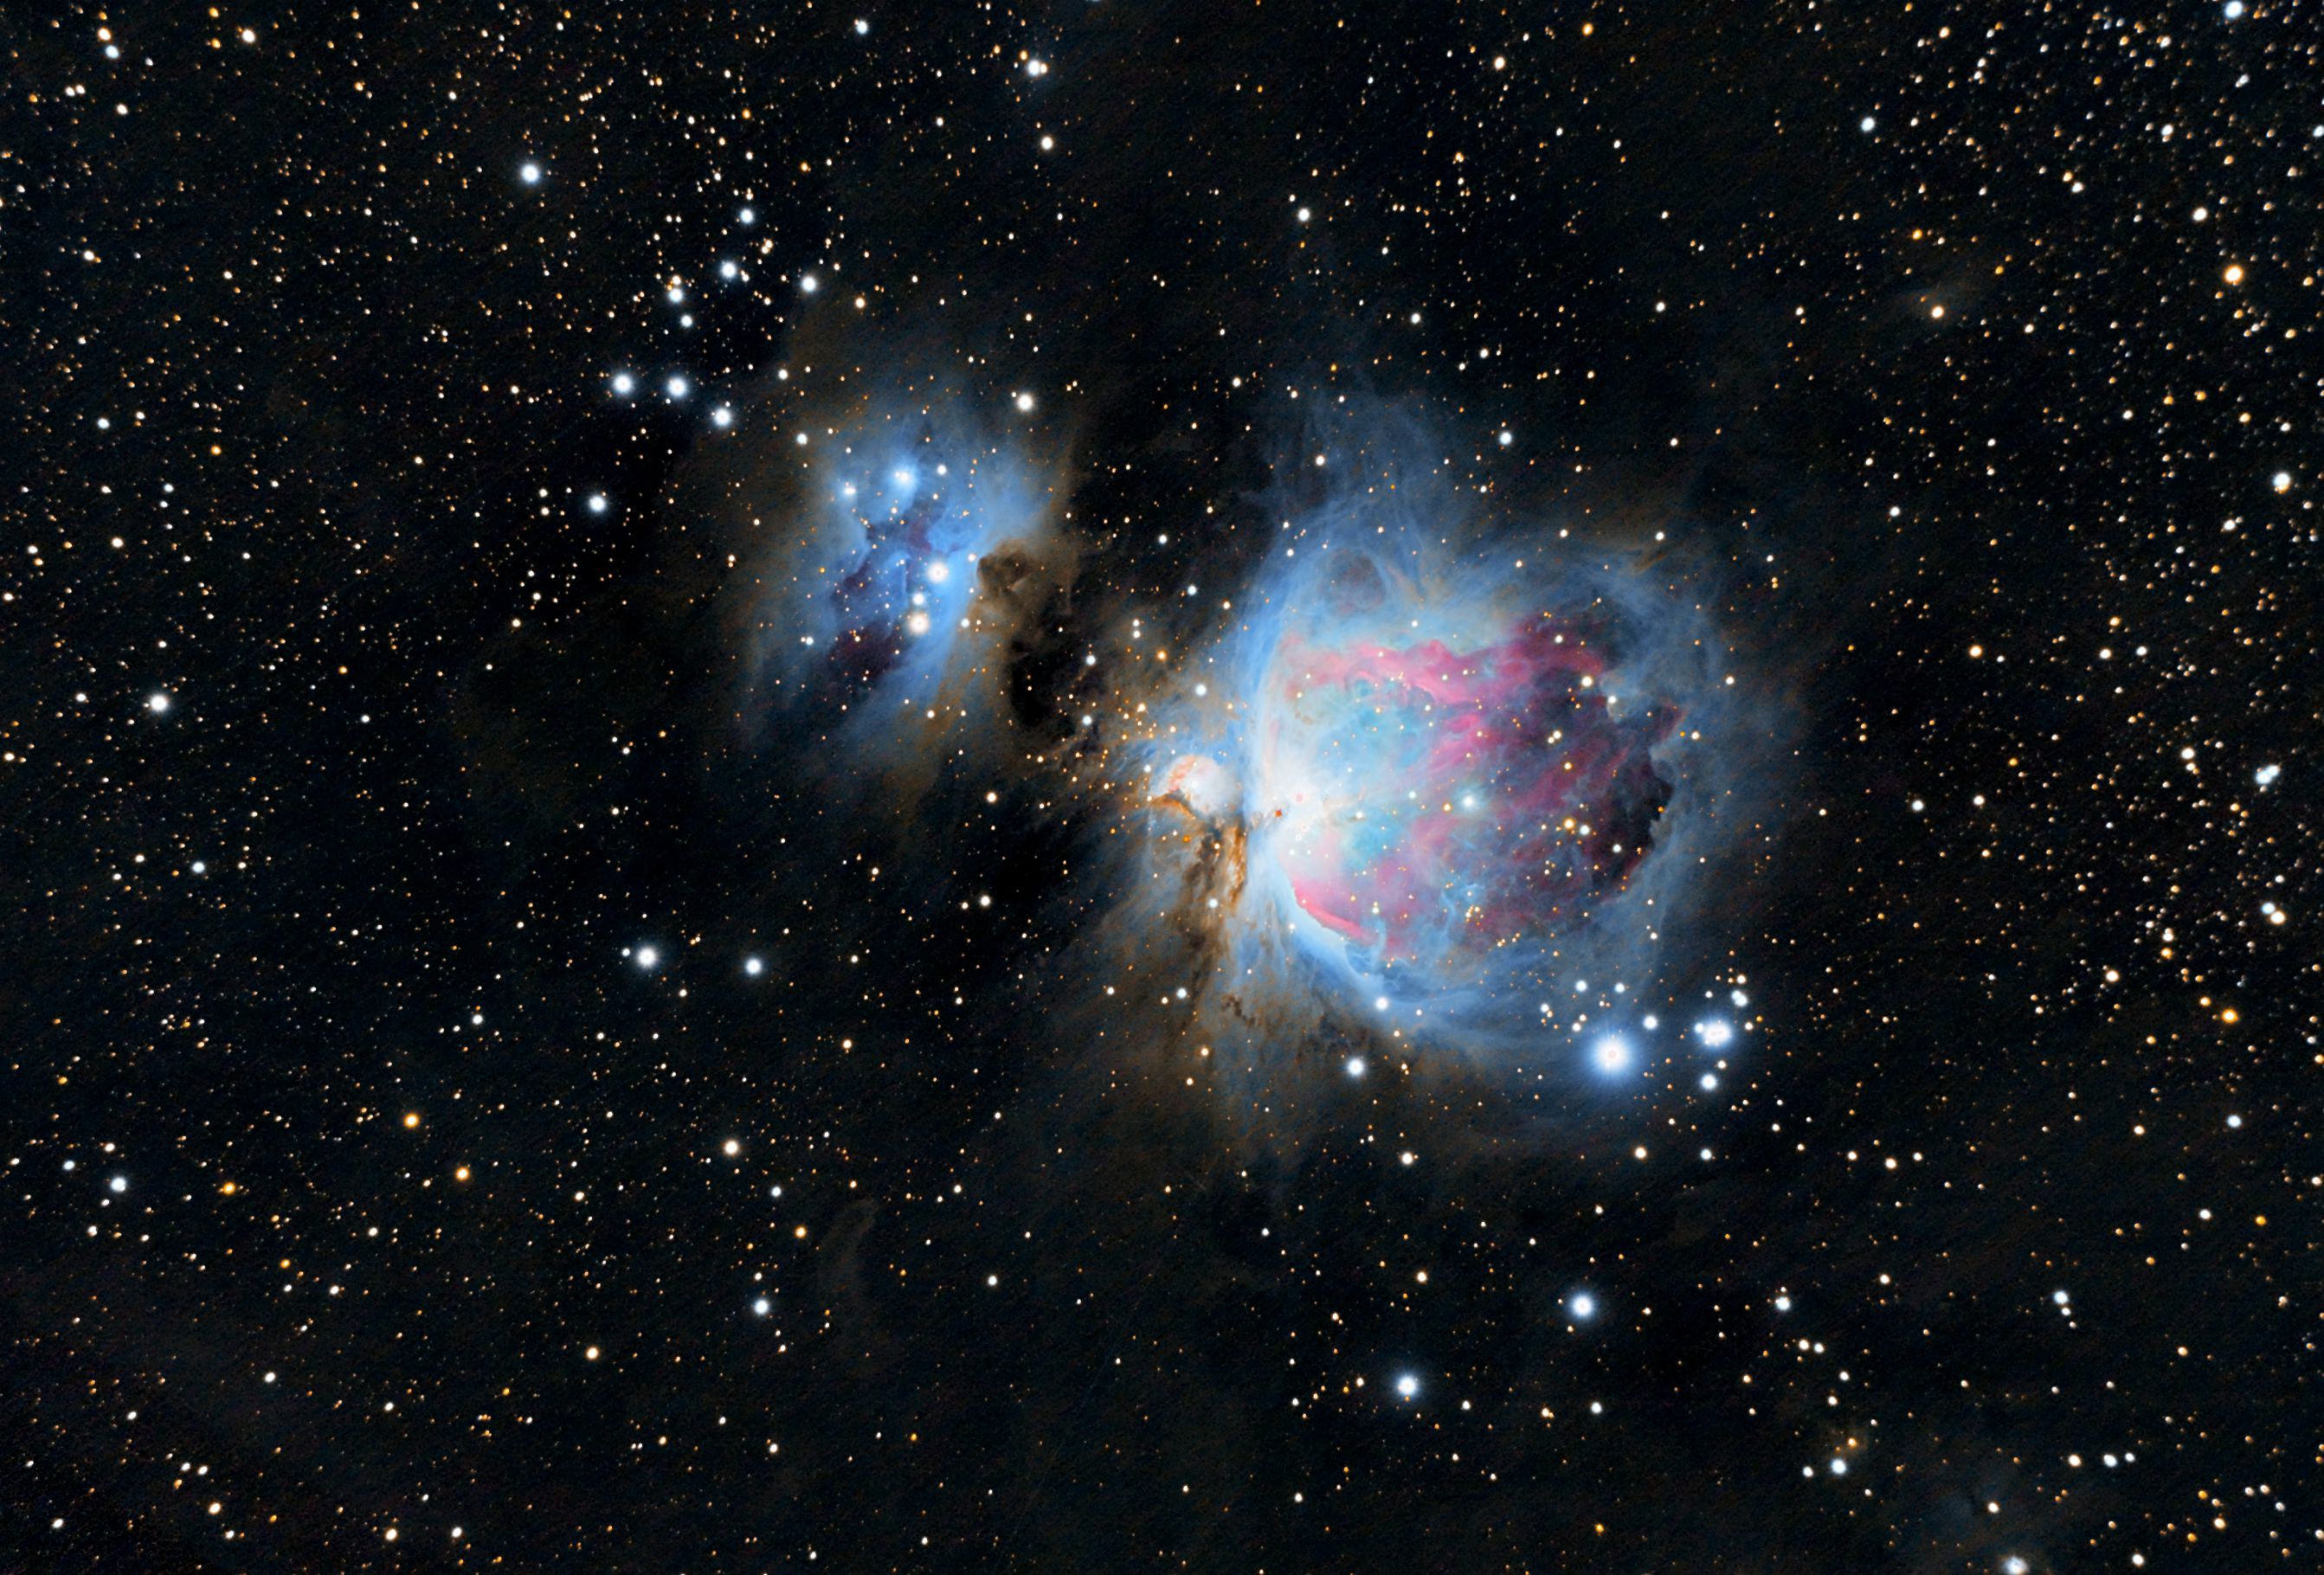
My brother had a pig roast this weekend! We had a few guys orchestrating things for the weekend, and I saw this as a clear opportunity to volunteer for overnight pig-watching duty. Why? You can probably guess. Turns out astrophotography and pig-roasting have something in common: they both require staying up all night. So, I gave Andromeda and Orion another whirl. Now, I imagine you’re getting a bit sick of photos of the same targets – I am too. But, in the interest of PseudoScience, I am trying to target the same things over and over so I can appreciate the more subtle improvements. Also, the moon was high and bright, so I needed targets that were brighter lest I not get much at all. Orion was also a choice target for this particular weekend, as the Orionid meteor shower was peaking.
Not as much color as I’ve gotten in the past, and not super great – owing both I think to the high and bright moon washing things out, and the fact that, well, I was drunk and distracted by monitoring a roasting pig.
Same goes for Orion – not quite as much color/detail as I got from truly dark skies. Notable, however, is that the field flattener seems to have helped quite a bit – still not perfect, but you can see that the corners are much less distorted. Still a lot of noise making it difficult for me to pull detail out of the dust lanes which were definitely there, but just too comingled with noise :( The core was a bit overexposed, too – something I could correct by taking some shorter exposures and compositing with the rest, but I had my hands full managing to take darks/flats/offsets while dealing with the pig, so .. next time, maybe.
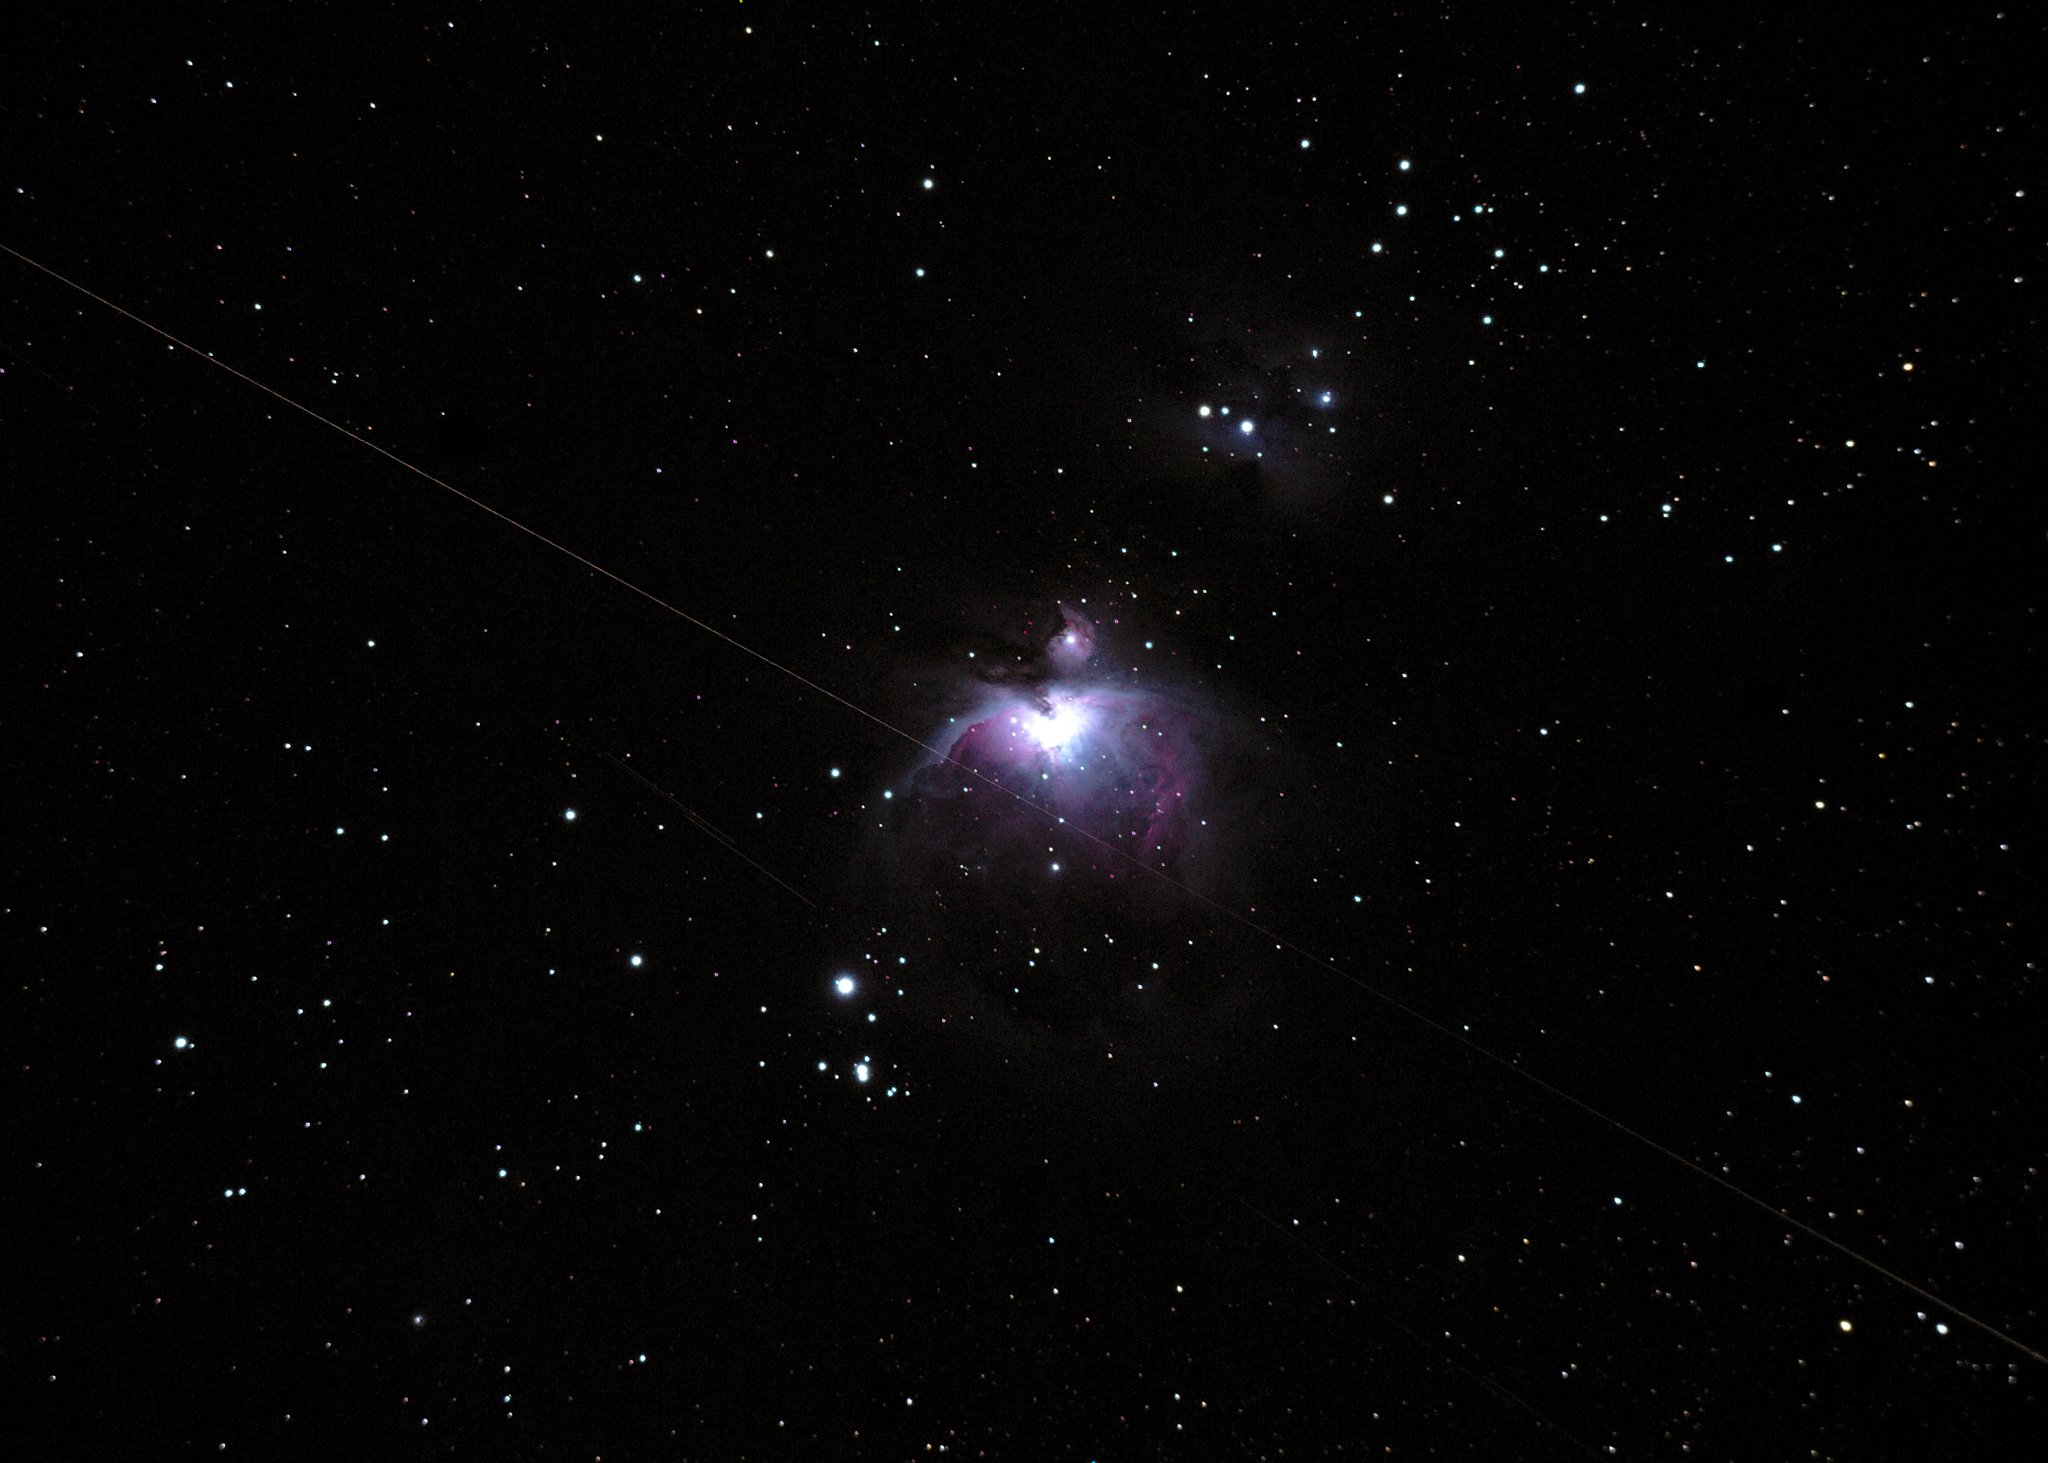
The meteor shower was pretty fun, though. I spent a good amount of time in the hot tub with a glass of bourbon watching meteors while the pig cooked and my camera did its work. Highly recommended. There were a few bright meteors I hoped passed close enough to Orion itself that they’d be captured in a frame – and I was right! One of them went right through the frame:
… and another towards the bottom of the wider frame. It might give you some appreciation for how bright these meteors were, since this one was visible at near daybreak:
And, just for fun, here’s an animation of my exposures of Orion as they were rudely interrupted by the rise of our brightest star, the Sun – quickly putting an end to my night of astrophotography:
Next up: I bought a guidescope! I am hoping to actually try guiding to see if it improves detail. Should be fun!
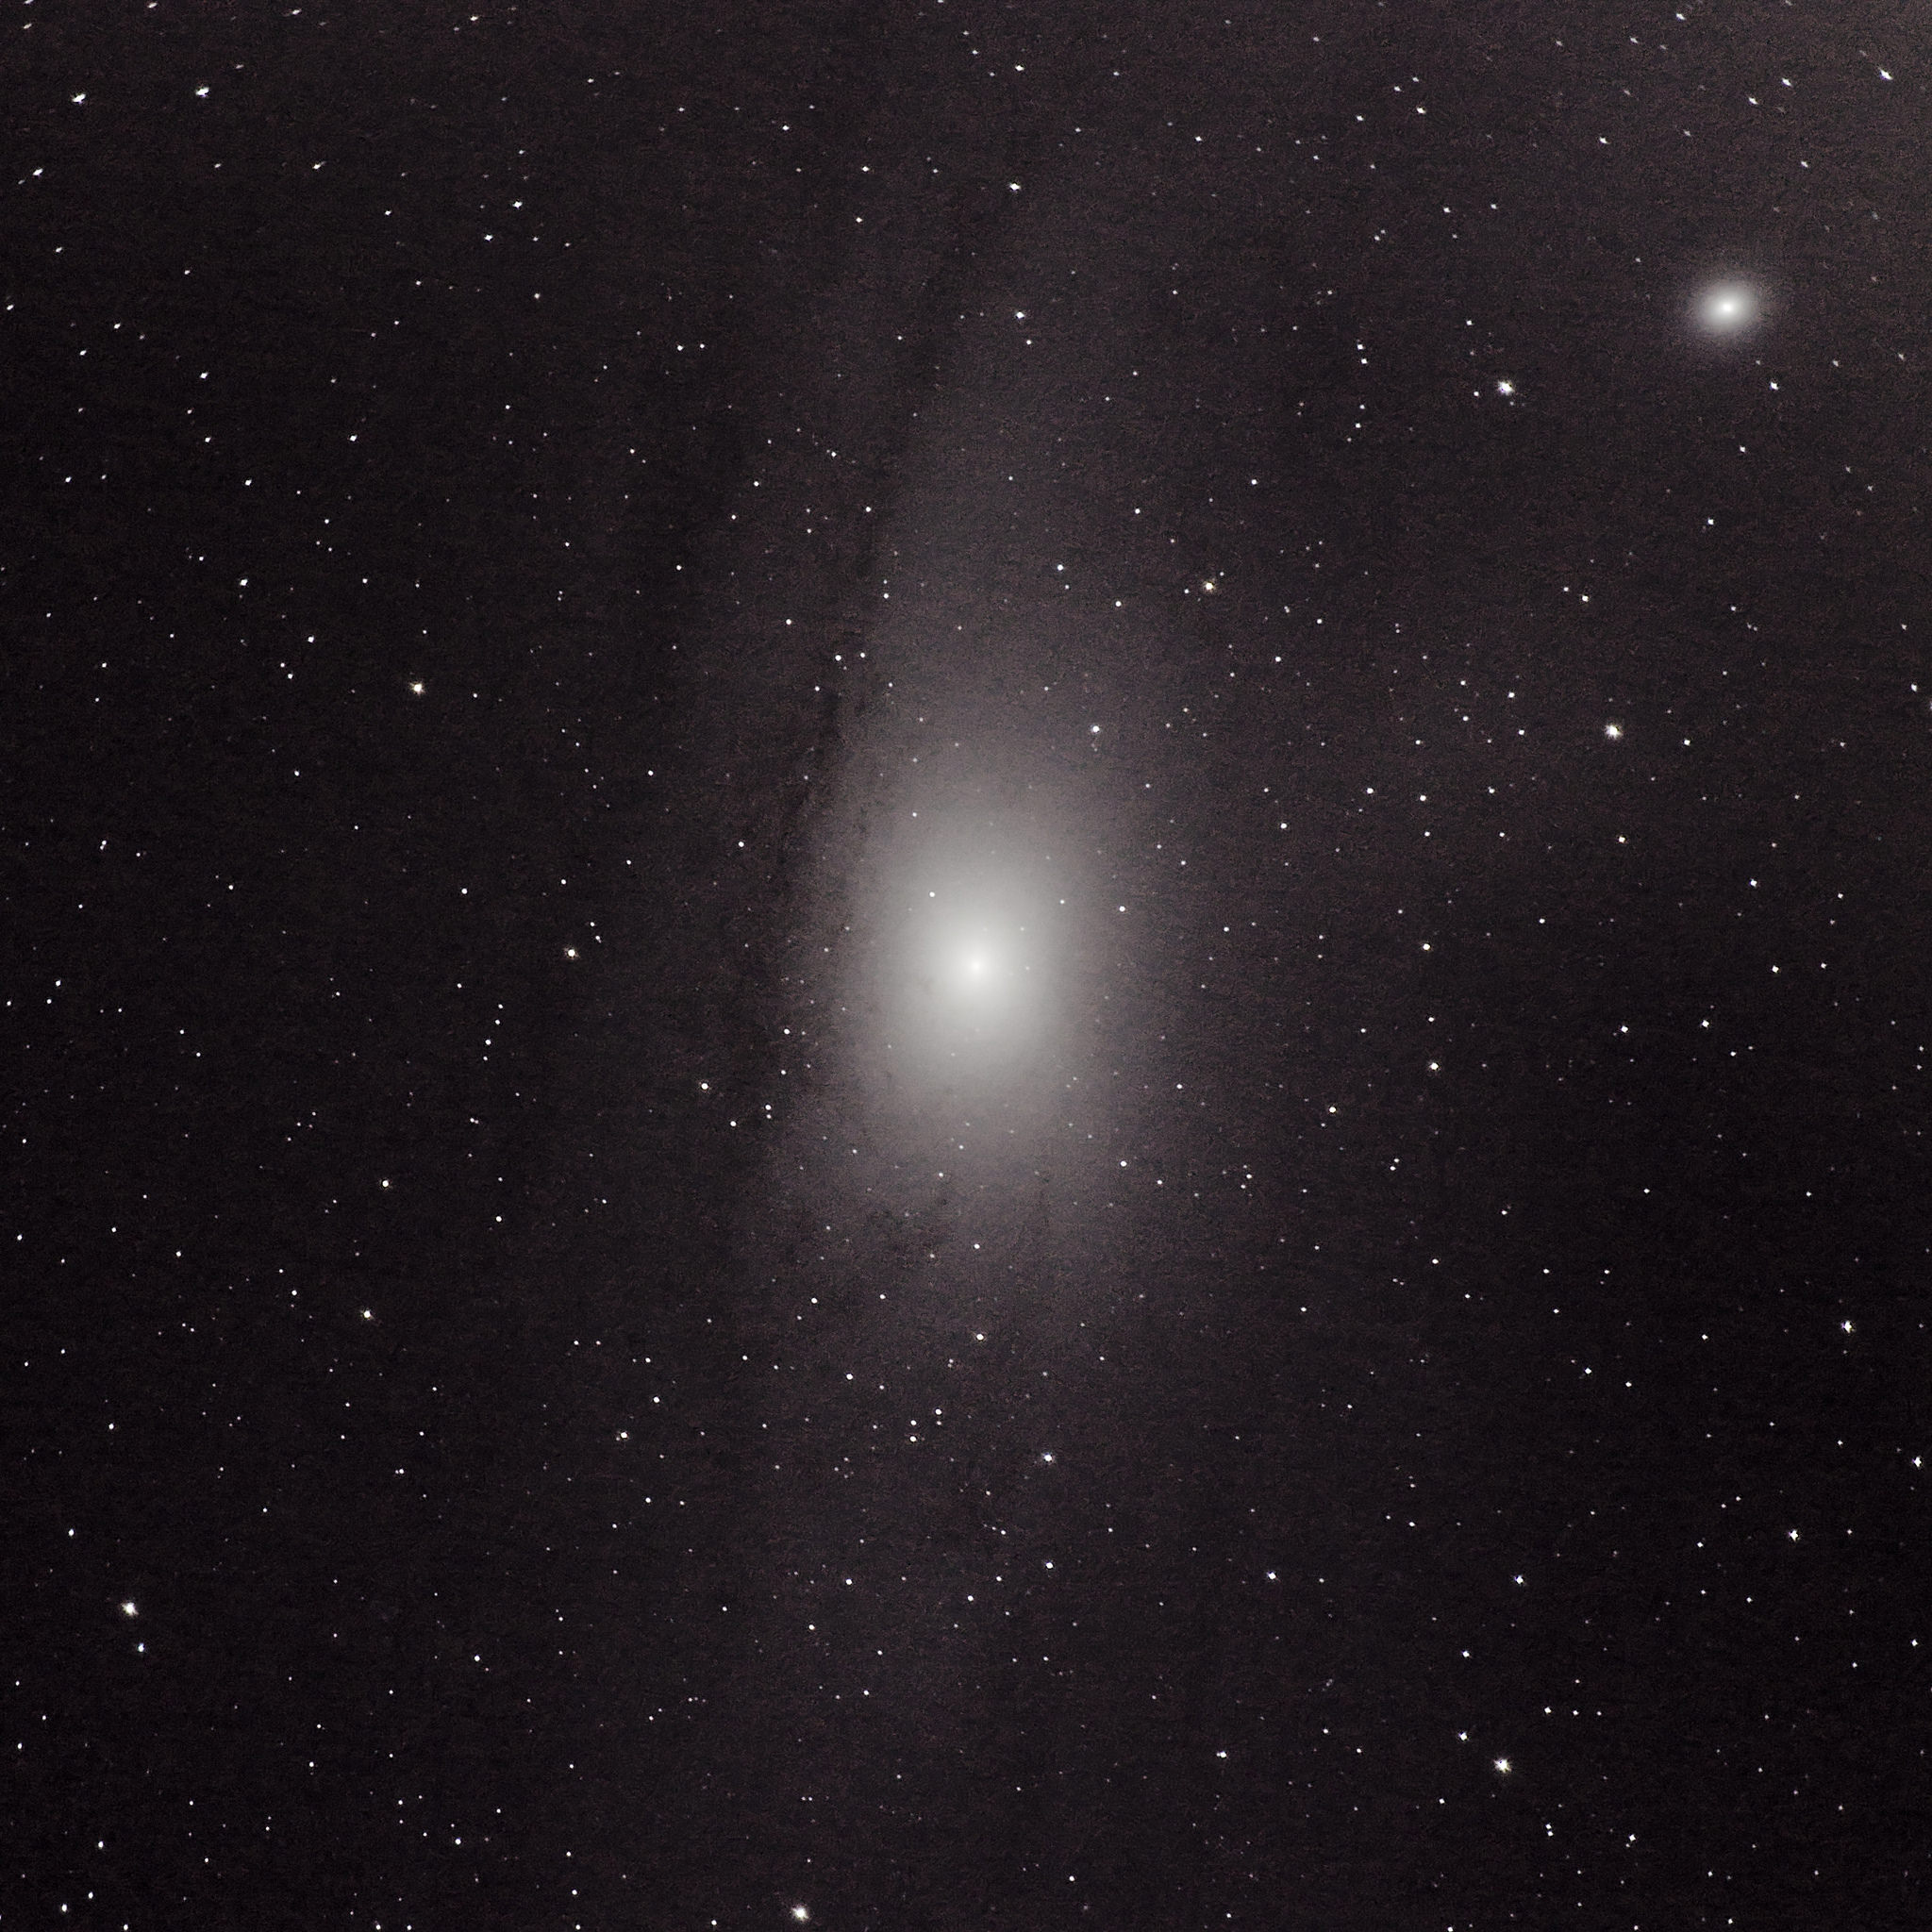
One thing I forgot to post from the Oct 15th session. I also wanted to try eliminating my Sony camera from the mix entirely (and I still may pursue this), so I gave Andromeda a shot with my trusty Canon 5D mk I. Partially I was just curious to see if the noise problem was any different (it was – much more ‘normal’ noise) or better (it wasn’t – a 13 year old camera shows its age), but it was also amusing to me in a sense to use this camera for astrophotography.
This particular 5D started its life in the hands of a friend’s boyfriend who used it to take photos of some pretty spectacular coldwater ocean life. It then made its way to me, and was my trusty daily driver for around a decade as I got my footing with photography in general. This camera was a beast and near-indestructible, taking all manner of abuse and still performing admirably. I thought it only fitting that instead of collecting dust, I at least close out (?) its lifespan shooting some stars. So, here you have it: Andromeda shot from my deck with an original mkI Canon 5D:
I didn’t do a hugely long integration for this test, since I just wanted to get a feel for the noise, but still – the results go to show that even an old camera is no barrier to doing astrophotography!
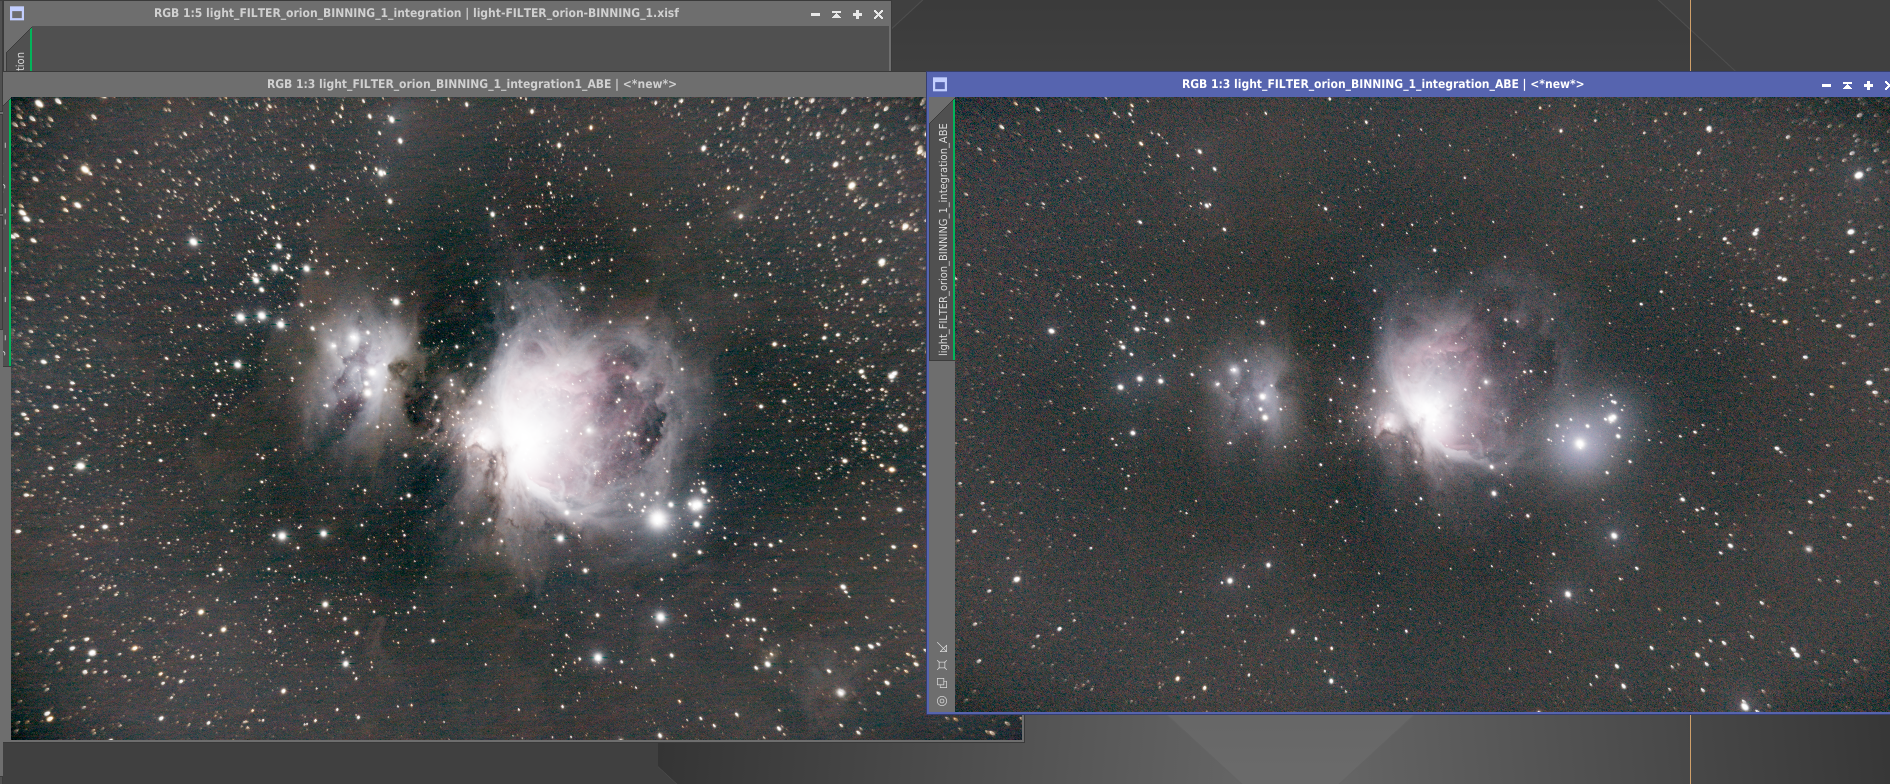
Just a quick update here – mostly grey skies as we move into fall, but I did a bit of experimenting over the last week. First, I gave some more thought to my “noise problem” such as it is. I realized that when I first embarked on this hobby, I was shooting Sony uncompressed RAW (as I always had), and as noted in an earlier update, I quickly realized that none of my software supported this particular format. I switched to compressed RAW on the (I think now flawed) assumption/premise that Sony’s “compressed” RAW wasn’t really compressed so much as it was just a smaller RAW file with, I dunno, less dynamic range or something. (Insert an interlude here about how little I know about RAW file formats.) I think this was probably wrong, and I did some testing with my earliest uncompressed data by using Adobe’s RAW conversion tool to convert it to DNG. The results seemed somewhat promising! But, I didn’t really know what I was doing with processing back then, so I didn’t have a lot to compare to.
If I were a good scientist I would have done a test run with just uncompressed RAW but leaving everything the same. Alas, instead, I am impatient and tried shooting uncompressed RAW in addition to trying some manual dithering/rotation. You can see below a comparison of my original integration from dark skies a few weeks ago – the results are otherwise unprocessed and autostretched to show the noise profile. On the right are my recent results – far less good data (clouds mostly ruined most of the exposures and it was in the city anyway), but good enough for a comparison:
You can clearly see there’s none of the weird ribbons of striated noise and a much more “normal” noise pattern. There’s still a disappointing amount of noise in general, but perhaps more manageable. I didn’t spent a lot of time processing it further since there wasn’t enough signal it’d be worth it. Still, it’s progress. Ultimately I suspect that shooting uncompressed RAW didn’t help much (but is probably still nonetheless worth doing) and that it was mostly the dithering that avoided the weird patterns in the noise. What I don’t know yet is if this will actually make it any easier to remove. Further experimentation is necessary!
In unrelated news, my field flattener arrived! Looking forward to testing this out.
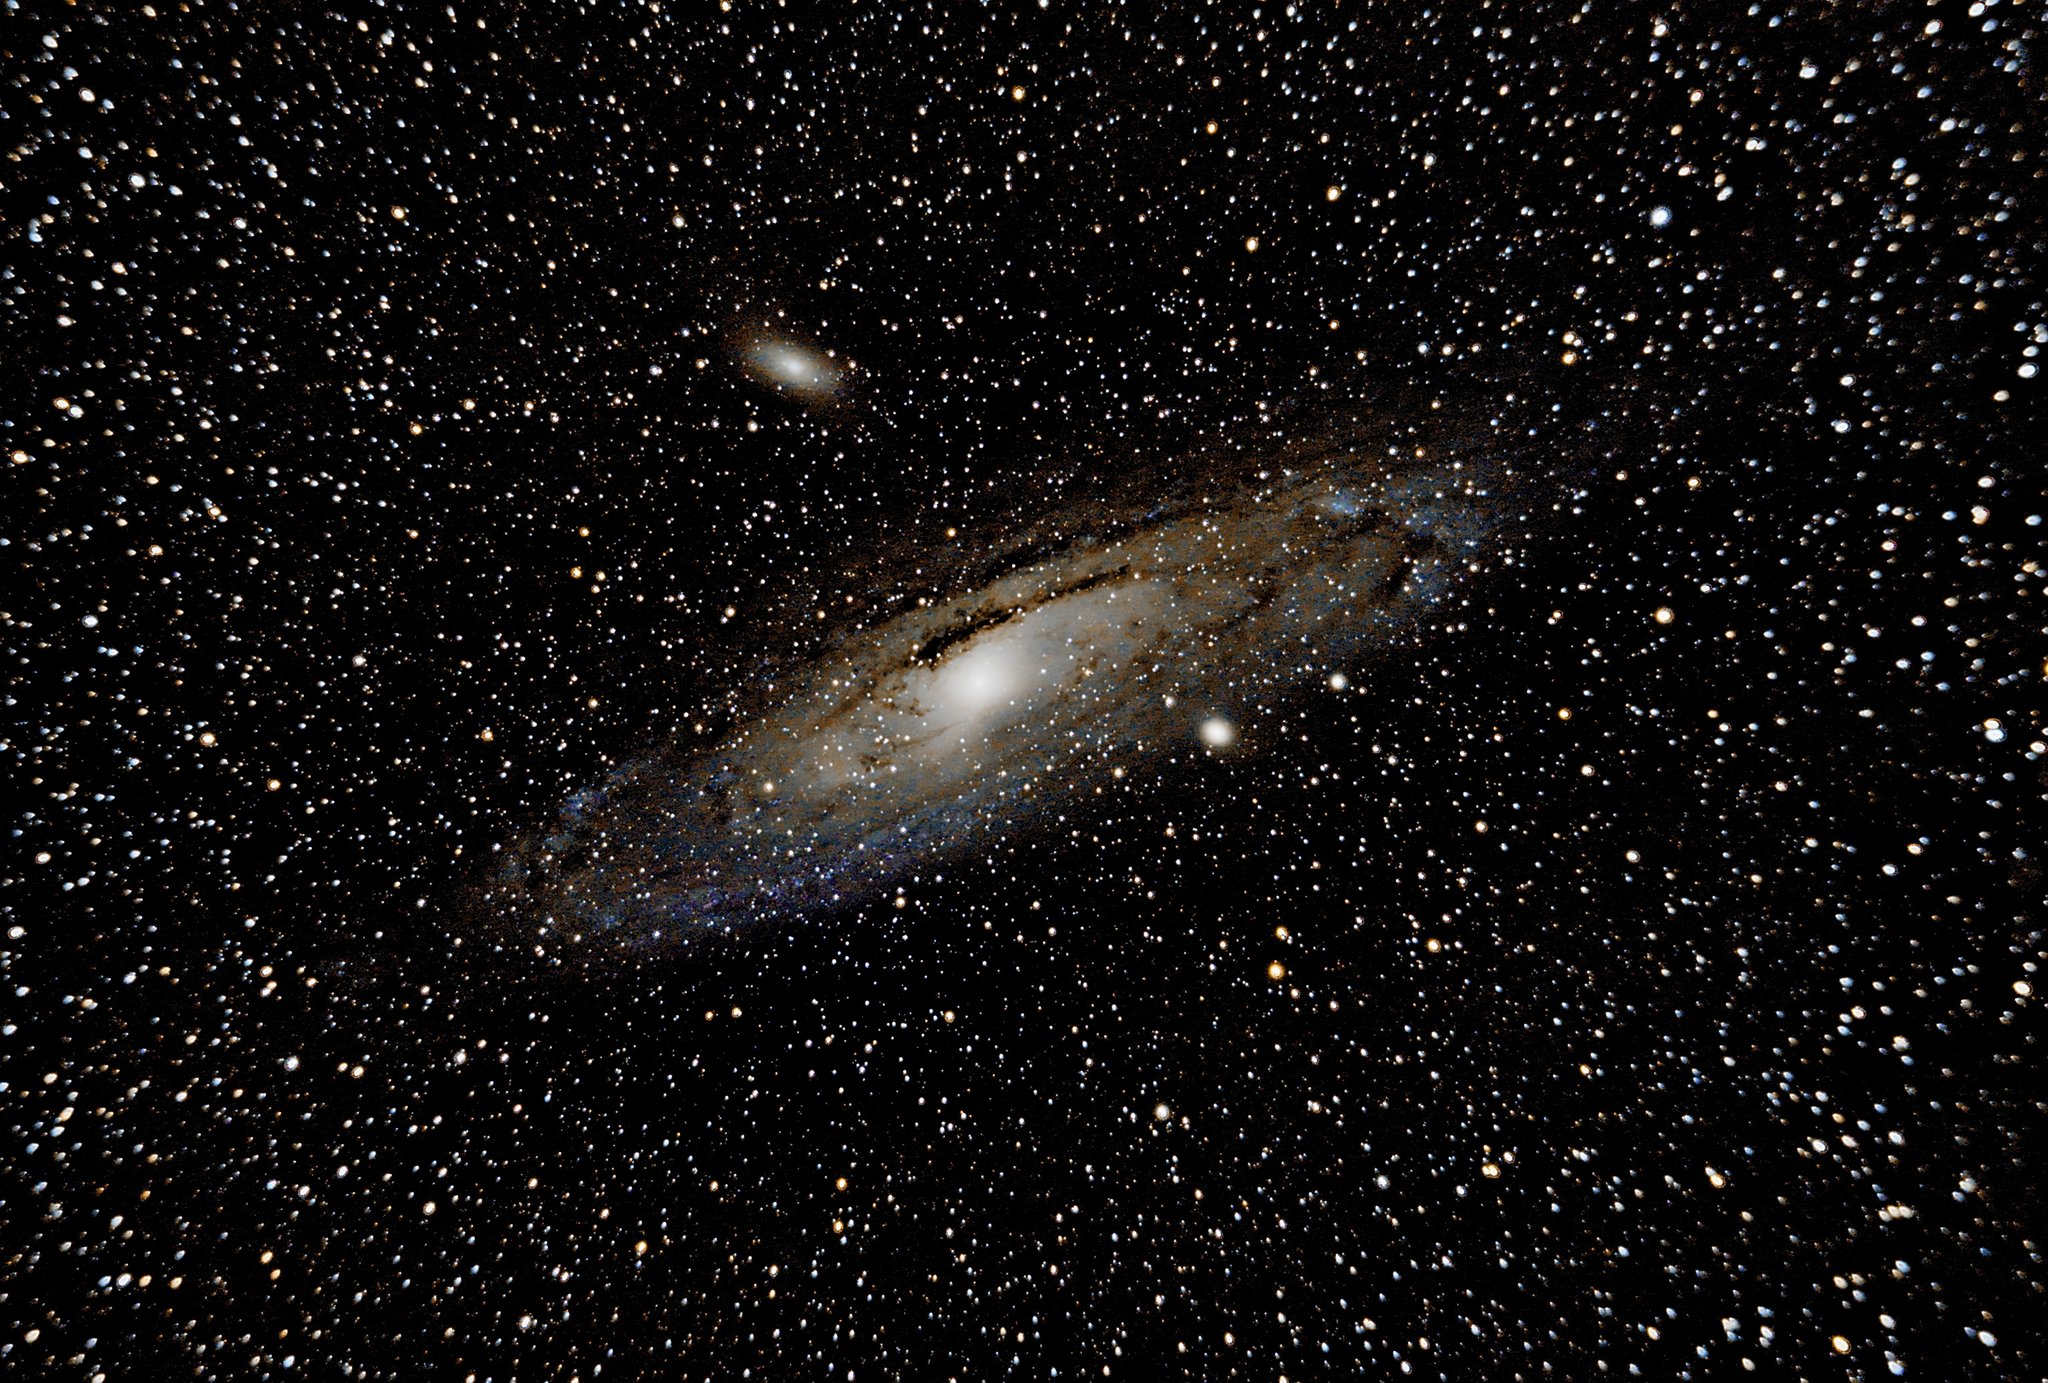
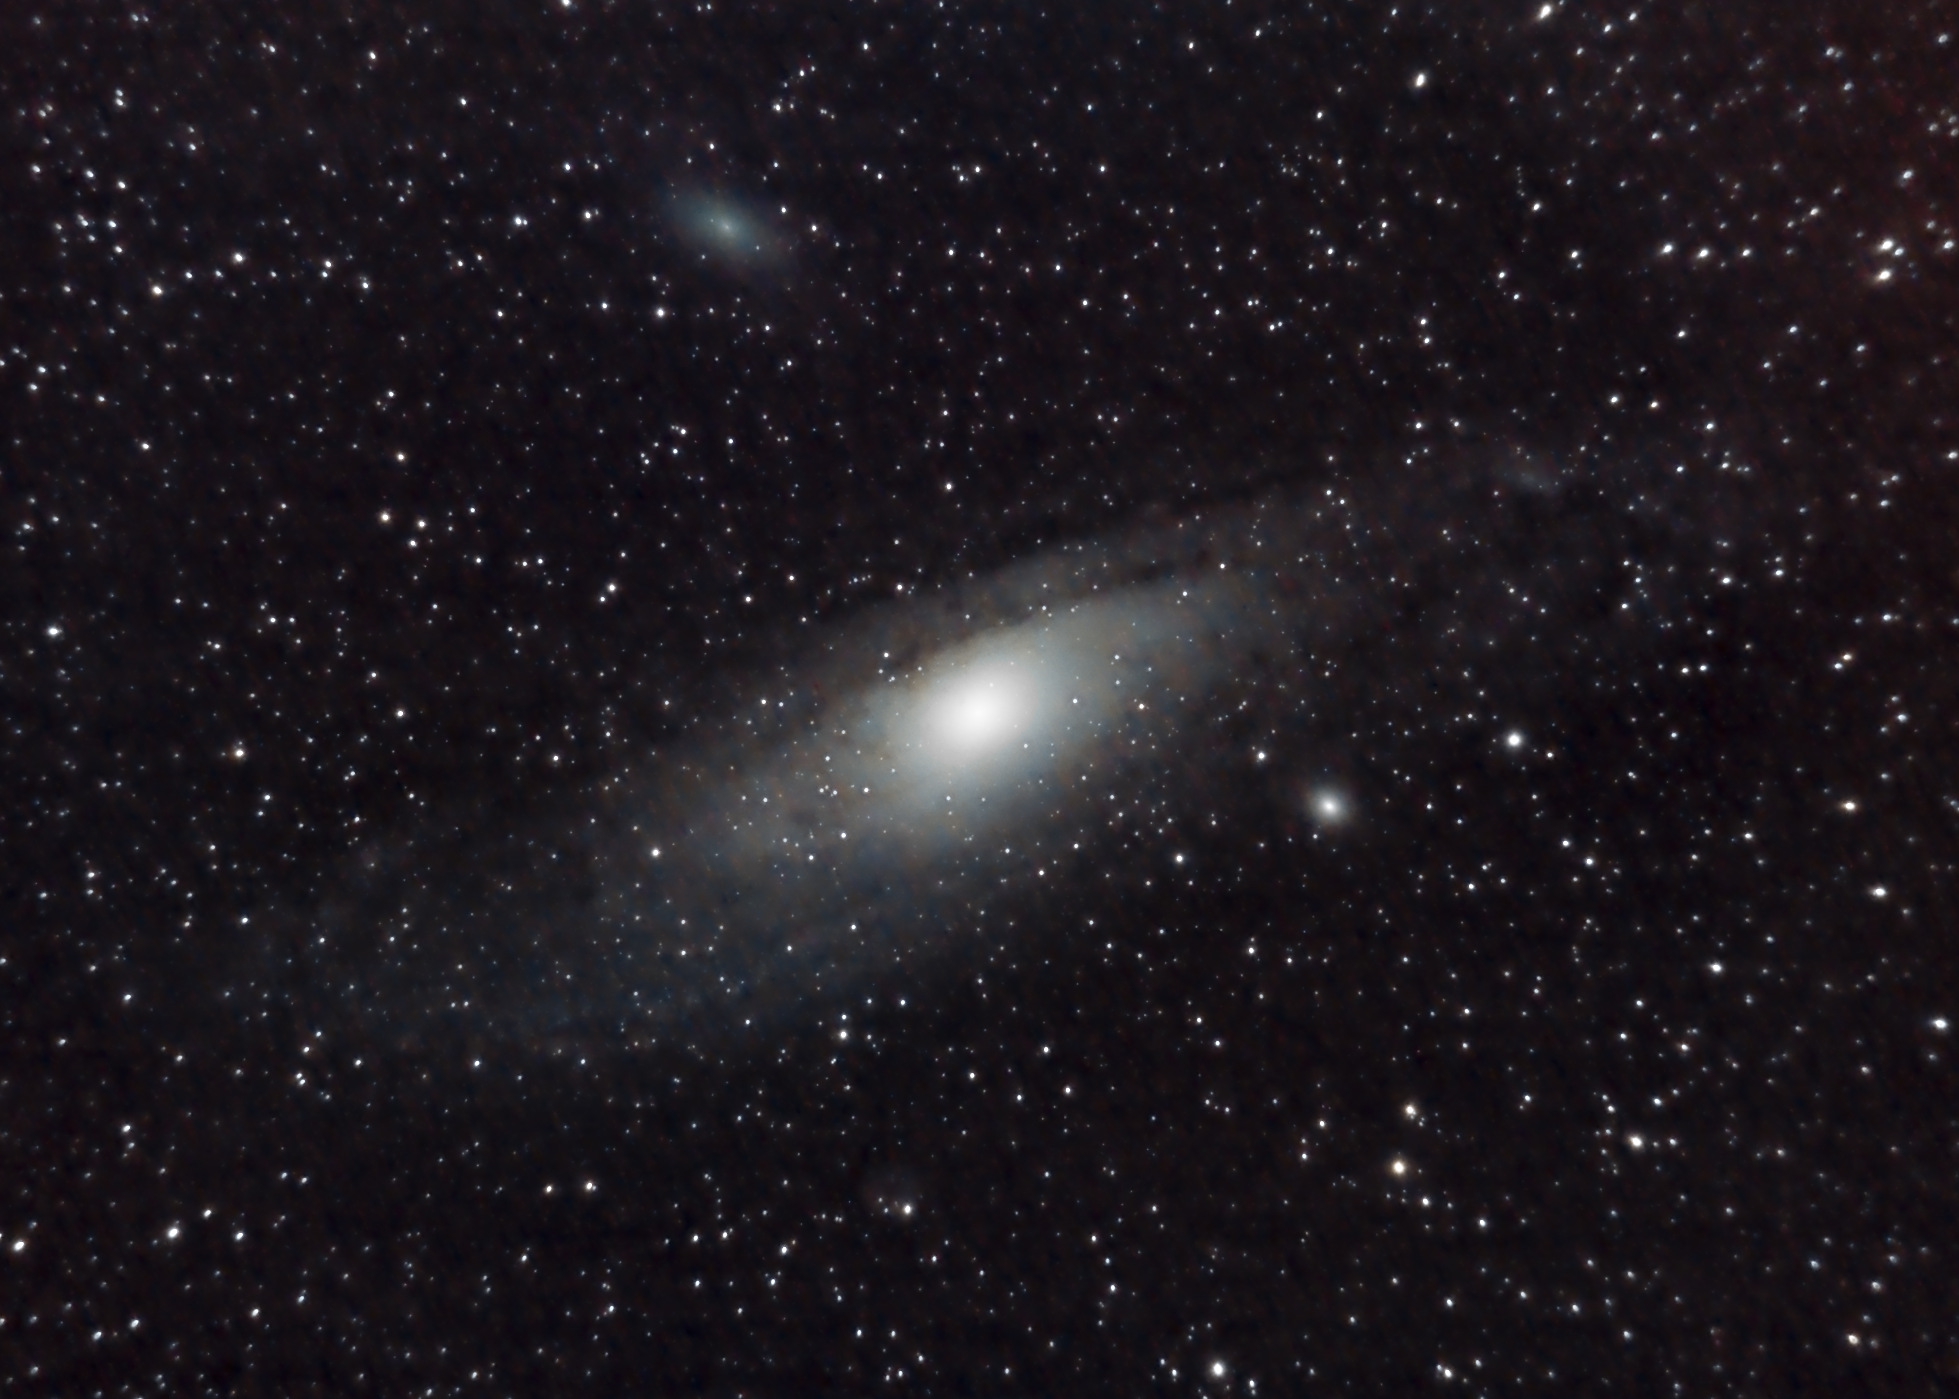
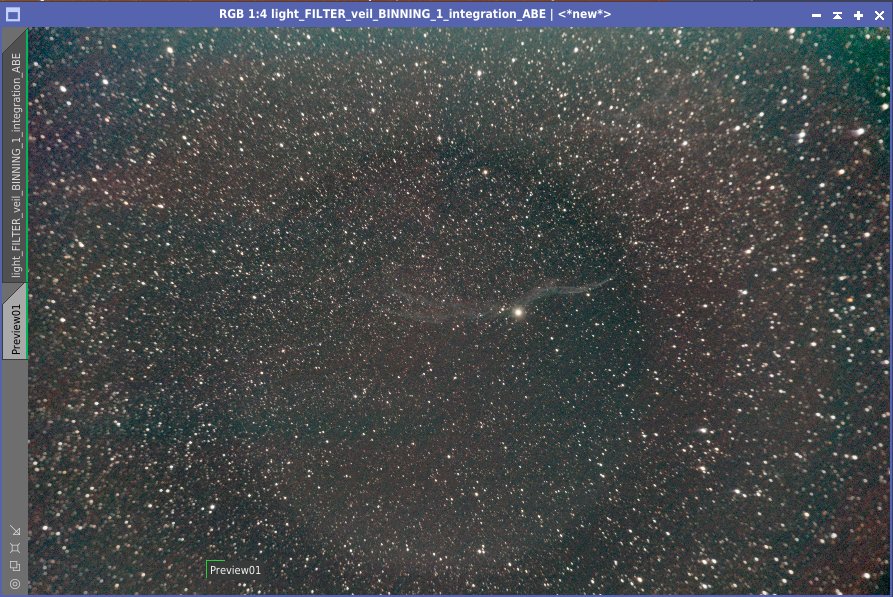
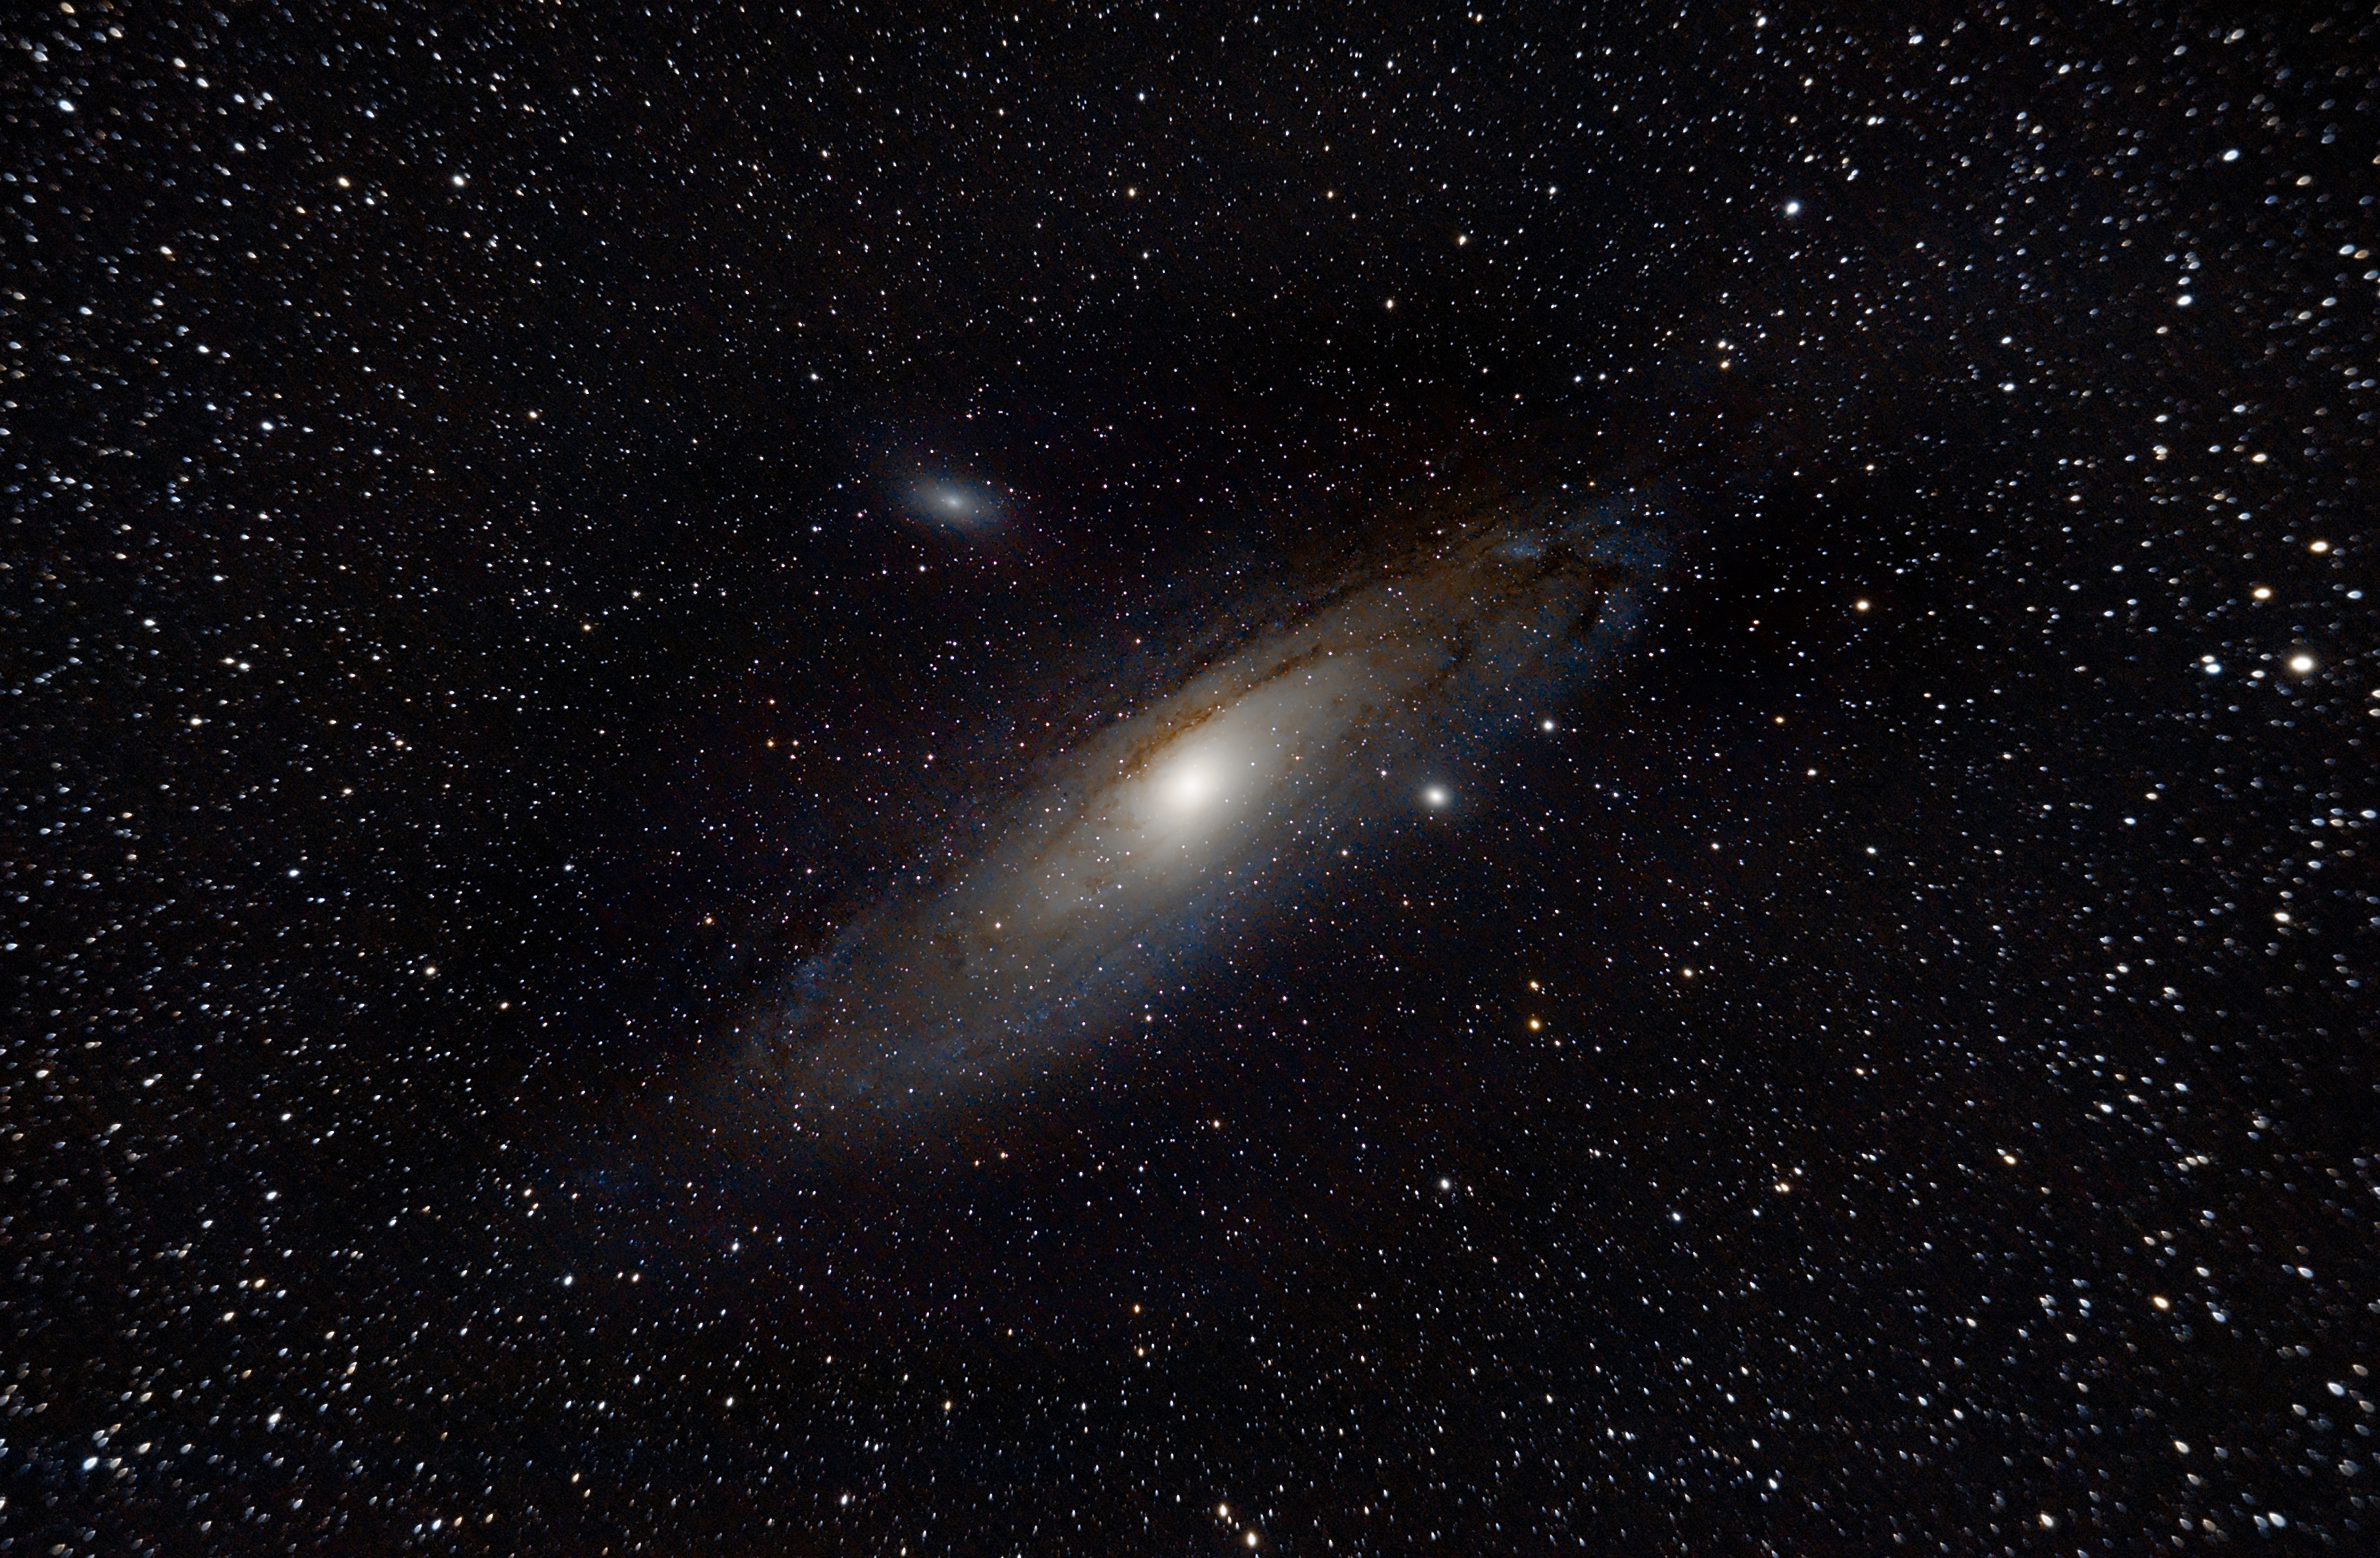
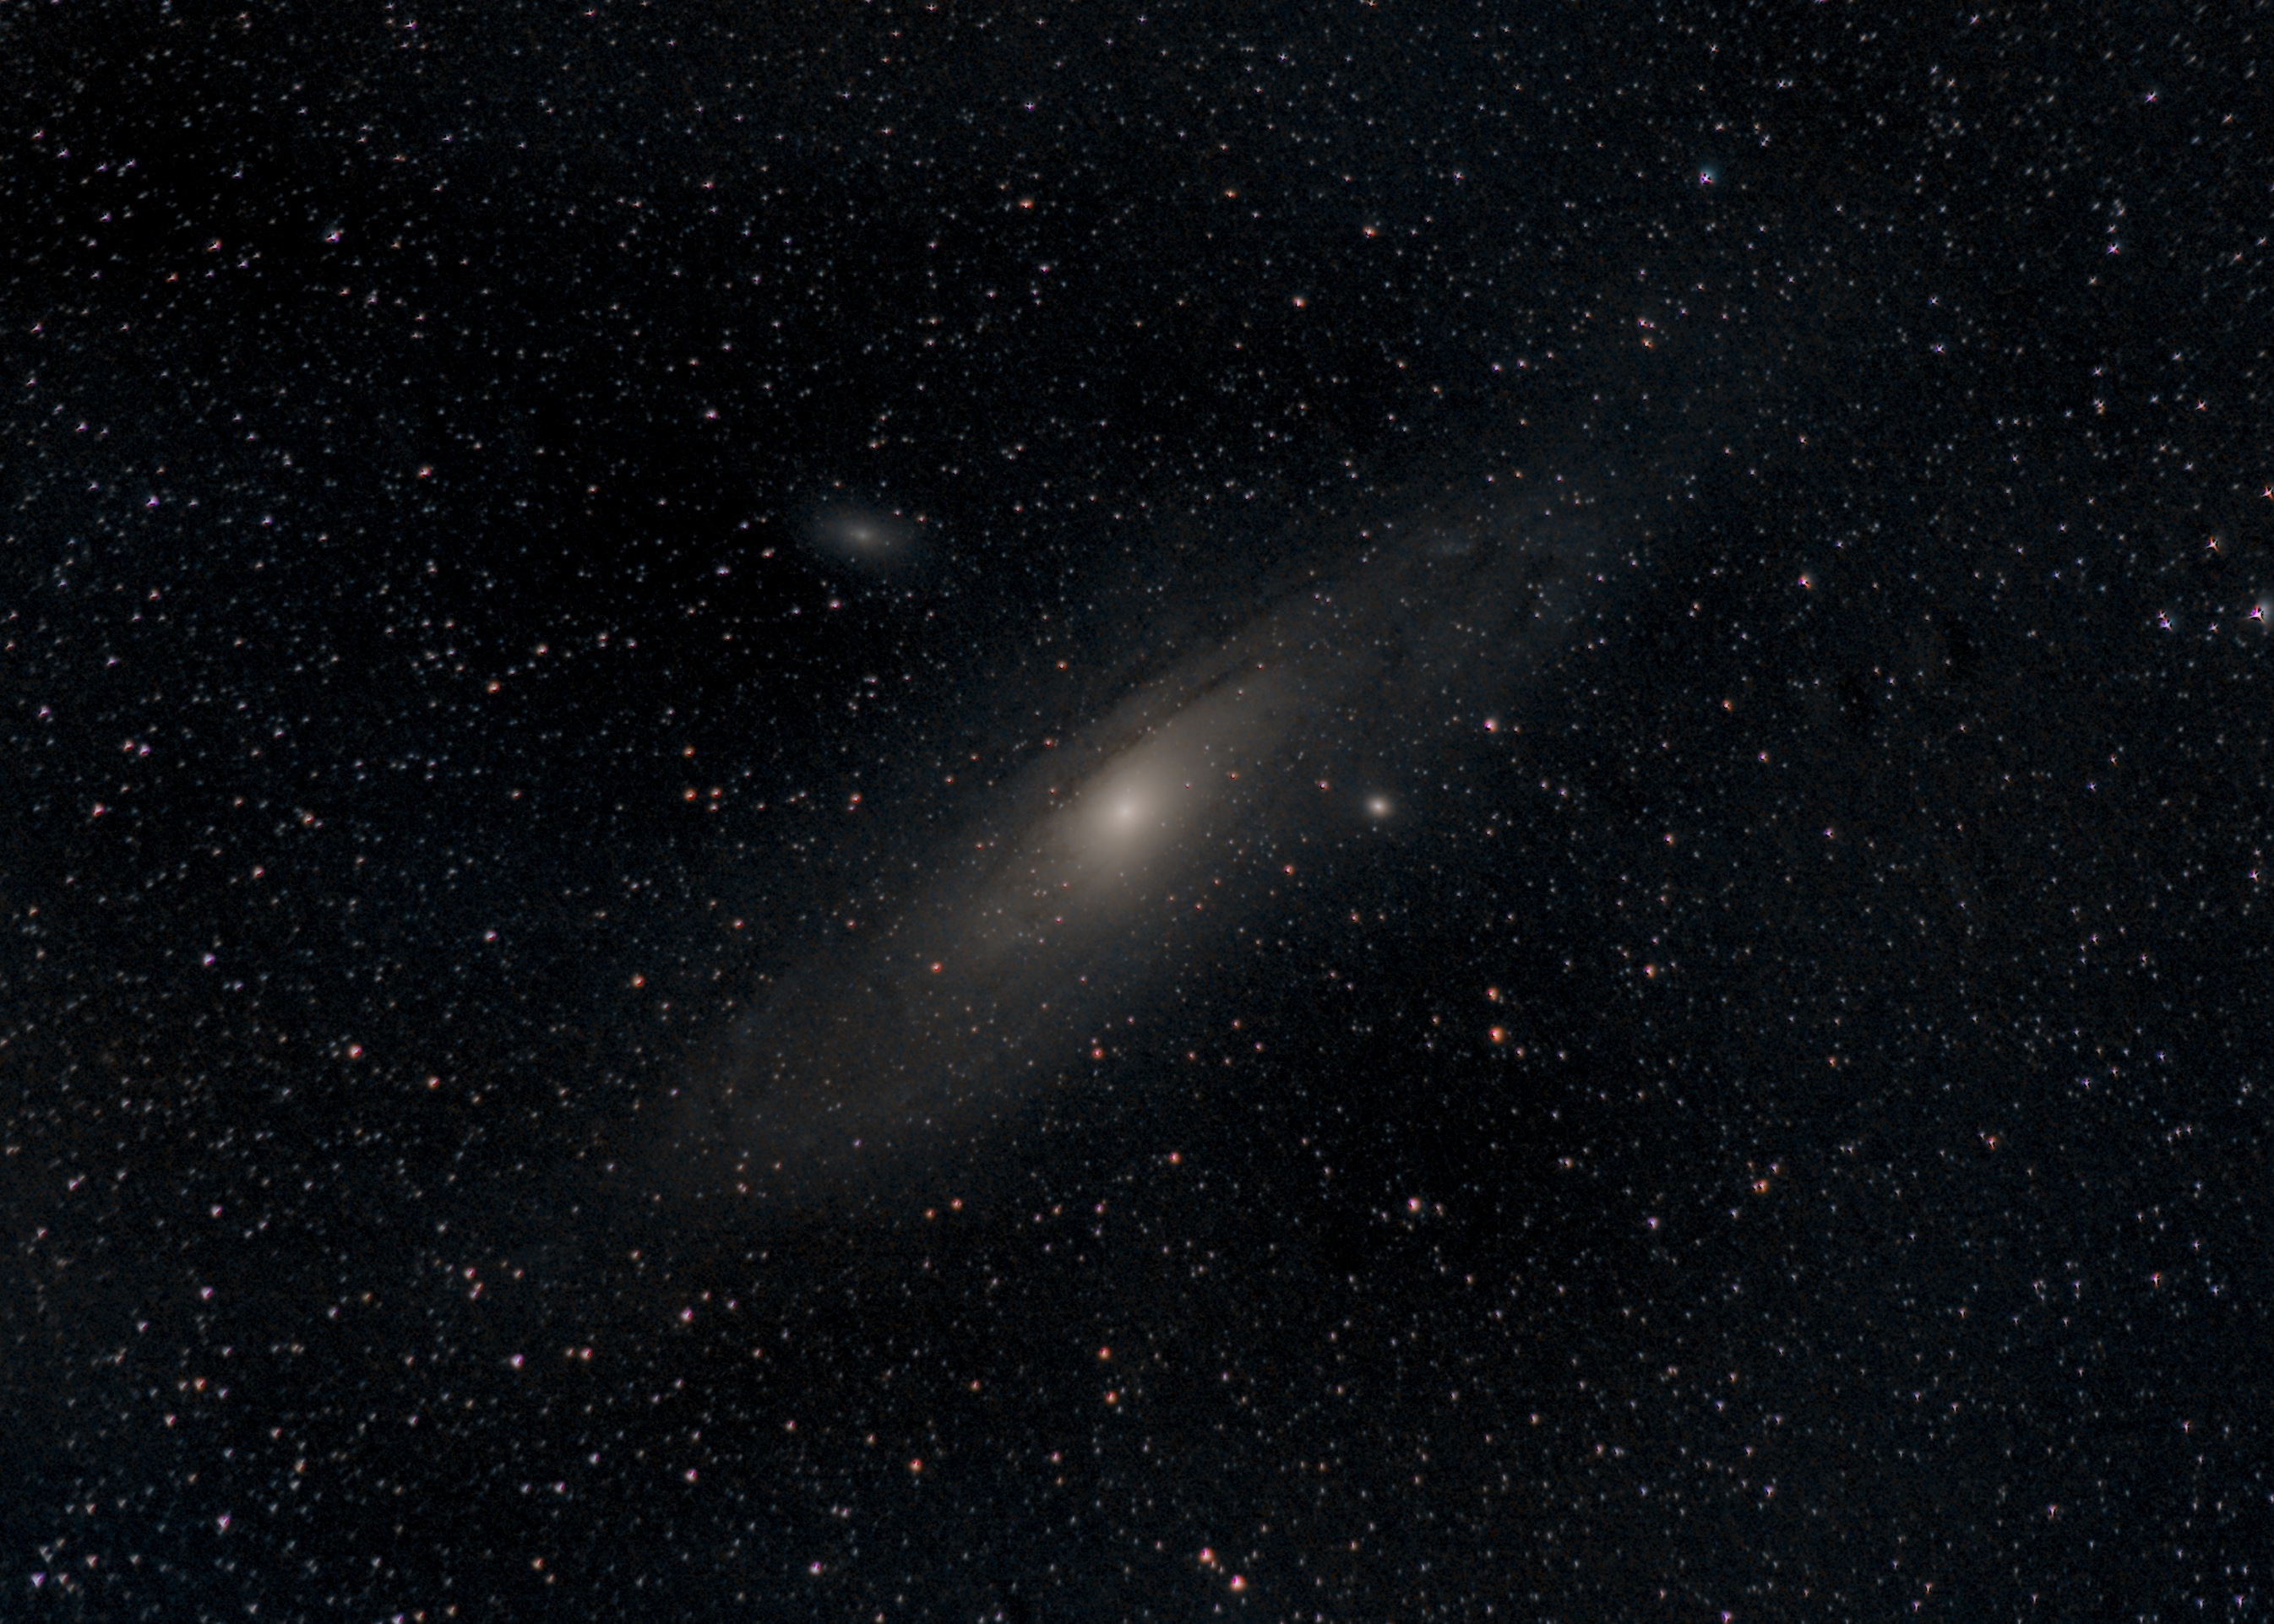
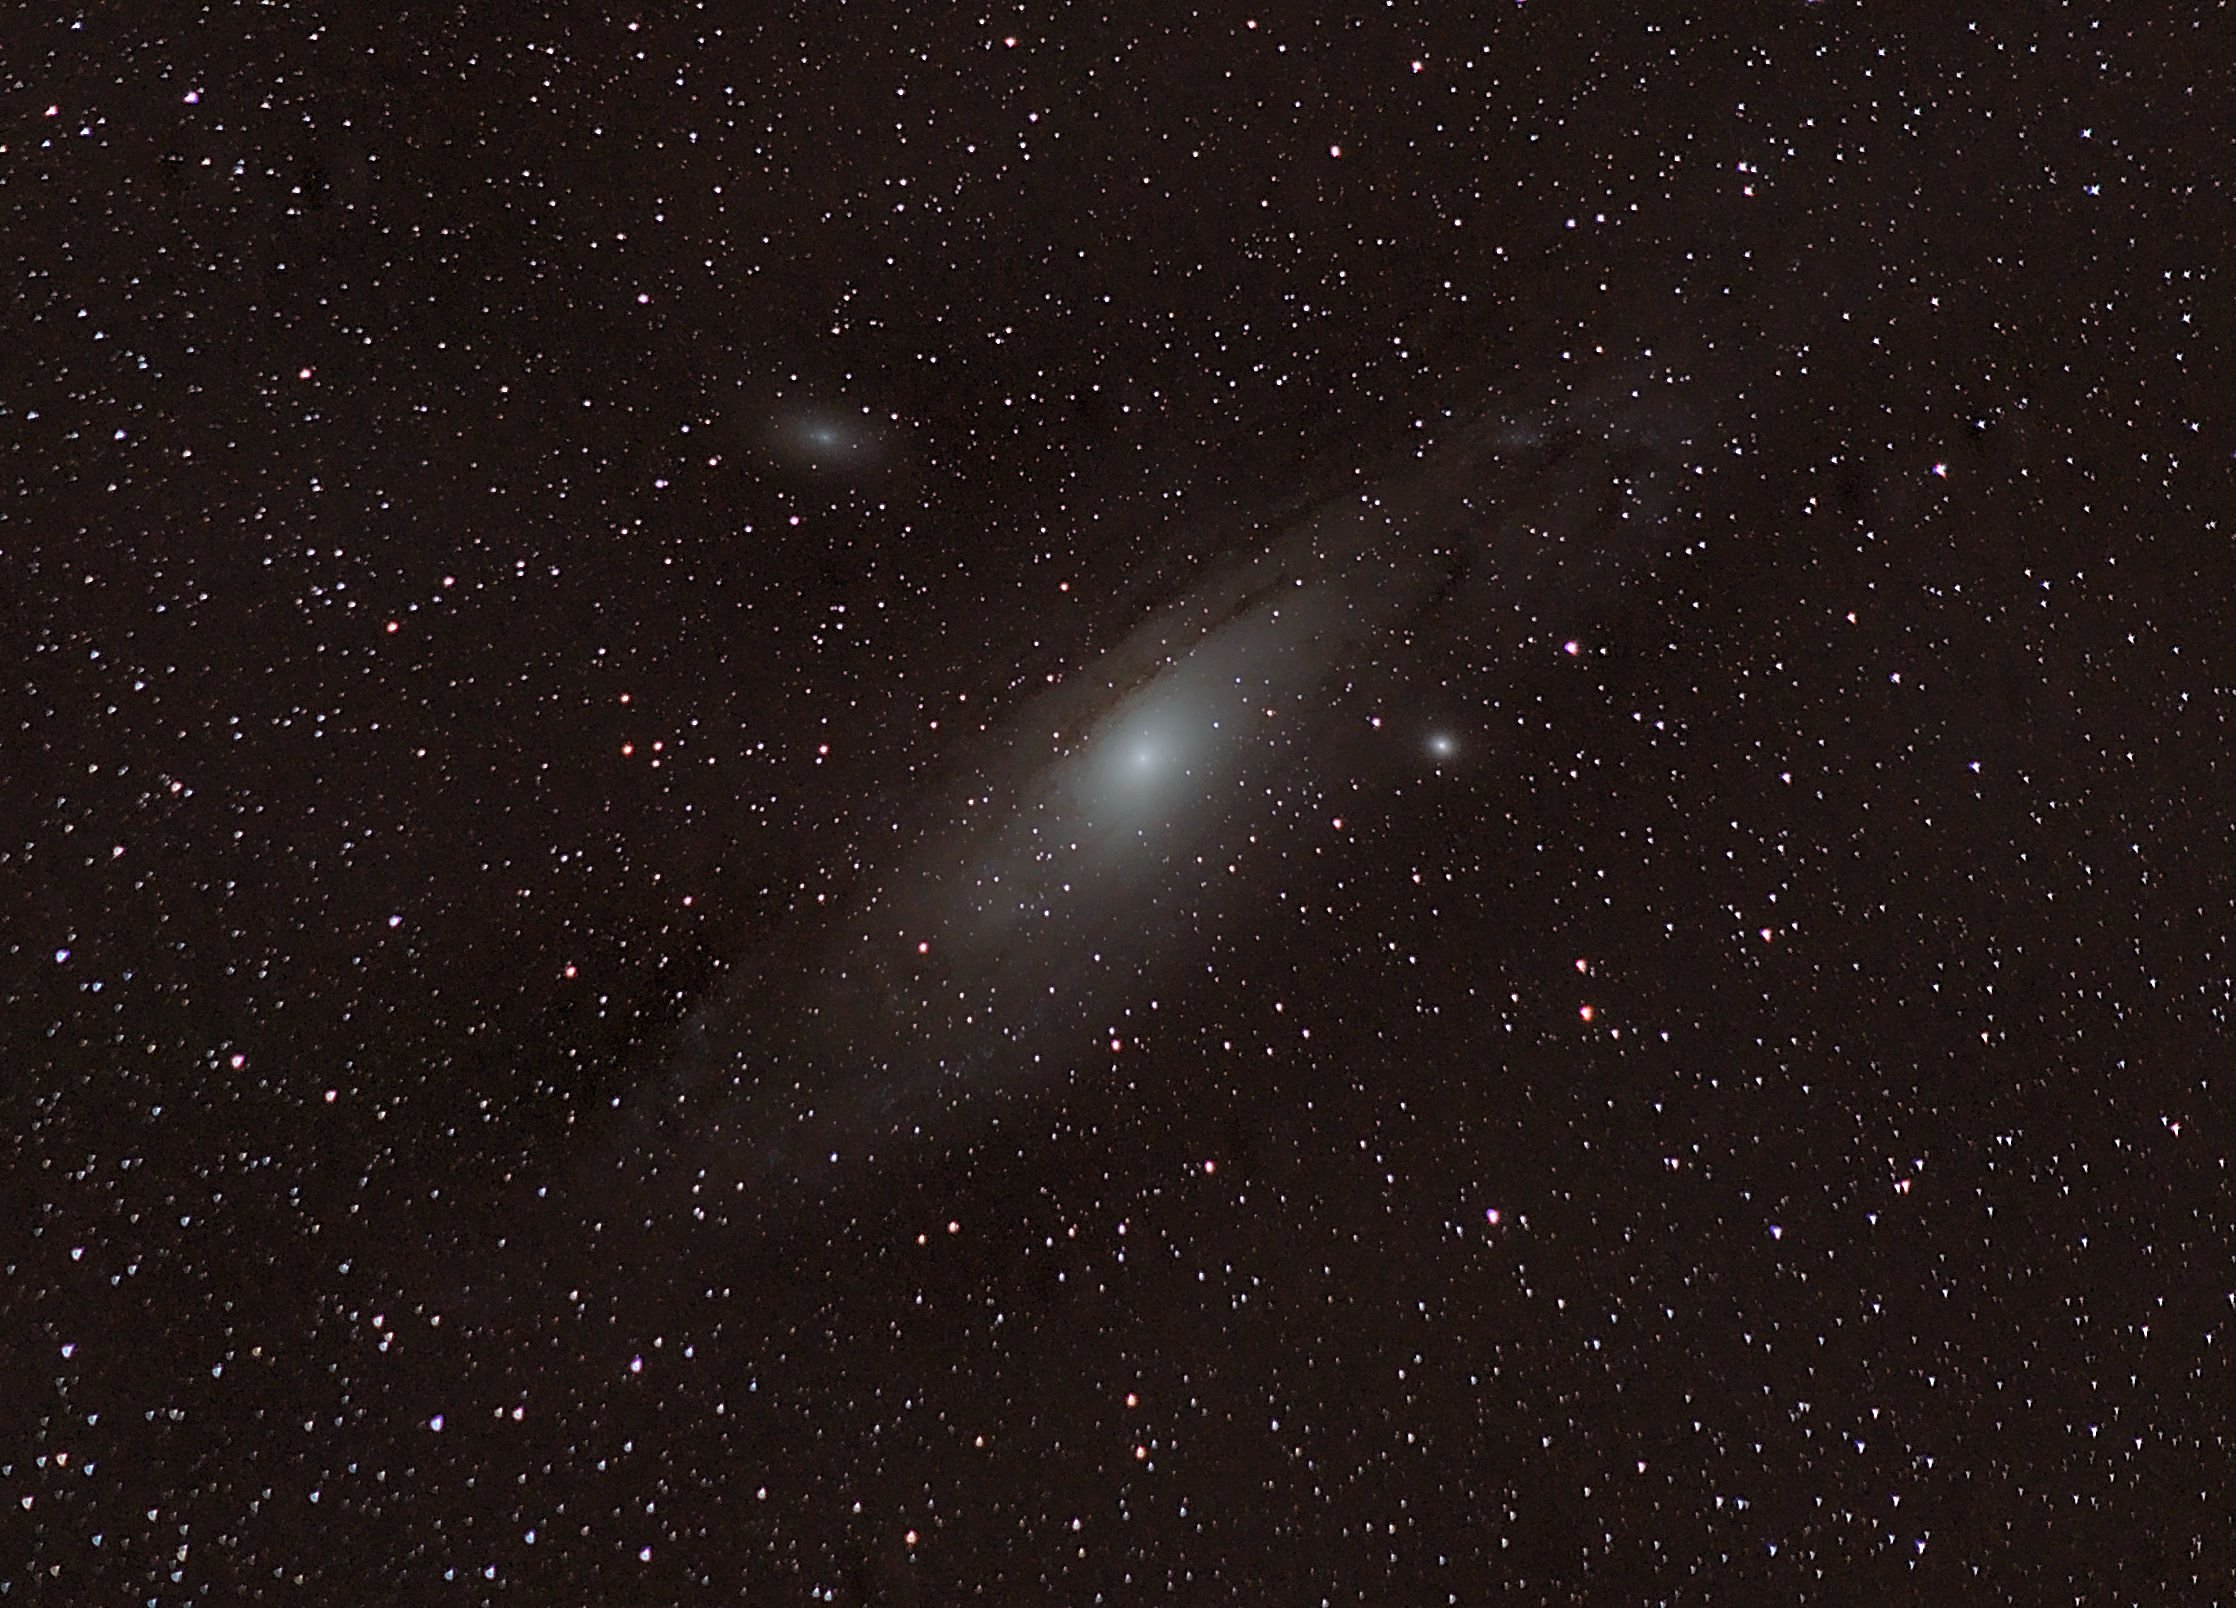
With clear skies in the forecast and being a Friday night, I decided to take my gear out to my brother’s place – about an hour east of Nashville, blessed with much darker skies. It was rather remarkable, the difference – silly as it sounds, this was my first expedition into dark skies while actually knowing what I am doing – at least a bit. We spent a little time just doing some visual through his telescope and mine, before I set up my camera to take yet another stab at Andromeda – an obvious choice for my continued testing: it’s bright, easy to find and provides a good baseline for improving my data acquisition and processing.
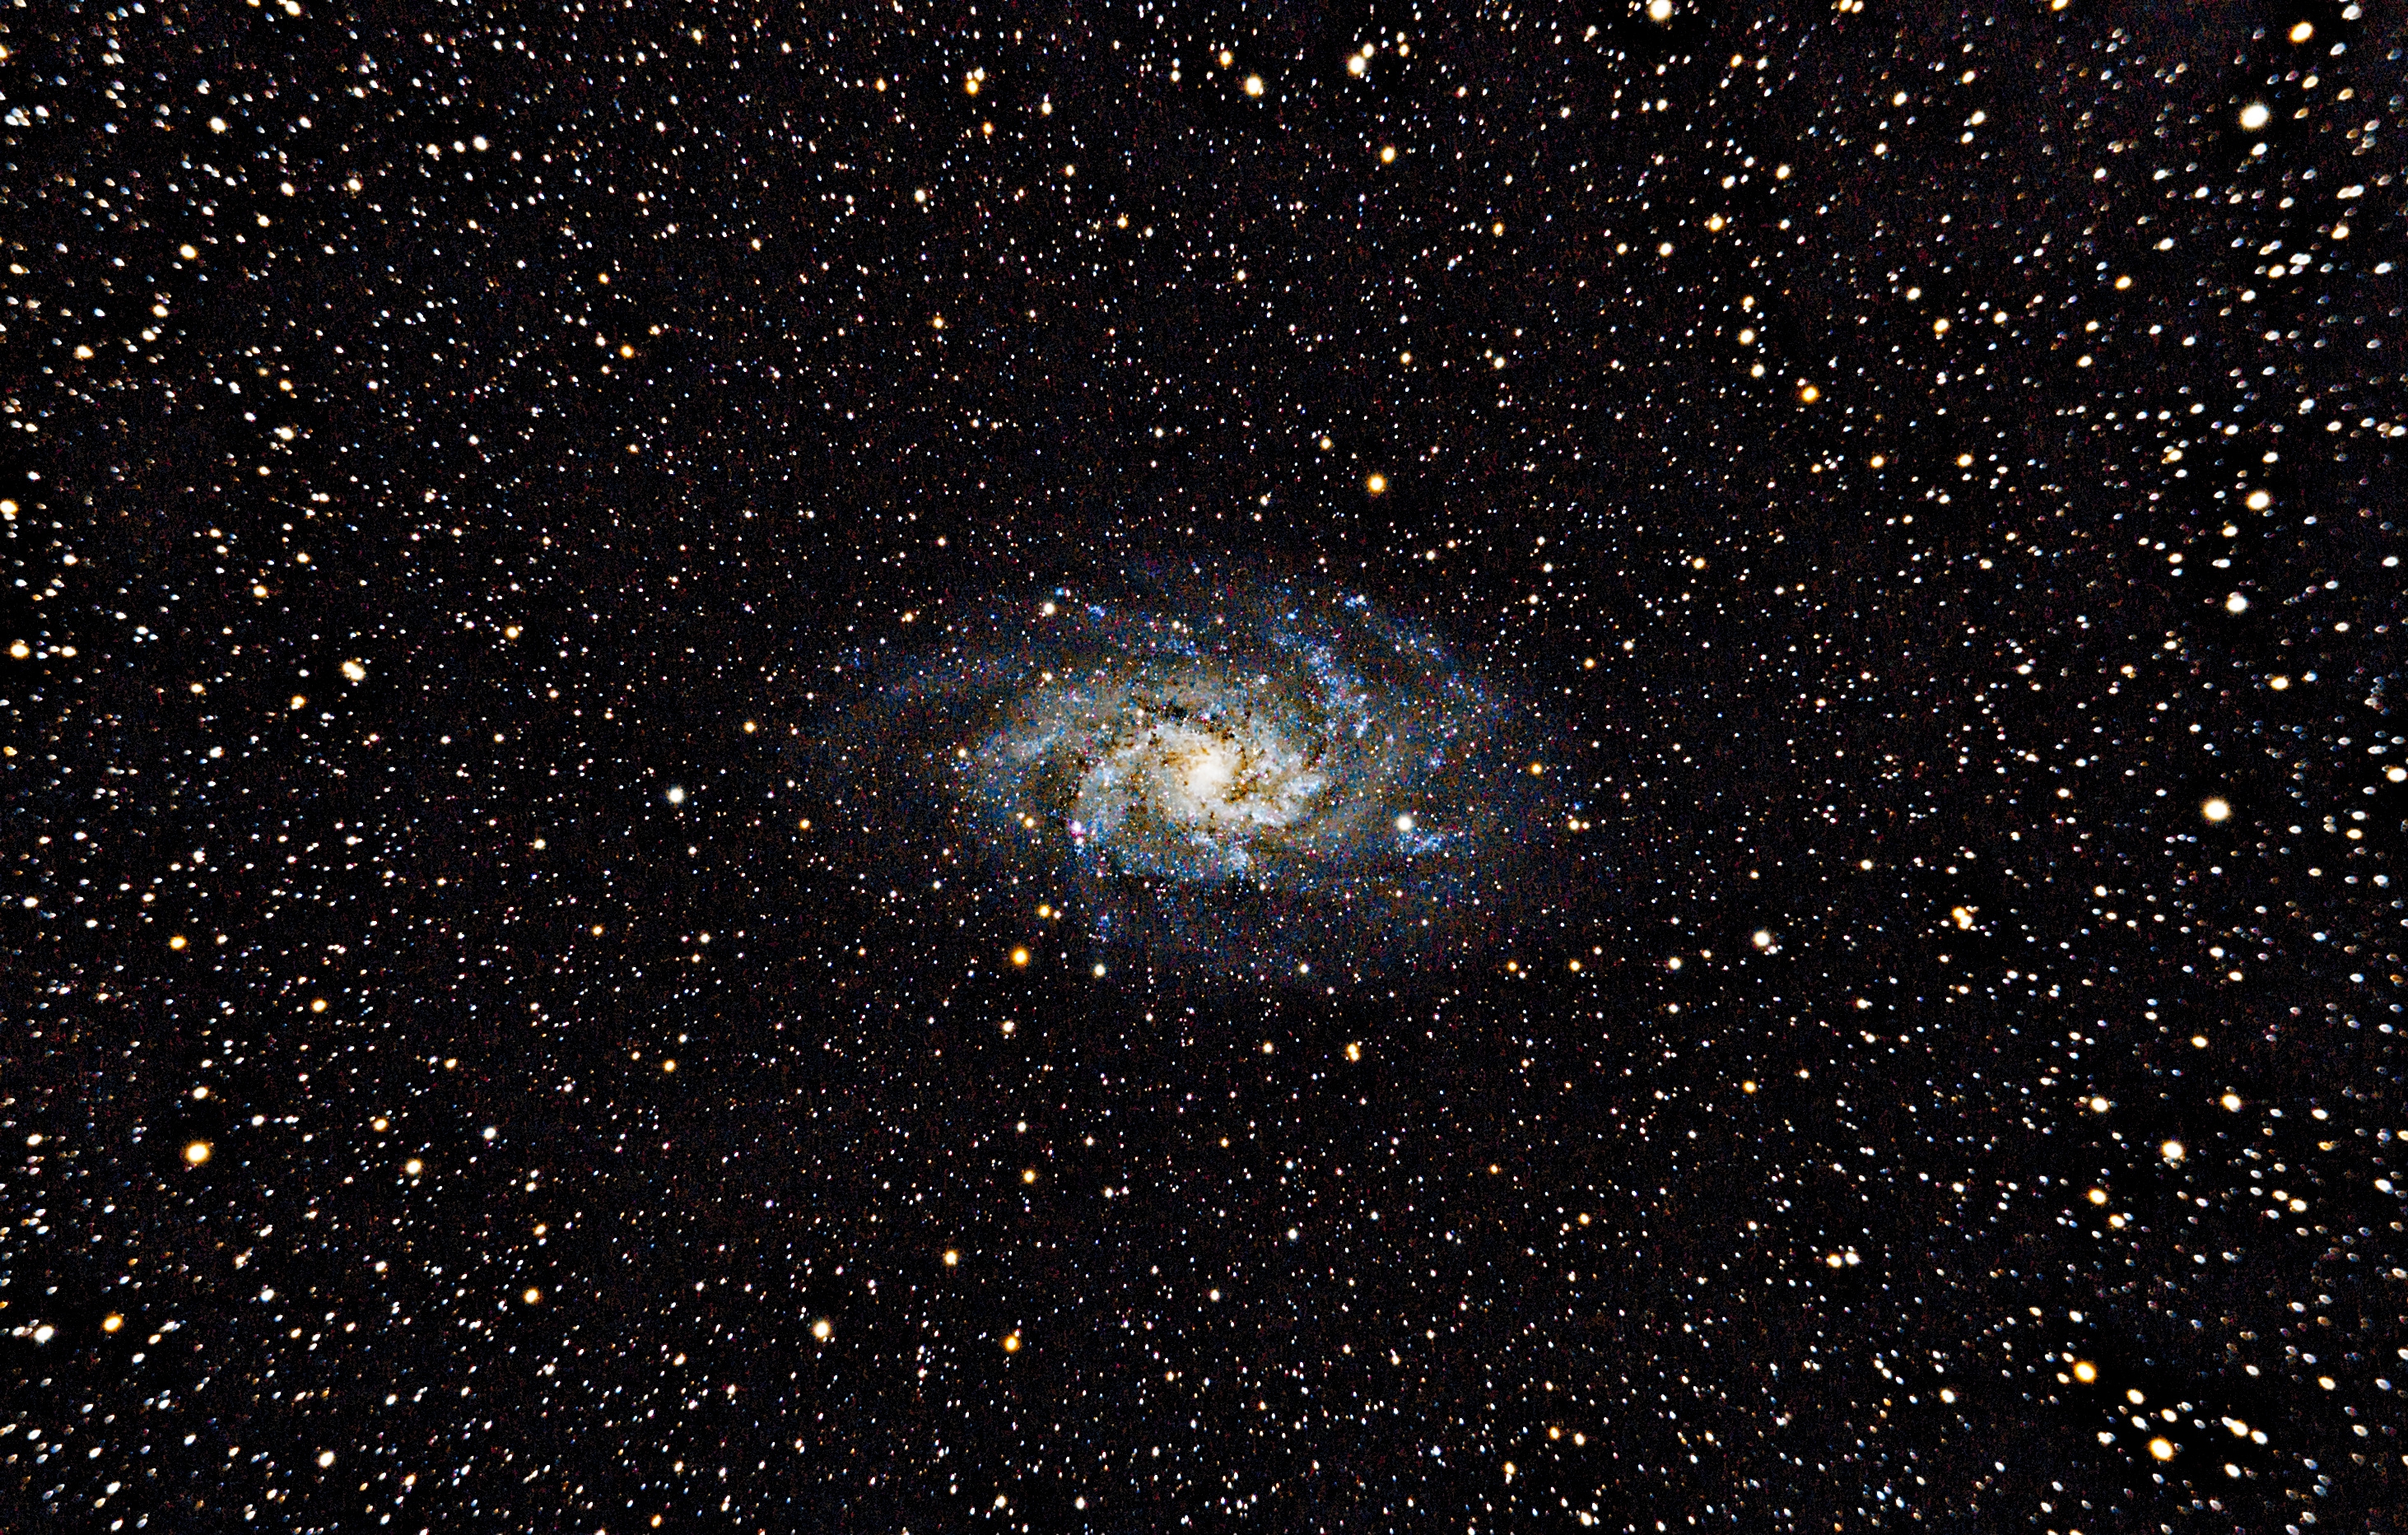
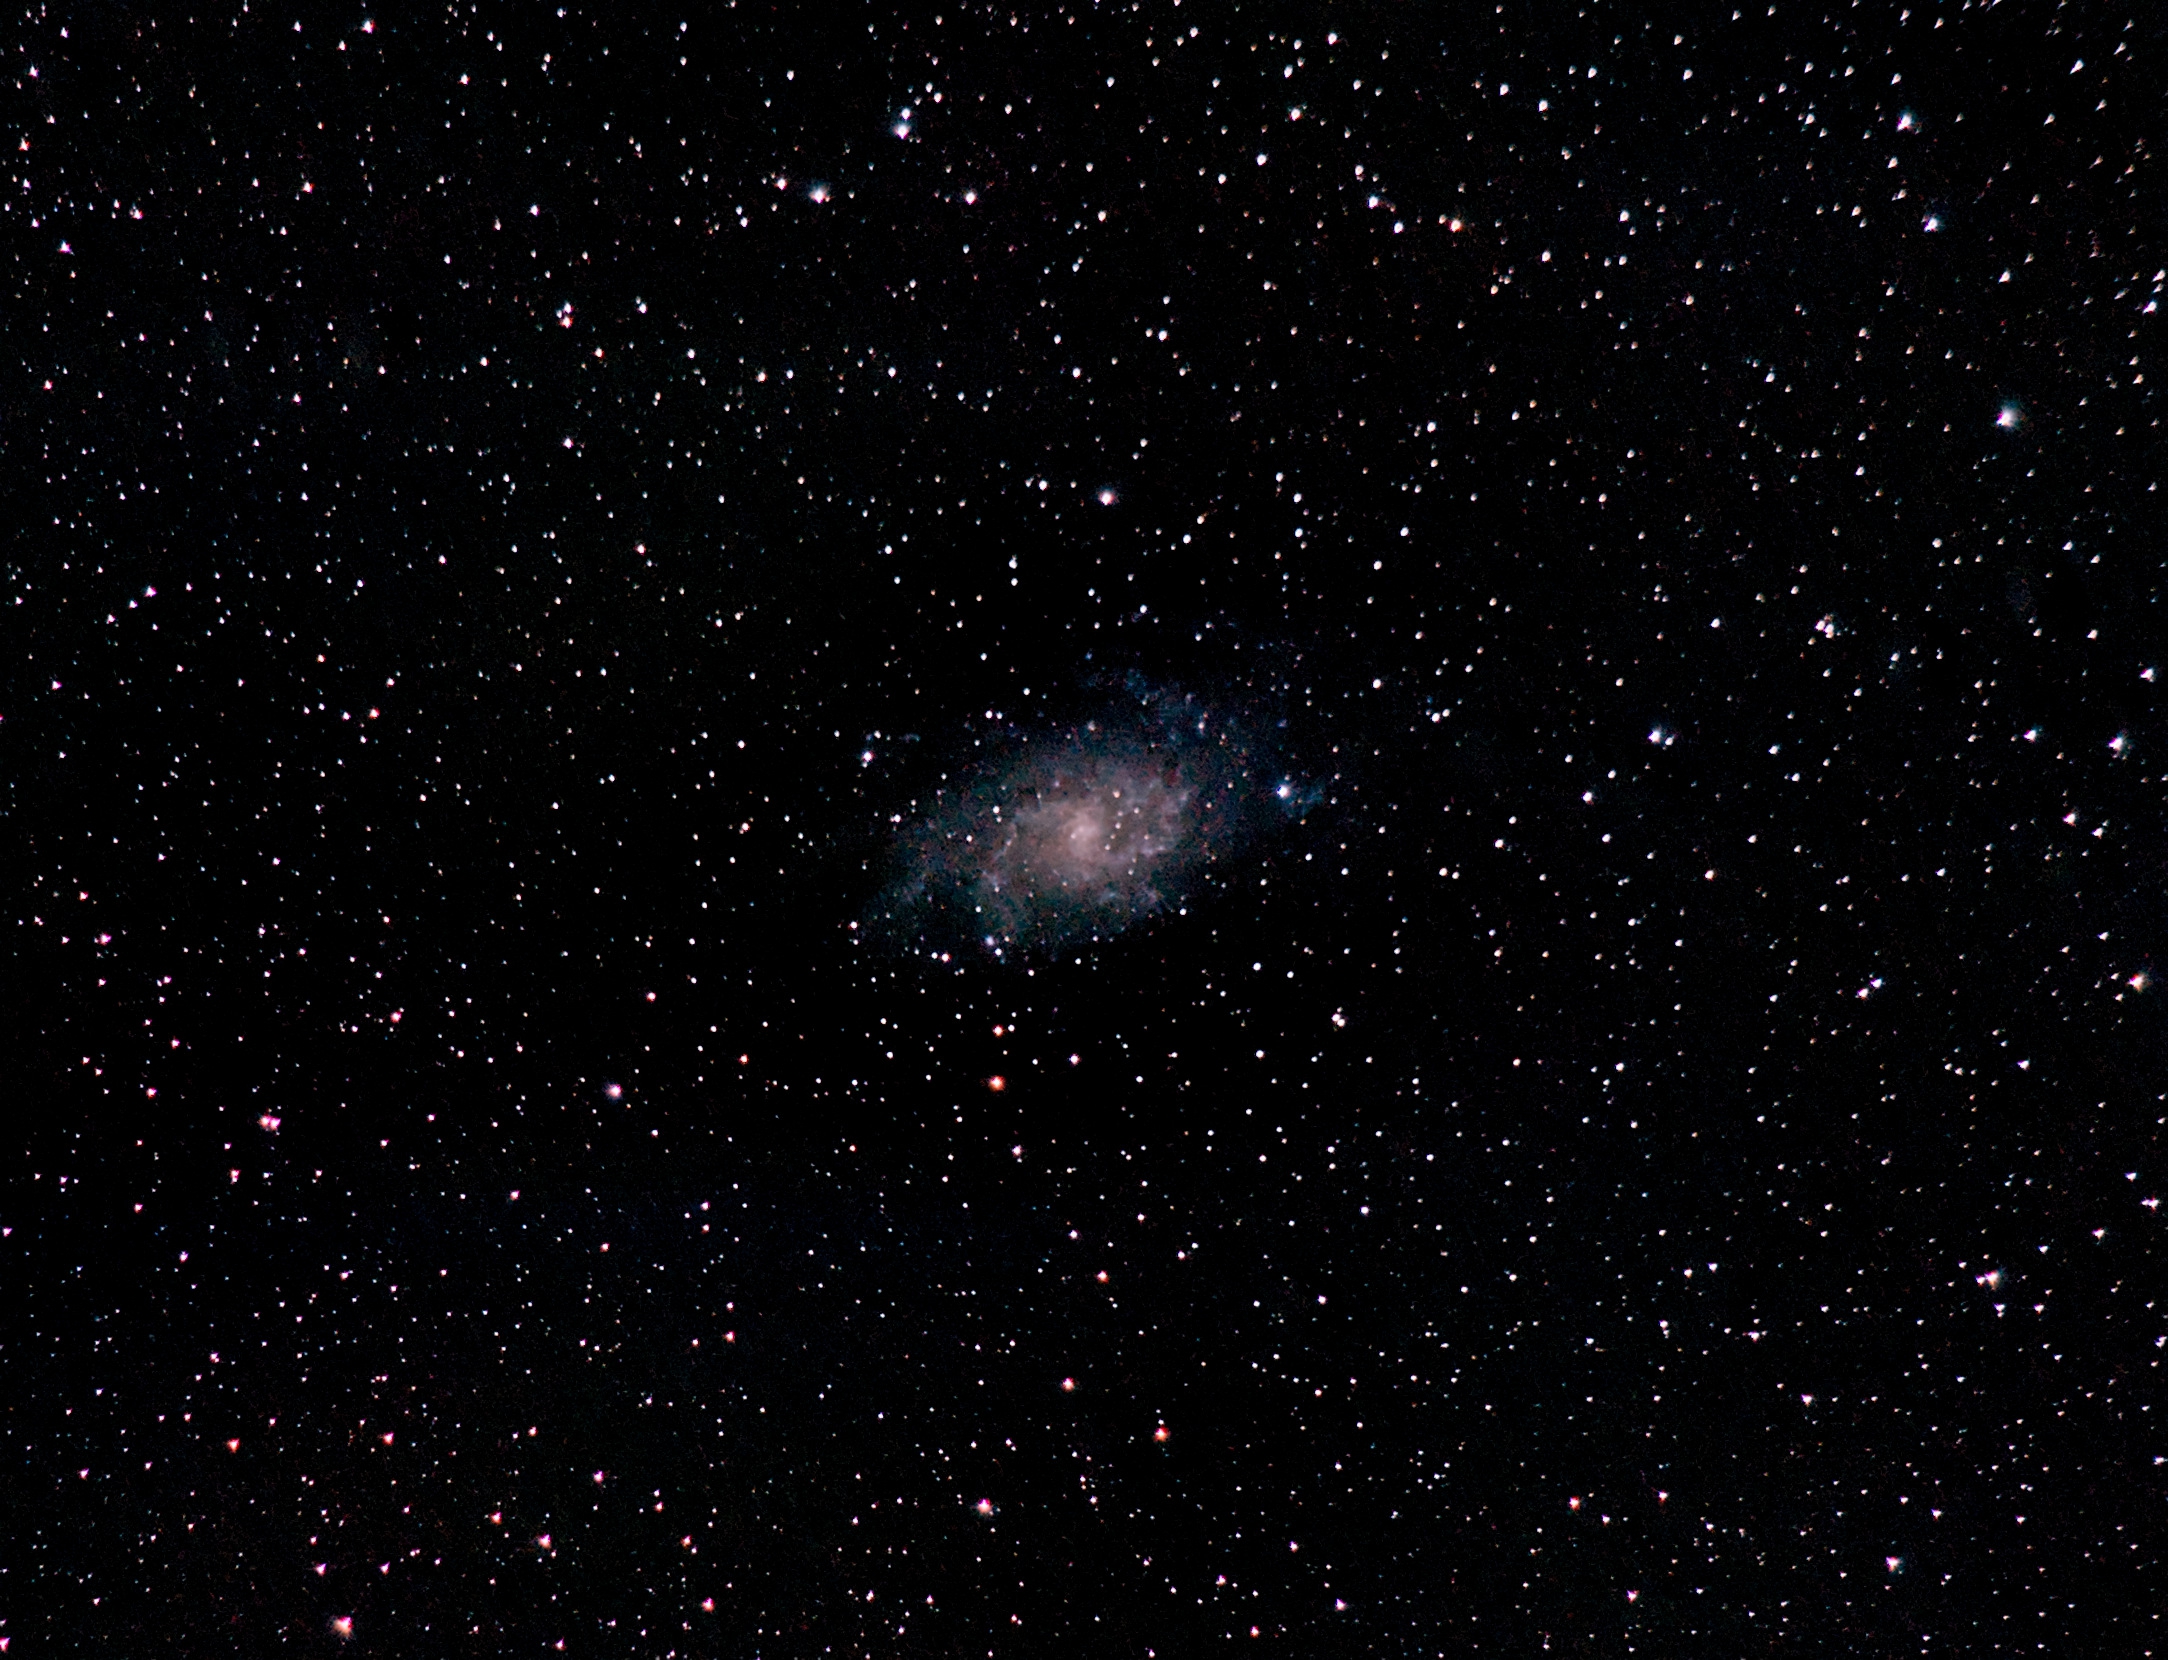
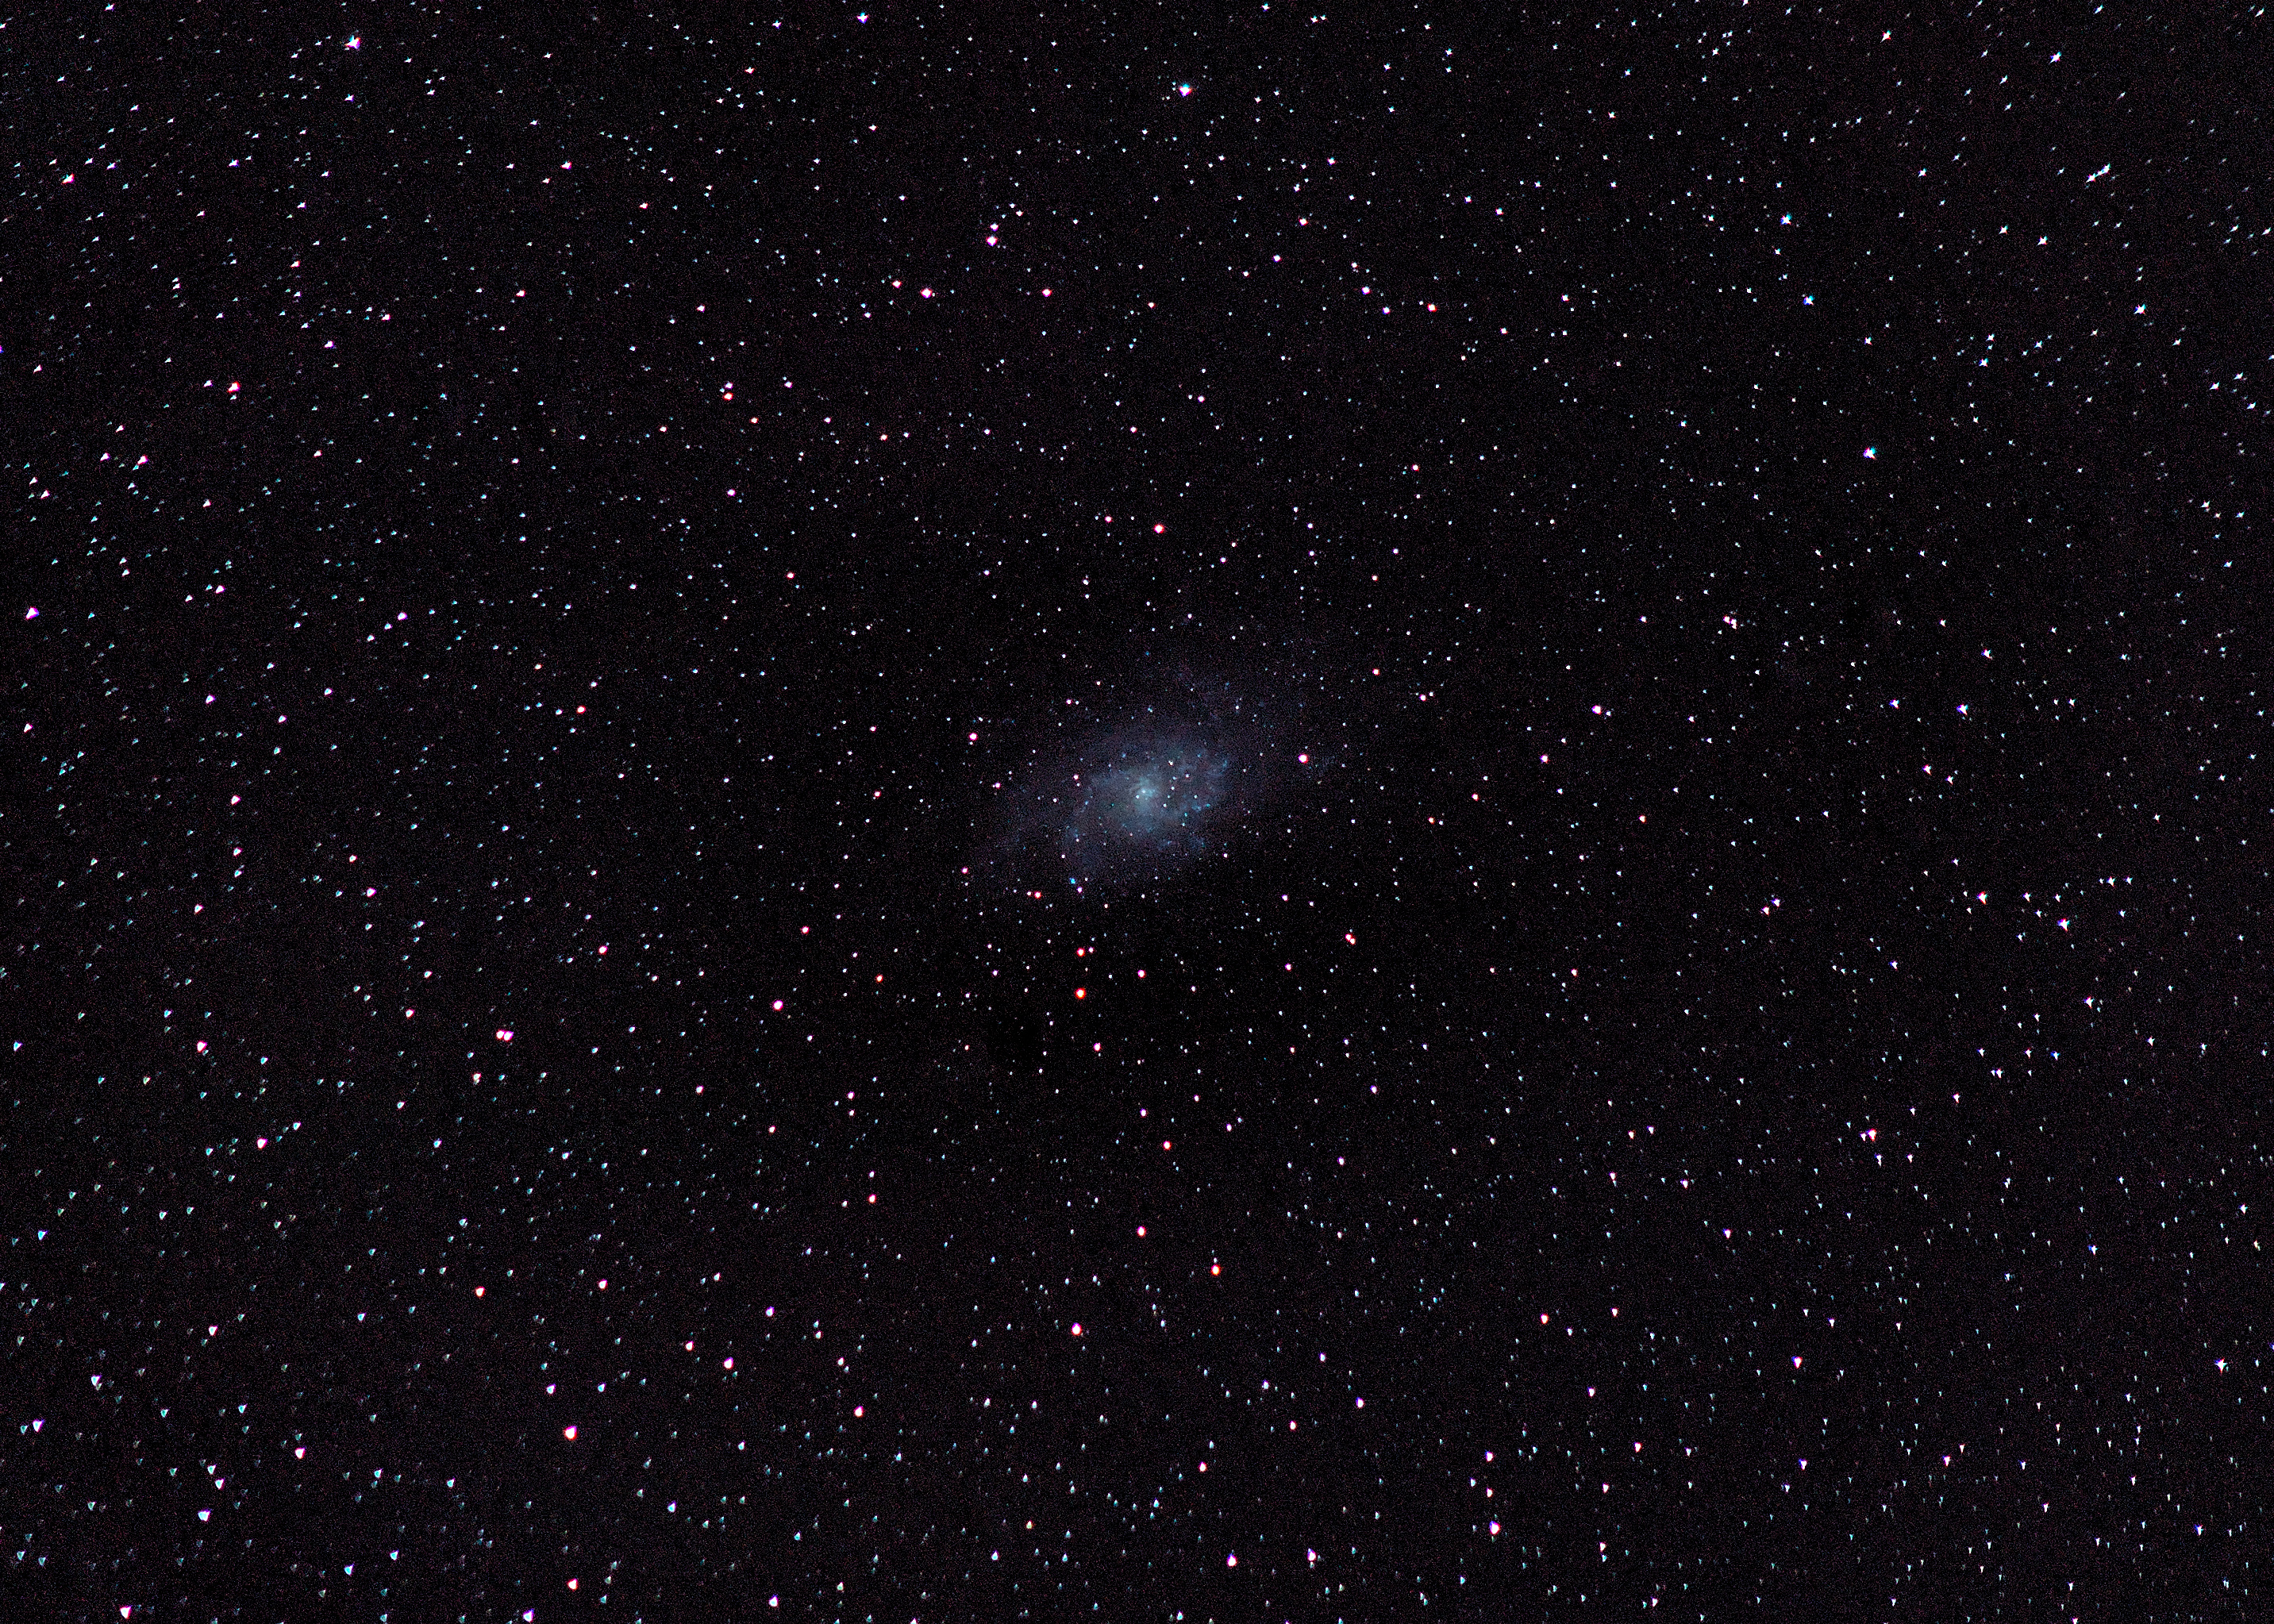
Next I wanted to take a stab at the Orion Nebula, but it hadn’t risen yet, so I took a shorter set of photos of M33. M33 never turns out particularly well for me – it’s fairly dim and so I think I’d need a lot more integration time to overcome all the noise, which is quite evident in what I got:
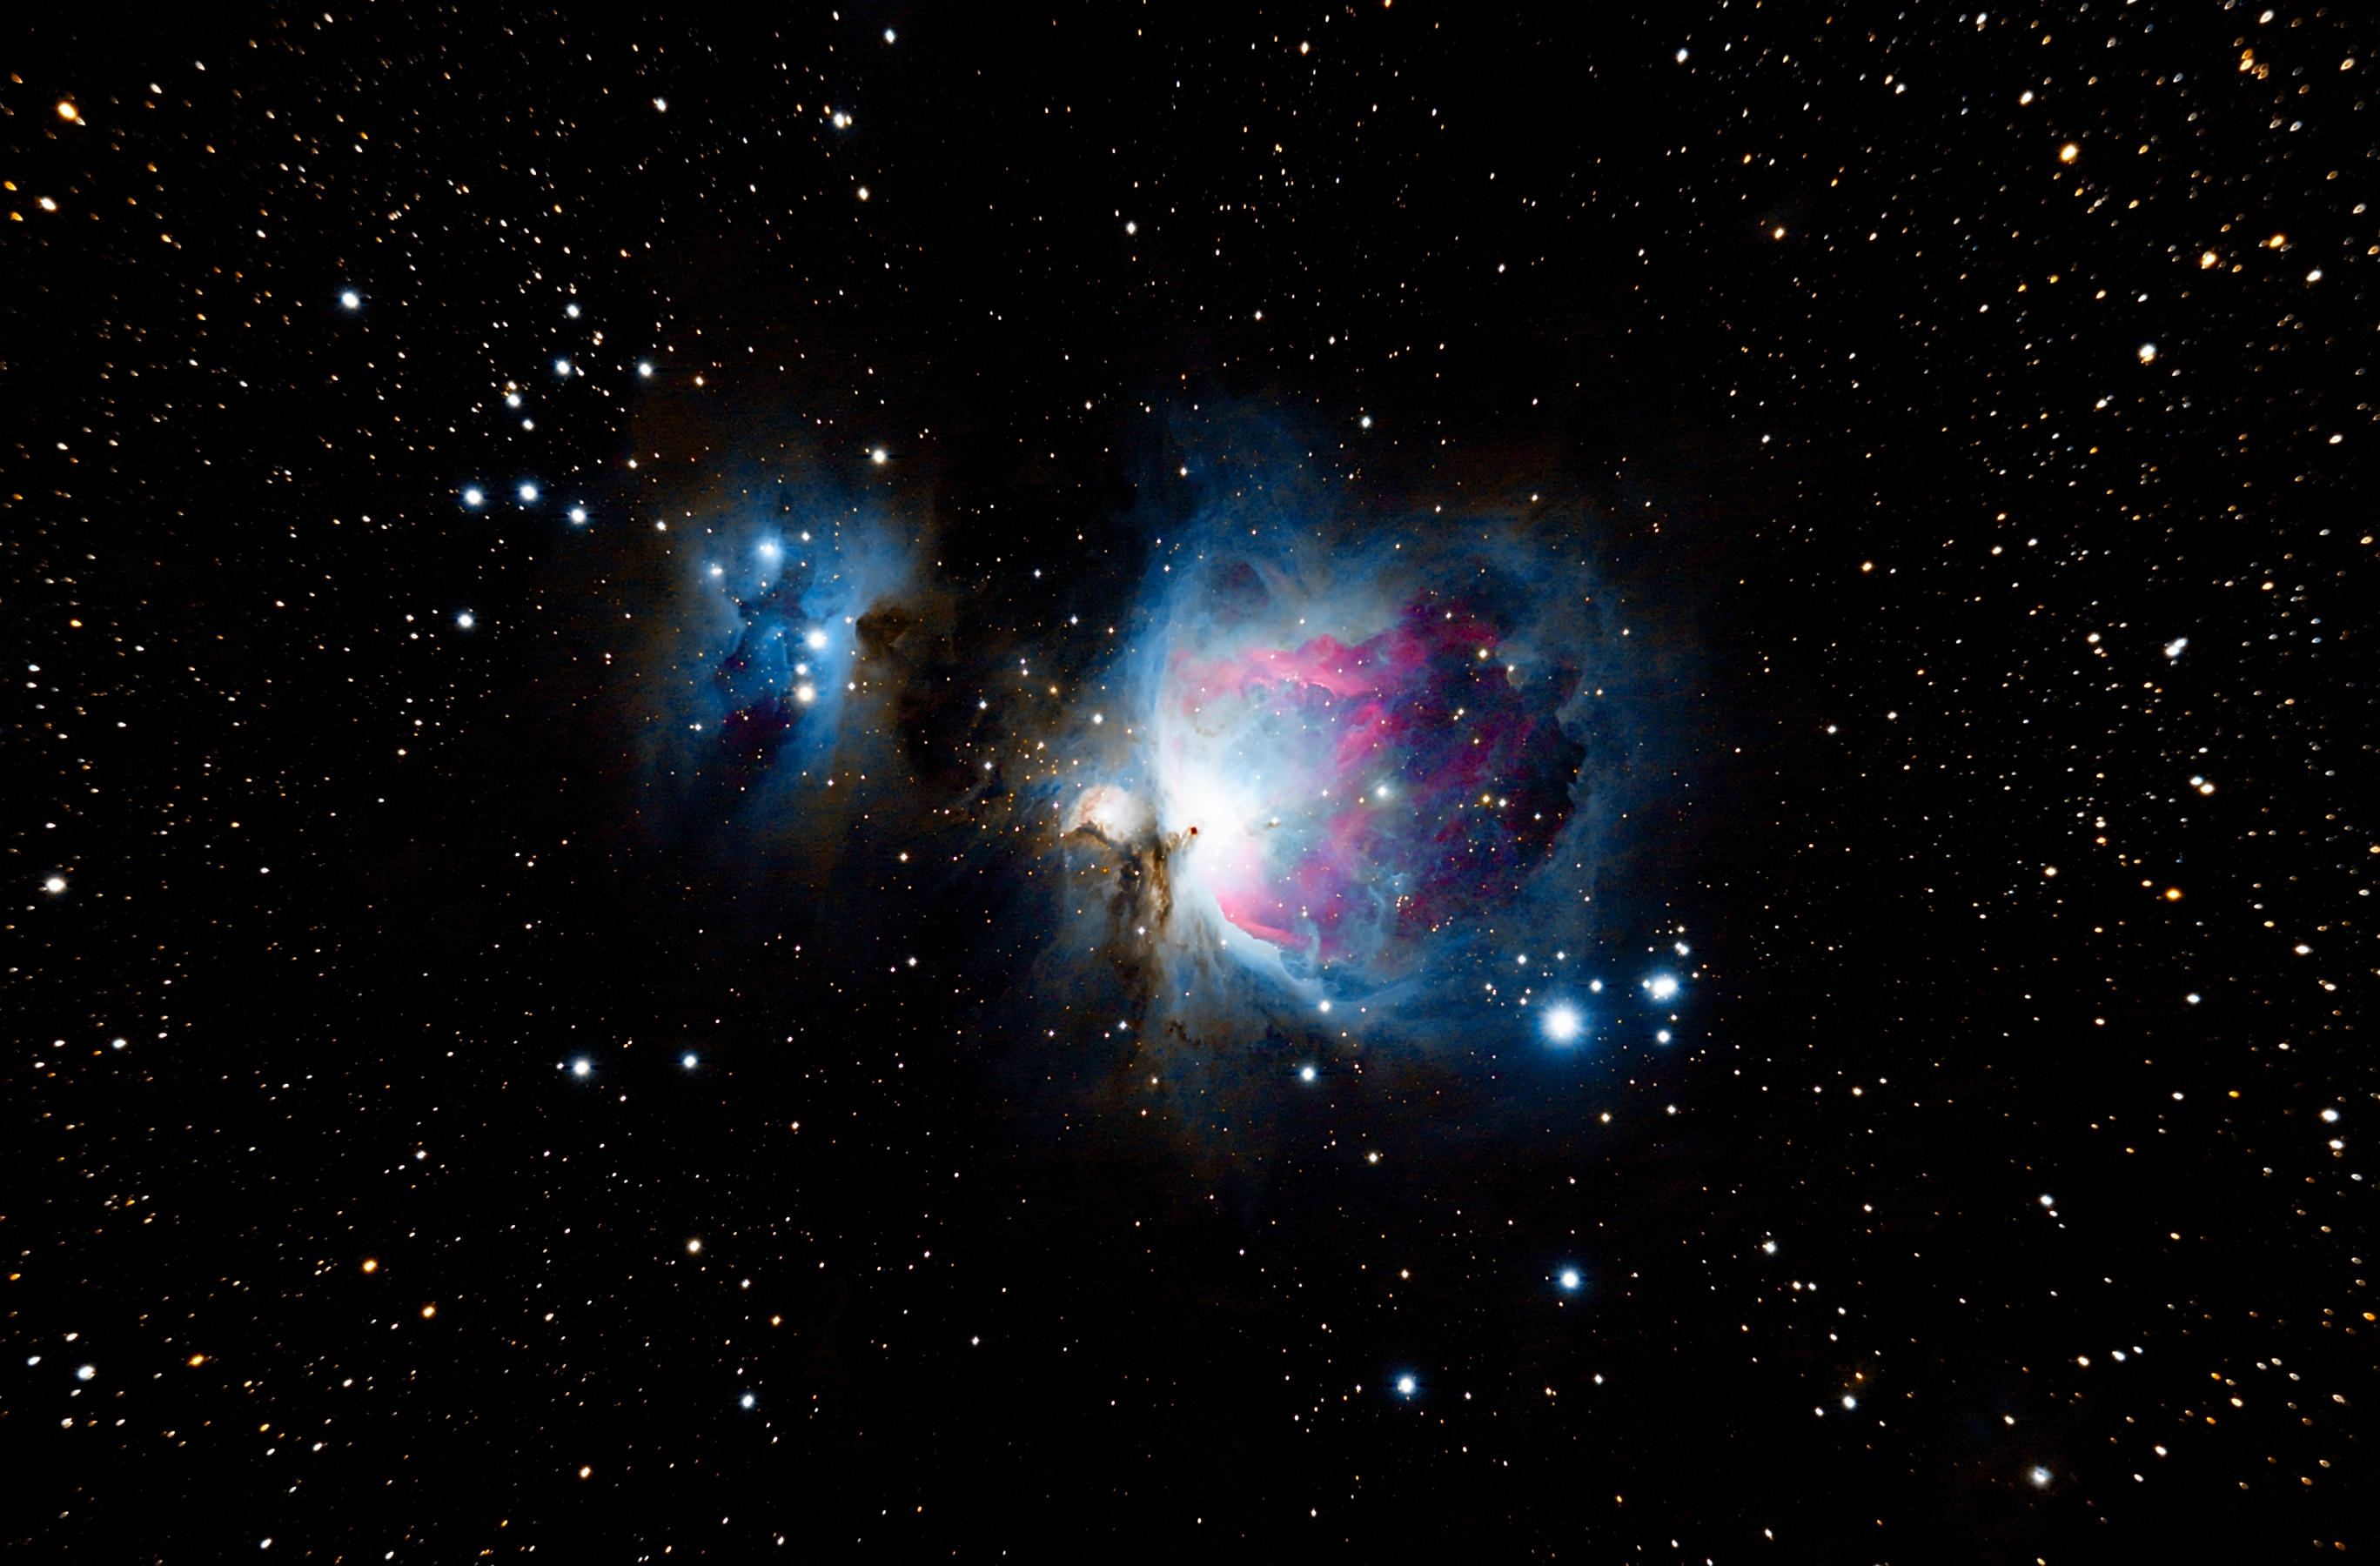
Not terrible, but not great – M33 is so small in the center of the frame with my not-so-long 430mm focal length field of view, it’s hard to combat the noise. I think a much longer set of exposures would help. Once done, the Orion Nebula finally rose, and I was not prepared for how big/bright it is. It’s normally obscured by trees/buildings from my house, so I had never seen it before. It’s huge! Even single shot frames were blowing me away:
The final stacked result was pretty impressive (to me):
So, some pretty good results. What does all this mean for my Noise Problem? I am not sure. I am not even sure I still have a Noise Problem so much as just normal noise and a Signal to Noise problem – i.e. it’s entirely possible I just need more integration time in clearer/darker skies, and to lower my expectations for the noise likely to result from a fullframe mirrorless Sony on a relatively hot night. There was still plenty of noise in the image as clearly seen here in this autostretched preview of the integrated data:
So while I was able to get a pretty cool photo, you can see from the above preview that there was actually a lot more nebulosity/dust-lanes that had to be discarded because I couldn’t quite separate it from the noise.
A few takeaways though:
It seems likely that dithering would help – this is a process by which you literally move the object in your camera’s frame by shifting and rotating it. The result is that the data you are integrating is located in different parts of the image so there’s less of a tendency for noise itself to stack.
More data is better. This should go without saying at this point – while it’s fun to try to do multiple targets, I think next time I will try for a much longer data acquisition process on one target. (Although Orion is tricky because it rises so late).
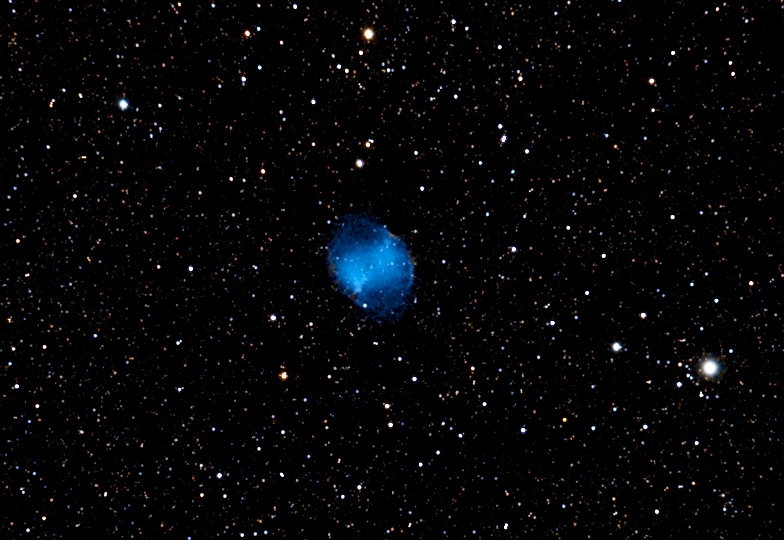
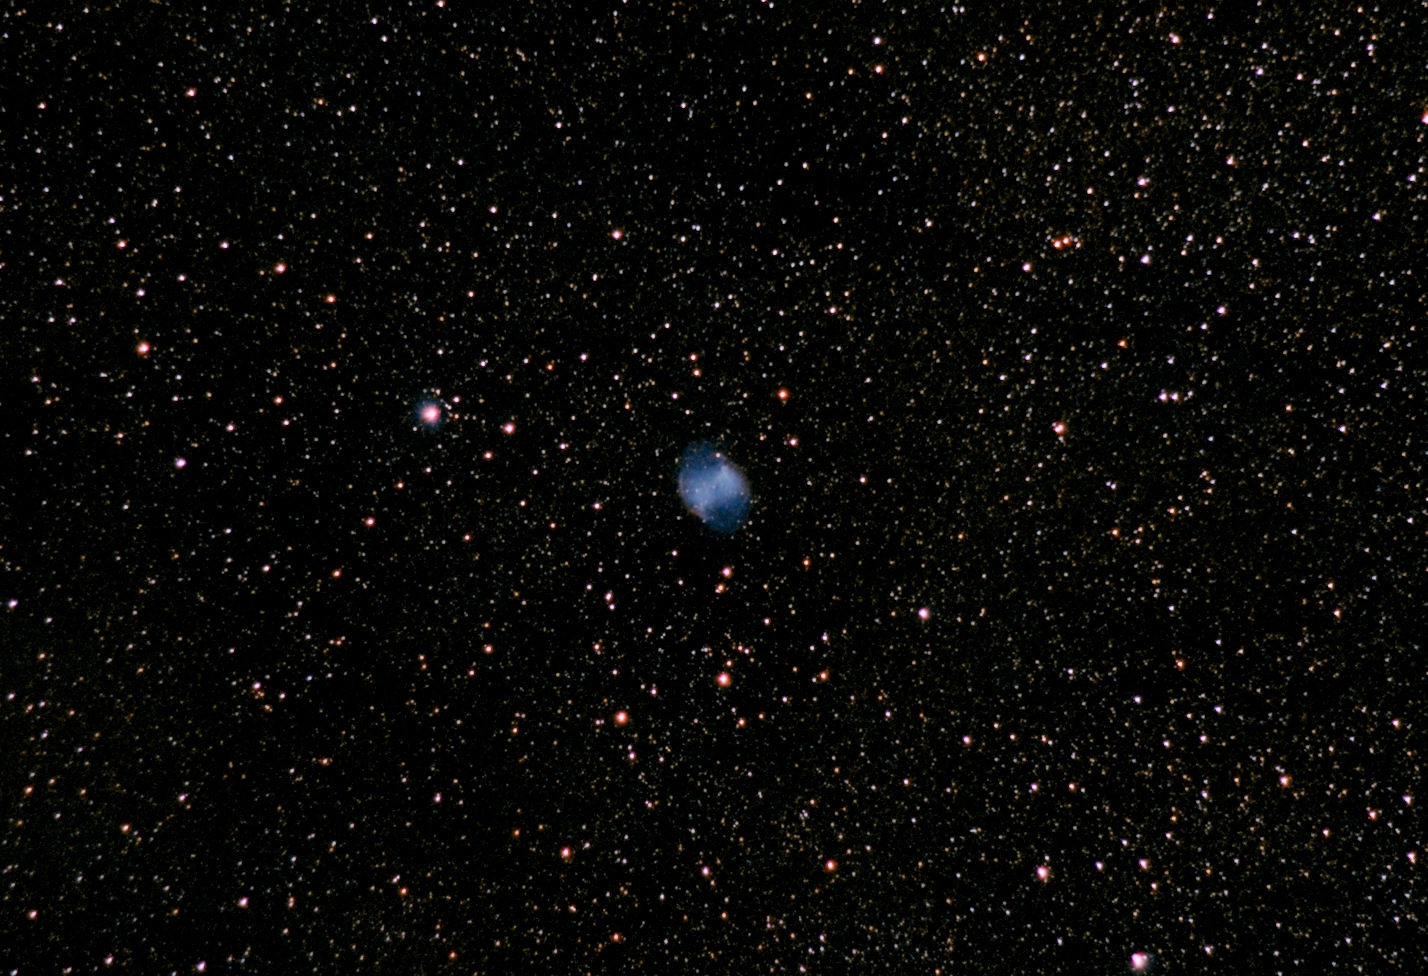
Had some clear skies this last Thursday, so I gave the dumbbell nebula a whirl, hoping taking flats differently would help with my noise issue. tl;dr it didn’t, but the photo still came out okay nonetheless!
So, whatever issue with noise I have is not the result of flats, or at least if it is, my attempt at taking them differently didn’t help.
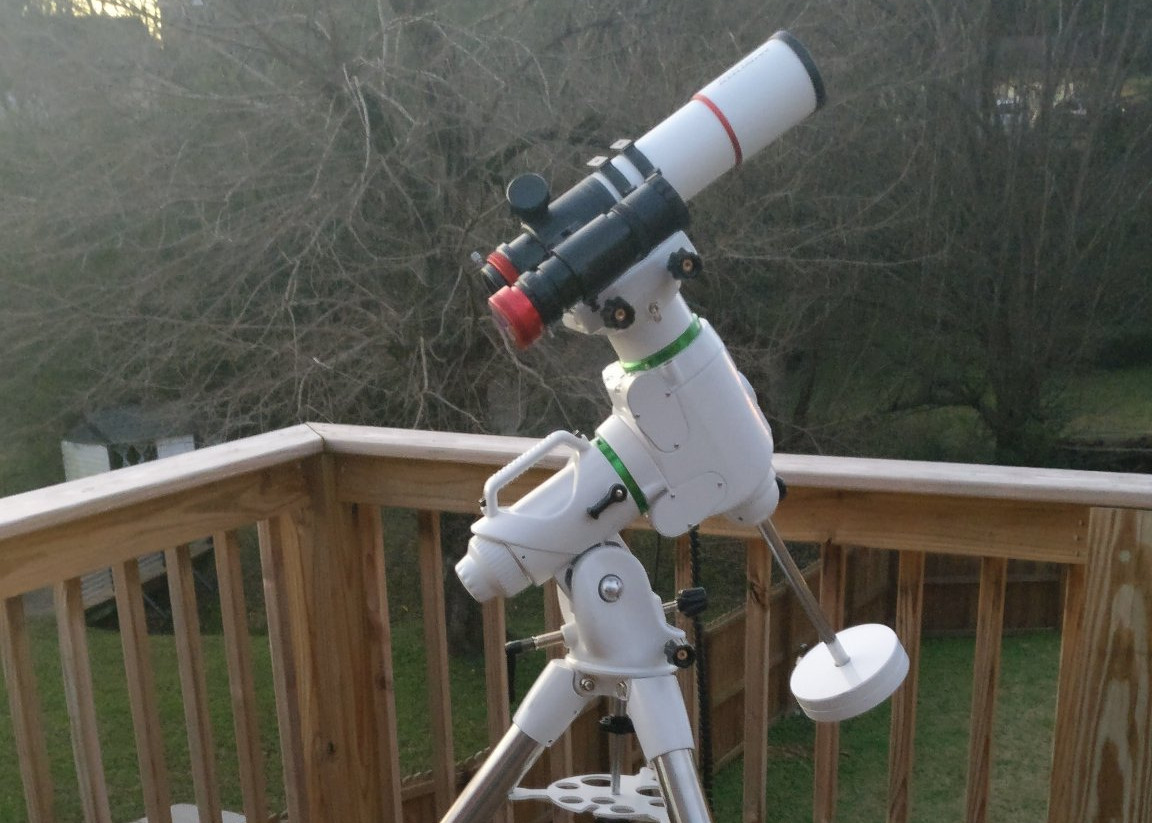
It’s been a while since my last update, so I’ll skip forward a bit and spare you all a lot of testing, successes and failures. First, I got a new telescope! I know, I know. It was a responsible purchase. I long ago came to the conclusion that the AWB Onesky 130 – while an excellent beginner telescope – is basically atrocious for photography (see above for reasons). I had a lot more success simply using my Canon 200mm + TC, despite the awful coma. While I did still spend some time waffling on the eternal reflector vs. refractor debate, I was quickly becoming enamored with the convenience/size of my lens vs. the bulkiness/unwieldiness of the reflector. I had read a lot about the Astro-Tech AT72EDII already, as it has a pretty good reputation as a relatively inexpensive doublet refractor, but they were out of stock on pre-order waiting for the next shipment to arrive. My waffling ended when someone on the /r/astrophotography discord mentioned he had one for sale. Done deal! It’s not terribly different from my lens + TC combo, with the exception that it’s, well, designed for astrophotography. Chief among the improvements are a silky-smooth dual-speed locking focuser and a solid 2” mount with a 1.25” adapter. This means I can mount my camera directly with a 2” adapter and take advantage of its full-frame sensor without vignetting. The downside is that this 430mm refractor probably isn’t as good for planetary stuff as a big aperture newtonian would be, but I feel comfortable with this compromise. Planetary stuff is fun, but I feel like it’s a bit limiting (there are only so many planets to take photos of).
The telescope arrived, and brought with it, of course, a week of rain. Once it cleared this past weekend I spent some time testing it out. Thus I came to the next dilemma: the only skyglow/light pollution filter I had was 1.25”. I’ve long been conflicted on the actual value of light pollution filters. Are they really necessary? Are the compromises worth it? Do I really want to put a $100 tiny piece of glass in front of my fancypants new telescope – effectively dropping the quality of light reaching my sensor to it as the lowest common denominator? Well, no way to know unless I tested. So, Friday night I gave it a whirl with the 1.25” adapter and the skyglow filter. Andromeda, as always, is my preferred target because it’s big, forgiving, and high in the sky – perfect for testing the relative merits of these difference approaches.
So, it kinda looked like shit. I had a lot of detail lost and no color evident. This wasn’t entirely a fair test because it was also extremely gross outside (90% humidity with dewpoint hovering right around ambient temperature), and so I didn’t do a super long set of photos. Nonetheless, it seemed somewhat evident to me that the filter was working against me in this case. Also evident is a lot of coma, which was expected – this is largely fixable with a field flattener, which I’ve already ordered, so hopefully that will be solved soon.
Saturday night I gave it another whirl with better conditions. I opted to test with the LP filter again, since it didn’t get a fair shake on Friday due to bad conditions. This time I also tried a larger number of longer exposures – somewhat bold, since it’d mean I’d be burned for the night if I screwed something up. The results were very encouraging though! Turns out more data is better, who knew:
I was amazed I got any nebulosity, but here is where I started to run into a roadblock. After doing the normal background extraction, I was seeing a lot of leftover noise. Noise that I couldn’t explain as being from light pollution – it was weird, ugly red splotches of noise. Thus, the results I got of the nebula were compromised by having to clip a lot of signal to get rid of the noise. I am not certain what the cause is yet, but the pattern seemed to have a circular-ish pattern, leading me to think there was some problem with my flats:
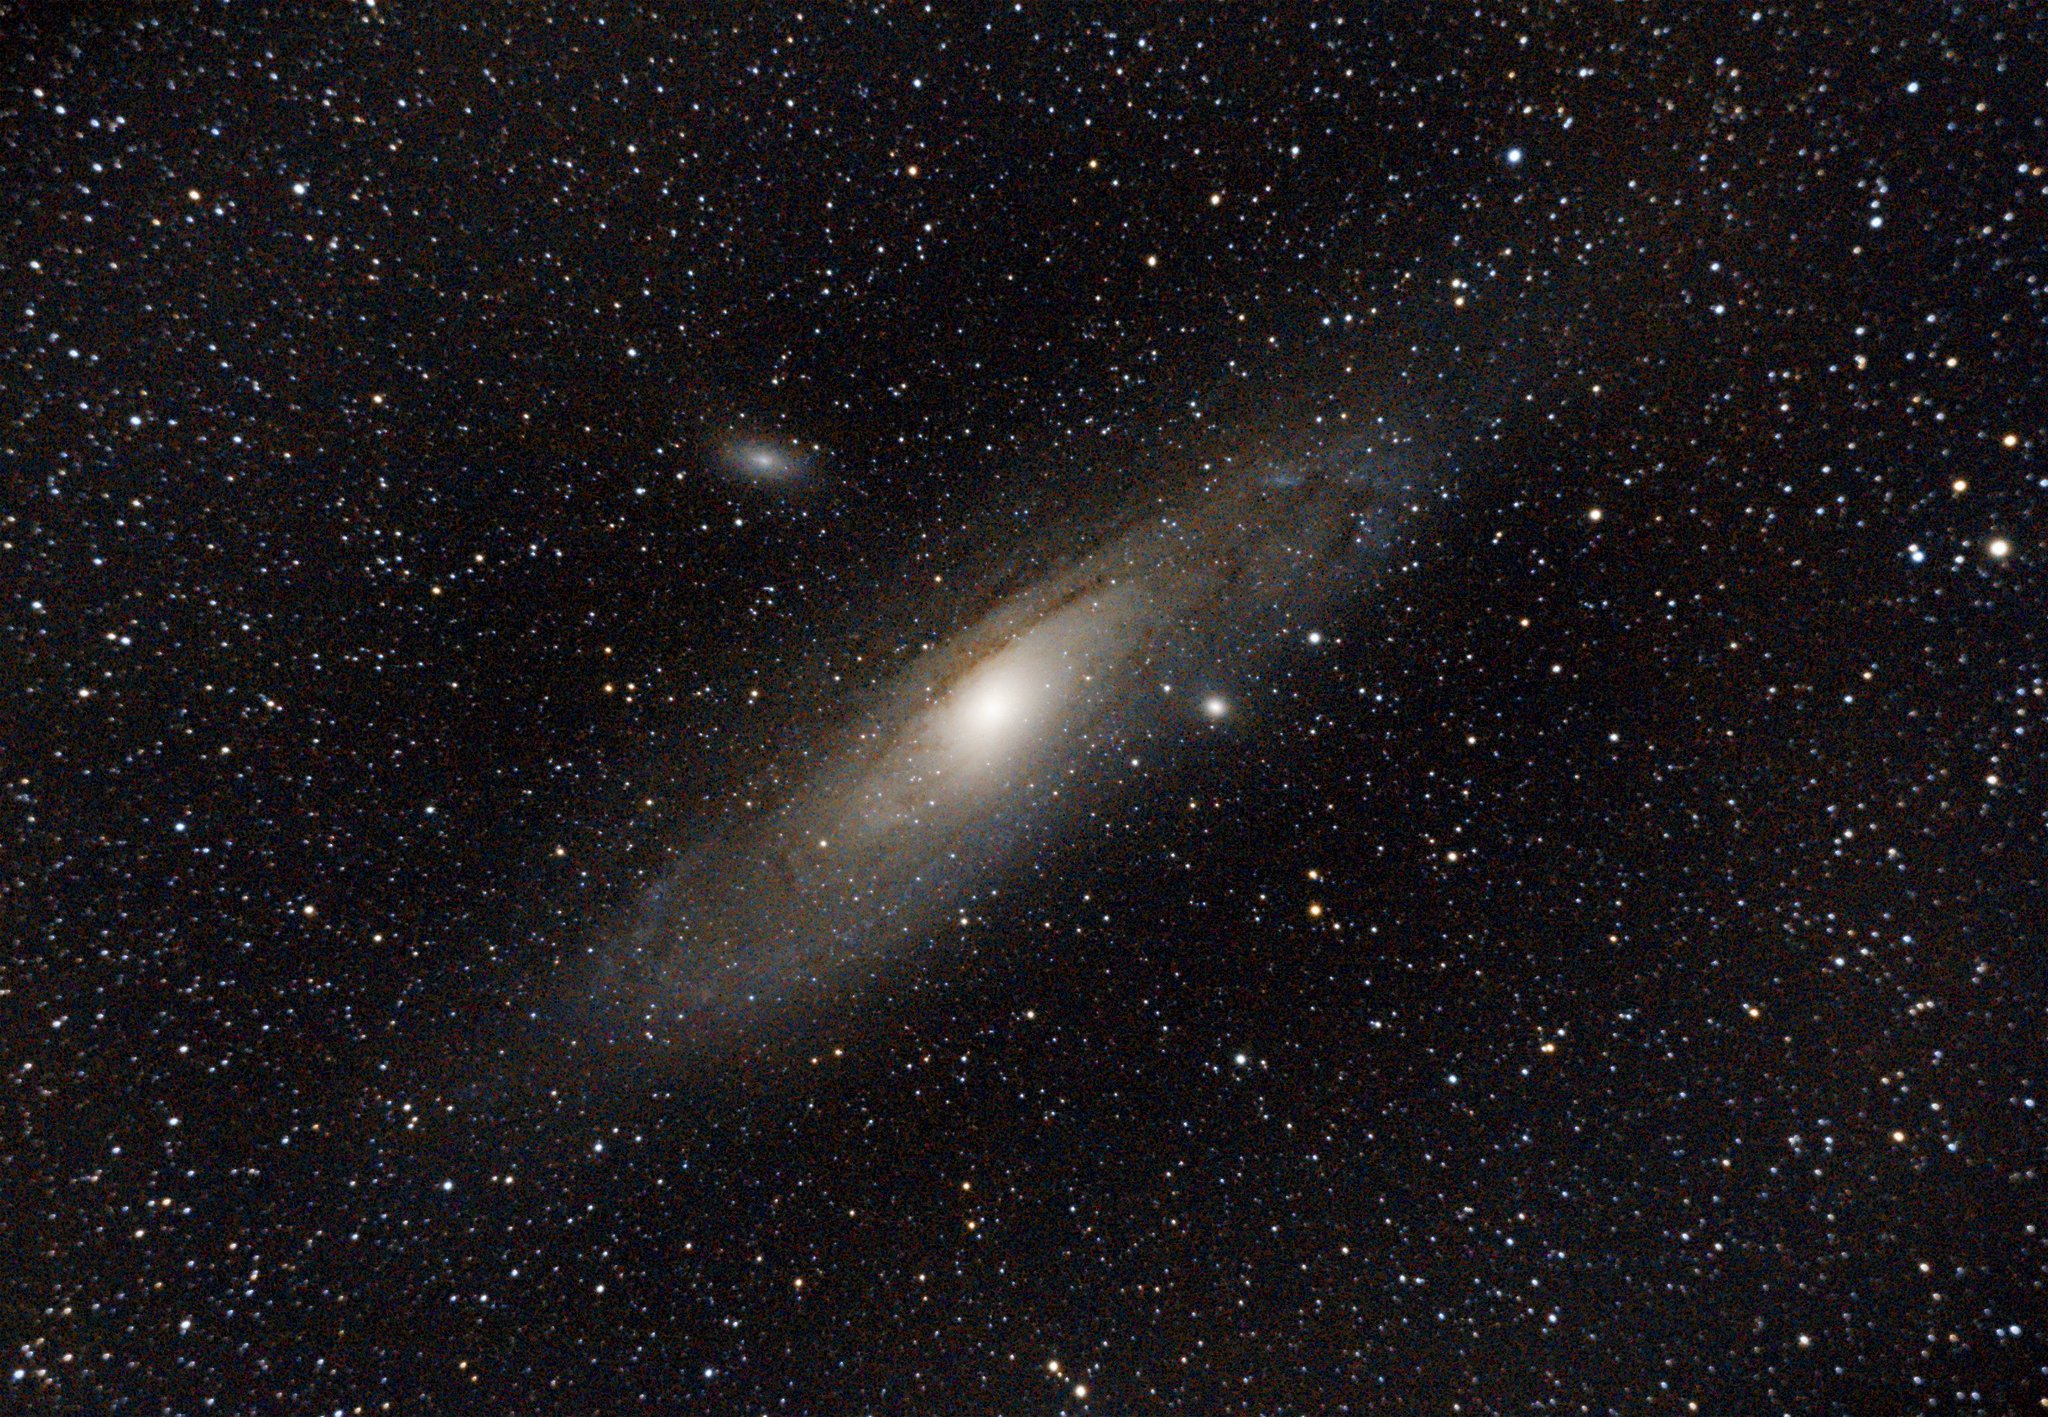
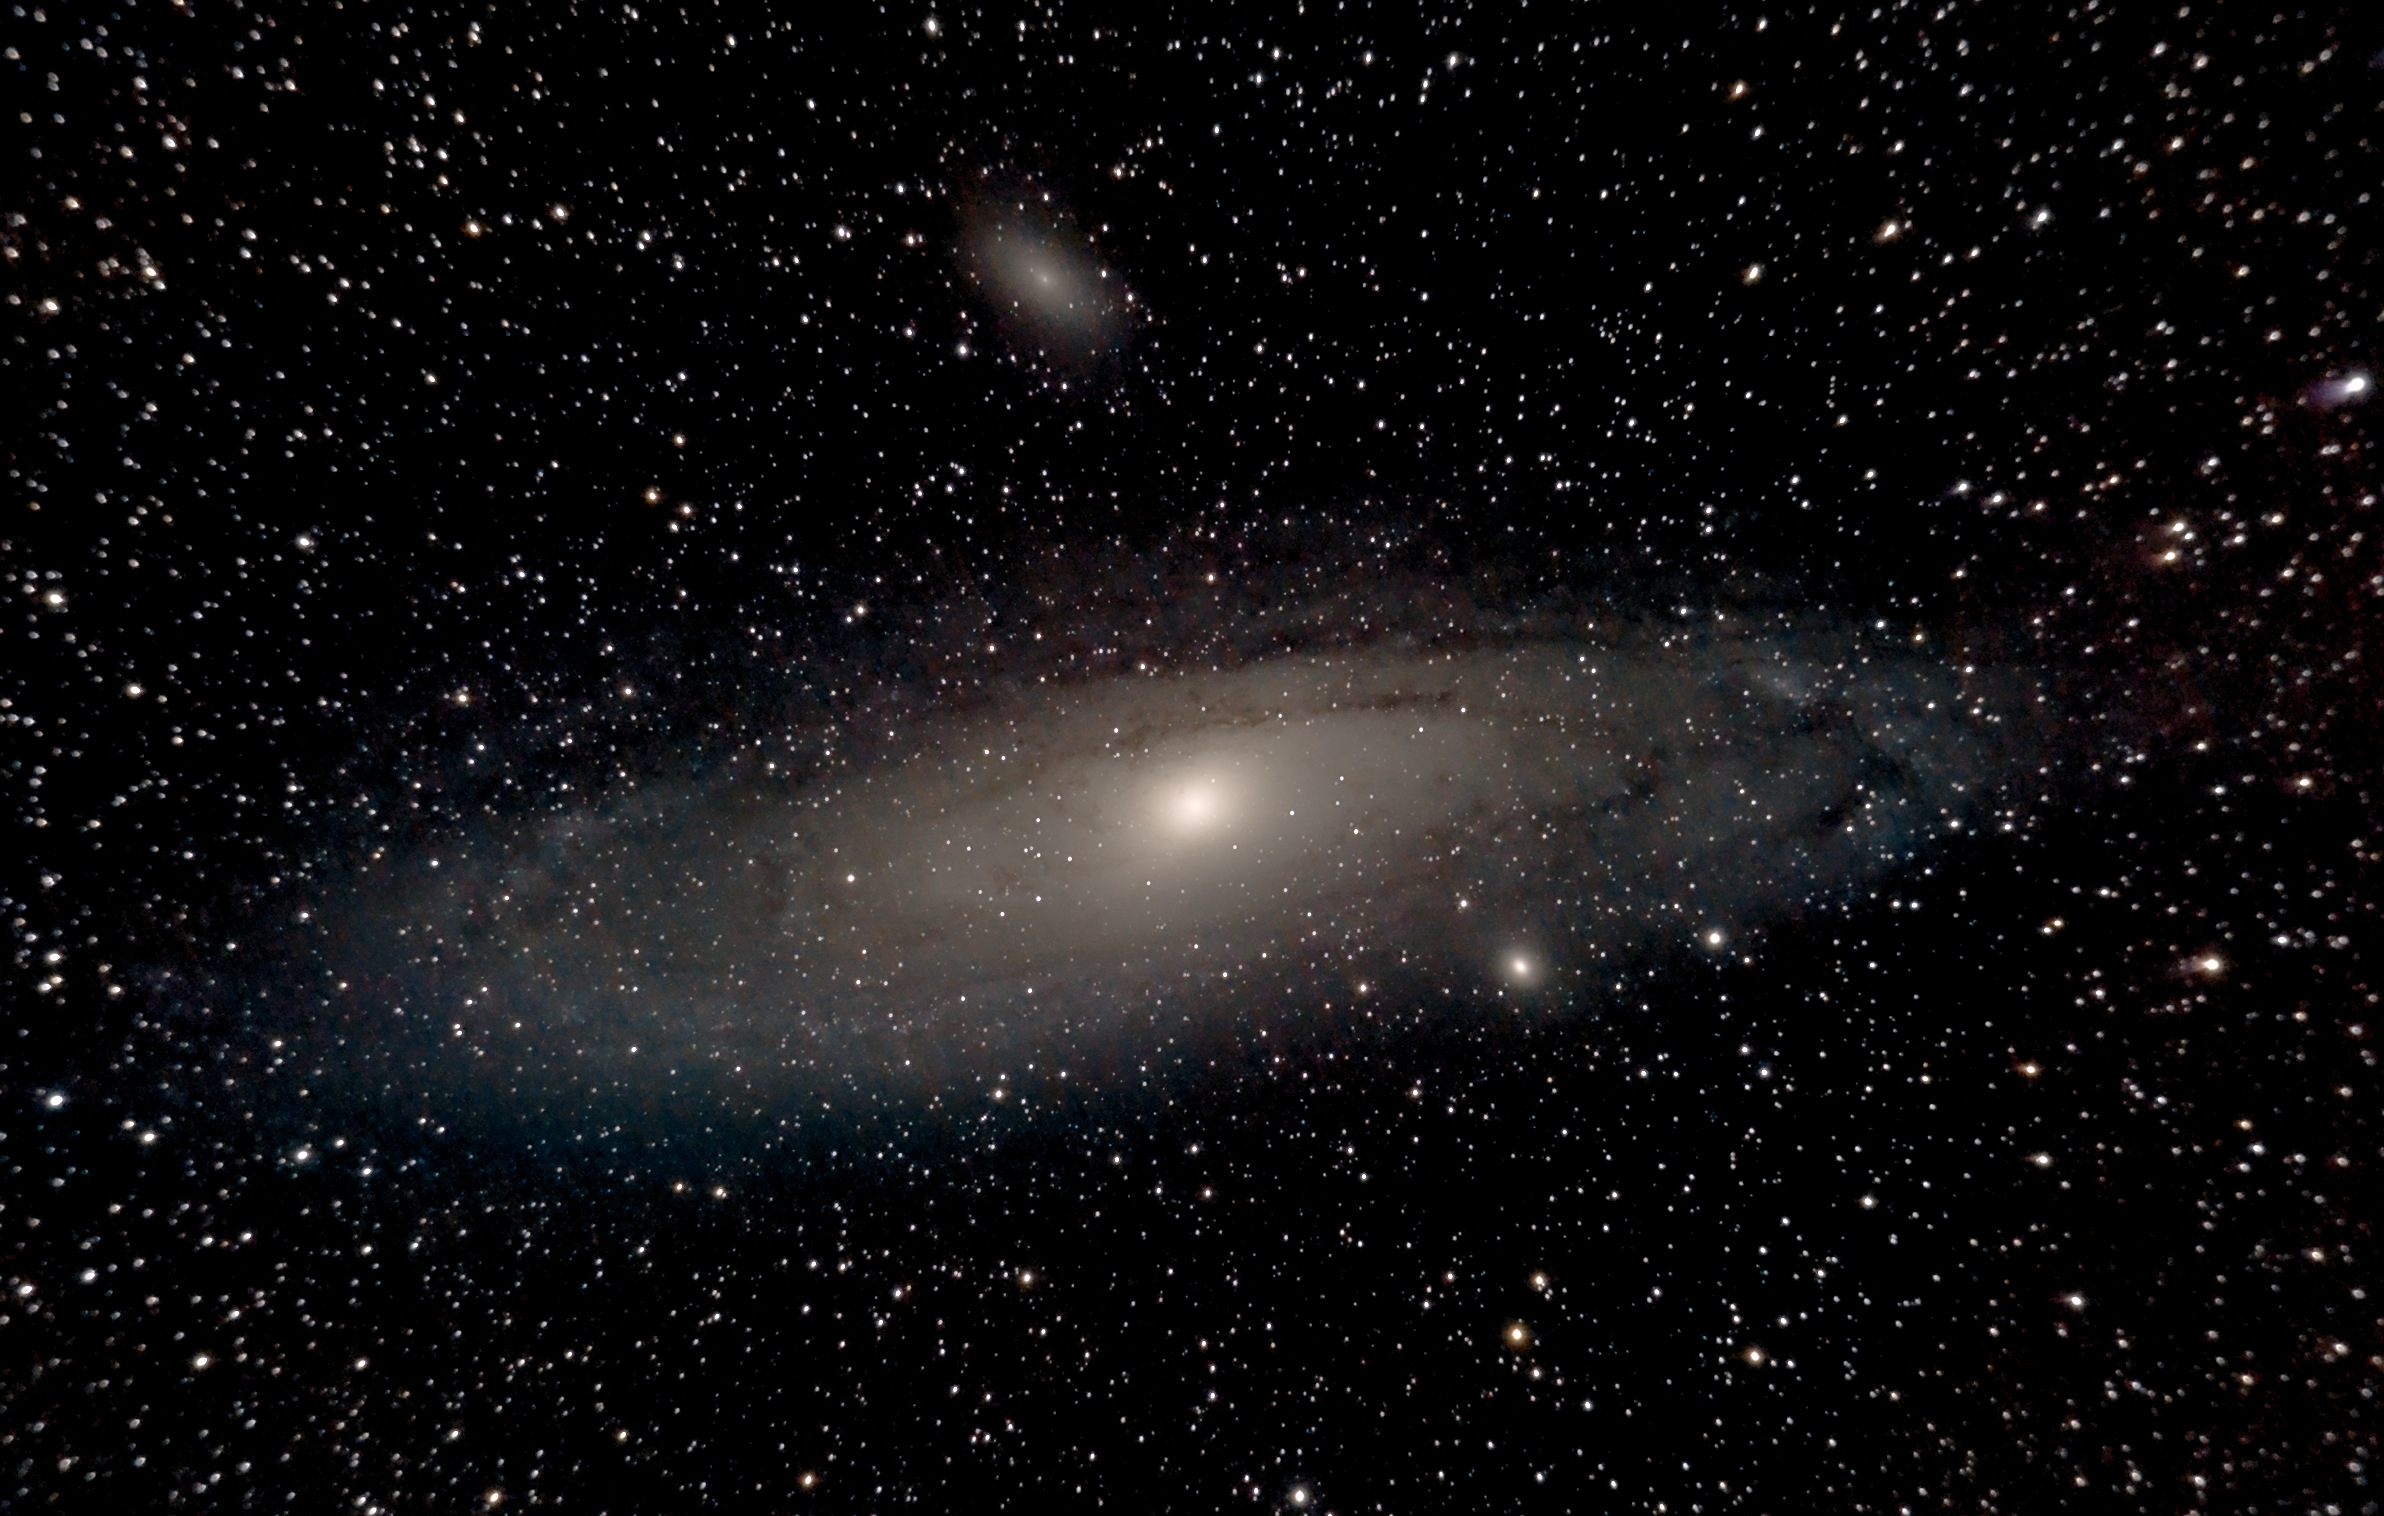
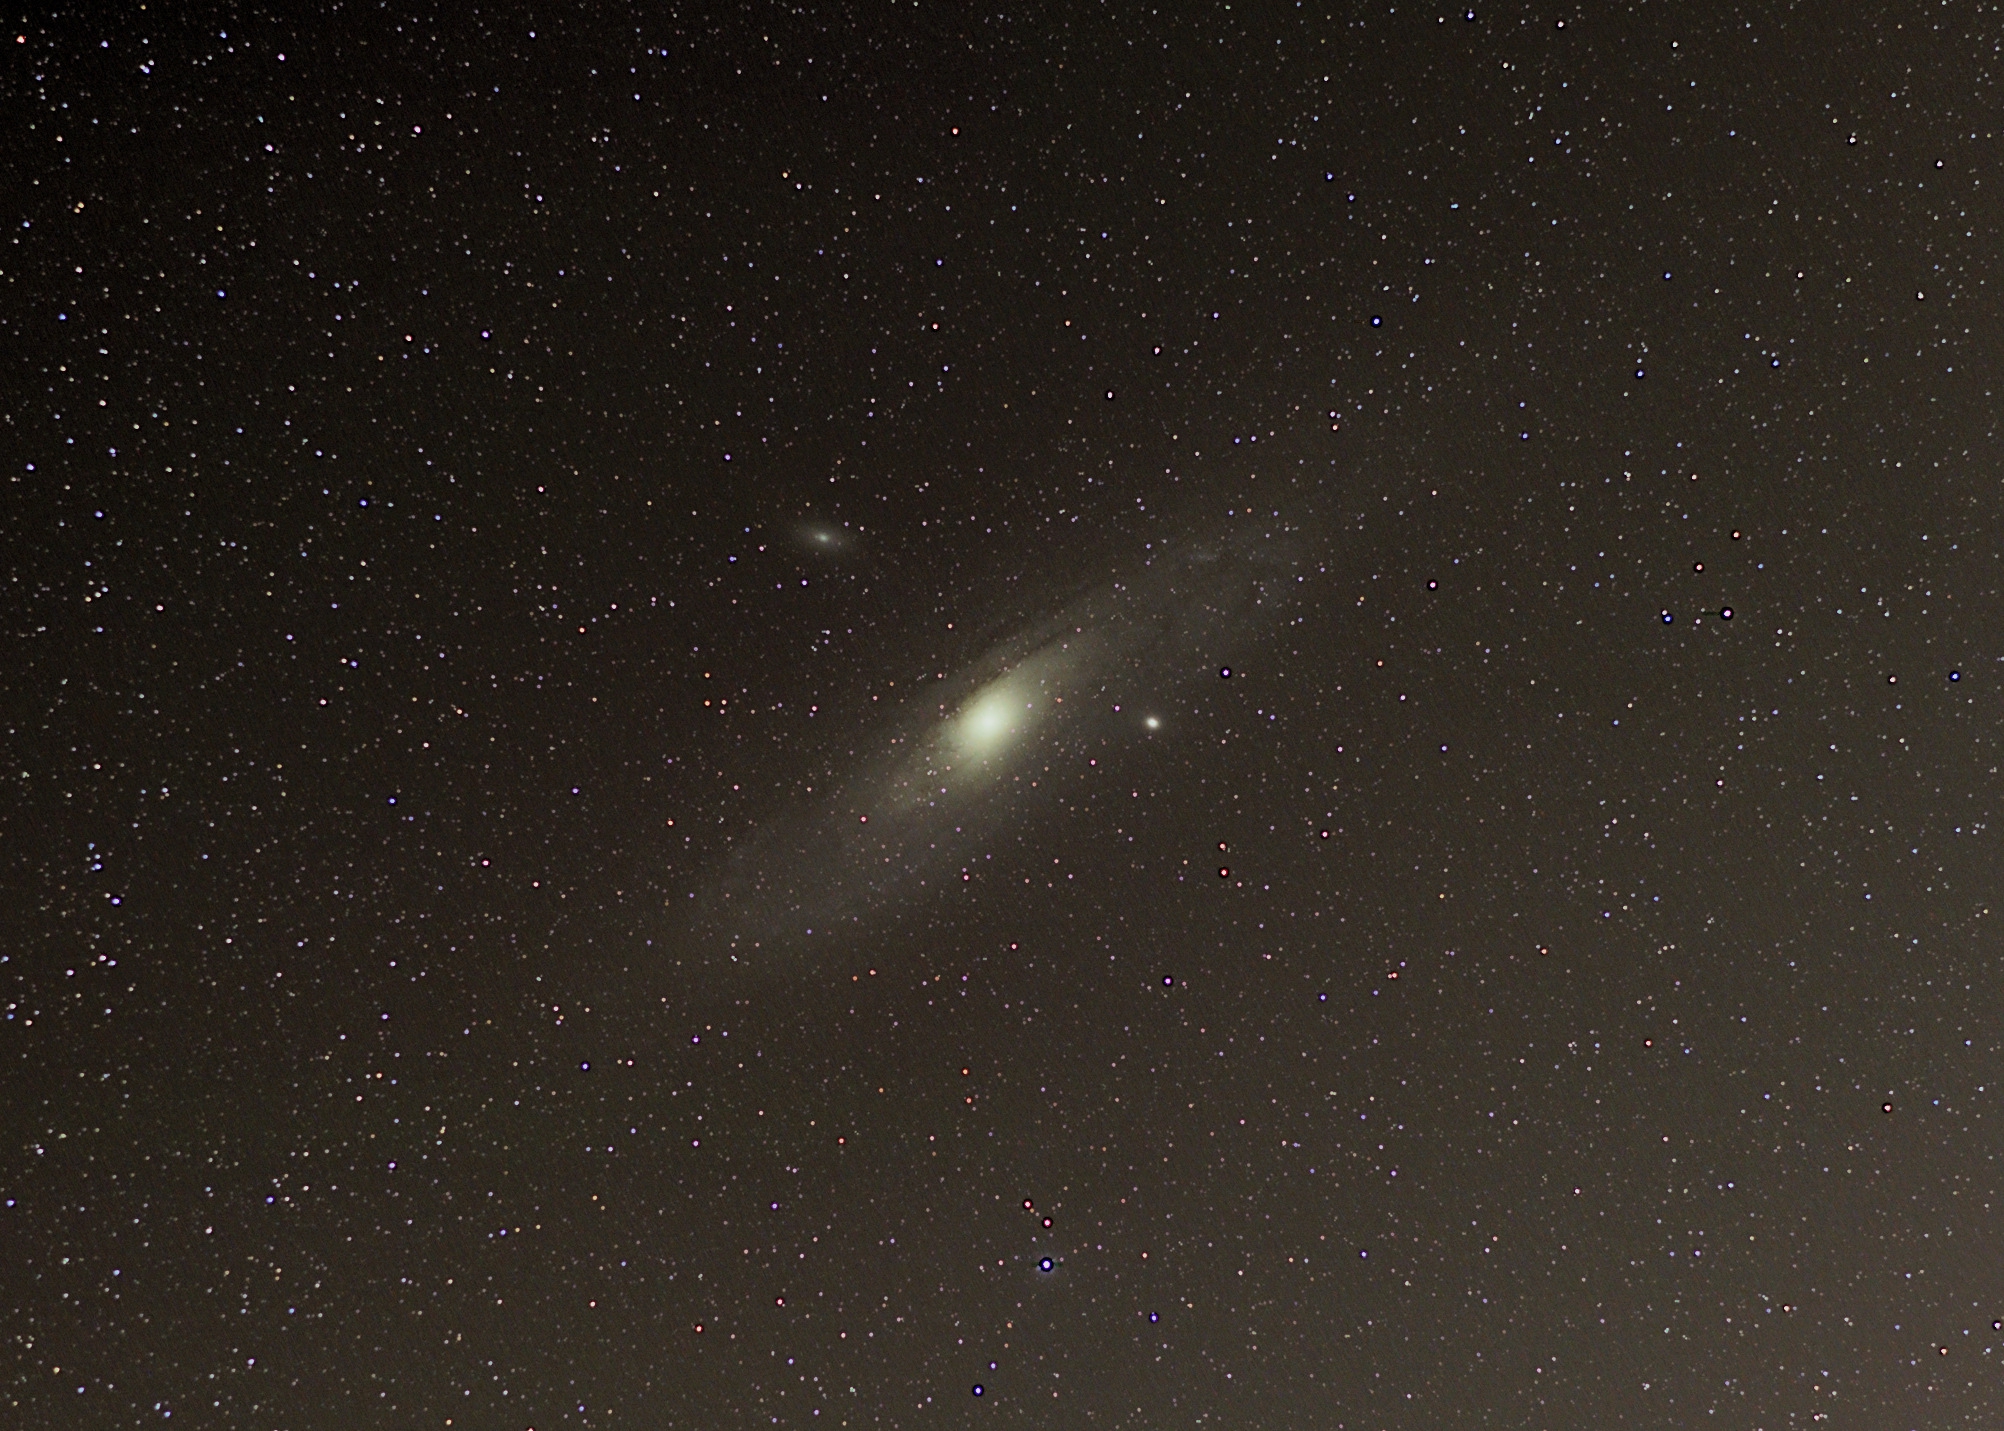
Sunday night looked to be my last chance for clear skies, so I gave Andromeda another shot. This time I opted to finally try the 2” adapter sans filter. I had good luck with a much bigger data set, so this go round I went big for 120 exposures at 60”, which would about push the limit of my battery life. It came out pretty great, despite still fighting a lot of noise (more still on that below). I even managed to get some color from this, though I think that had as much to do with post processing as it did with data acquisition:
This is easily my best result so far, and so I’m proud of it, but this is where things started to go off the rails a bit. I had some time left, so I decided to try M33 (Triangulum) again. I did roughly the same process (100 lights at 60”, 20 darks, 20 flat, 20 offset). However, during post-processing I encountered the same noise problem – and because M33 is so much smaller on my sensor, it made getting anything usable out of the data almost impossible. No amount of background extraction or noise reduction could get rid of it:
There was probably something miserably salvageable from this data, but I ended up giving up. I even sent the source data to someone in the /r/astrophotography discord, who generously offered to take a stab at it and even he gave up. You can watch it here if you’re particularly masochistic.
I am a bit frustrated because this is a problem I don’t know how to solve. The aforementioned person indicated he thought my flats were bad over and over and I am inclined to trust him, though I’m not sure how/where I’m going wrong. My current process is:
Lights: (pretty obvious, point at stars, do exposures)
Darks: put the cap on the telescope dew shield, repeat exposures (I’ve been doing 20, maybe not enough, but I don’t think it explains this)
Offsets: set camera to lowest possible shutter speed (1/8000s in the case of my camera), do 20 exposures
Flats: I rigged up a cheap LED tracing pad inside its box with a hole cut out for the dewshield of my telescope so I could just place it on top of the dewshield to provide a flat white surface to take photos of. Set camera to Aperture priority mode, leave everything else the same, take 20 exposures.
Current theories:
putting the LED thing so close to the lens element means I have to dim it to its lowest so I can get at least somewhat longer exposed flats (usually around .125/.10s). the low LED setting is maybe causing subtle flickering resulting in variance in the flats (I can’t see any, but it’s still possible)
putting the LED thing so close to the lens element means I’m getting weird reflections inside the barrel from incidental light
some mystery setting or factor in my Sony camera’s compress raw data means the pixel math being done with the flats, darks and/or offsets is resulting in this weirdness (???)
… something else
I think my next strategy is going to be taking the flats by simply setting up the tracing pad a few feet from the scope and pointing it at it, rather than just plopping it on top, operating on the theory that one of or both of the first two theories is affecting things. Fingers crossed for next time!
Friday night – you know what that means: astrophotography, wooooo party. I took delivery today of a 72mm light pollution filter I bought on a whim for my Canon 200mm/2.8. There wasn’t much research that went into this purchase: it was simply the only filter I could find that’d fit my lens. It claims it filters out 570-610 nm so I decided to give it a whirl. First, though, I setup my telescope and attempted to get prime focus (without the use of a barlow). I succeeded but gave up pretty quickly on any attempts at photography for the simple reason that there are two or three mega-bright sodium vapor lamps blaring into my yard, and while the OneSky 130 is good at a lot of things, blocking incidental light is not one of them. Since it’s collapsible, half of the telescope is exposed (just 2 tubes), which is not a problem in dark skies, but in the city, it’s a massive opening for light/glare. I used it to align the mount (which I’ve gotten down to a relatively quick process now, fortunately), and took it off and just rolled with my camera.
First target was the Dumbbell Nebula (M27) simply because it was high in the sky. It came out pretty well! This is my first attempt actually picking up any nebulosity from anything with color, so that feels pretty good.
Subject: Dumbbell Nebula (M27)
Camera: Sony A7S II
Lens: Canon 200mm/2.8 II w/ Tamron 2X teleconverter
Next I tried Andromeda again because why not. I still struggle with processing Andromeda – DBE seems to work splendidly on other more remote targets, but Andromeda’s size means I was constantly struggling between eliminating the background noise and losing detail in the galaxy itself. I am hoping this will be a non-issue when I try again from darker skies. Additionally, I might have better luck if I waited till it was higher in the sky. Nonetheless this is still the best results I’ve gotten of Andromeda – and not bad considering I’m shooting from the middle of a white-zone urban area.
Subject: Andromeda (M31)
Camera: Sony A7S II
Lens: Canon 200mm/2.8 II w/ Tamron 2X teleconverter
By this point I was getting tired and running out of ideas, so I just pointed at M33 again, to see if the light pollution filter yielded better results than the previous attempt. It came out okay – slightly better than my first attempt, though I think that’s owed more to my skill with postprocessing improving than any improvement in the actual data.
Subject: Triangulum Galaxy (M33)
Camera: Sony A7S II
Lens: Canon 200mm/2.8 II w/ Tamron 2X teleconverter
It was around this time that I noticed the Pleiades had risen – which around here is a sure sign you should be in bed. Because I prefer to make bad decisions, I tried to photograph that as well. It seemed to be turning out okay, but postprocessing attempts fell apart due to some sort of data corruption. I am not really sure what the issue was (something with my darks and/or offsets, I think), but it was segfaulting Pixinsight and DeepSkyStacker both. I managed to coax DSS to actually stack them somehow, but the whole thing was kindof a mess and I wound up with some sort of green tinge (in stark contrast to the normal stunning blue through the nebulous gas in the foreground you usually see). Oh well, next time!
The clouds have parted! After a week of heavy clouds, we finally had some clear skies last night. I might get lucky and have a few more days this weekend, too, despite the barrage of hurricanes currently off the coast. I setup the mount last night and decided to play with using just my camera, the Canon 200mm/2.8 and a Tamron 2X teleconverter. I knew the TC is not particularly great, but I was hoping the optical compromises would be worth the 400mm focal length and that I might be able to get some interesting stuff.
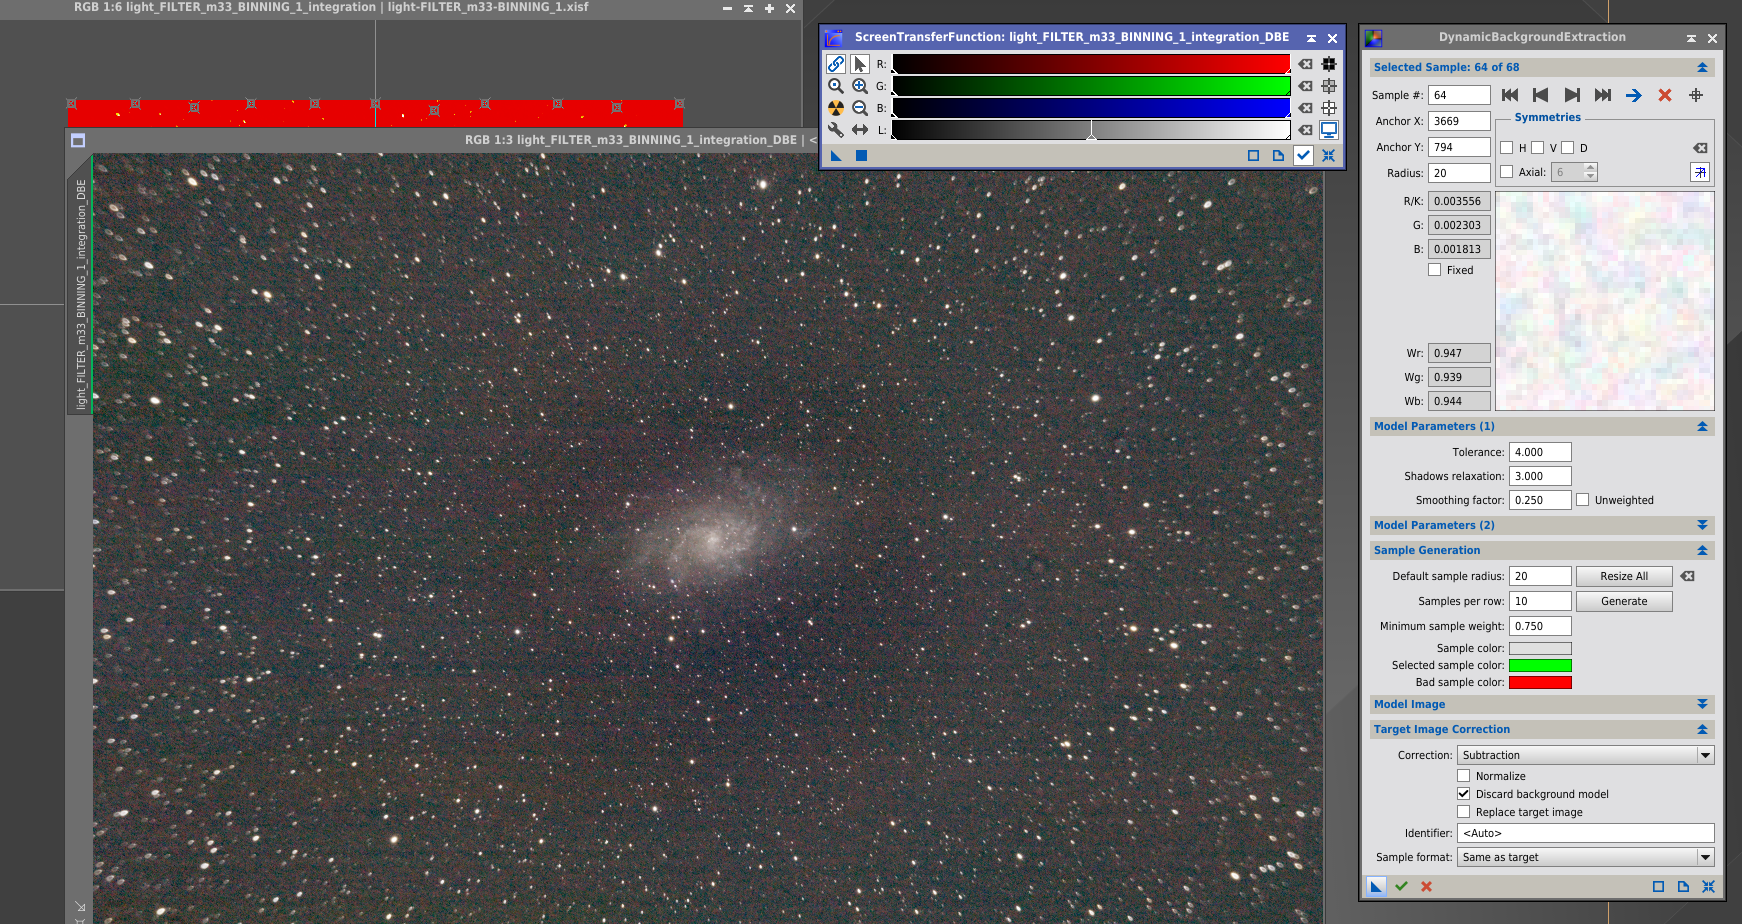
First attempt was M13 – it came out okay, all things considered. The TC added some horrendous coma in the corners, but I knew most of these targets would be in the center of the frame, so it looked okay. The good news is: I figured out how to fix the light pollution gradient! Turns out the Pixinsight tool I’ve been looking for is DynamicBackgroundExtraction (DBE). It lets you sample points along an image (avoiding actual data/stars) and develops a gradient that you can then subtract or divide from the master image. It worked great!
Subject: M13
Camera: Sony A7S II
Lens: Canon 200mm/2.8 II w/ Tamron 2X teleconverter
Aperture: f/2.8
ISO: 640
Shutter Speed: 30”
Light Frames: 40
Dark Frames: 20
Flat Frames: 20
Offset Frames: 20
Software: Pixinsight - Color Calibration, DynamicBackgroundExtraction, Masked Stretch, Unsharp Mask
Next I tried Andromeda again because … why not. I’m sure it will be a frequent subject. This turned out okay, all things considered – not a lot of color or detail, but that’s to be expected given all the light pollution and the amount of glass it’s going through (including the cheap teleconverter). Still, glad I got a result without the awful gradient.
Subject: Andromeda (M31)
Camera: Sony A7S II
Lens: Canon 200mm/2.8 II w/ Tamron 2X teleconverter
Aperture: f/2.8
ISO: 640
Shutter Speed: 30”
Light Frames: 40
Dark Frames: 20
Flat Frames: 20
Offset Frames: 20
Software: Pixinsight - Color Calibration, DynamicBackgroundExtraction, Masked Stretch, Unsharp Mask
Lastly I picked an arbitrary target before bed – the Triangulum Galaxy (M33). I thought this would be a long-shot, because I could hardly see anything in the test shots, but it turned out pretty well! I cheated and used the same darks, flats and offsets I took for andromeda since nothing else had changed, and I didn’t notice any detrimental effect – although there’s still some dust spots that weren’t eliminated by the flats. I’m not 100% certain why, but I should probably just clean my shit, really.
I was pleased to get a bit of color in this, and impressed that I got any detail in the galaxy at all – probably owing to its location high in the sky, so I was cutting through less atmosphere (and less glare from streetlight pollution).
Subject: Triangulum Galaxy (M33)
Camera: Sony A7S II
Lens: Canon 200mm/2.8 II w/ Tamron 2X teleconverter
Aperture: f/2.8
ISO: 640
Shutter Speed: 30”
Light Frames: 40
Dark Frames: 20
Flat Frames: 20
Offset Frames: 20
Software: Pixinsight - Color Calibration, DynamicBackgroundExtraction, Masked Stretch, Unsharp Mask
All in all a pretty successful night – looking forward to having a chance to set this stuff up in some darker skies. I’m still deliberating on what path I want to choose for upgrading my optics – for now I am still enjoying learning how to use the mount and the processing tools. There are so many options to choose from between reflectors, refractors, etc – I’m still feeling out what I think the best path is. Using the AWB OneSky has somewhat lost its allure because it’s a tremendous pain to use (and obtain focus with), compared to the simplicity of mounting the camera + lens itself. But, I’m trying not to let this color my decision, since obviously the AWB OneSky is about as far as you can get from a telescope designed for imaging, and I know that better refractor setups are not without their annoyances (e.g. sensitivity to temp/conditions, etc).
Minor update – turd-polishing edition. Clouds have rolled in, so I’m left to reprocess old data and hopefully learn some things. I took another stab at Andromeda from yesterday in Pixinsight this time. Everything worked pretty well and I was able to pull out a bit more detail, but I’m still stymied by the gradient from the plague of sodium-vapor streetlamps flanking my house. I feel like PI has a tool that can remove this, but I am not sure what it is yet.
Brief update: practiced setting up and tearing down the mount on my deck last night. I think I’ve got it down, at this point – was able to get it polar aligned and goto aligned in about 10 mins. Pointed it at andromeda with my camera + 200mm just to see what I could get. Despite the light pollution at my house, still came out pretty well! I think switching to compressed raw helped quite a bit.
Subject: Andromeda
Camera: Sony A7S II
Lens: Canon 200mm/2.8 II
Aperture: f/2.8
ISO: 200
Shutter Speed: 20”
Light Frames: 40
Dark Frames: 20
Flat Frames: 20
Offset Frames: 10
Software: DeepSkyStacker and Darktable
Had some trouble with the pixinsight preprocessbatch script – it was complaining about inability to find stars. I’m not certain if it’s the light pollution or underexposure, but DSS had no trouble with it.
This Labor Day weekend my parents hosted a family get-together for some birthdays. I decided to take the opportunity to haul the new mount and telescope out to their place, since they live in Castillian Springs, TN – which, while not perfectly dark still has far less light pollution. I setup the mount early in the evening before dinner while we waited for it to get dark:
(Warning: boring ranting about mount polar alignment and goto tracking to follow – skip ahead to avoid.)
So. Getting this mount aligned was a bit of an ordeal. I spent about 3 hours trying it over, and over and over. Sweat pouring down my face, making treks back/forth to the house to watch tutorial after tutorial on youtube. I could find no fault with the polar alignment, but when I attempted the initial alignment (with 1, 2, or 3 stars), it simply didn’t seem to be working: I’d pick Vega as the first star, and it would slew to a point way off-target from where Vega was. At one point I even thought I had accidentally aligned it with a star other than Polaris and went out into the dark to do some old-fashioned star chart/constellation navigation to make sure I actually had it pointed it at Polaris, which I did. In the end, when I was about to give up, I decided to just power through the 3-star alignment and manually slew the telescope to where the star should be. Et voila, it worked fine after that. What I realize now is that I think I was expecting a bit too much of the hand controller’s initial alignment star acquisition. I thought something was wrong because it wasn’t anywhere near Vega, when in reality that’s just how it goes (and why many people opt to use a computer and eqmod over the hand controller).
I’ve also learned the extent to which polar alignment is separate/different from star alignment. If the mount is aligned at the North Celestial Pole via polaris, the equatorial tracking will work, period, regardless of anything else. Aligning the go-to functionality by initial stars is, conversely, entirely relative based on your location, elevation, and time, so it makes perfect sense that the first-pass before alignment is not going to be great.
Anyway, tl;dr: I got it working.
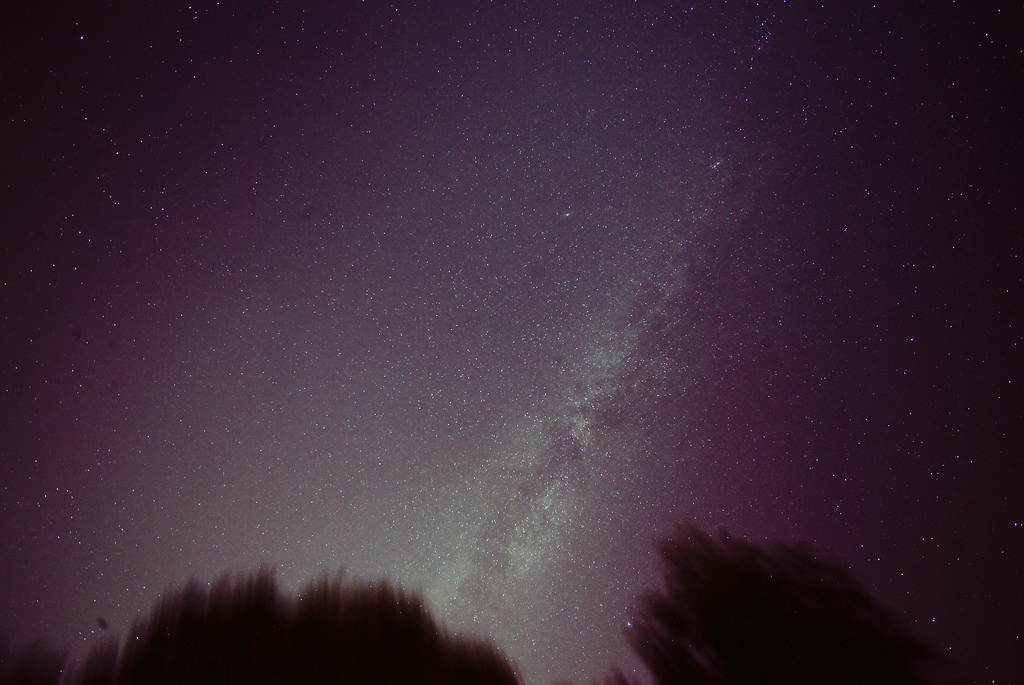
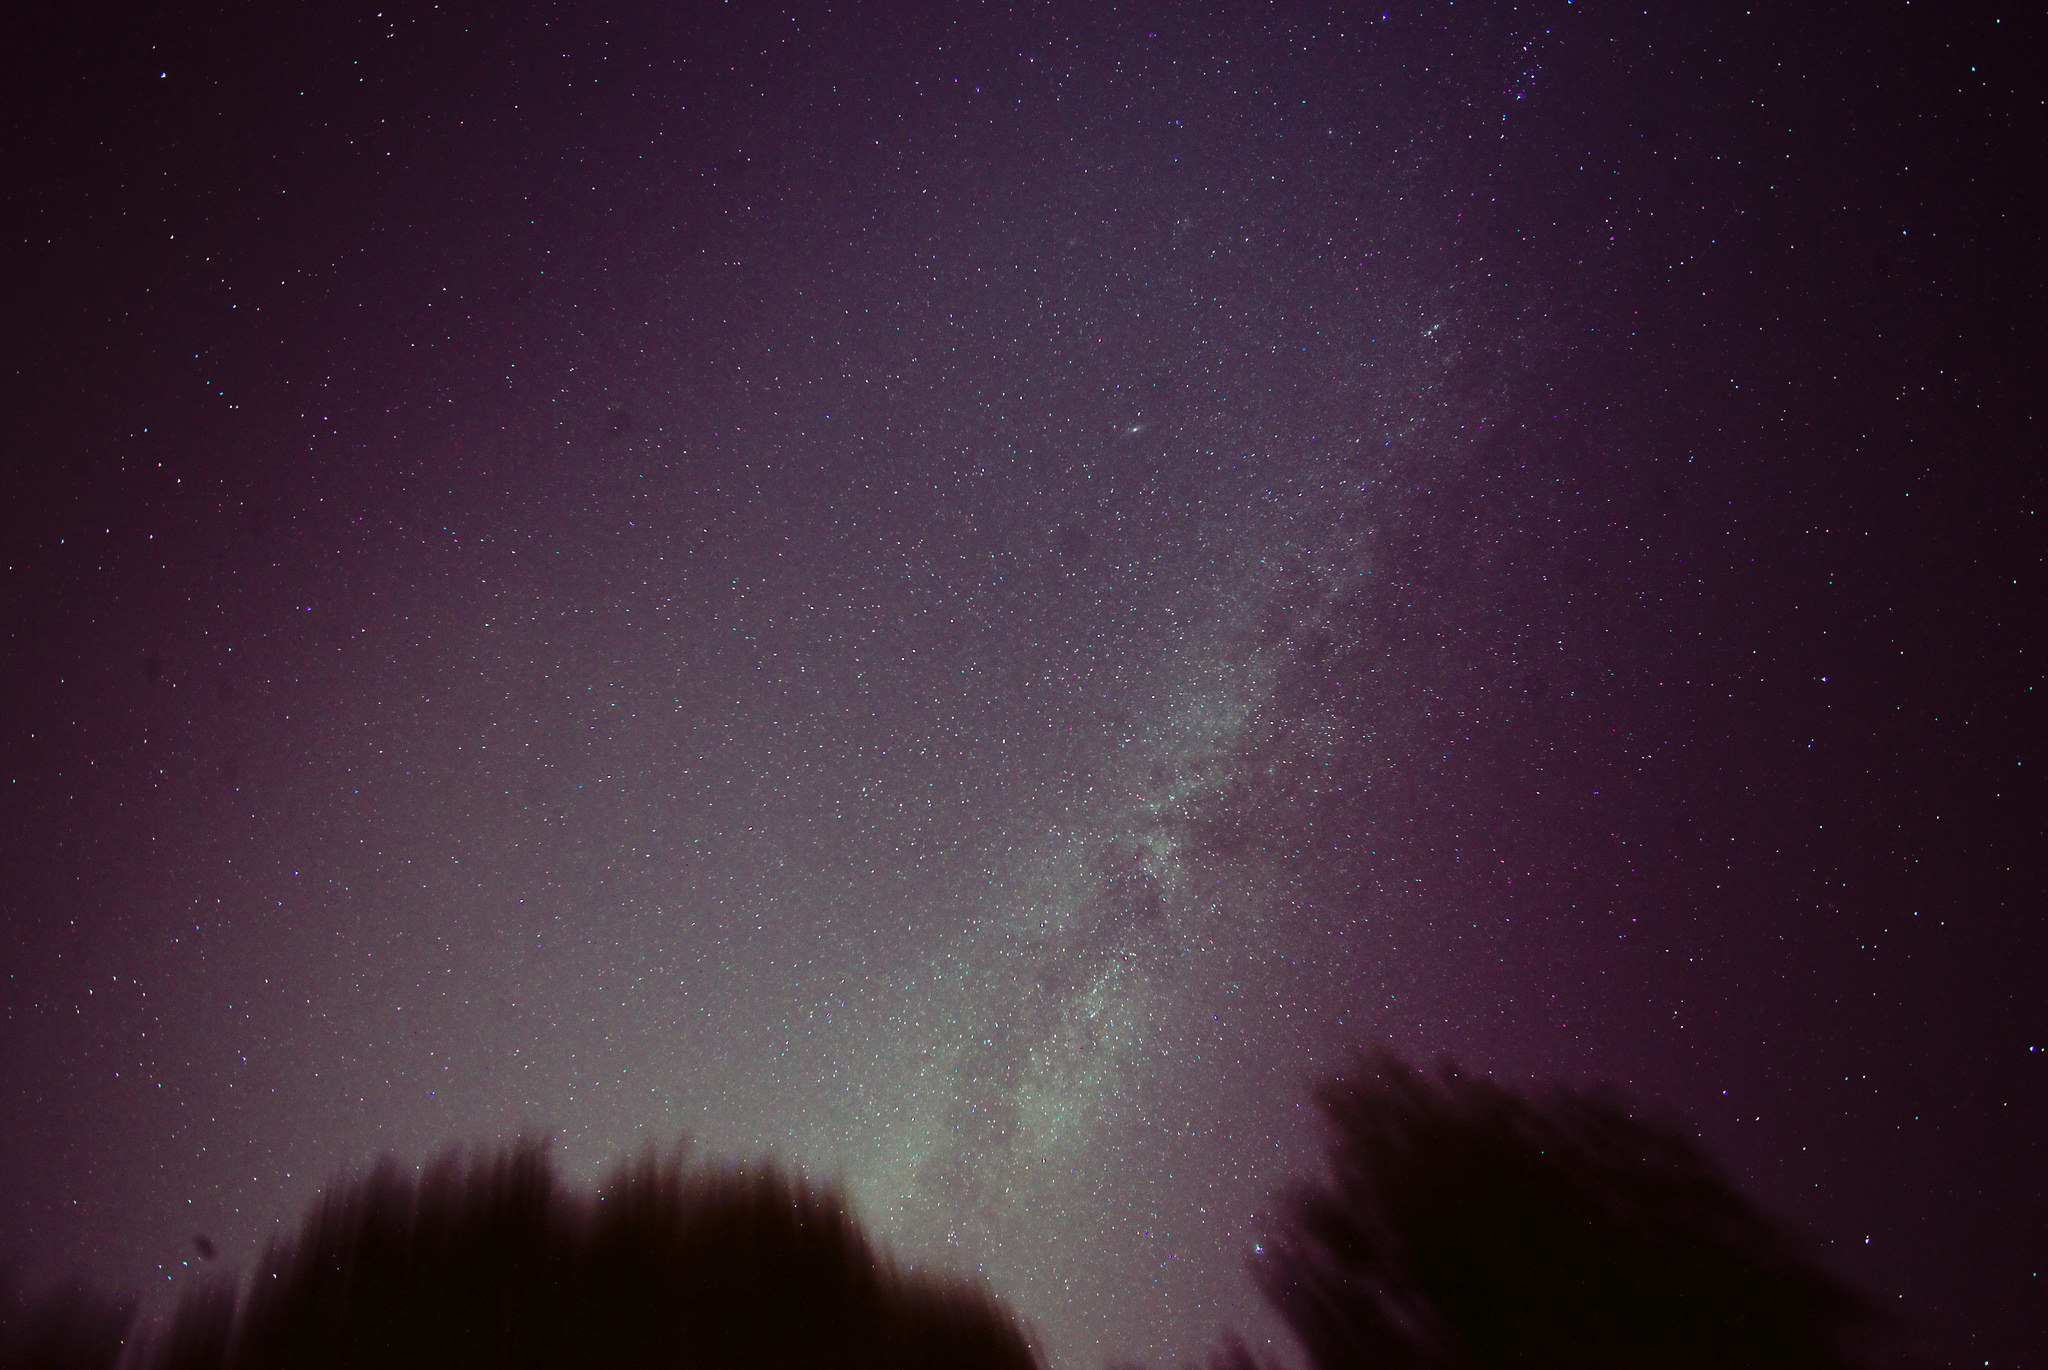
It was about midnight by the time I finally got goto working, so I didn’t have a ton of time. I pointed it at Andromeda first and took some lights, darks and improvised flats (paper towel and LED headlamp) with my telescope, some wide-angle 10mm shots of the milkyway with my camera, and some 200mm shots near IC59 (basically just stars). I didn’t bring a computer with me, so all processing of the data would have to wait for the next day.
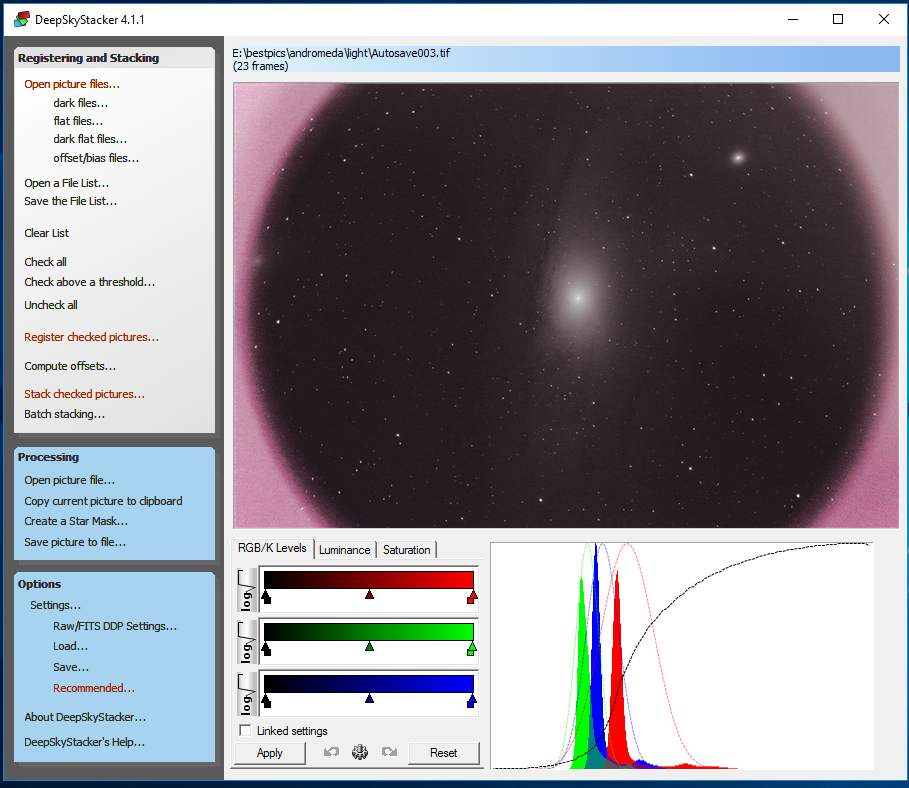
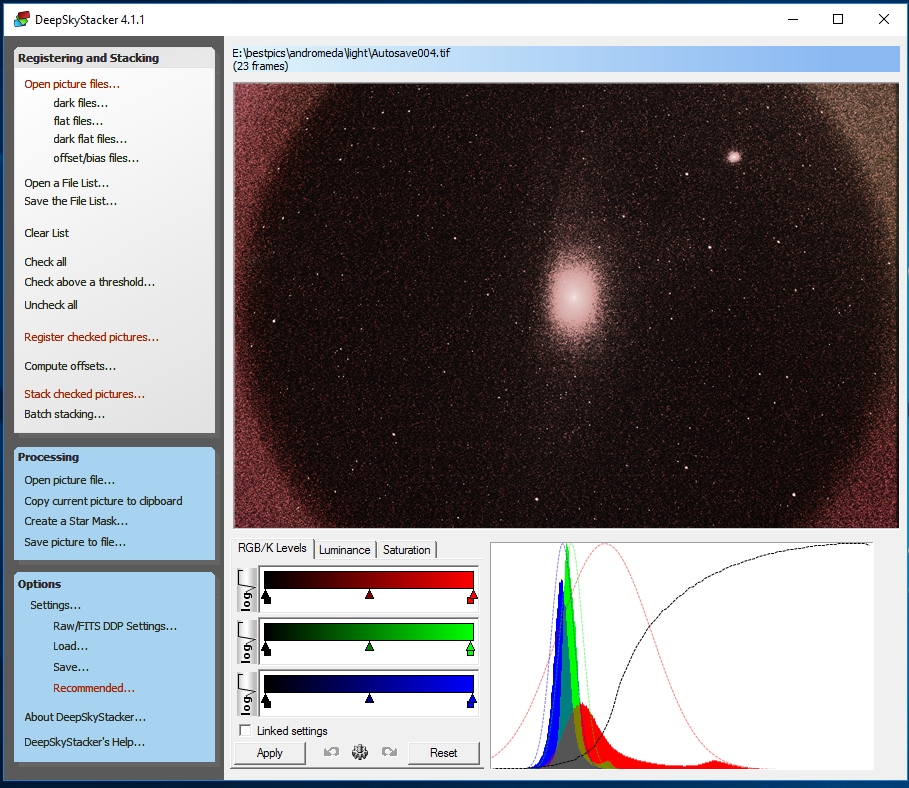
This was my first time trying stacking with data actually much more sensitive to flat/dark calibration and noise, and it was a good test to isolate some weaknesses in my gear for this stuff. To start with, I dumped the shots of andromeda into DeepSkyStacker (vs Pixinsight, because I am still learning it and wanted a quick test), and could see that for some reason adding the dark frames basically ruined the photo:
I’m still not entirely sure what went wrong, but after some deliberation with people in the /r/astrophotography discord, it seems likely that the issue is with the data and conversion from my Sony’s raw format to TIF. Sony’s raw format is not supported by either Pixinsight or DeepSkyStacker, so for this processing I had been converting to uncompressed (in theory) 32-bit TIF from Darktable and using that as source data in pixinsight and Deepskystacker. There’s no way of knowing what darktable is actually doing – someone in the discord channel said the supposedly uncompressed TIF seemed to still have bad compression artifacts. I was able to salvage the data into semi-presentable photos by just not using the dark frames. The conclusion I’ve reached is that for future attempts, I am going to use the Sony compressed RAW format, which pixinsight does actually support, and should hopefully yield much better results.
The good news is the mount performed admirably. From the shots I took (most at 30”), there didn’t appear to be much trailing. I suspect anything much beyond 30” would have started trailing a bit (based on some subtle drift I could see from frame to frame), but once I tackle the mount’s periodic error correction, I expect it to do quite well.
Subject: Andromeda
Camera: Sony A7S II
Telescope: AWB Onesky 130
Barlow: Celestron 2X
ISO: 800
Shutter Speed: 30”
Total Exposures: 30
Software: DeepSkyStacker + Darktable
You really don’t appreciate how big andromeda is until you get it into view. Why didn’t I turn the axis of the camera so the horizontal sensor was in line with the plane of the galaxy? I don’t know!
Subject: milky way and trees
Camera: Sony A7S II
Lens: Voigtlander 10mm
Aperture: f/5.6
ISO: 640
Shutter Speed: 30”
Total Exposures: 30
Software: Pixinsight + Darktable
Sadly I had no flats for the milkyway. I was able to improvise flats for the telescope and 200mm shots with a paper towel and LED, but this lens’s hood is so short there was just no way. Thus, quite a bit of dust spots evident. Clean your gear, kids. Flats would have also corrected the pretty severe light fall-off. I’ll have to figure out some sort of softbox contraption or just get better at doing them during the day w/ the sun.
Subject: widefield near IC59
Camera: Sony A7S II
Lens: Canon 200mm/2.8 II
Aperture: f/2.8
ISO: 640
Shutter Speed: 30”
Total Exposures: 30
Software: Pixinsight + Darktable
This photo is not particularly impressive since it has no subject per se, but it shows pretty clearly that there was little to no trailing and that the 200mm is pretty impressive for this sort of thing – no visible coma in the corners at all. I wish now I had pointed it at andromeda instead of or in addition to using the telescope – I think it would have come out nicely, despite being a wider field of view (turns out Andromeda is huge).
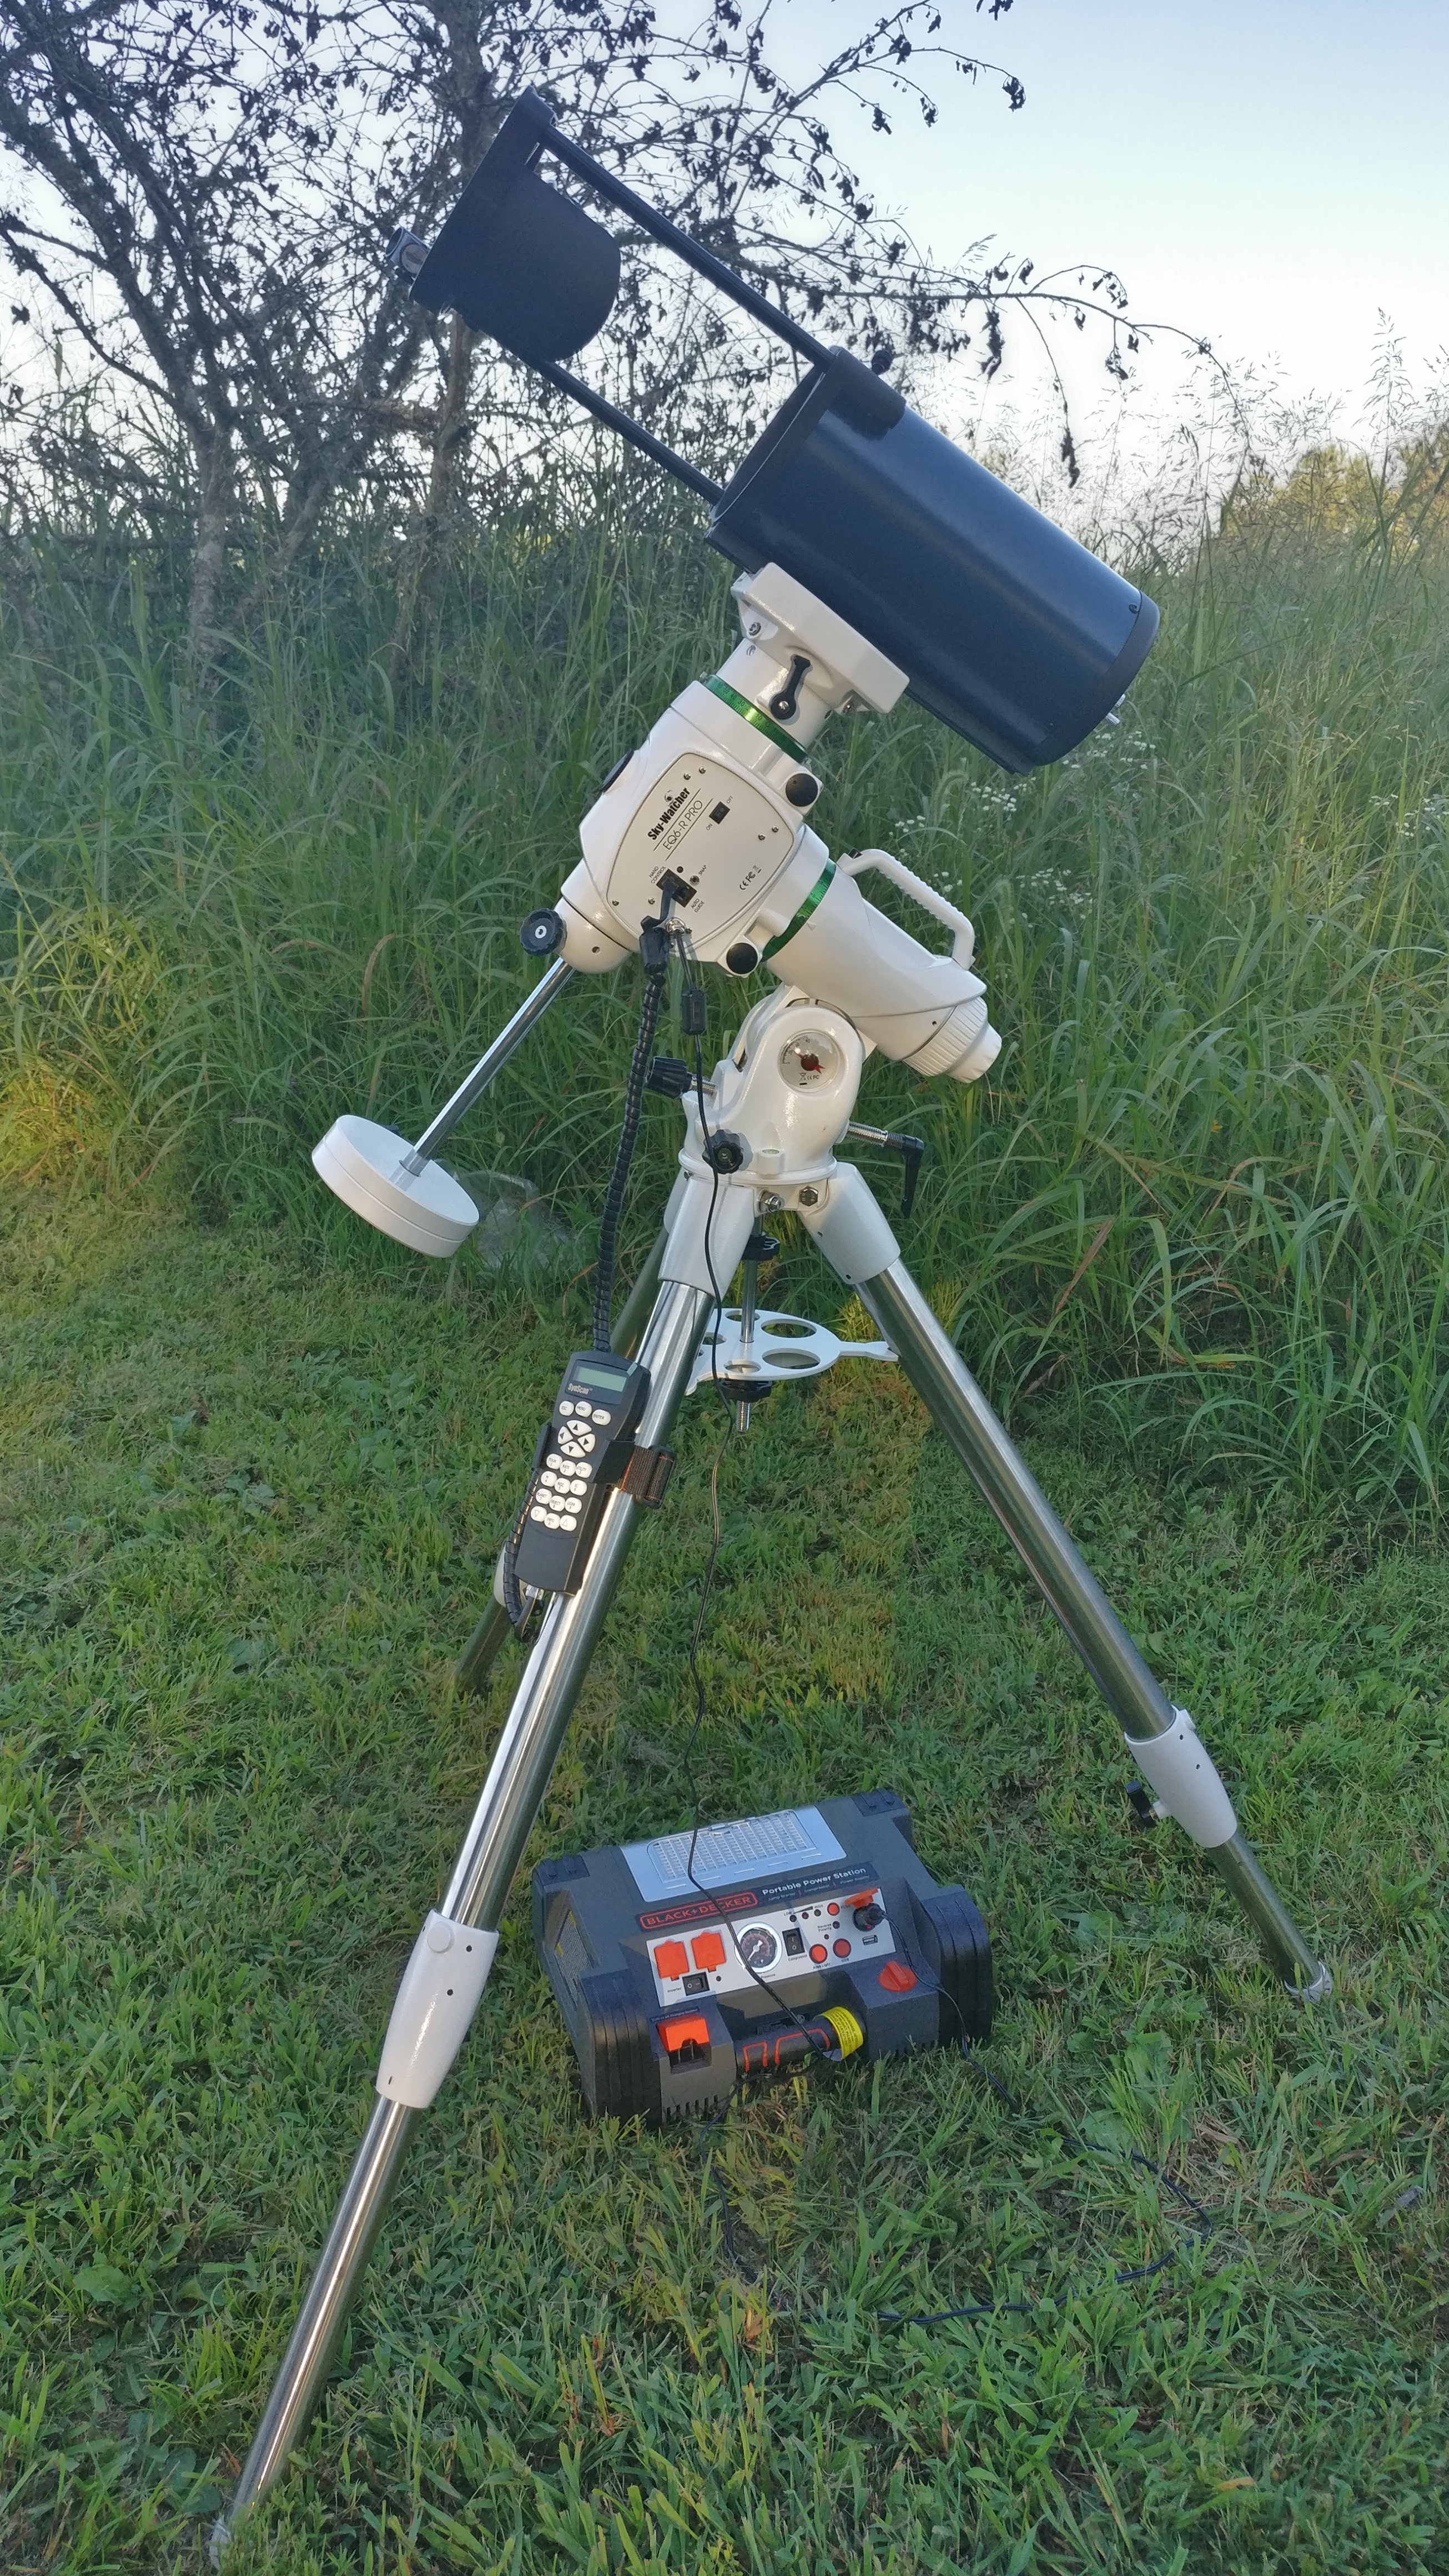
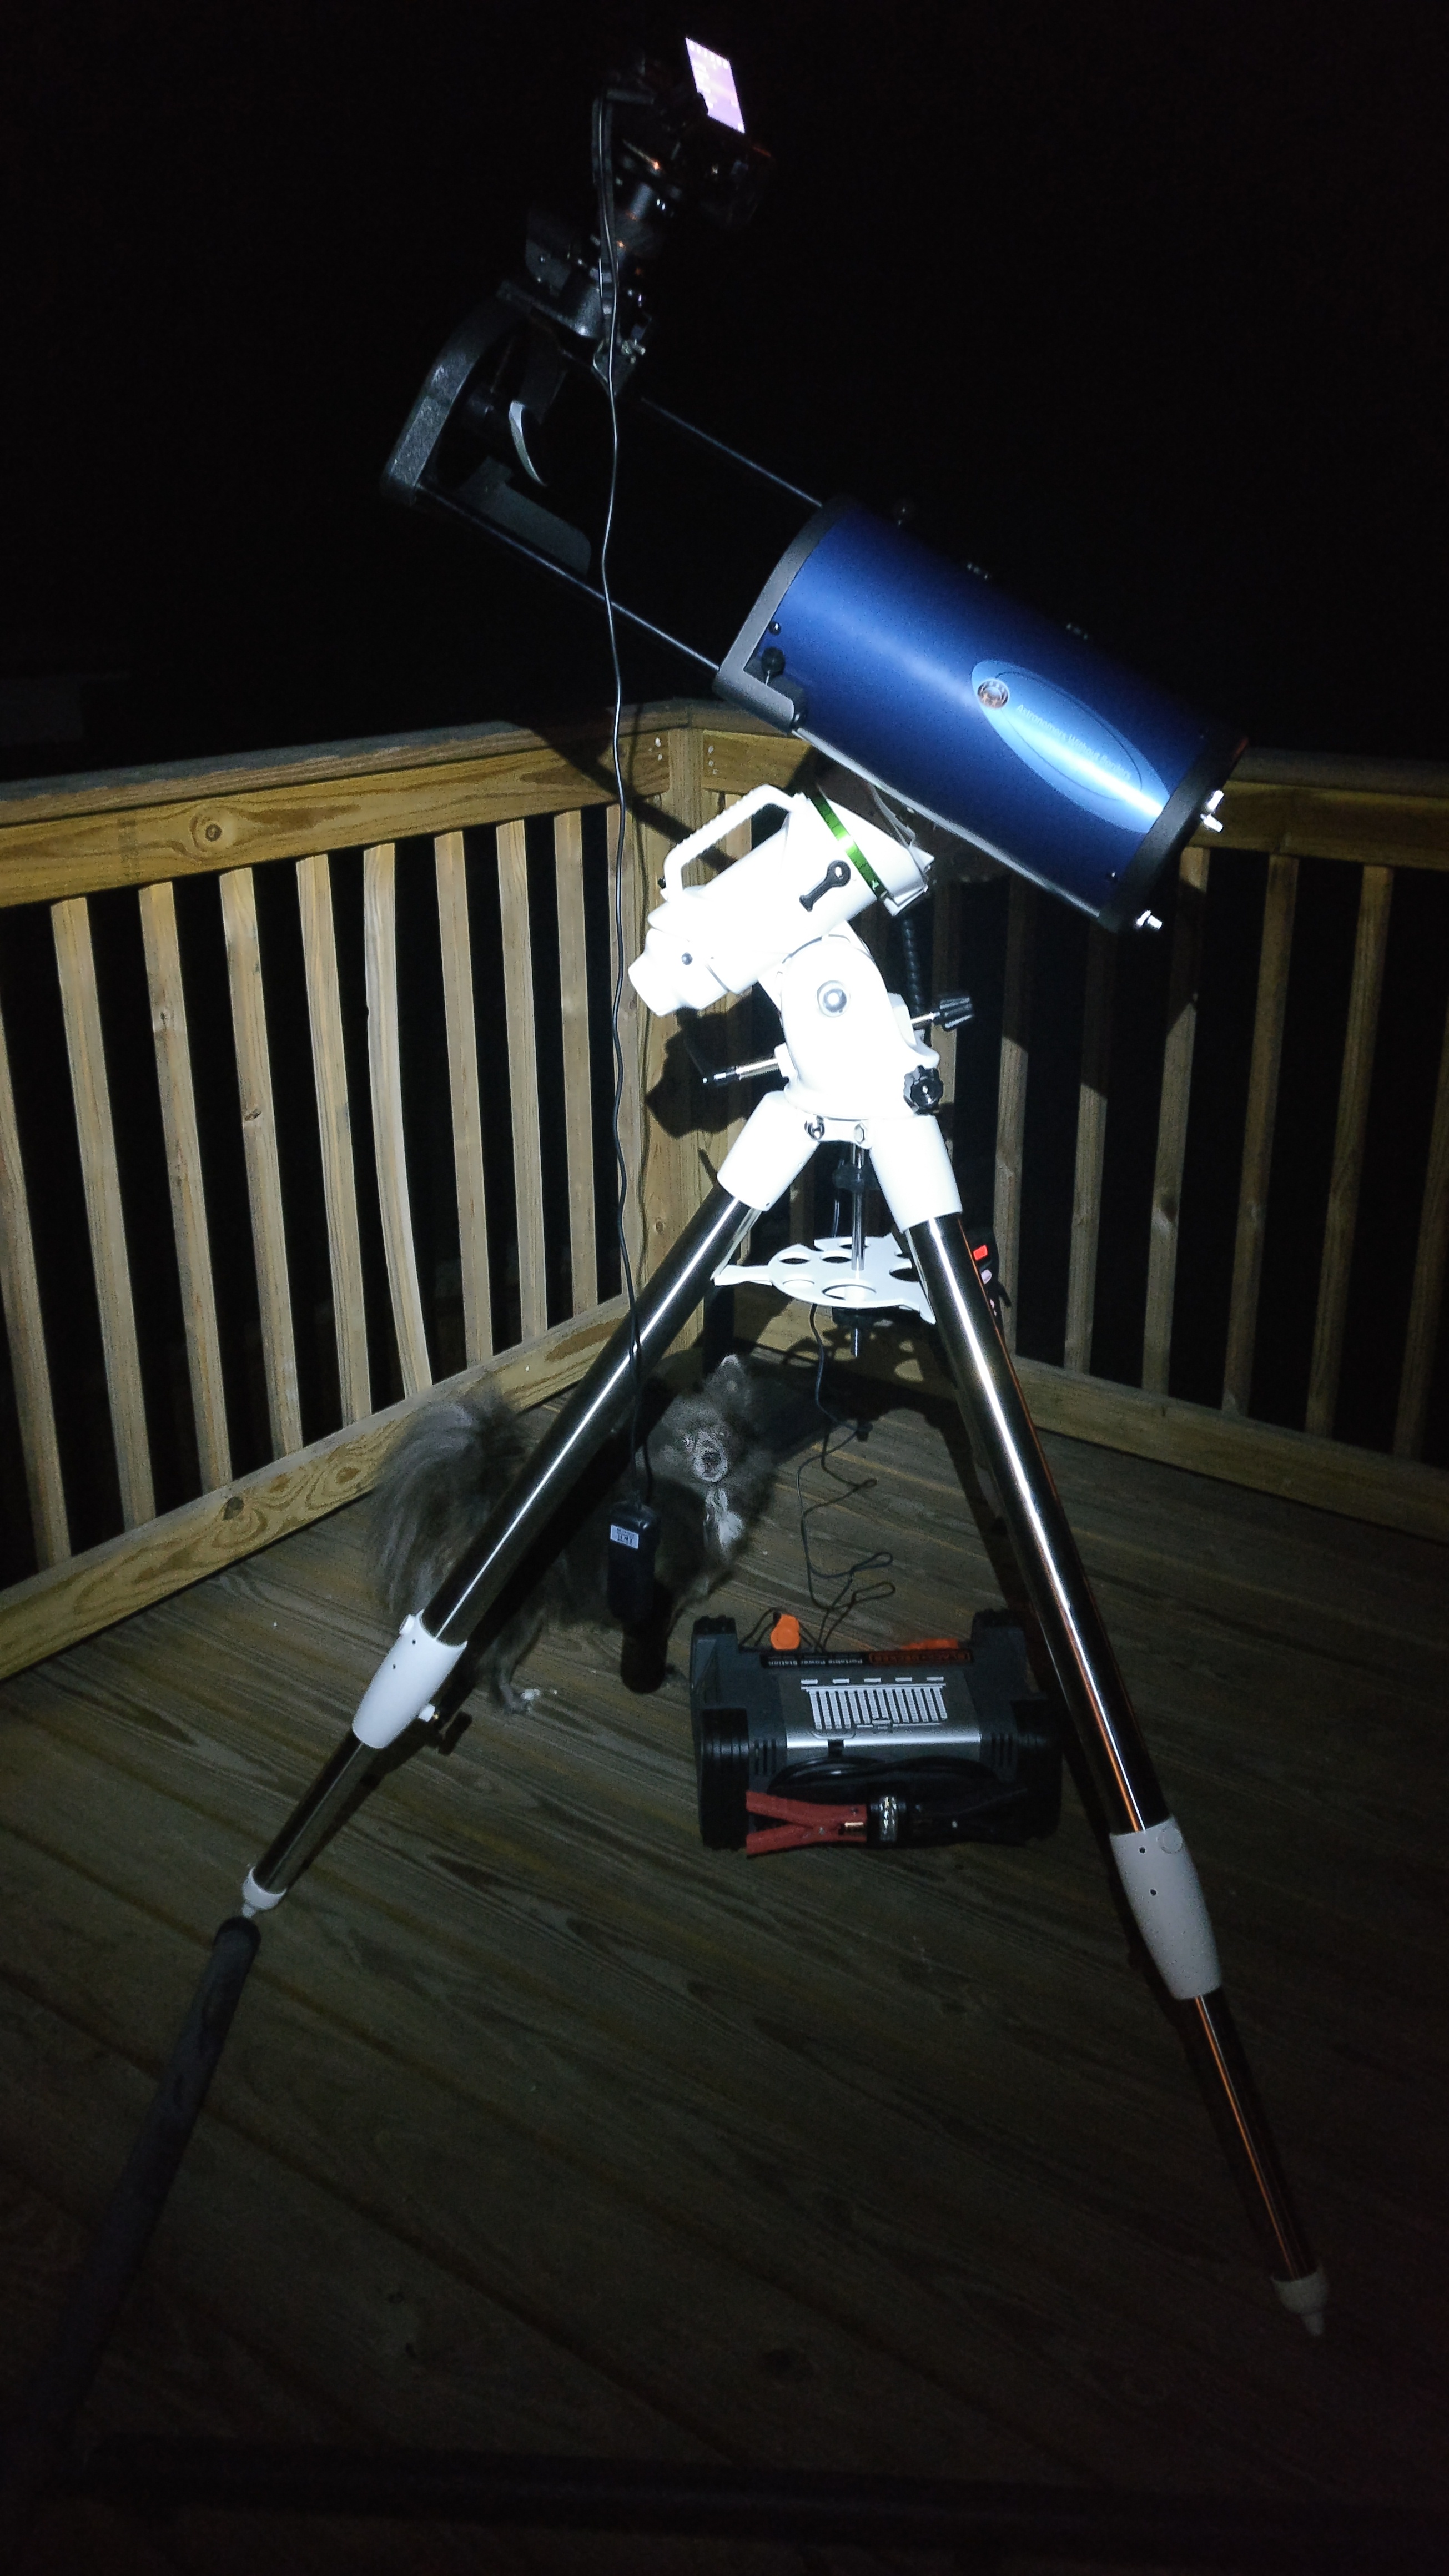
I got a new mount! Despite my intentions to not go overboard and spend a ton of money, I decided to go ahead and go overboard and spend a ton of money. I got a Skywatcher EQ6-R Pro mount. Why? In the pantheon of Things You Can Buy For Astrophotography (which I am learning every day is bigger than I thought), the mount you use seems to be what everyone recommends to start with. In addition to equatorial tracking, it can also do go-to navigation for telling it what to point at (after some alignment/calibration), and allows for fairly heavy loads (with a capacity far exceeding anything I’ll be using short-term with my camera or Onesky 130). The EQ6-R Pro is a newer and very well-regarded mount that comes highly recommended – and if I get bored of the hobby, it should hold its value and be pretty easy to sell. “Mount first” is a mantra I hear from a lot of people, because I think stability and tracking are paramount over anything else, so I decided to get the mount and learn how to use it before deciding if/how I want to proceed upgrading the telescope and other parts of the optical train.
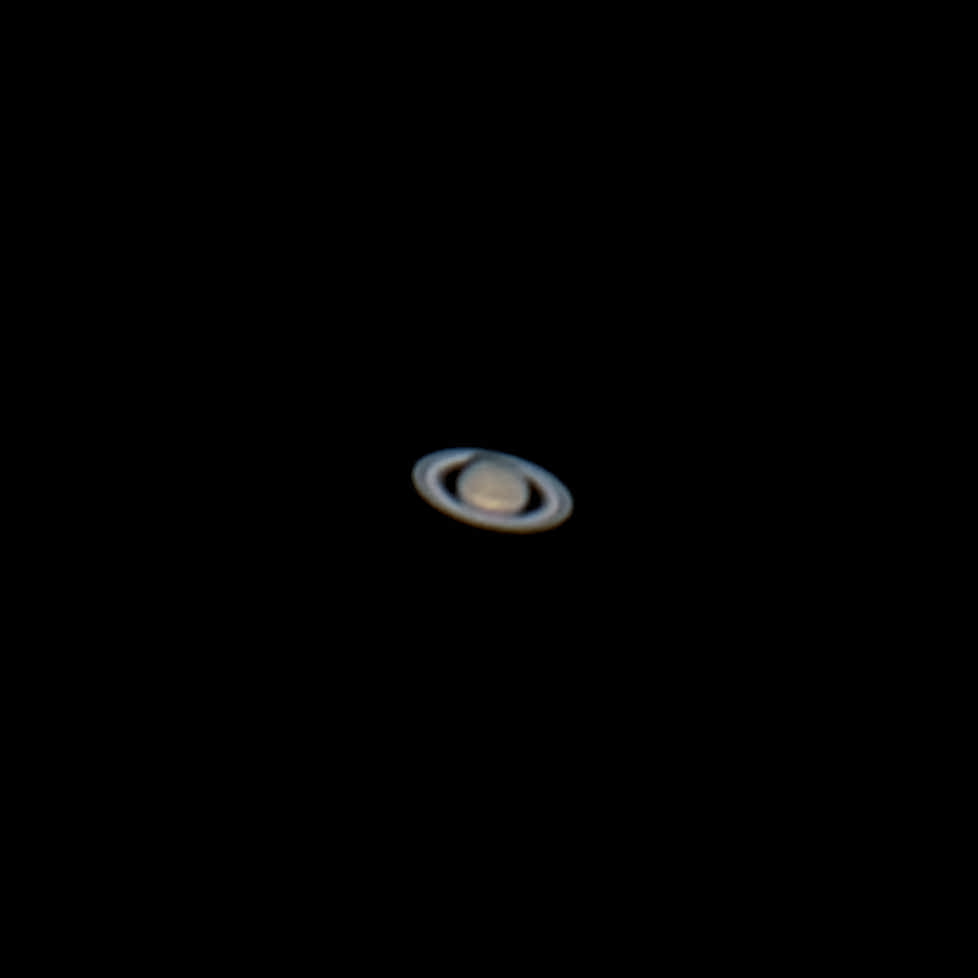
Tonight I did a test-run of the setup/teardown and polar alignment on my deck (seen above along with my assistant Emma The Dog). It was not easy (more on that later), but it worked. I was able to point my telescope at Saturn and leave it tracking as long as I needed. I took some shots and stacked – probably the best result I’ve had for Saturn so far:
You can see the cassini division in this one, at least! At this point, the limiting factor for planetary photos is clearly optical – the collimation of my telescope and the tilt (the weight of my camera pulls it and the focusing ring away from the focal plane a bit) combined are reducing my ability to get shots with better focus. This may be improved if I collimate better, but probably it’s not going to get much better without a different telescope better suited to photography. I did also manage to point the telescope at Andromeda, M15 and a few other things, but I won’t humiliate myself from posting the photos I attempted from the city, since the sodium vapor lamps near my house mostly stole the show.
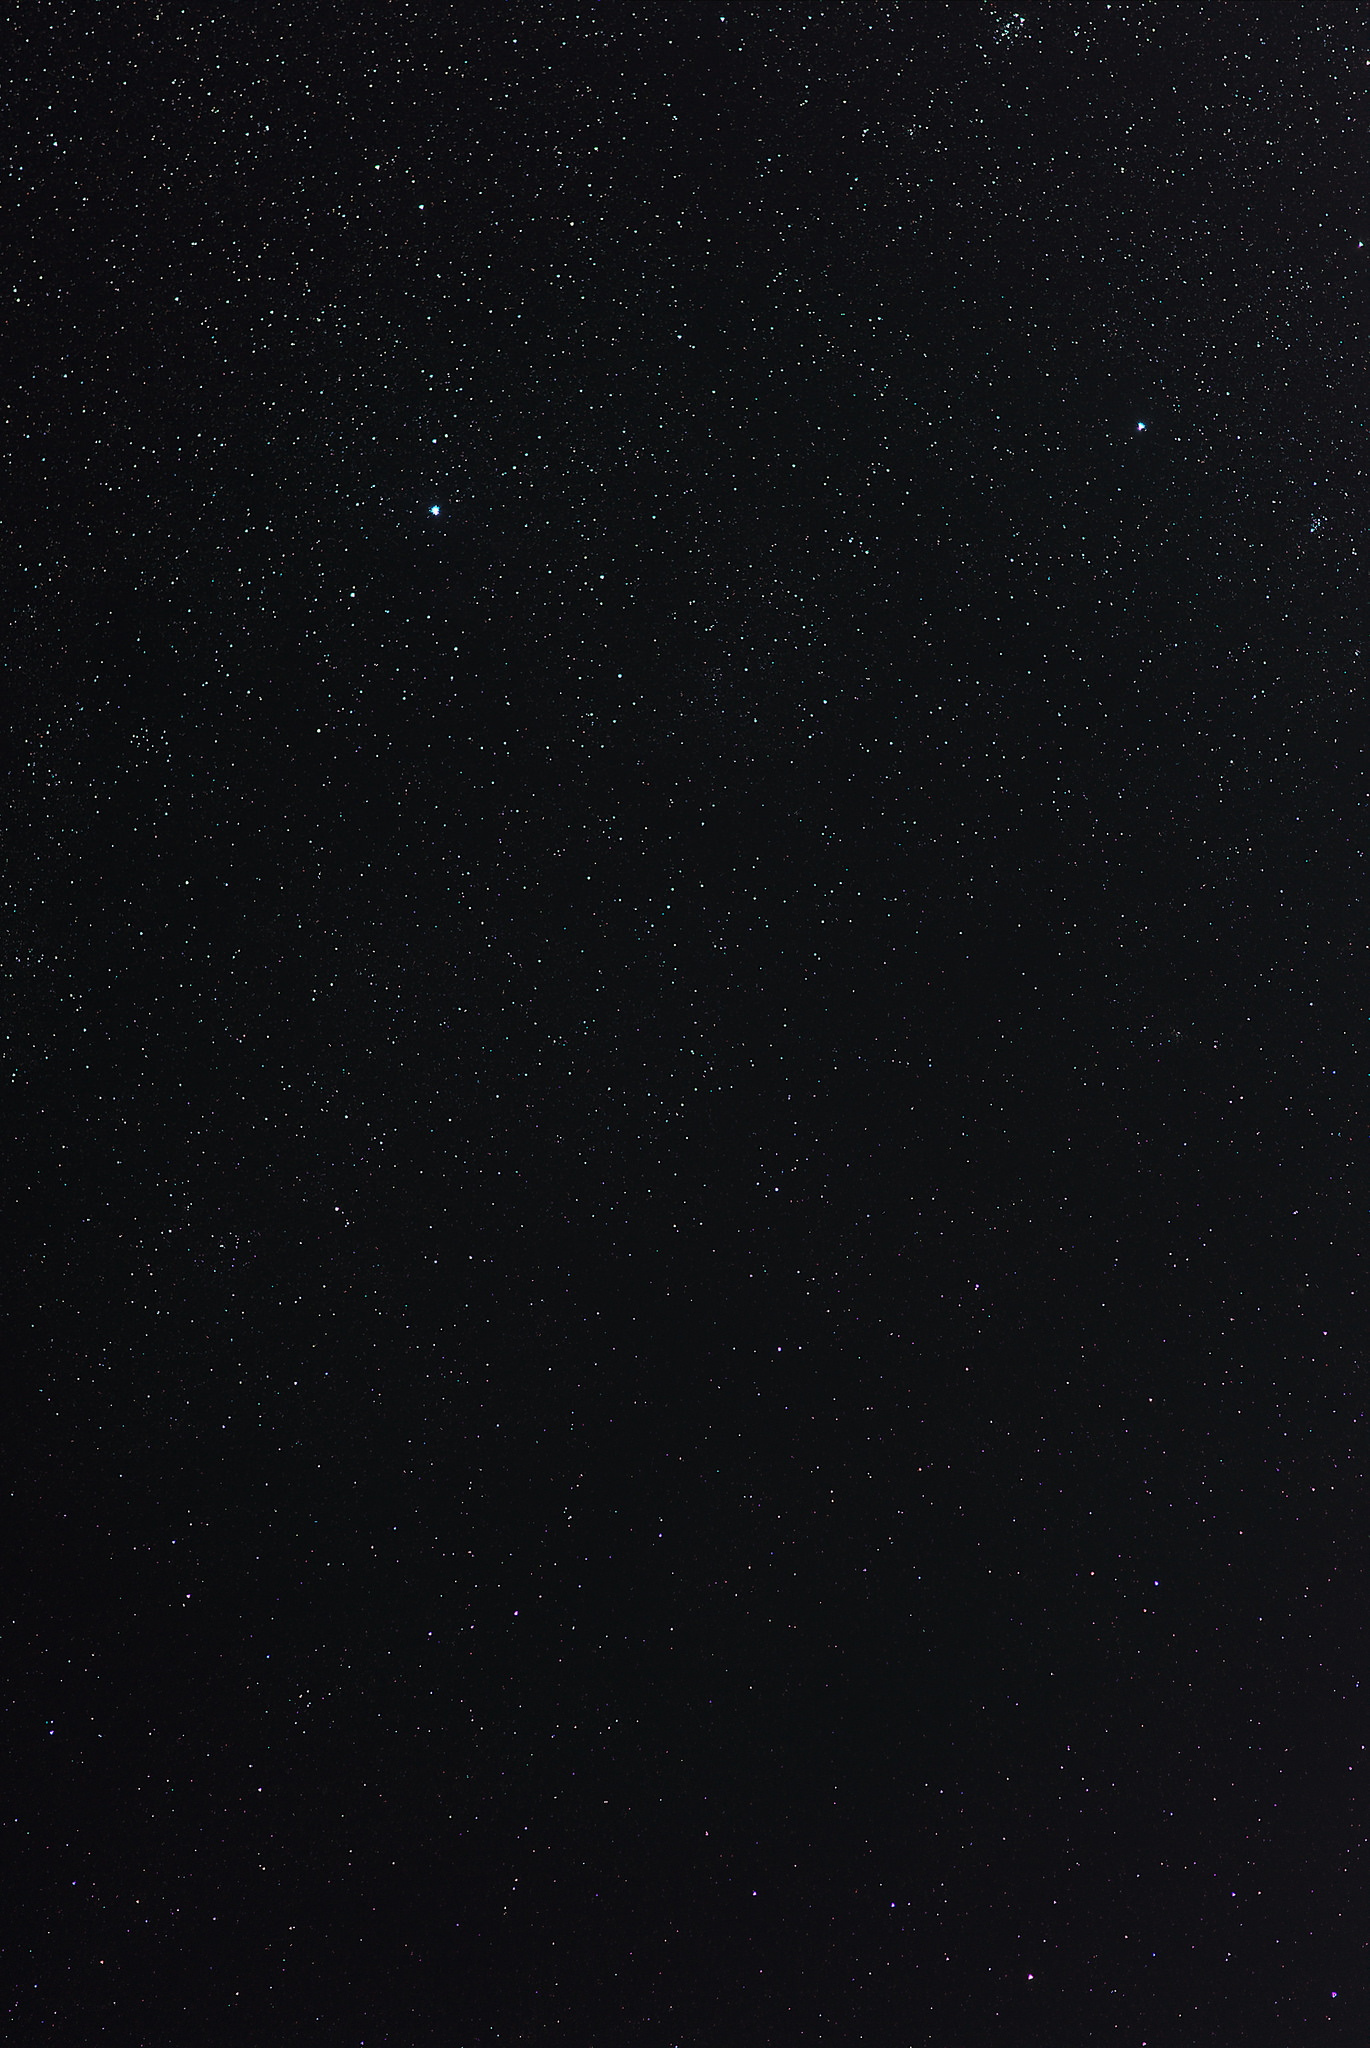
A day of unexpected success! I hadn’t planned on doing any shooting tonight, but the skies were remarkably clear, so I gave it a whirl. First I wanted to try my equatorial tracker again, with the goal of producing a basic wide starfield free of as much noise as can be expected in the city. I’d previously been having a lot of trouble with post-processing. Specifically, my flats were overcorrecting the final stacked image. This time around, I shot the flats outside by putting a white t-shirt over my hood and aiming a diffuse LED flashlight at it. Still not ideal, but it yielded much better results. No overcorrection!
Camera: Sony A7S II
Lens: Canon 85/1.8
ISO: 160
Shutter Speed: 2”
Aperture: f/2.0
Total Exposures: 80
Dark frames: 30
Flat frames: 10
Offset frames: 30
Software: Pixinsight proprocess batch script
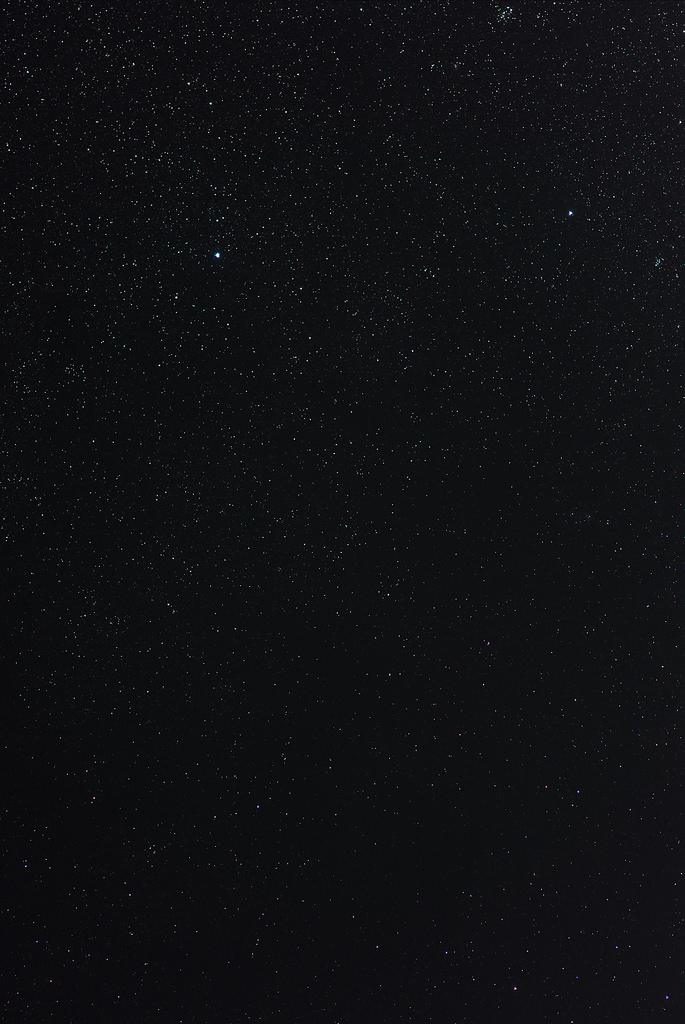
Still nothing amazing – I just pointed the camera straight up and away from the rising moon, so that’s Vega on the left completely blown out. Still some trailing, of course, because my polar alignment wasn’t quite perfect. Still, encouraging results.
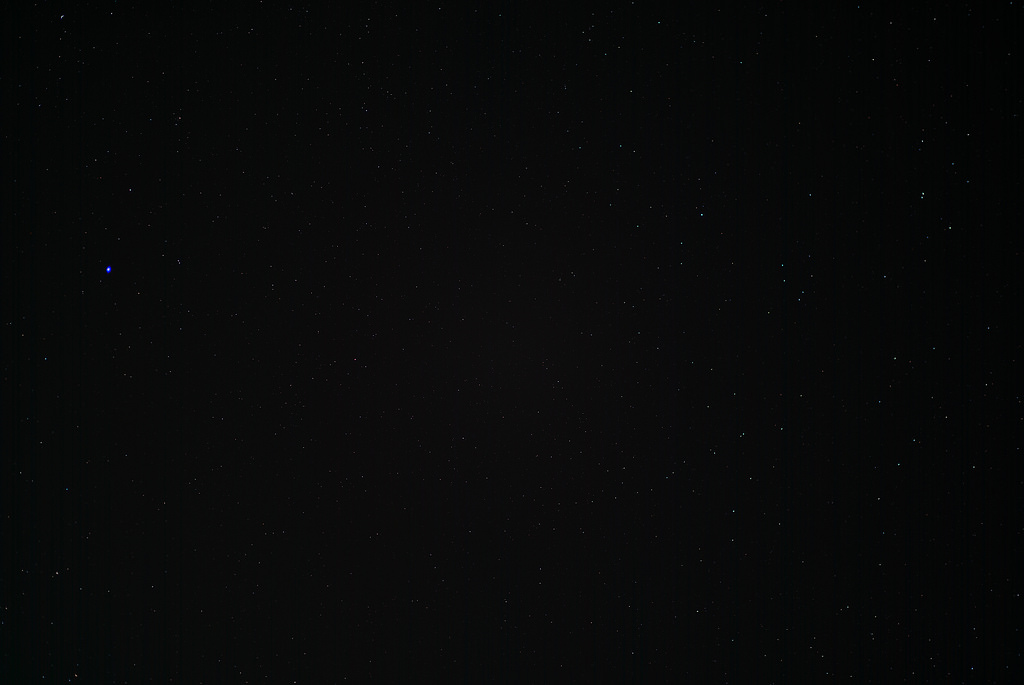
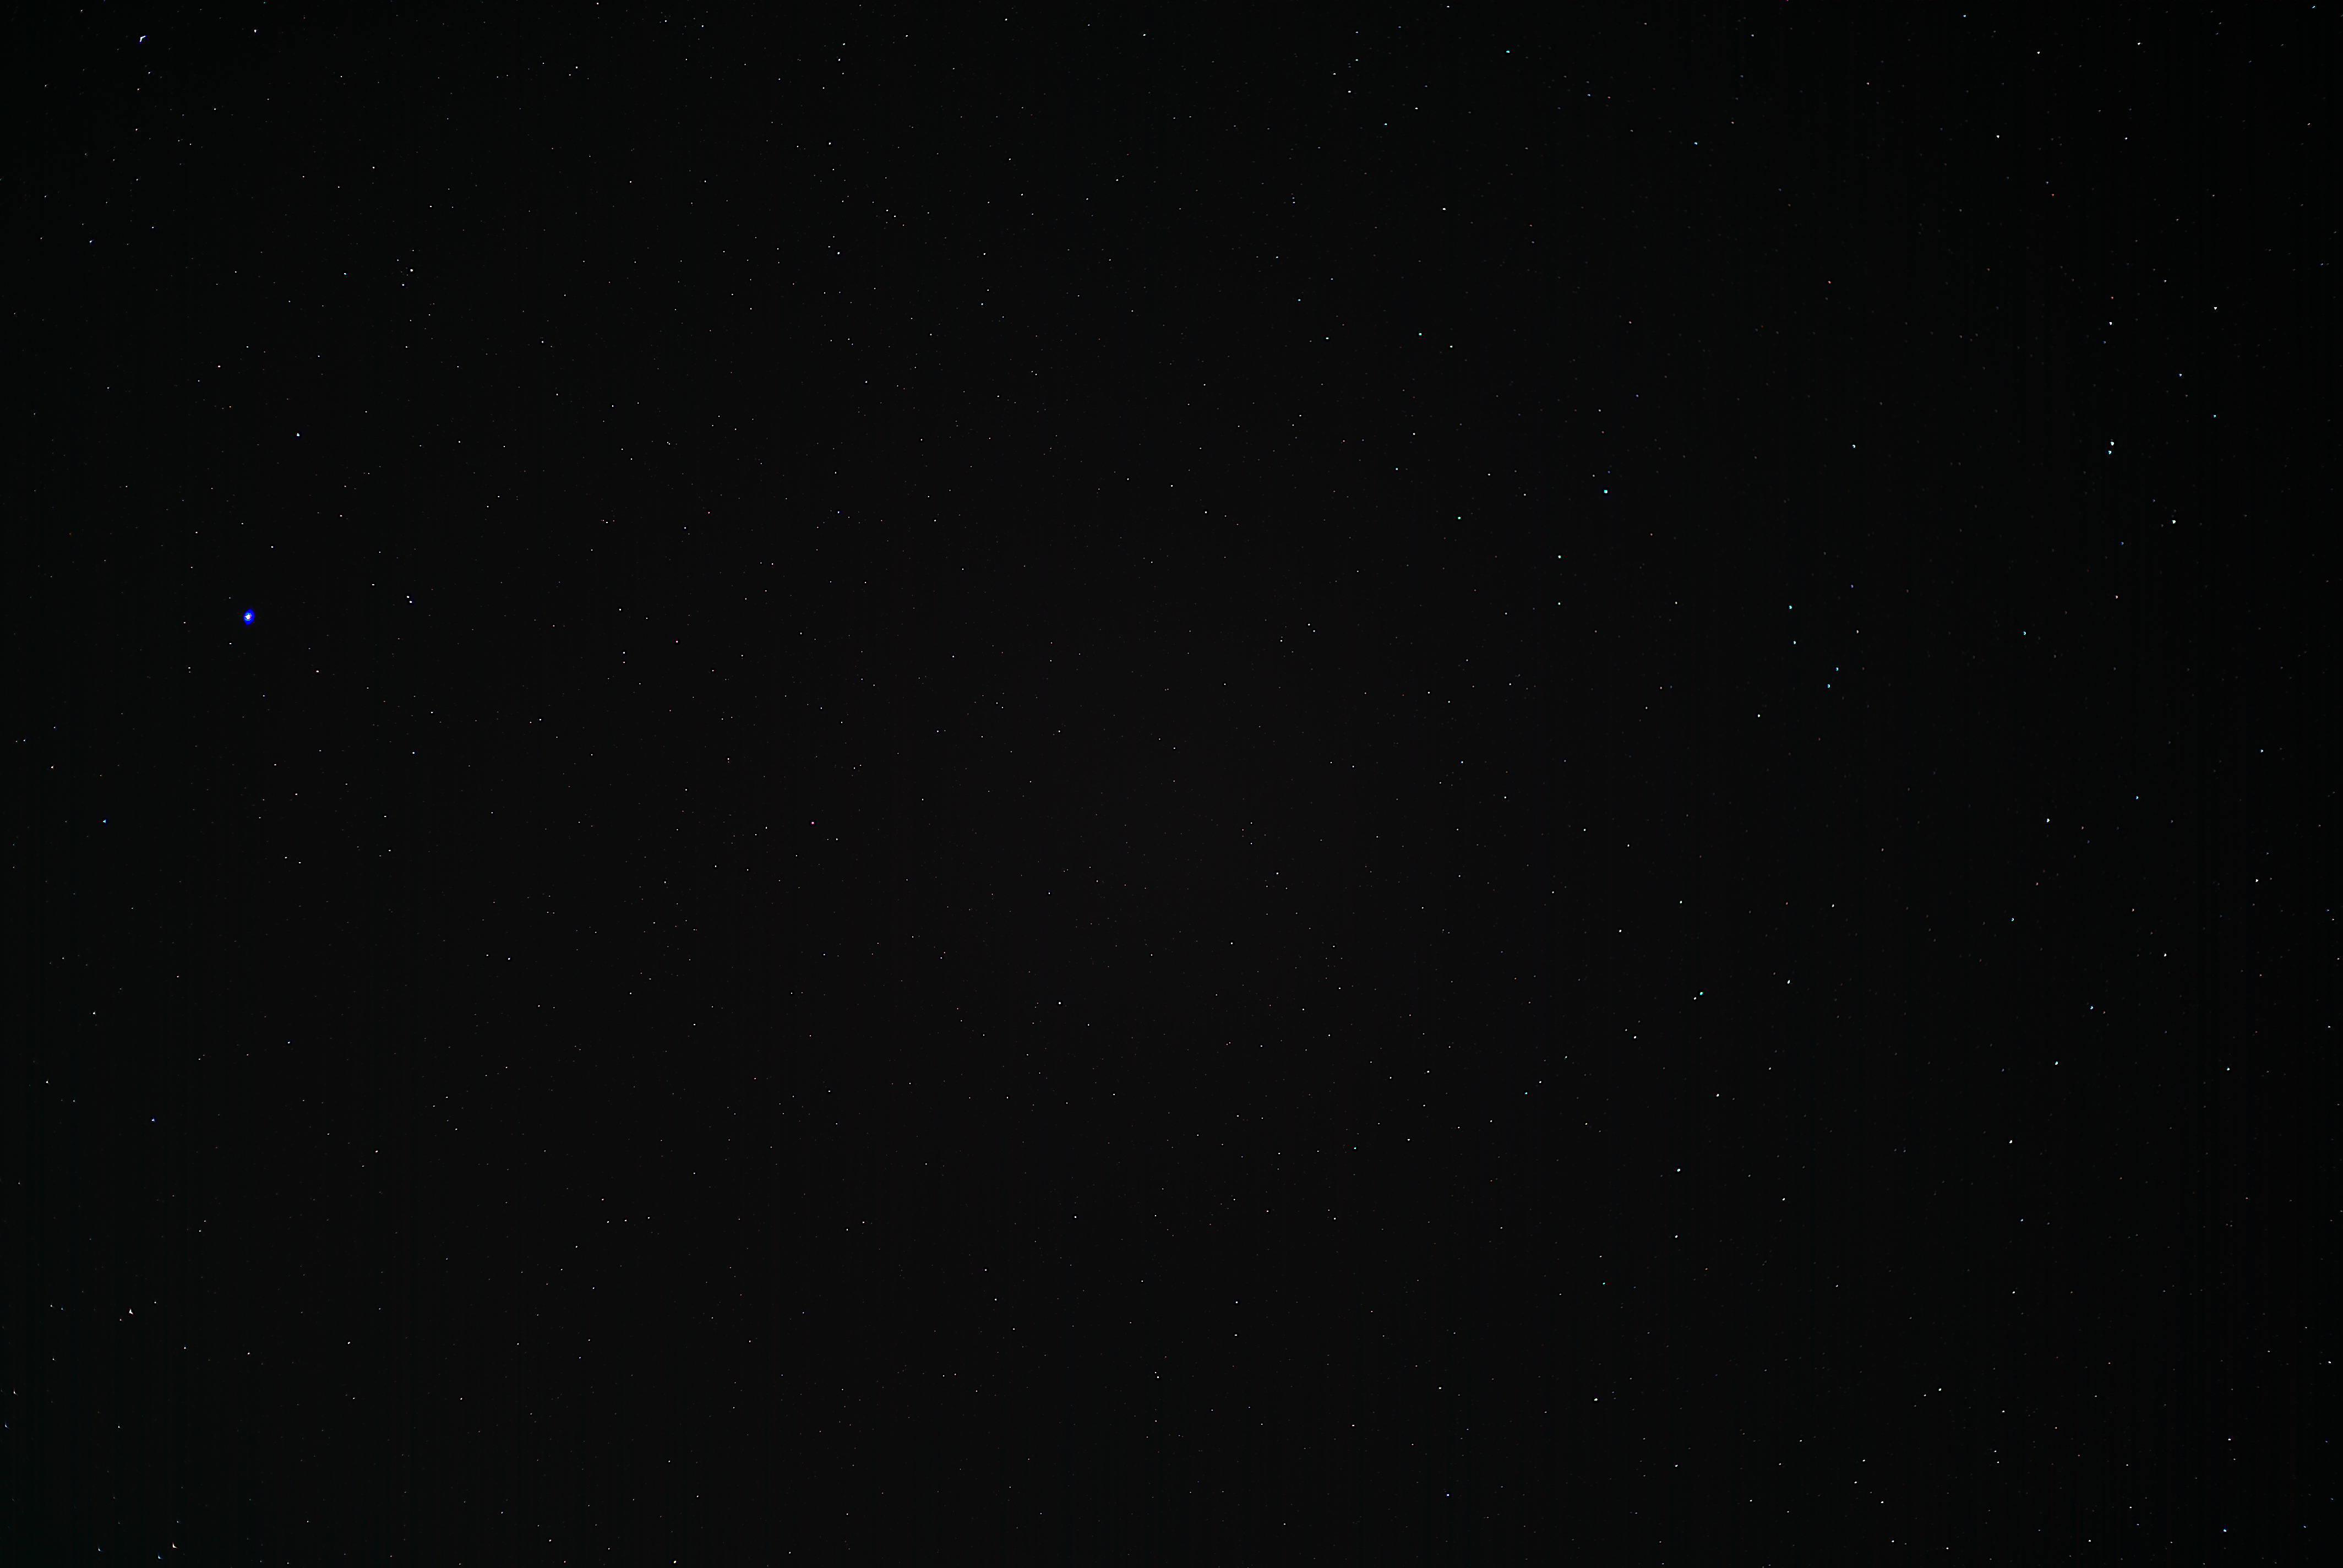
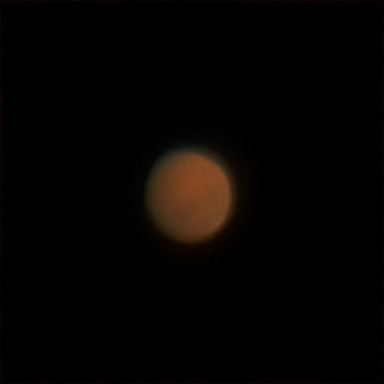
After this, the moon rose, making any further starfield attempts kinda pointless, so I figured I’d try to get Mars (so far my white whale) again. I’ve had a lot of trouble with Mars – never getting much beyond an overexposed blur. I think it’s just so bright I kept consistently over-exposing it. I made an effort this time to expose it properly and had some moderate success for a change! First, I stacked the entire wide field w/ Mars in DeepSkyStacker so I was able to get a shot cropped with some stars around it:
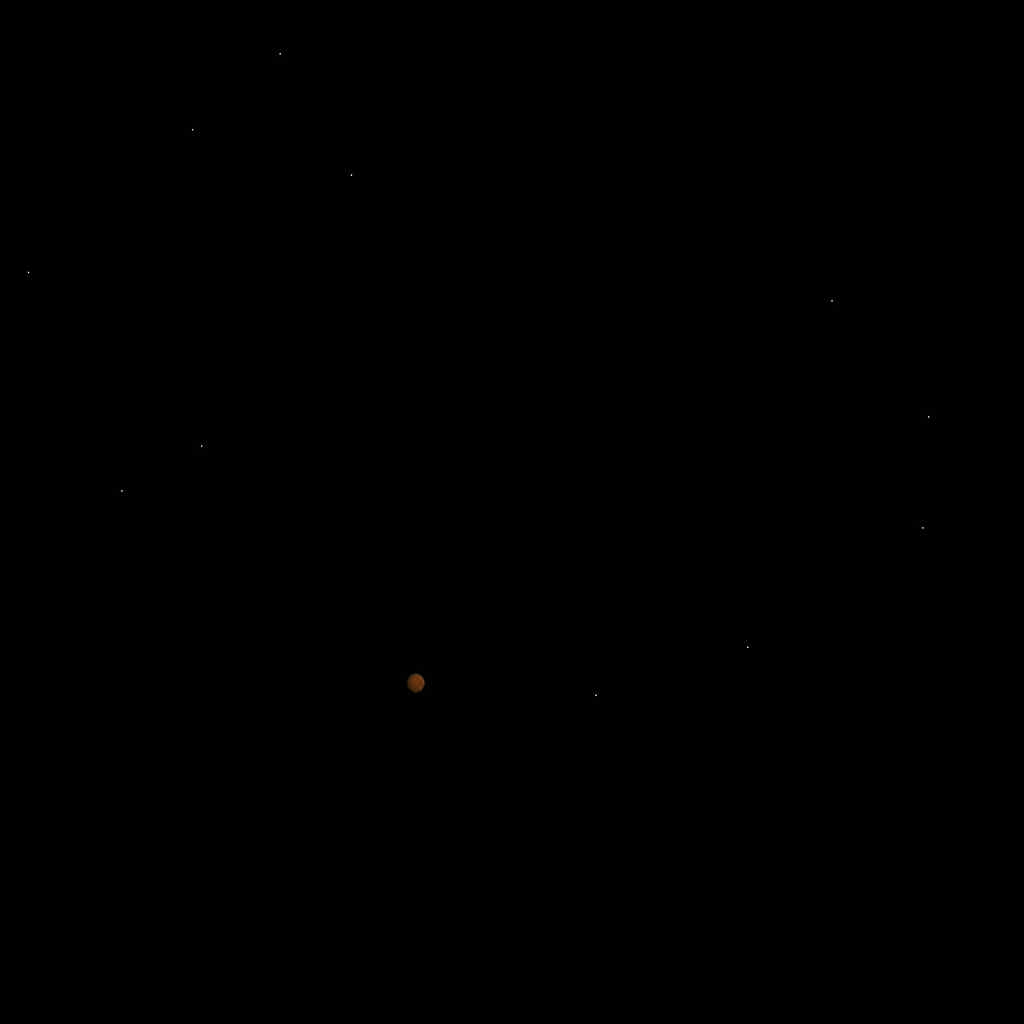
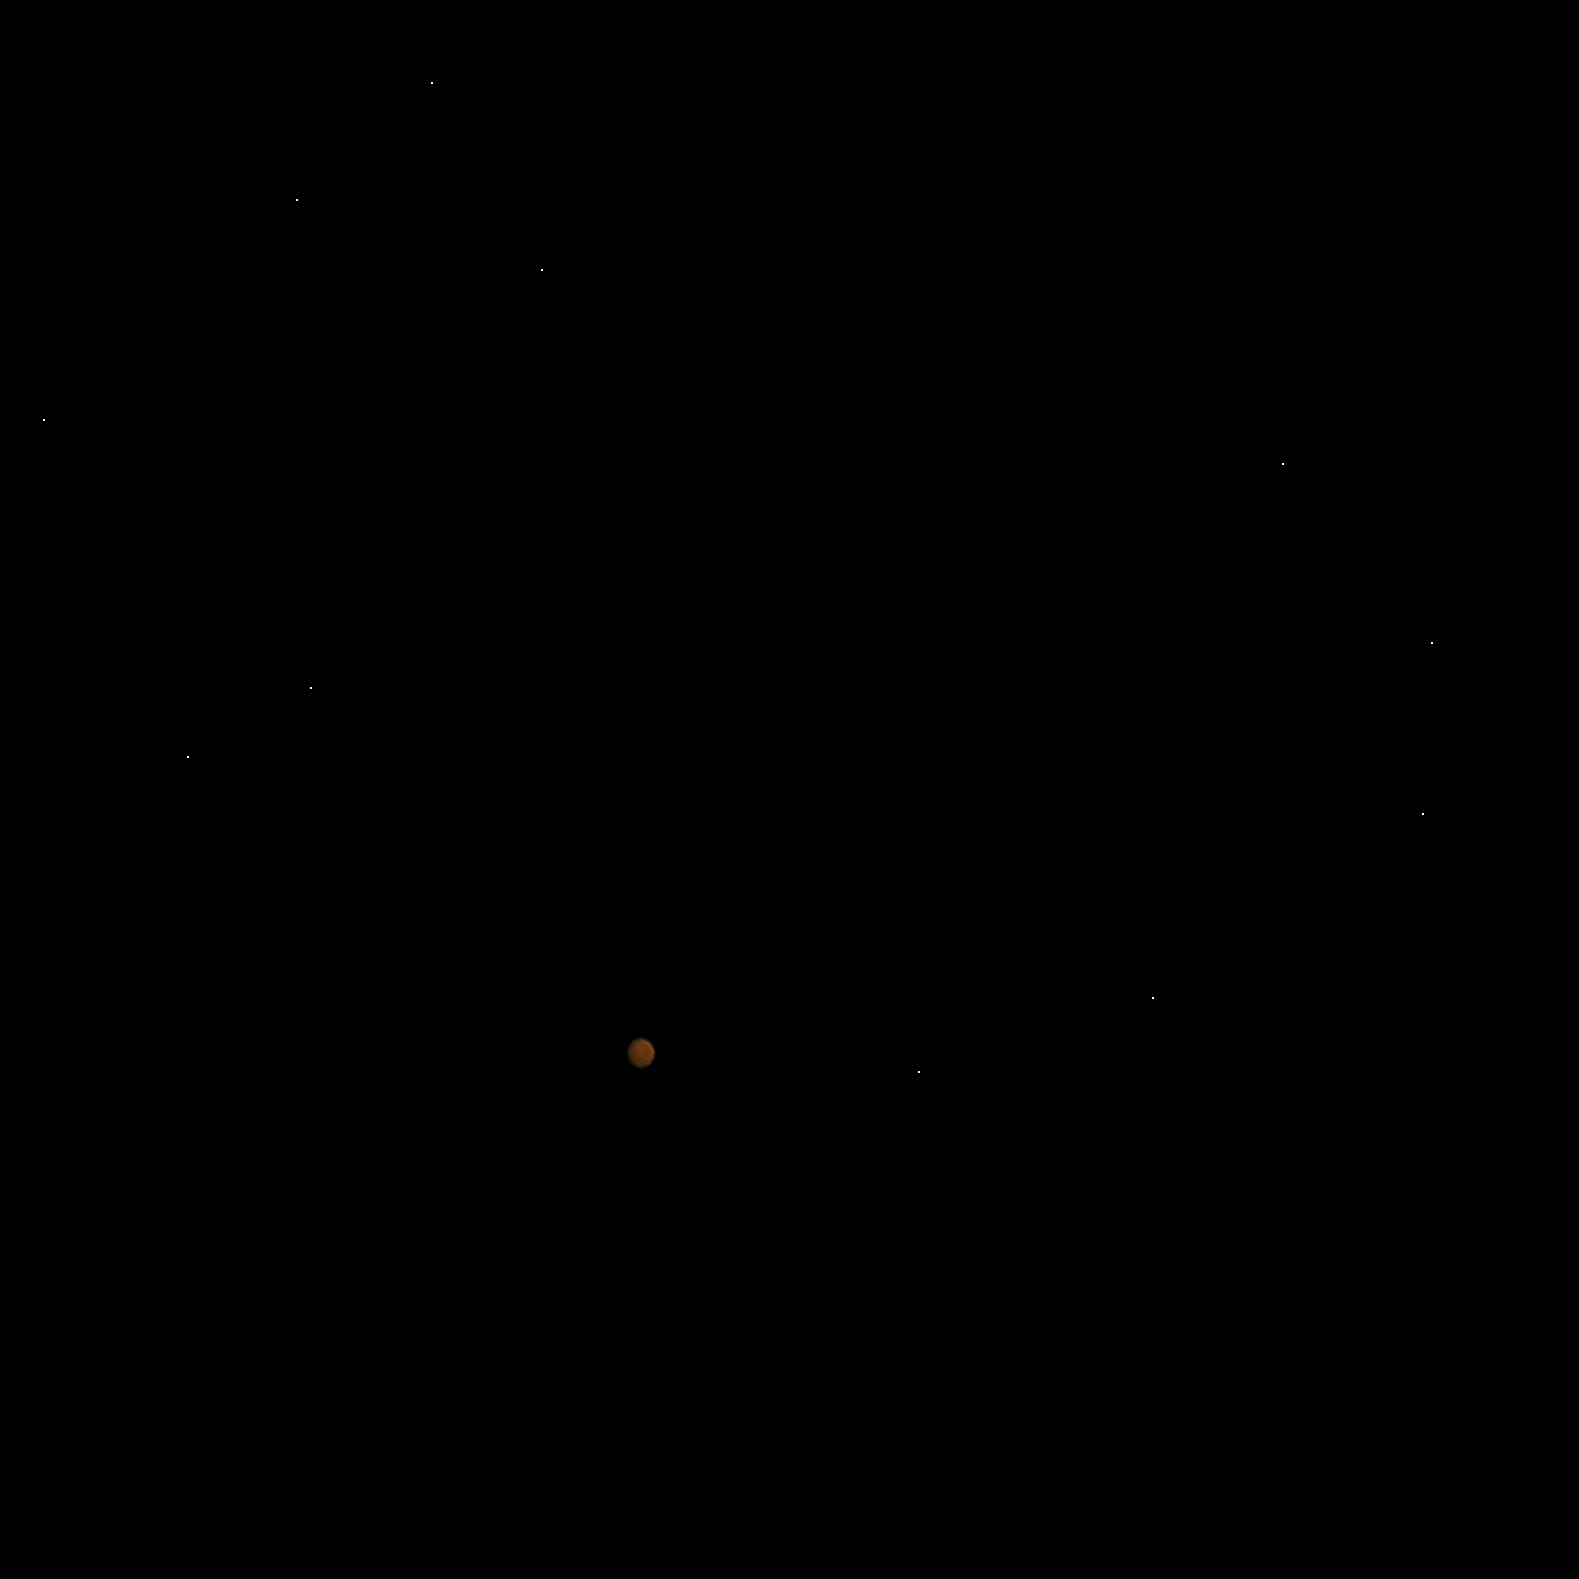
I then used PIPP and Autostakkert to stack just the planet itself. Pretty blurry but you can see a tiny bit of detail and, if you squint and really believe, the polar ice cap on the bottom.
Camera: Sony A7S II
Telescope: AWB Onesky 130
Barlow: Celestron 3X
ISO: 640
Shutter Speed: 1/500
Total Exposures: 60
Software: DeepSkyStacker for wider field image, PIPP + Autostakkert for planetary stacking