trial and error
17 Apr 2019Not a lot of amazing results to report, but plenty of trial and error learning. One thing I knew going into the whole monochrome camera thing is that it inherently would involve more time. And boy, does it ever: between the added time of having to take different sets of data for at least LRGB and do flats for each one, it can be a real challenge to finish even one photo in a night. Weather hasn’t been cooperating, with roughly one clear night in the last ~2 weeks or so, so I have a lot of incomplete data owing to delays from both software and hardware problems.
Part 1: Acquisition
My first issue came last week, when we had a clear night and I decided to set everything up, expecting that I’d have a full night of clean imaging without any problems! (You can probably see where this is going.) I quickly ran into a snag when I realized that my awesome plate-solving alignment process (covered here) was .. delayed. Turns out astrometry.net is like any website and occasionally gets slammed – I don’t know if it was the fact that it was the first clear night in a while and the entire eastern seaboard was slamming them at once, but I suspect that might have been part of it. So, anyway – using their API to platesolve was right out (the few jobs I submitted didn’t actually platesolve until 5AM that morning). So I was forced to take a stab at getting local platesolving working – I won’t go into the unsavory details, but it involved installing at least 3 different platesolving software packages and by midnight I found myself installing cygwin, build tools, and editing makefiles. I knew I’d have to do this eventually anyway, since relying on internet access to do astrophotography is silly.
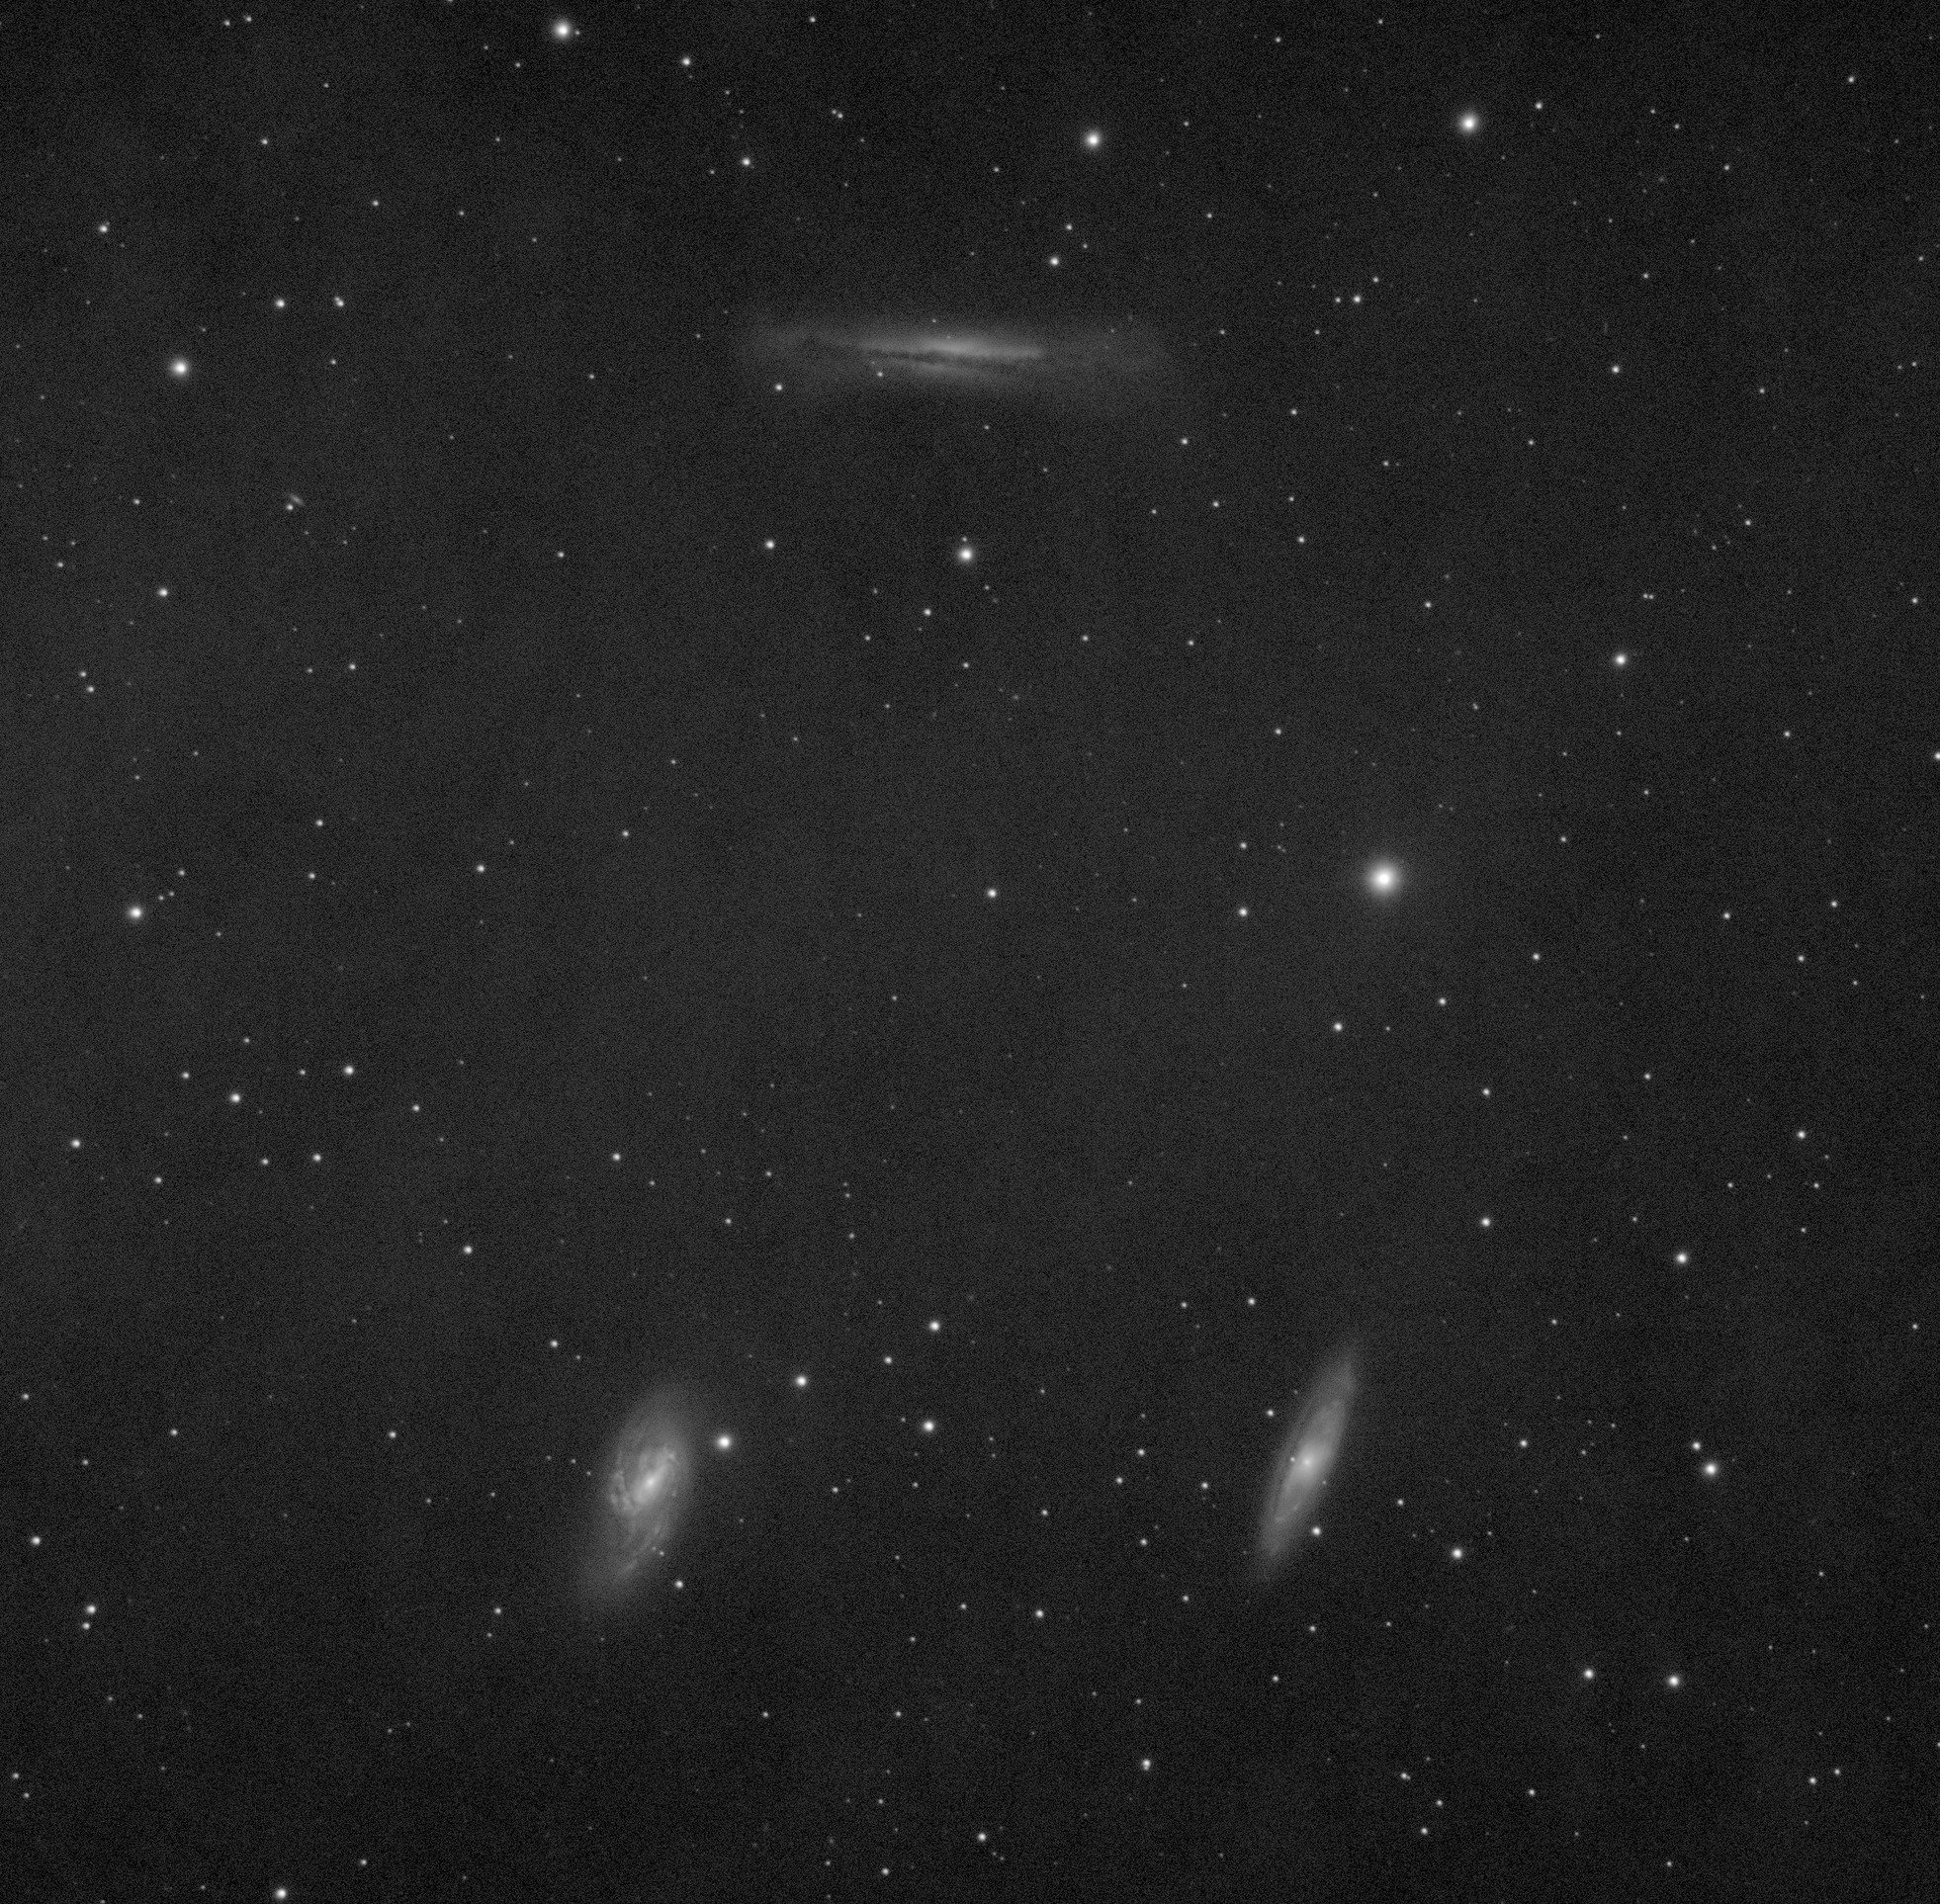
Sooo yeah. I did finally get one/some of them working enough to get aligned and started imaging the Leo Triplet. Unfortunately, this session came to an abrupt halt when I realized my telescope got stuck again (Leo Triplet is high in the meridian) when my guidescope banged into the mount. It was pretty late at this point, so it put a quick end to my hopes for the night, since I had only just started imaging red data and still had green and blue to go. The results were somewhat promising from the luminance data at least:
This was the last straw for mount clearance problems putting a stop to imaging, so I bit the bullet and bought a pier extension – this is basically an 8” tube that adds space between your mount head and the tripod so you have more clearance from the legs. Hopefully this will help, although I am dismayed that I now have Yet Another Piece of Gear to shlep around.
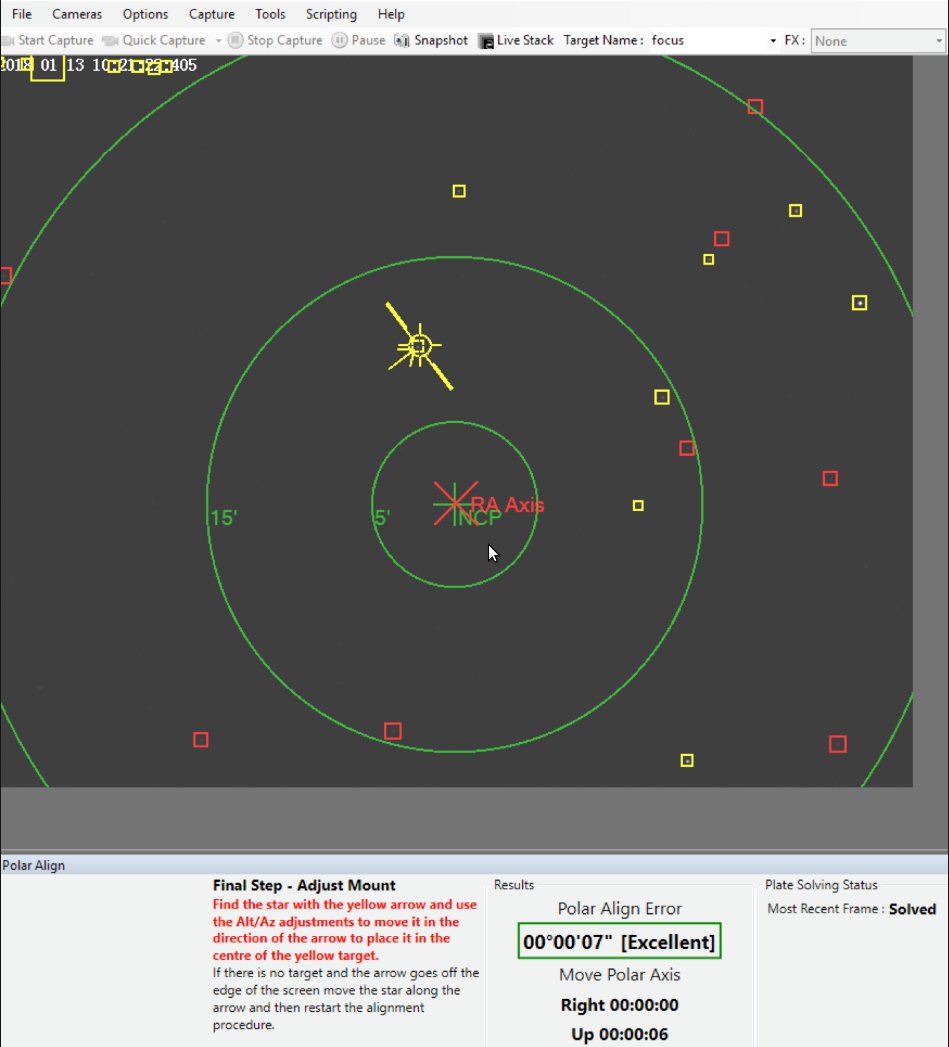
The only other subsequent clear night we had was a non-starter for finishing Leo Triplet, because the moon was up and high, basically tracking right alongside the triplet. So I decided to take a stab at Bode’s and Cigar again, since they were a little further away from the moon. This night of imaging went much smoother – I got platesolved and aligned quickly. I even got my guiding down to sub-3 arcsecond corrections (which is not amazing, but still pretty good for me so far). I’ve been using another neat bit of software to improve my polar alignment. Basically, aligning an equatorial mount to polaris though its polar scope works well, but is unavoidably imperfect – squatting down and looking through a small scope and trying to align a star in a reticle is not exactly a super precise process. Sharpcap is a piece of software which has an awesome polar alignment utility (only with purchasing the Pro version – but well worth it!). This software lets you refine your polar alignment by platesolving (again, another magical use of this technology!), rotating the mount on the RA axis, platesolving again and using the combined positions to calculate how far off you are from celestial north alignment:
It seems to have helped a lot! So, anyway, I was able to image a full set of data, with the exception that a thin patch of wispy high altitude clouds rolled across towards the end of the green and blue sets, so I had far less of this data. Everything else generally went well, except that I had some trouble taking flats (always the bane of my existence). NINA is software with an amazing set of tools – one of which is a “flats wizard”, which will take some exposures and help you optimize exposure. This is something I clearly need, since I’ve taken more bad flats than good images in my career so far. One of the things it was telling me is that my flats were too bright (even with my LED tracing pad on its lowest setting). This left me with an engineering problem – one I solved by (for now), cutting up a perfectly good white undershirt and duct-taping it to the LED pad (cue the macgyver theme) to cut the light, which seemed to help, but I’m still wary that the uneven pattern of the shirt fabric could result in imperfections in the flat. I’m still also struggling with the actual process (for now precariously balancing the LED tracing pad and its battery pack on top of the telescope’s lens hood and hoping it doesn’t fall off or rotate while I take the flats). There has to be a better way, but I still haven’t figured it out.
Part two: Processing
It’s clear that the days of “take photos, process and post results on the internet for everyone to gawk at” are long gone, now – just imaging a full set of data in one night at all was a miracle. (I expect this will get better with time as I learn, but nonetheless..). So I spent the next week or so toying with the data and embarking on my first attempt at actually combining sets of luminance, red, green and blue data into a natural/real RGB image. It’s a lot of work. Fortunately, lightvortex.com has an amazing set of tutorials, one of which covers precisely how to do this – both preparing the data and actually combining it. I think the snags I ran into are probably not worth detailing here, but briefly: possibly bad flats resulting in weird background patterns (different on each channel), intense halos around all the stars, pronounced oversaturation of the red in the stars vs next to no actual color in the galaxies. I suspect the three main issues are: (still as ever) bad flats, bad/weak color data (washed out by moonlight), and my lack of experience in processing the data (perhaps not weighting or fitting the data linearly properly).
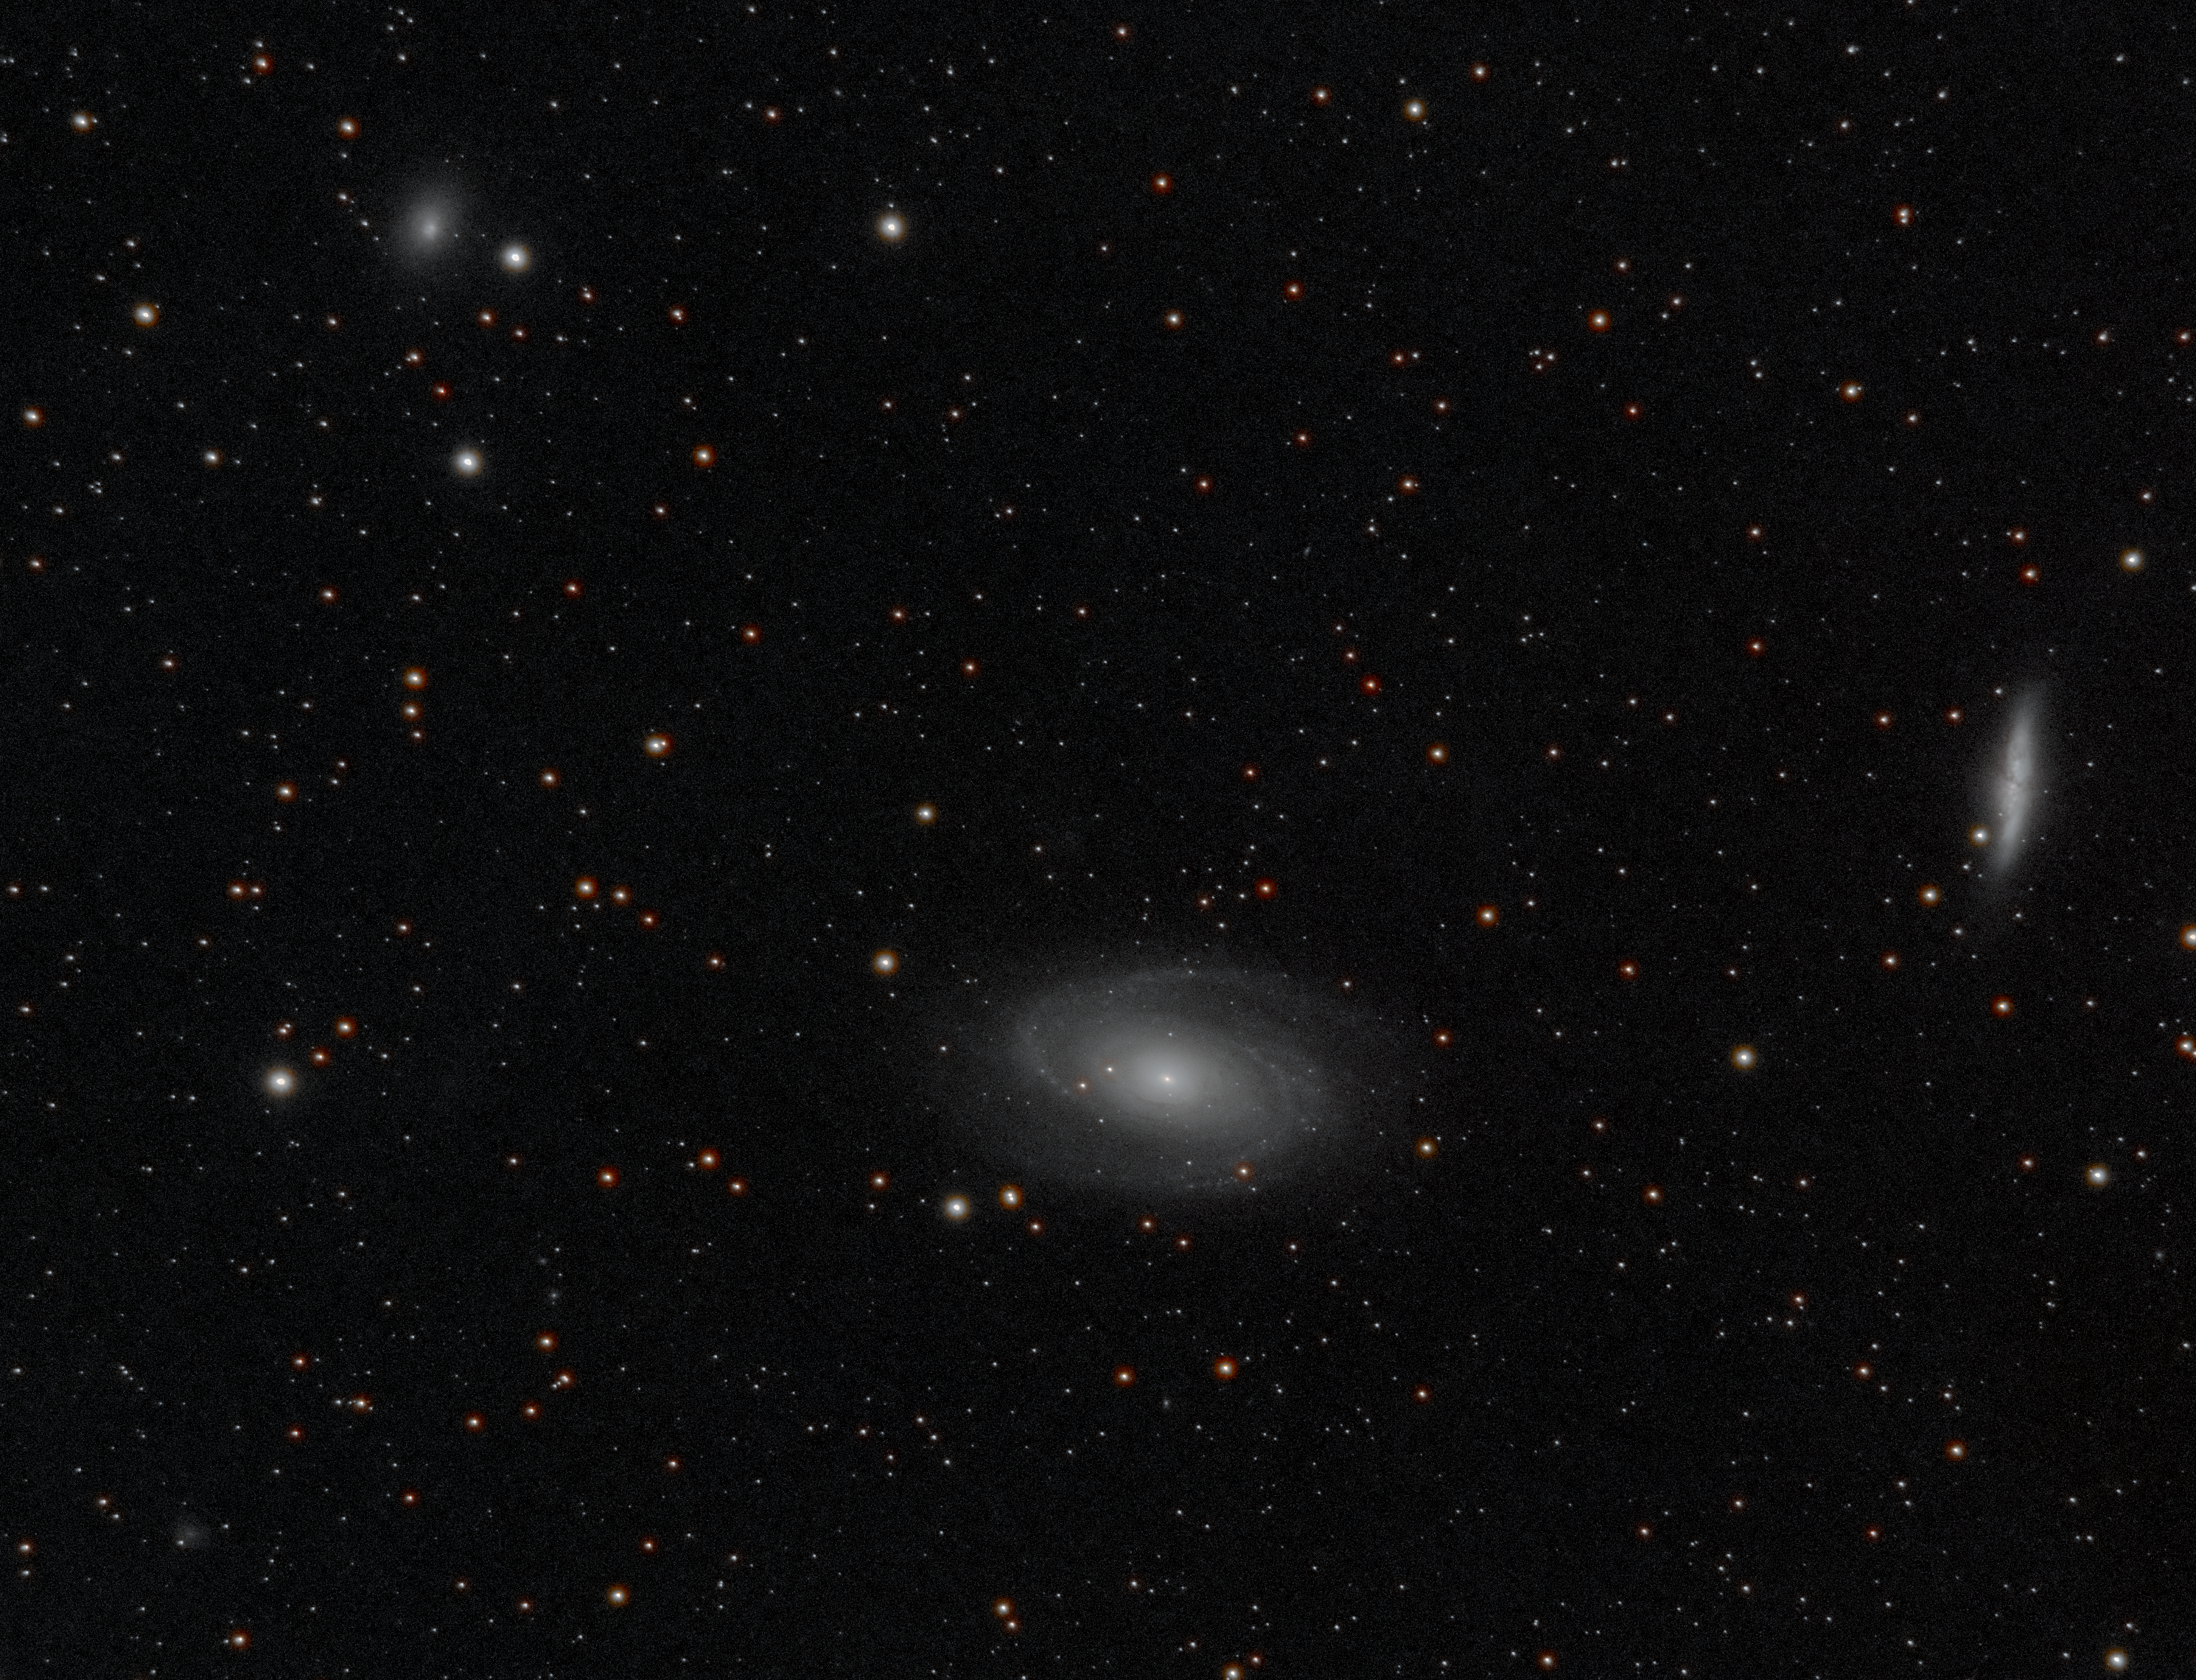
Sooooo yeah. I am not really happy about anything with how this photo turned out – stars look weird, I still had to clip a lot of really good detail in the galaxies due to chrominance noise, little to no color in the galaxies. Still, the mission was a success, at least, insofar as I actually imaged a full set of data and put it together, even though it kinda looks like crap. I think the results would have been better if I had: darker skies, no moon, and longer cloud-free sets of data. So all in all I shouldn’t be too hard on myself – even though it can be somewhat discouraging to put so many hours into one photo only to be like “yep that looks like shite”.
Bonus photo: one night after imaging my actual target I realized the american nebula was up, so I took one hydrogen alpha shot of it:
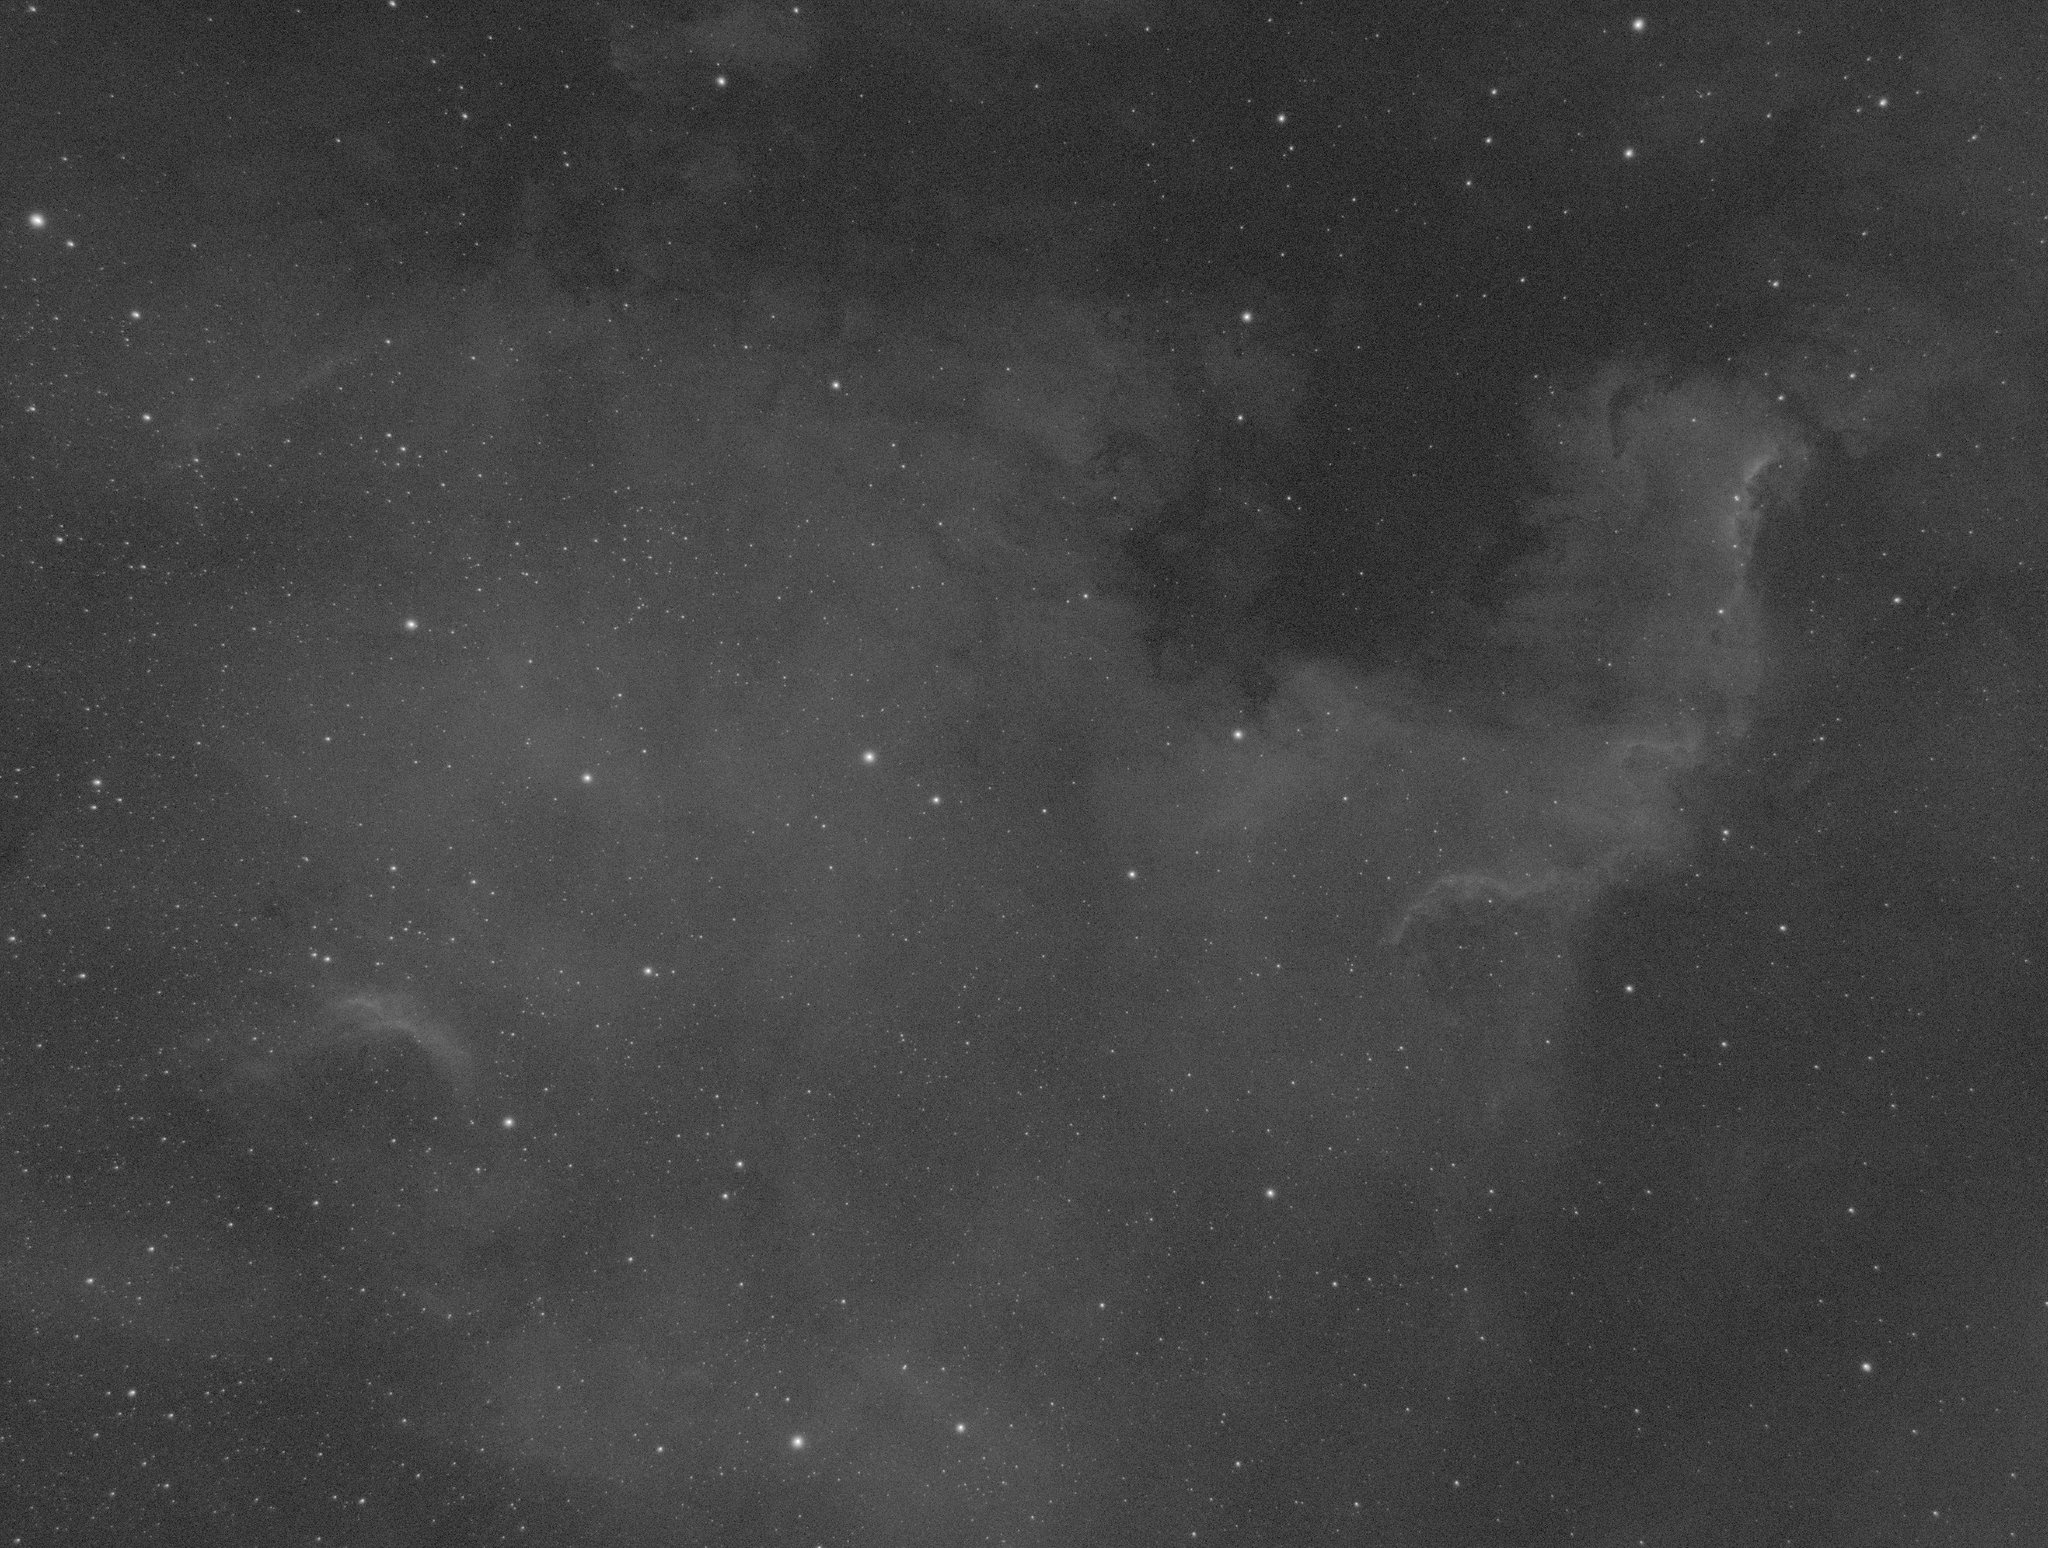
I’m continually impressed by how bright and crisp the images I get with this new camera are in narrowband – I am thinking american nebula might actually be my next target, since light pollution and moonlight would (in theory) be far less of a problem. In addition, it’s a target so big it’s too big even for my relatively wide telescope, so I could possibly try to do a mosaic or something.
So, to conclude:
Wins:
- Got sharpcap vastly improving my polar alignment and guiding
- actually assembled a set of LRGB data into a photo
- Ha narrowband imaging appears to be awesome
Losses:
- LRGB photo kinda looks like garbage
- clearance issue with my mount (should be fixed with pier extension)
Still lots to do!