21 Aug 2018
I got my first equatorial tracker mount! I don’t want to spend a ton of money before I have to (cough cough in theory cough), so I bought one of these – it’s a tiny little DIY type equatorial tracker. I had tested it out on a cloudy day and verified it mostly worked, even though I couldn’t see Polaris to align it very well. Last night the skies were clear for the first time in weeks, so despite the Very Bright Moon, I gave it a whirl in the opposite direction. Since I was mostly just testing the functionality of the tracker, I used a Jupiter-9 85mm – partially because it’s relatively light, fast and long, and partially because I was morbidly curious how bad it’d look (narrator voice: very bad).
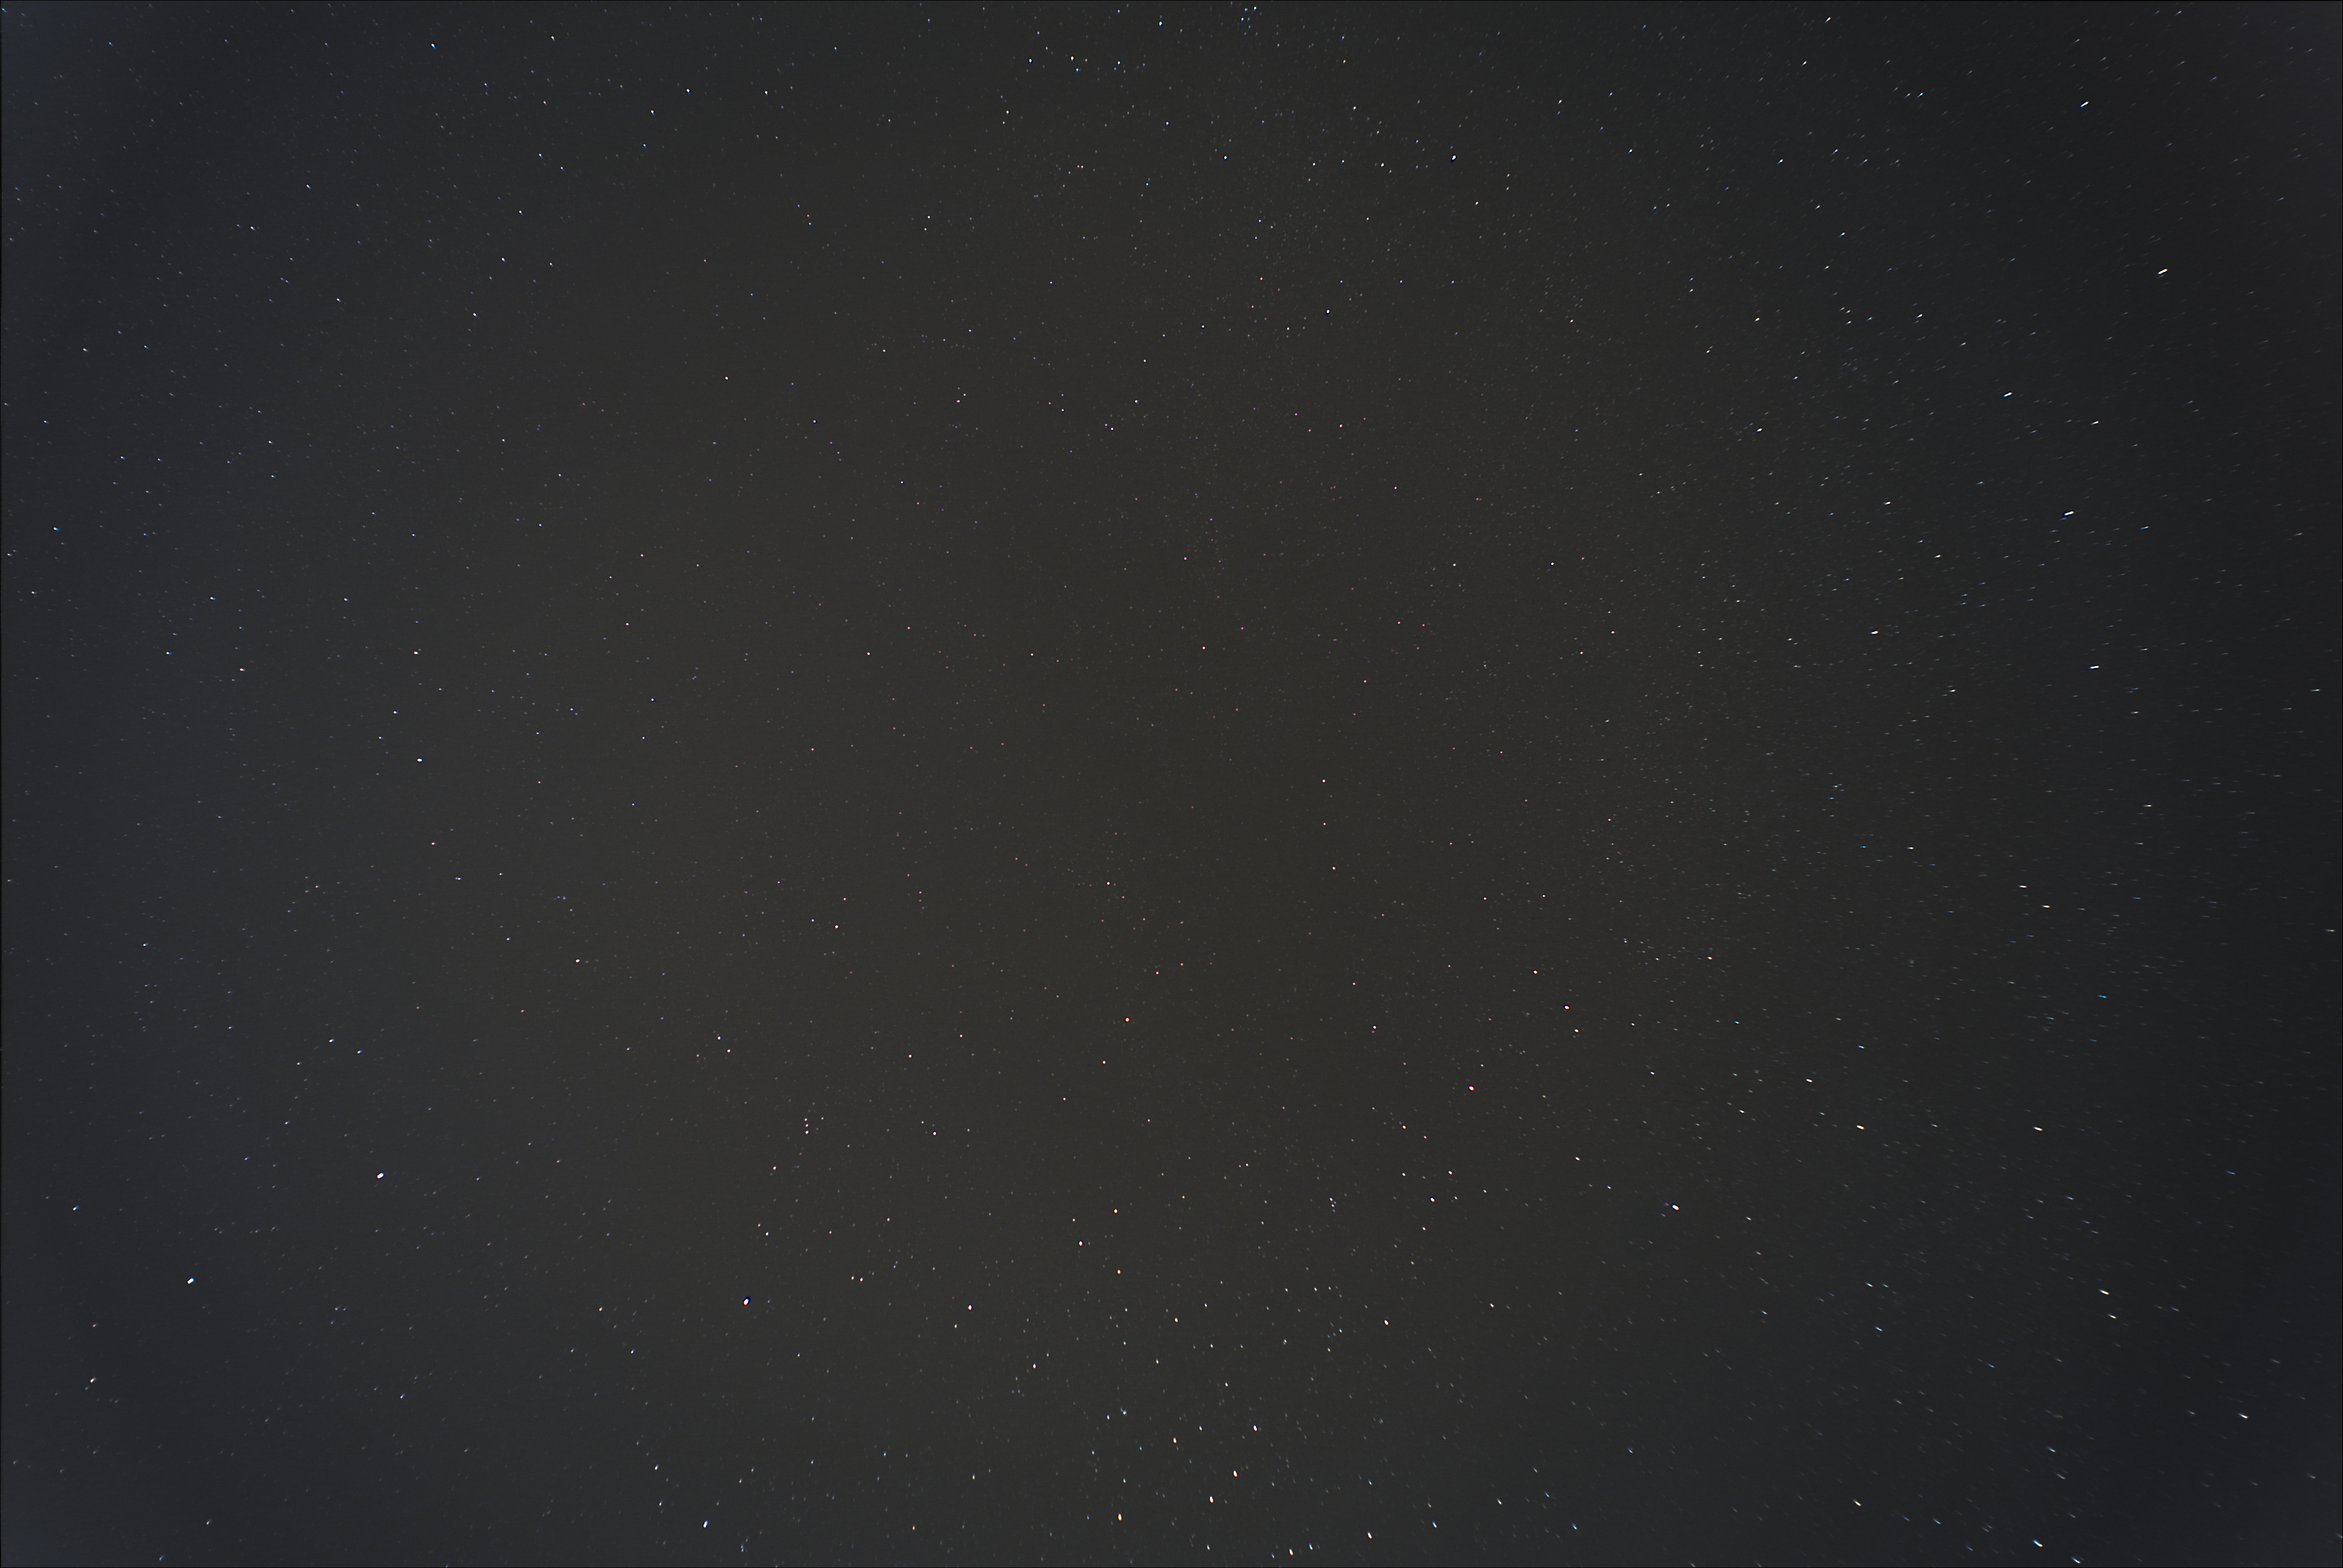
I just pointed it randomly in the sky away from the moon, so nothing of note necessarily – but astronometry knows what it is. So as you can see there’s quite a bit of light pollution and noise, but still: the center stars are (mostly) stable! The stars on the periphery suffer badly from coma, due to my poor choice in lenses. This was my first chance to learn more about processing photos as well: specifically, the value in using flat frames to correct for lens vignetting/fall-off (in addition to dark frames) when stacking. Not particularly amazing results, but good confirmation that the gear works and some processing experience under my belt!
- Camera: Sony A7S II
- Lens: Jupiter-9 85mm f/2.0
- ISO: 125
- Shutter Speed: 2”
- Aperture: f/4
- Total Exposures: 100
- Dark frames: 30
- Flat frames: 20
- Software: DeepSkyStacker and Darktable for levels adjustment
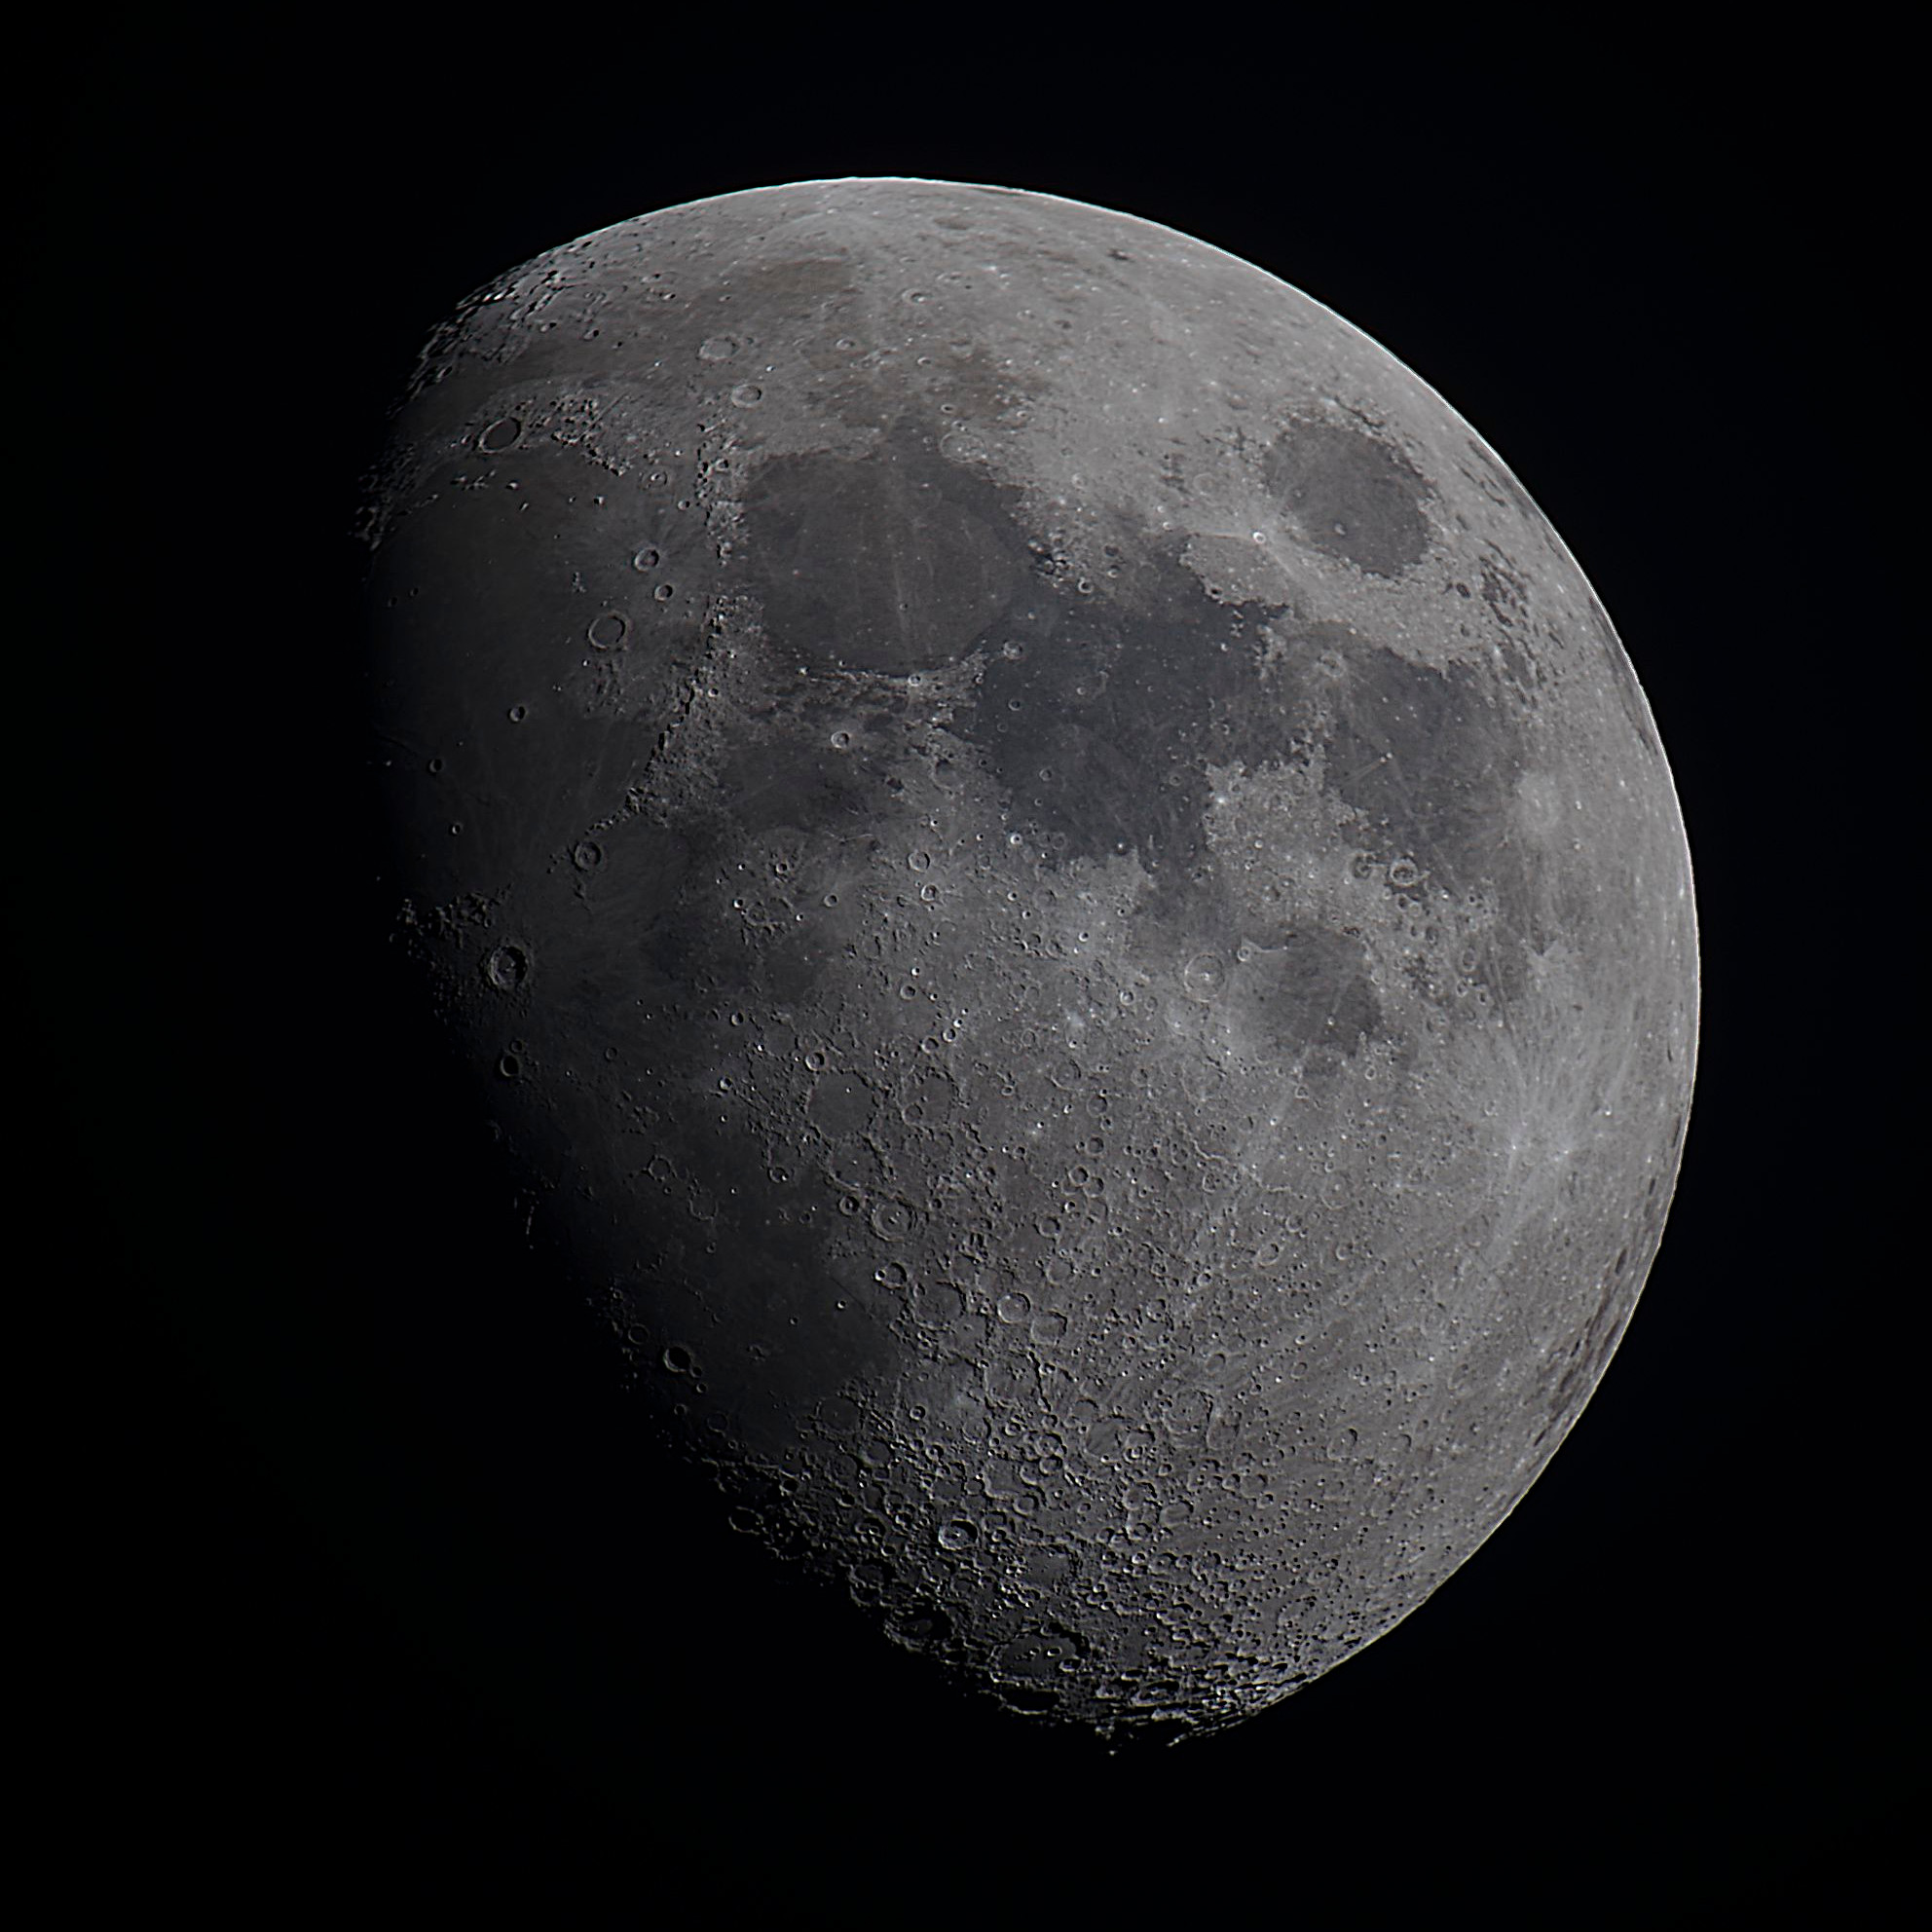
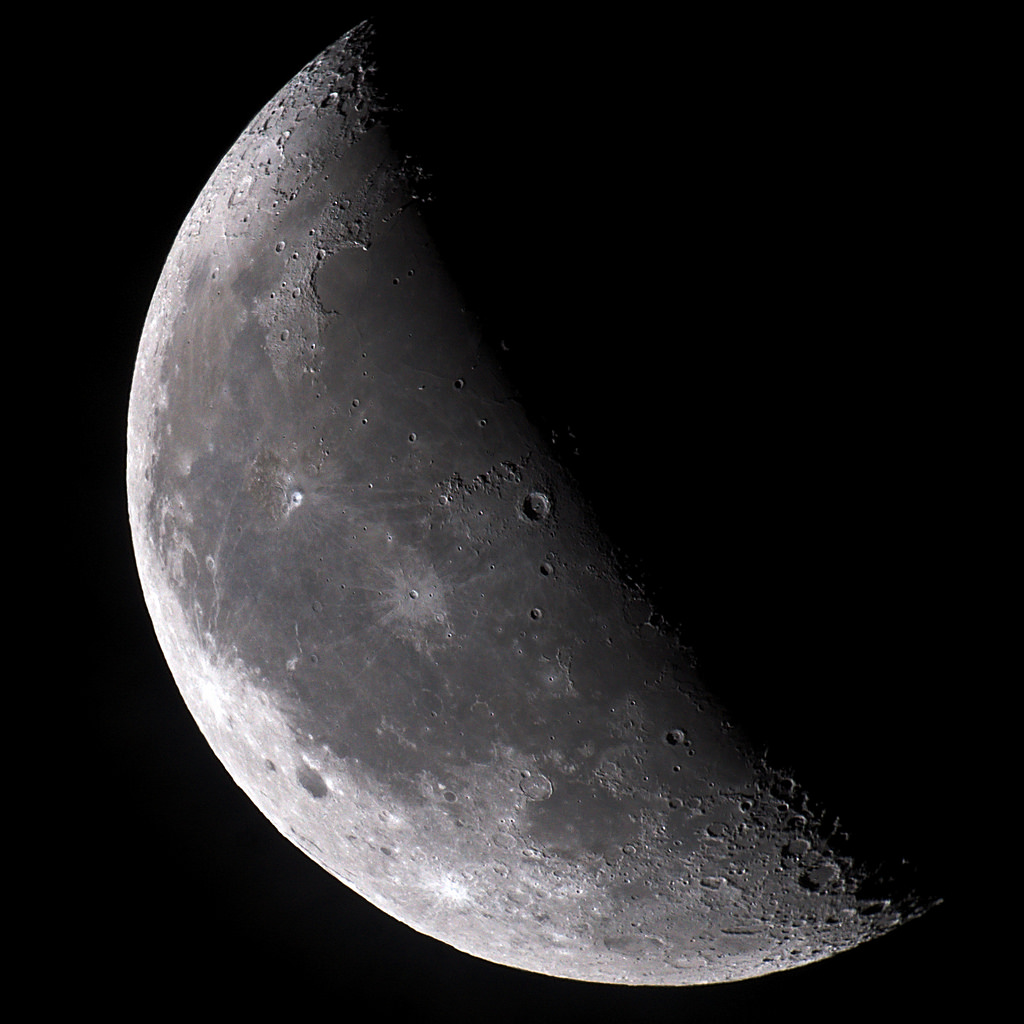
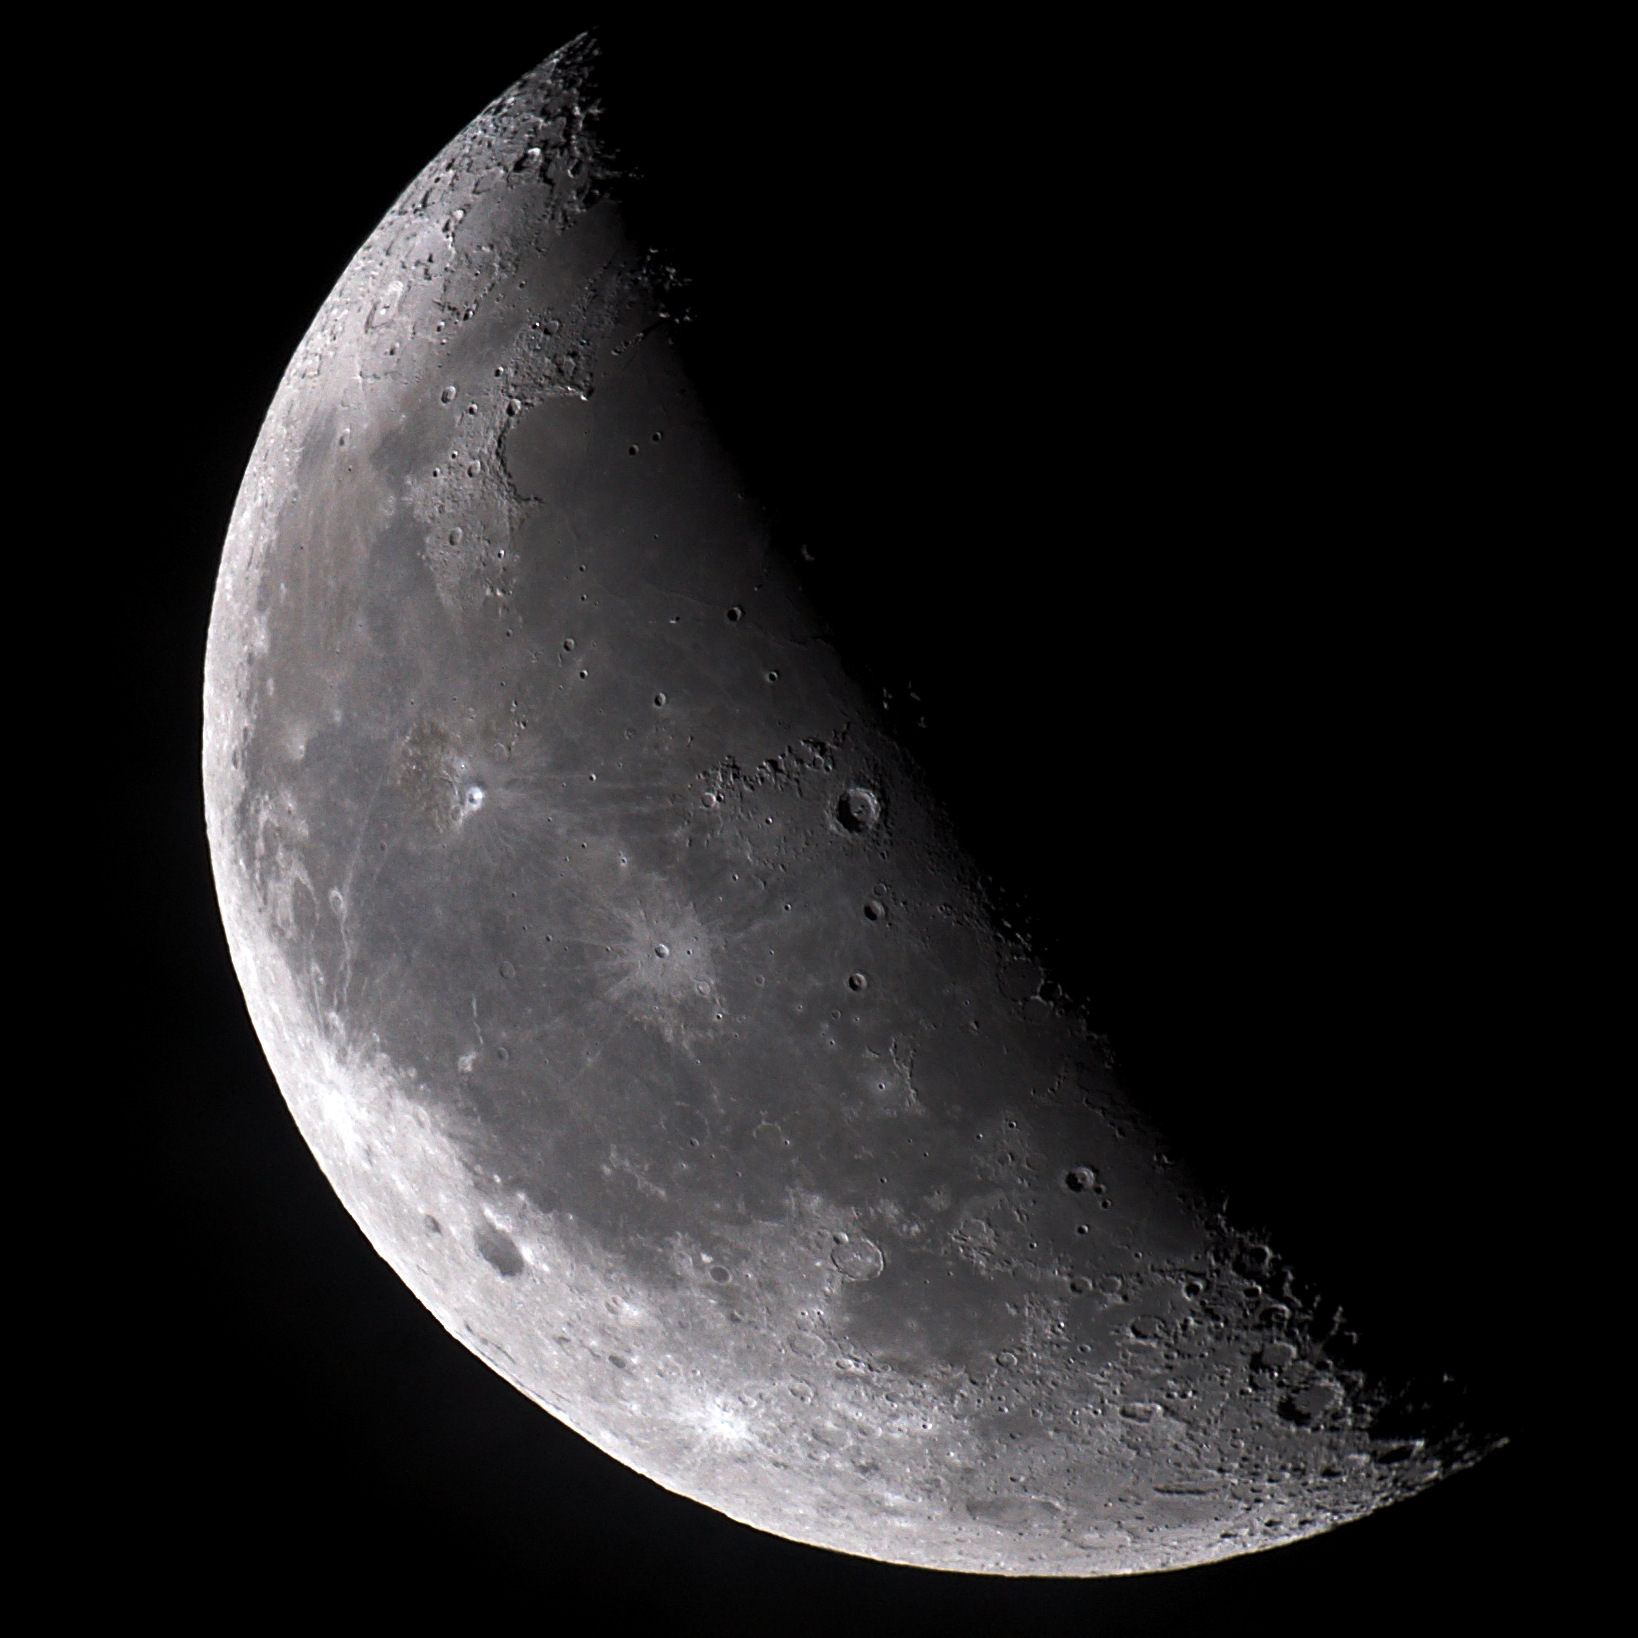
20 Aug 2018
Another attempt at moon photography. It’s been rainy/cloudy all week, but there was a brief moment of clear skies before some storms moved in.
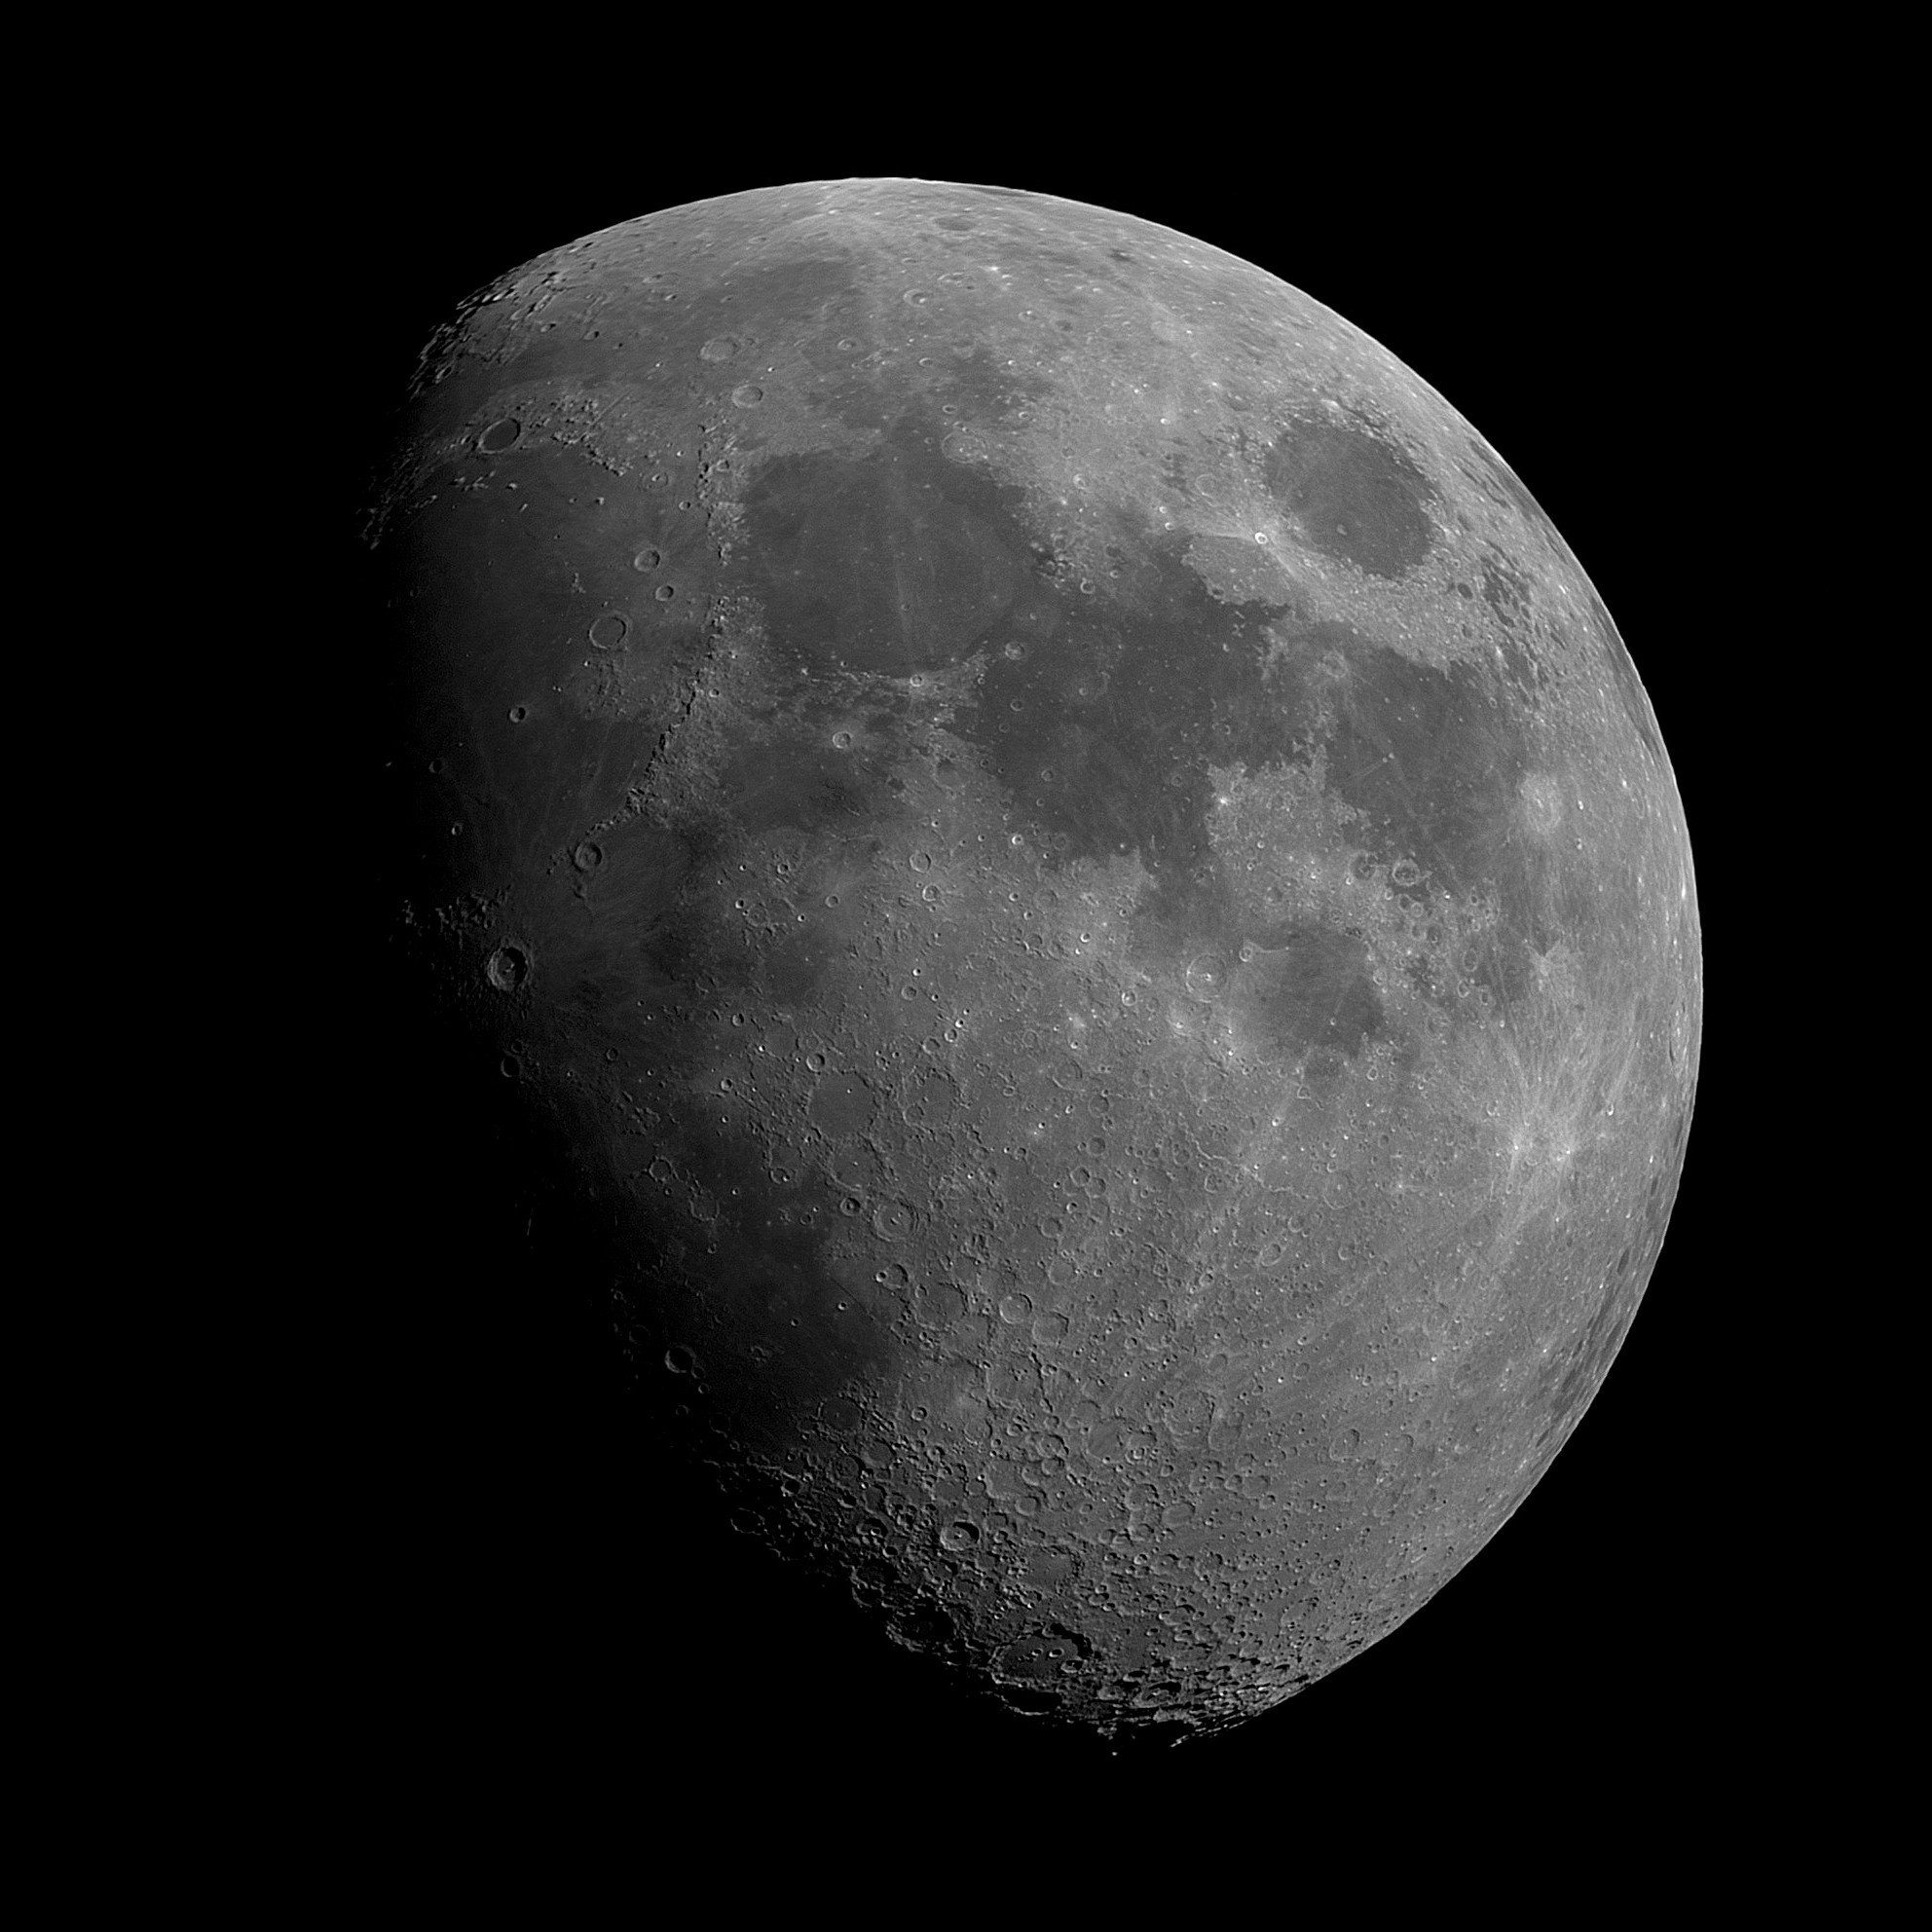
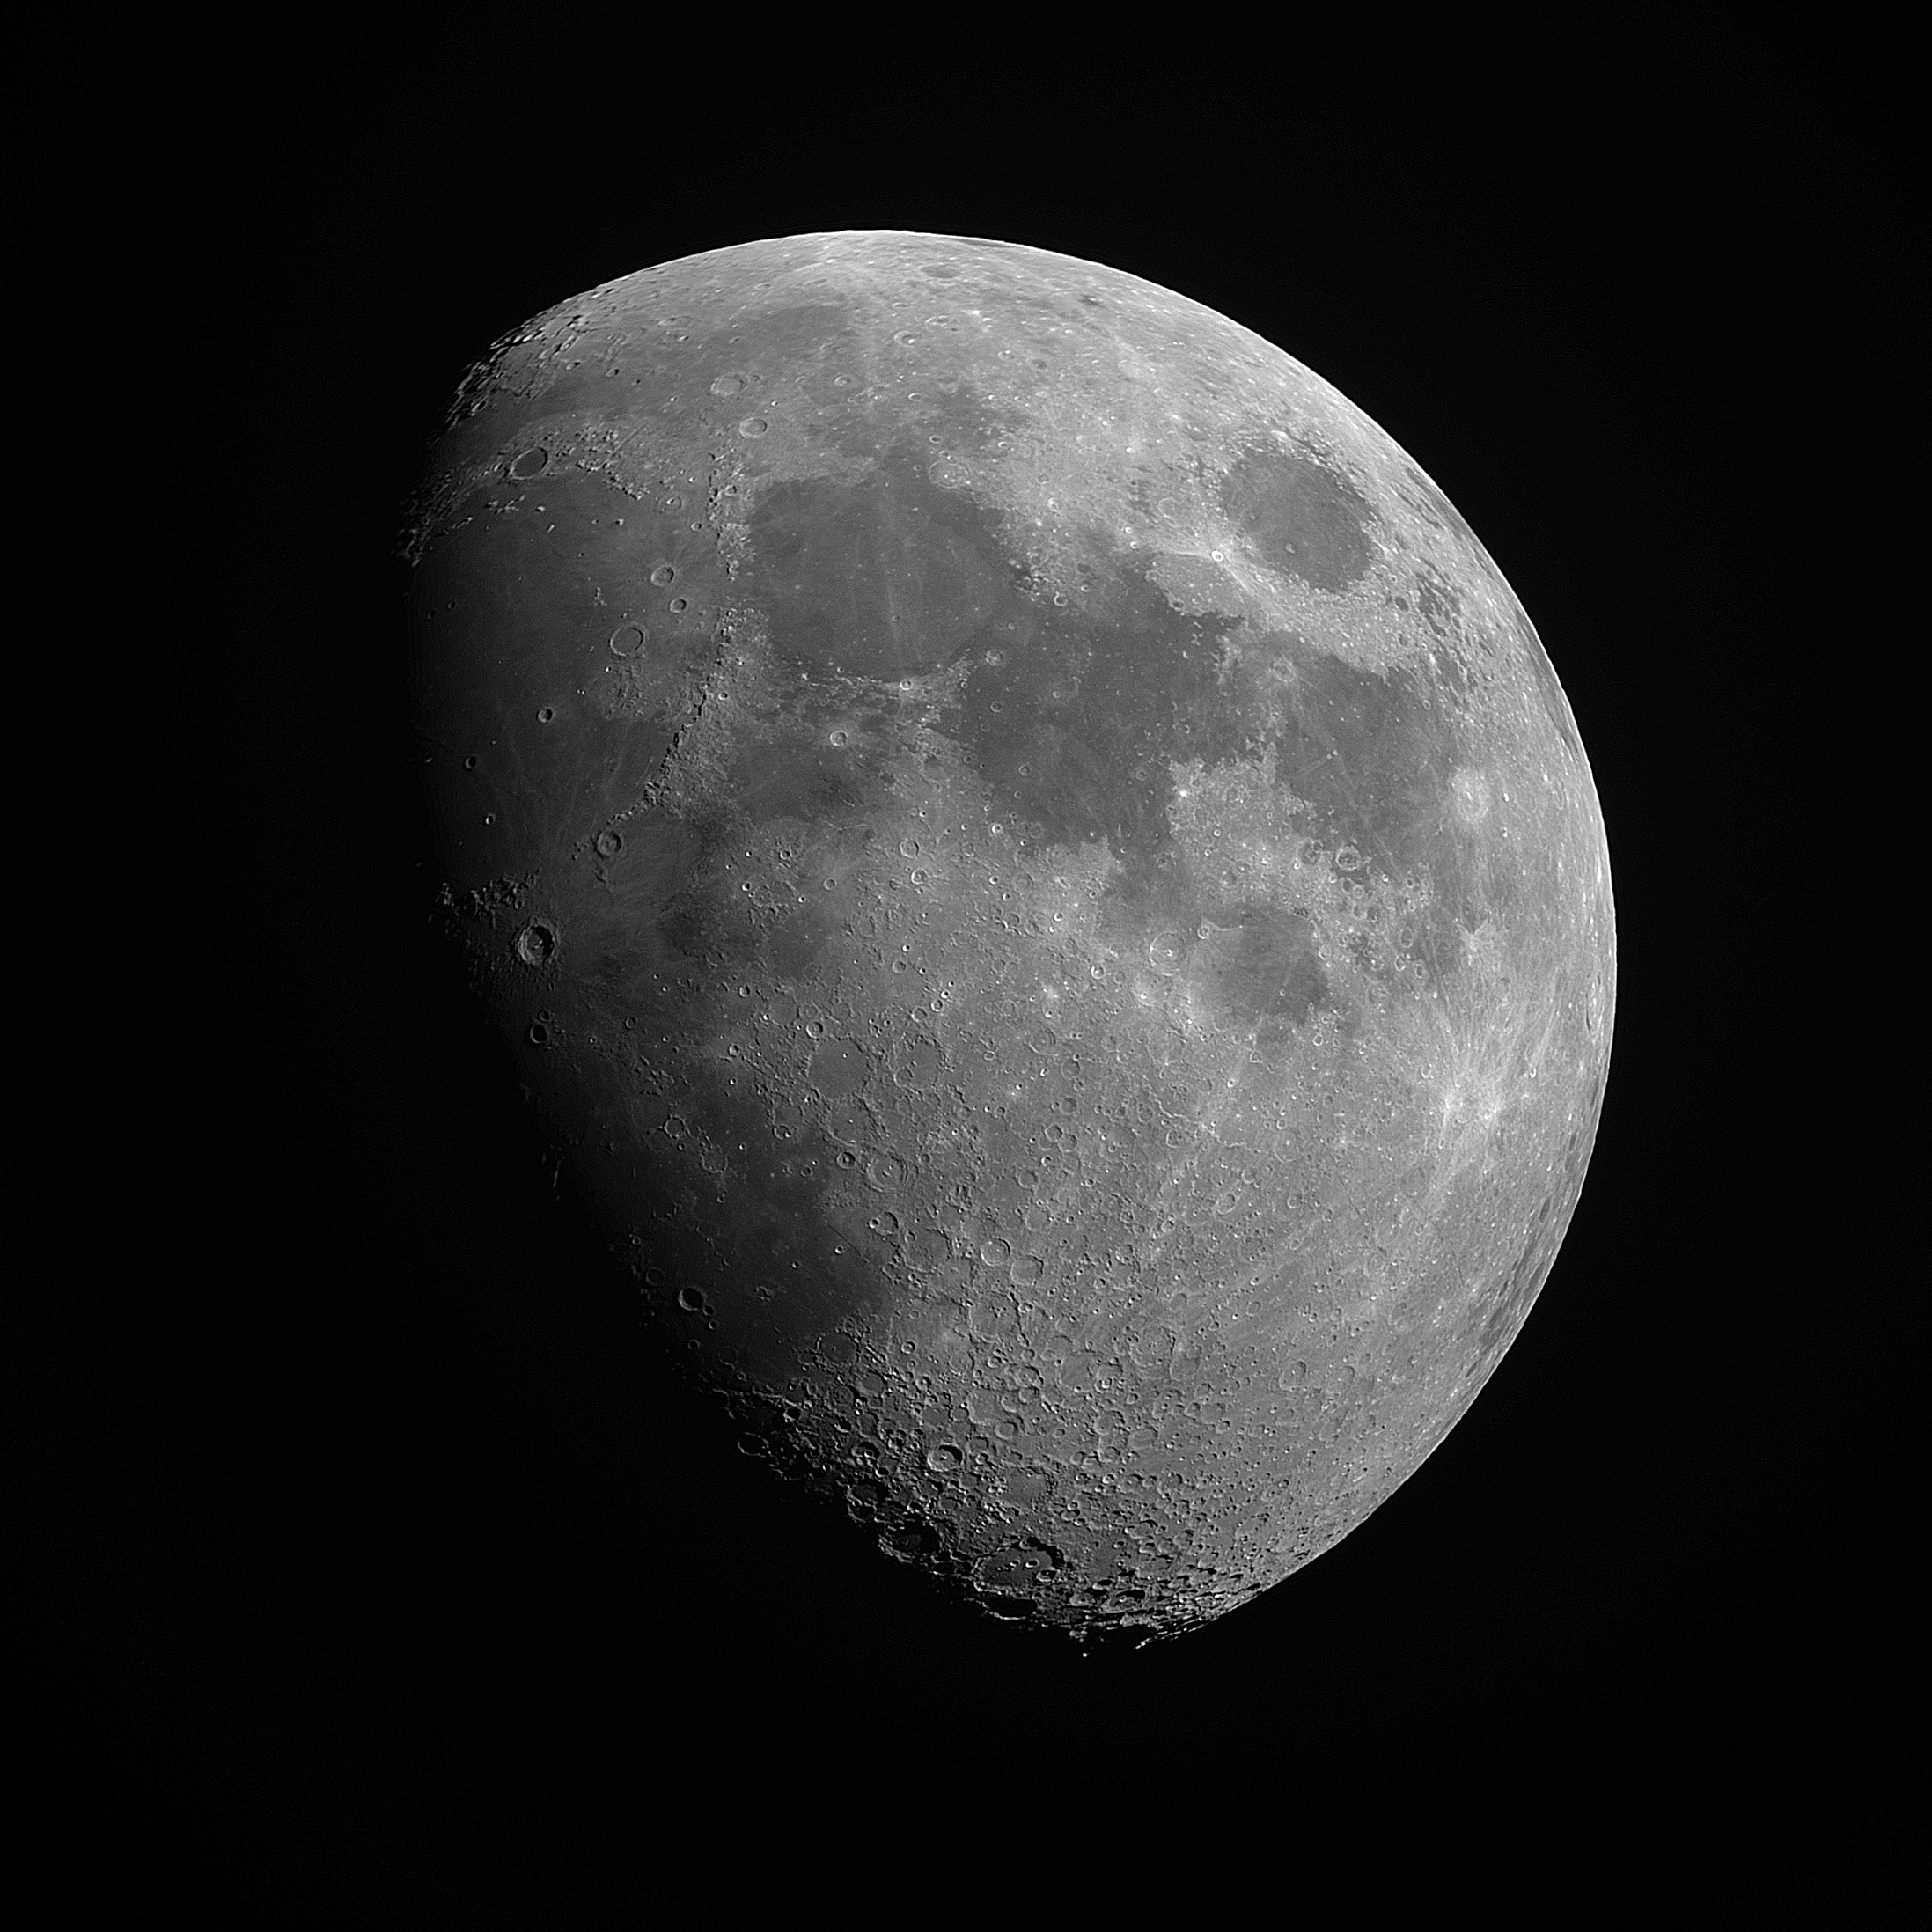
I played around with stacking/processing the photos of the moon with both PIPP/autostakkert and Pixinsight. Pixinsight, from what I can tell, is not really designed for planetary imaging, but I wanted to learn the tool and it was an easy place to start:
You can see that there’s some weird fringing/ringing around the moon in the pixinsight version – still a lot of learning to do with that tool, but not a bad start!
- Camera: Sony A7S II
- Telescope: AWB Onesky 130
- ISO: 125
- Shutter Speed: 1/40
- Total Exposures: 20
- Software: PIPP/Autostakkert and Pixinsight
14 Aug 2018
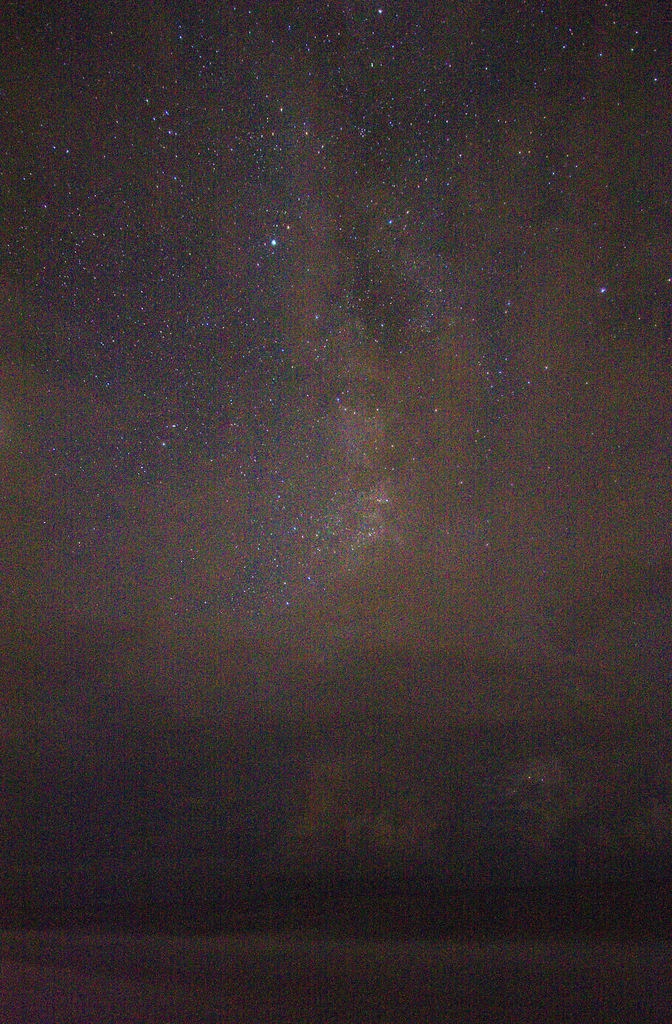
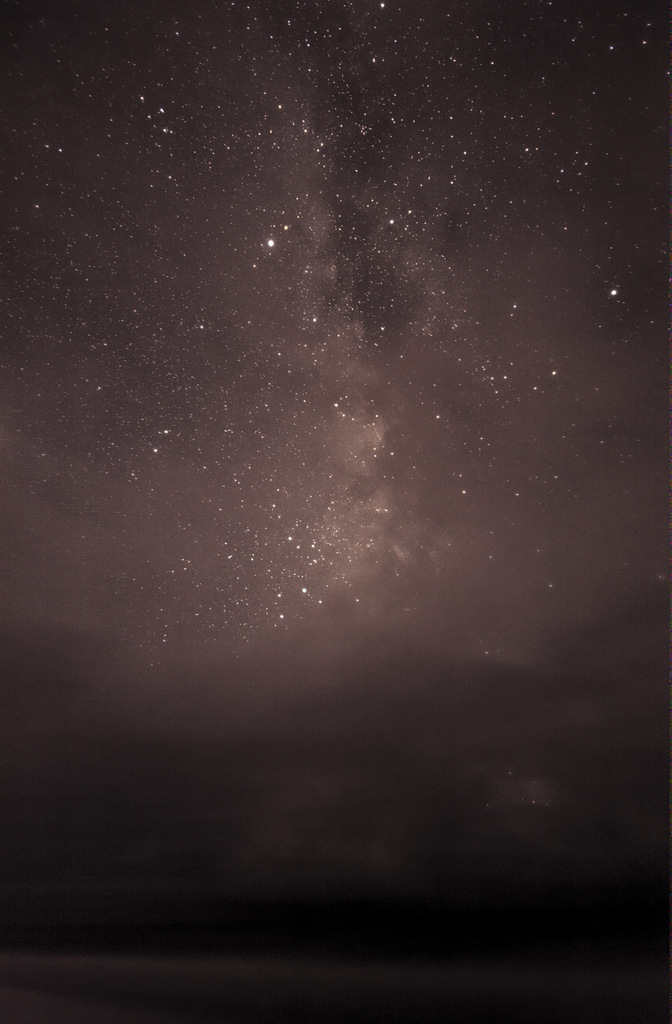
Here’s something fun: around 10 years ago, my family went to Cape San Blas, FL for a week. I was just getting into photography – I had a Canon 20D, a wide angle lens, and no idea what I was doing. But the views of the Milky Way from the beach were spectacular. I tried taking some long exposures, but between the noise of my relatively old crop sensor and the heat, the results were riddled with noise and hot pixels. I gave up and never posted any of the shots I got that night.
Skip forward ten years, and here I am playing with astrophotography and learning all about image stacking. It occurred to me I might be able to salvage the original data. I had the 10 original raw images and I gave it a whirl. I was stunned by the results!
On the left is an example of an uncorrected frame I got that night. On the right, the result of stacking & cleaning up. Modern software is pretty cool.
- Camera: Canon EOS 20D
- Lens: EF-S 10-22mm (shot at 10mm)
- ISO: 3200
- Aperture: f/3.5
- Shutter Speed: 30”
- Total Exposures: 10
- Software: DeepSkyStacker for stacking, darktable for levels correction & post-processing.
12 Aug 2018
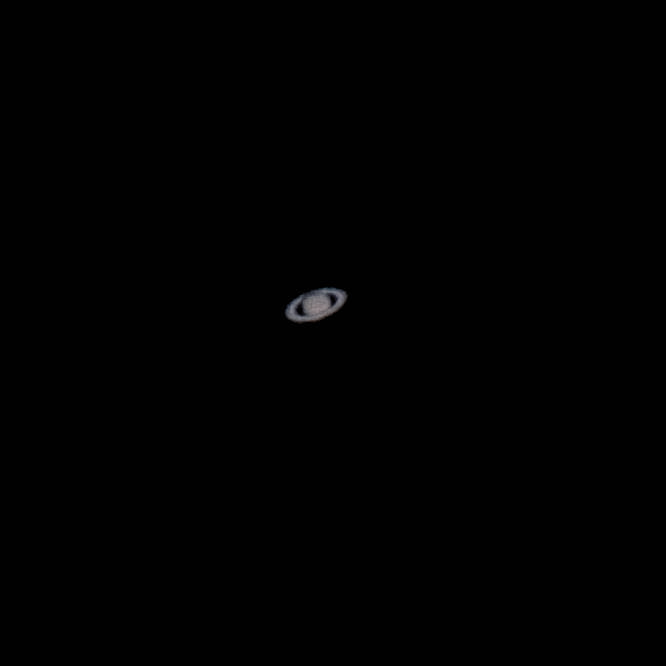
Emboldened by the success with Saturn, I gave Jupiter a try, with the 3x Barlow – tracking manually with the 3X barlow is pretty challenging, but I managed to get it in the frame long enough to take a few videos and stack them:
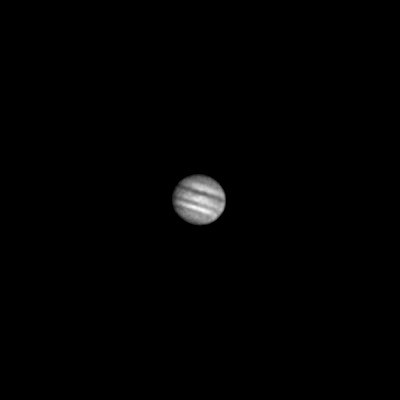
Not bad! I had some weird issues with banding at first, which I alleviated by tweaking the color detection in Autostakkert. I am not entirely sure why I lost all the color in stacking, but it’s probably because there just wasn’t much color to begin with.
- AWB Onesky
- 3x Barlow
- Sony A7S II
- Stacked in Autostakkert
- Wavelet/sharpened in Registax 6
11 Aug 2018
My first attempt at stacking!
This actually (surprisingly) worked quite well! This is a method where you take a video and use image stacking software to analyze the frames, discard the poor/blurry frames, and combine the remaining frames – generally for a boost in detail and reduction in noise. I didn’t have a lot to work with, because Saturn was projected as a very small dot on my sensor. Nonetheless it was able to pull out a decent amount of detail!
- AWB Onesky
- 2x Barlow
- Sony A7S II
- Stacked in Autostakkert
- Wavelet/sharpened in Registax 6
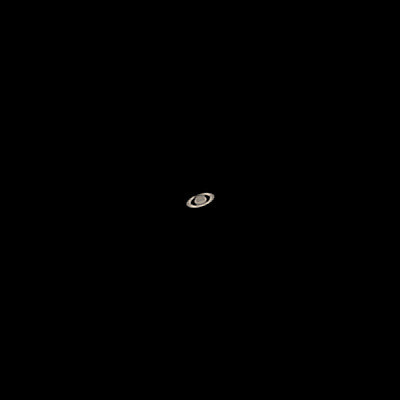
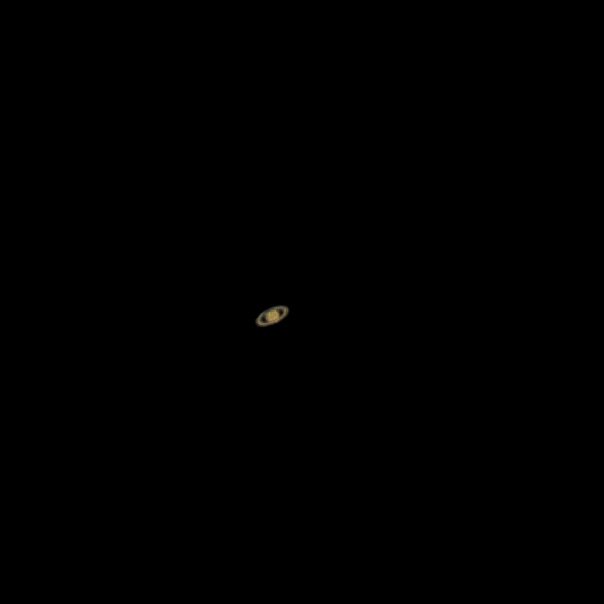
10 Aug 2018
I ordered a 3X barlow, hoping to get a bit more detail from Saturn:
Not bad: bigger, but not much detail.
04 Aug 2018
Took my first stab at Saturn:
Not amazing, but definitely Saturn! The moon was rising late that night, so I gave that a whirl, with pretty good results:
On this night I also experimented with eyepiece projection – a different method of photography where you use an eyepiece and barlow in between the telescope and the camera to “project” the image from the eyepiece onto your camera sensor. I didn’t have much luck with this, unsurprisingly, as between the adapters involved and the small eyepiece lenses, the light actually reaching my camera was cut to nearly nothing. This explains why eyepiece projection is generally regarded poorly by most astrophotographers. Live and learn!
03 Aug 2018
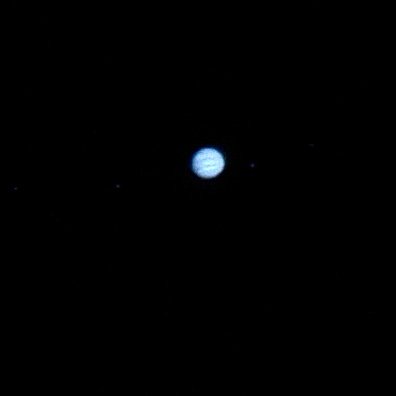
Skip forward a week, and I realized I could unscrew the barlow lens from its barrel and screw directly into the 1.25” adapter threads, which allowed me to give prime focus photography a try. Success! My first photo of jupiter and its moons, with uh … minimal (aka terrible) processing:
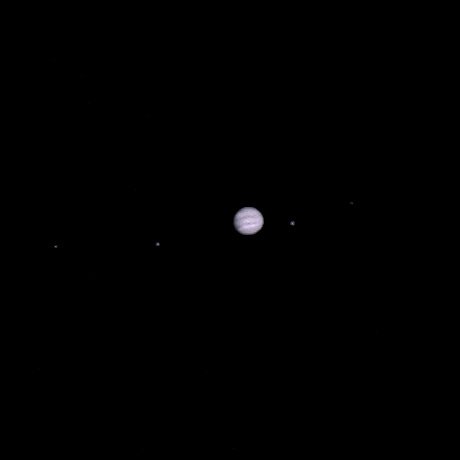
The following morning with fresh eyes I took a stab at reprocessing it with much better result – in this you can see all four moons! Barely!
26 Jul 2018
I bought my first telescope! I opted for the Astronomers Without Borders Onesky – a collapsible 130mm (5in) reflector. I opted for this telescope because:
- Relatively cheap at $200 – and I’m no stranger to the tendency for people to buy expensive telescopes that wind up collecting dust.
- Good for visual – I knew I’d want to get into photography, but primarily to start, I wanted to just see some planets and learn the sky.
- Compact/portable – easy for me to take places with less noise pollution (I live in the heart of an urban red zone).
I also bought a celestron kit w/ a variety of eyepieces, a 2x barlow, and a T2 adapter + 1.25” adapter for my Sony A7S II. This camera is not ideal for astrophotography, really, despite its low light performance. It has a large full-frame sensor and relatively few pixels, making for a general lack of detail in tiny objects through a telescope.

My first night I took it out to my parents’ place in Castillian Springs, where they live on a hill with unobstructed skies and much less light pollution. Spent some time getting acquainted with visual scoping, but didn’t have much luck with photography: I had trouble getting the focal point of the telescope on to my camera’s sensor – i.e. I couldn’t quite focus to infinity.